AMX VARIA-150 Bedienungsanleitung
AMX Nicht kategorisiert VARIA-150
Lies die bedienungsanleitung für AMX VARIA-150 (2 Seiten) kostenlos online; sie gehört zur Kategorie Nicht kategorisiert. Dieses Handbuch wurde von 50 Personen als hilfreich bewertet und erhielt im Schnitt 4.1 Sterne aus 9 Bewertungen. Hast du eine Frage zu AMX VARIA-150 oder möchtest du andere Nutzer dieses Produkts befragen? Stelle eine Frage
Seite 1/2
QUICK START GUIDE
VARIA-150 1 5.6”Touch Panel
VARIA-15 0N 1-5.6” Touch Panel (NoComm)
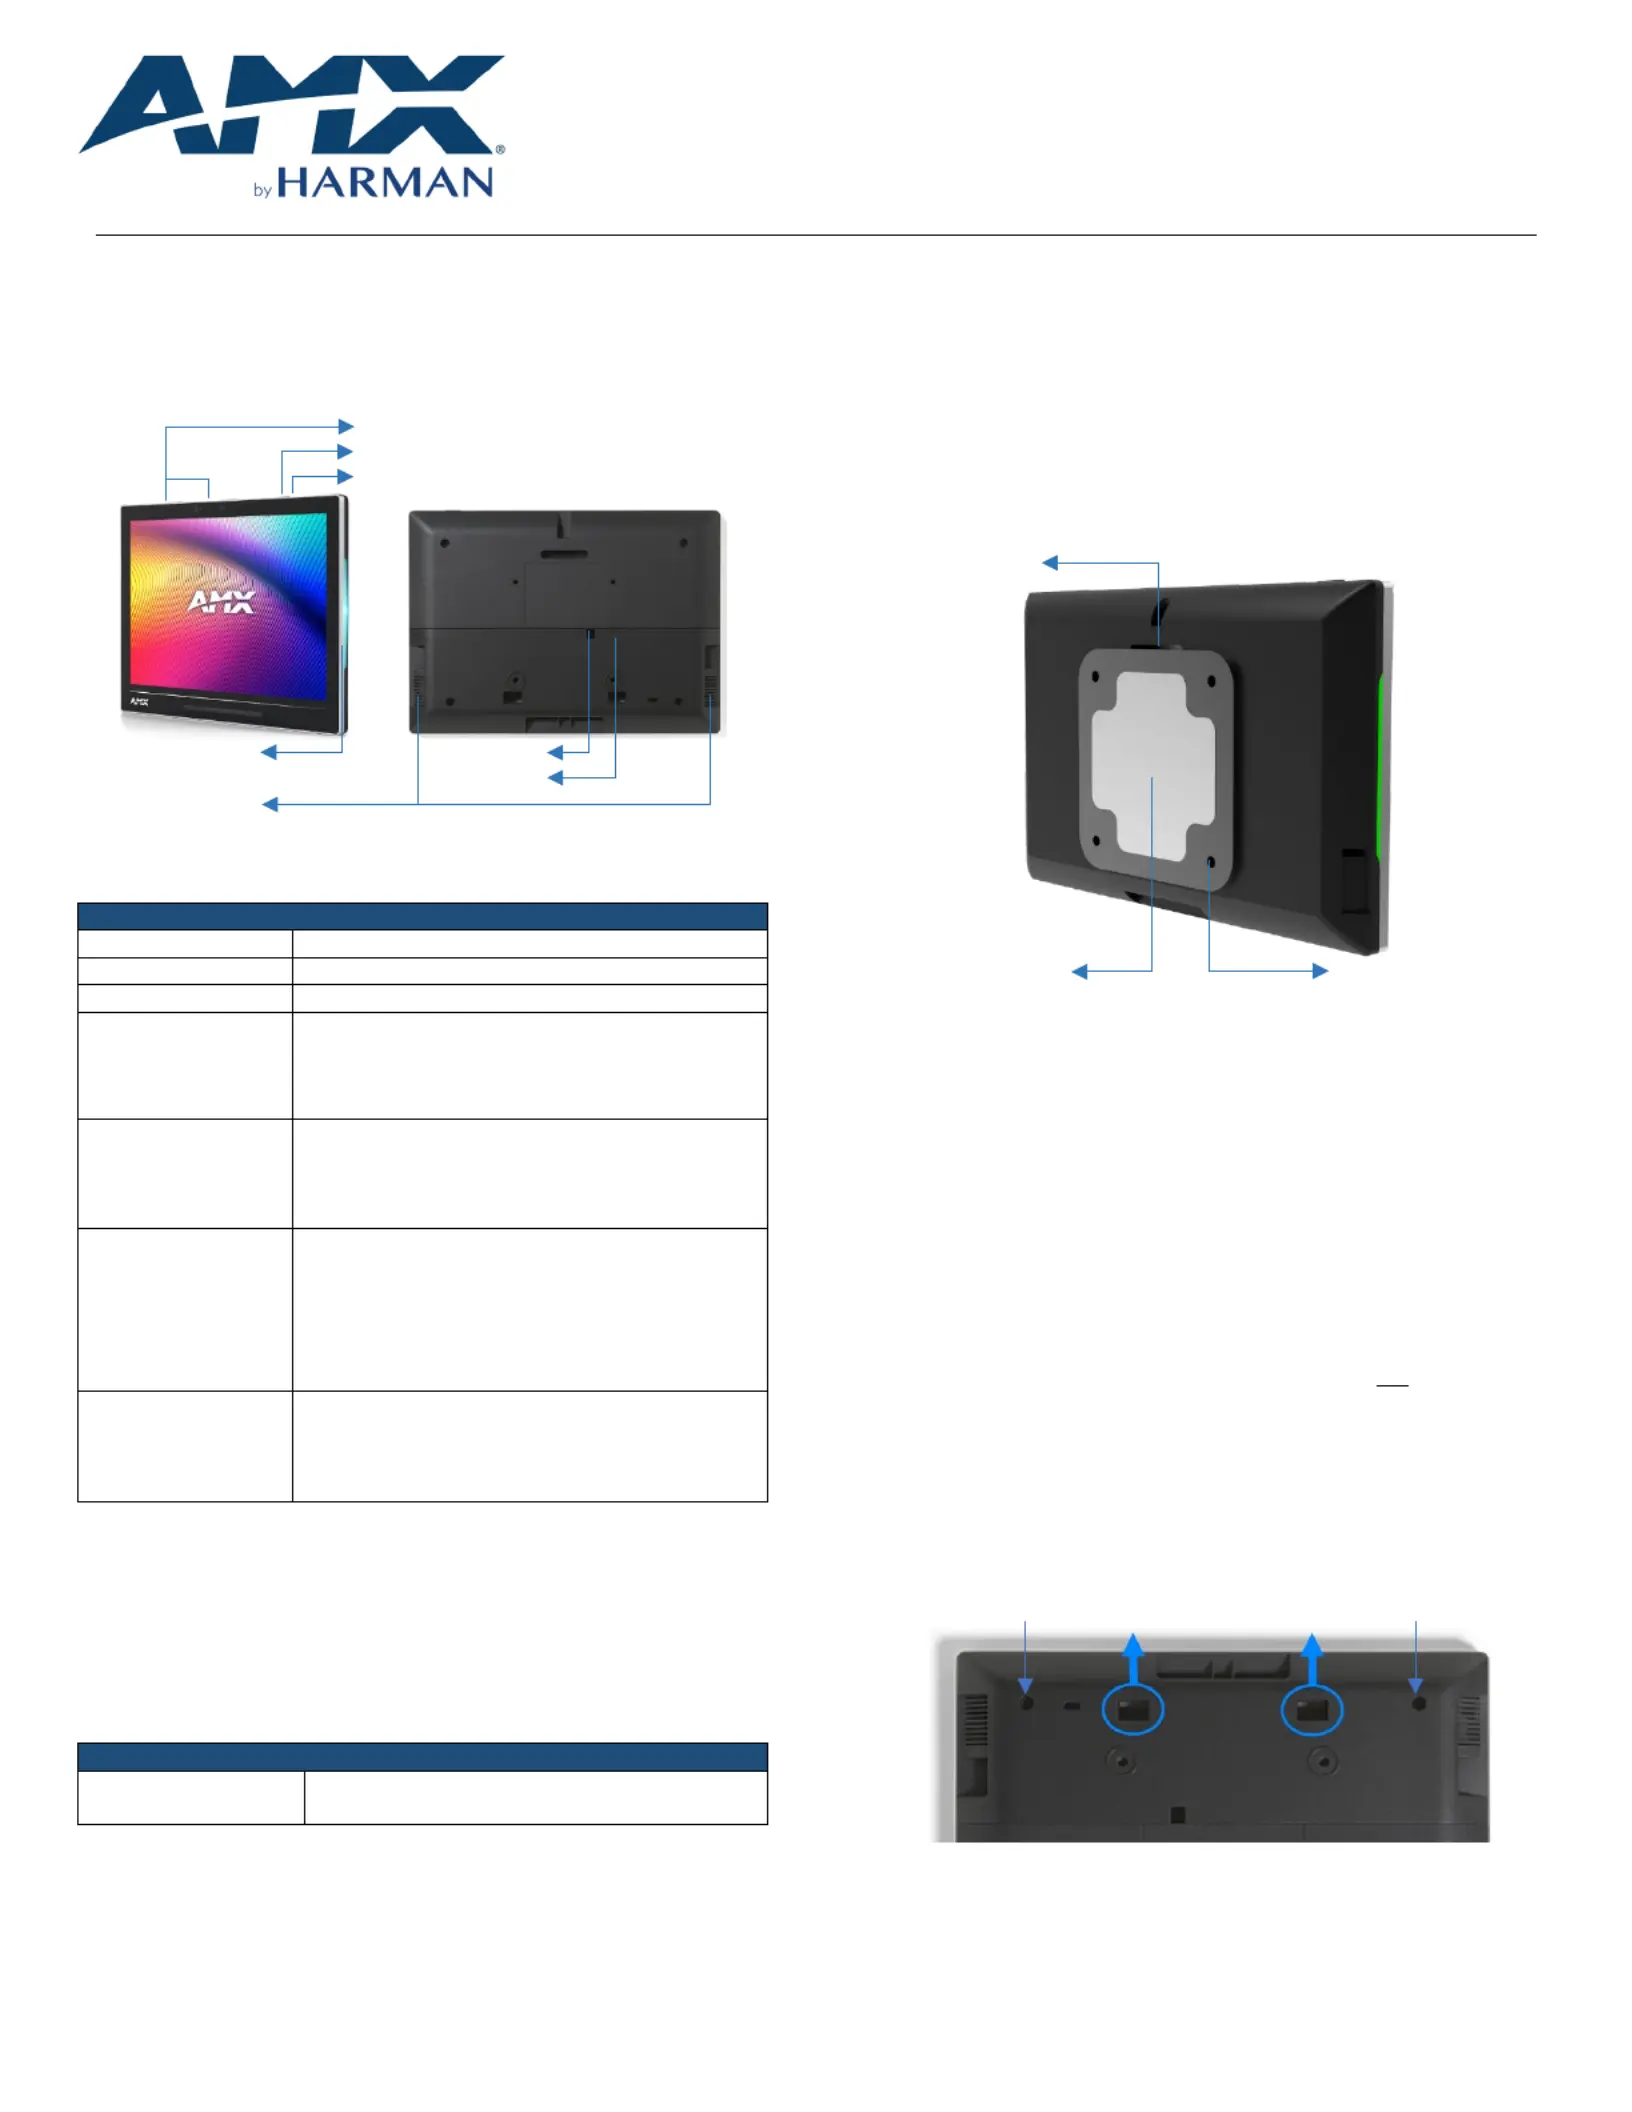
Overview
AMX VARIA-15-50 (AMXUTP111) & VARIA-150N -5(AMXUTP111N) are 15.6”
professional-s grade touch paneldesigned to adapt to the unique needs of your
environment by offering a selection of personas. Varia personas are pre-loaded
apps that define the entire panel experience.
s Microphone
(except No-Comm)
S ettingsButton
Function Button
Side LED LAN/POE
USB
Speakers
FIG. 1 AMX -150 TP VARIAouch anel
Product Specifications
VARIASPECIFICATIONS-150
Dimensions (HWD)
TBD
Weight
TBD
Power Consumption
PoE, 802.3at, 30 watt
External Power
Supply Required
Optimal performance requires use of the following
AMX PoE power suppl(not included):y
•PS--AT-POETC, PoE Injector, 802.3at
Compliant (FG423-84)
Certifications &
Compliance
•UL
•CE
•CB
•FCC Class B (- 5dB)
Environmental
Operating Temperature
•0°C - – 40° C (32°F 104°F)
•5% - 85% Humidity
Storage Temperature
•-2– 64– 0 0°C 0° C (°F 14°F)
•
5% - 90% Humidity
Included Accessories
•Mounting Plate
•Adhesive Pad
•Set Screw
•Installation Template
VARIA-150 Installation
Varia - can be surfacemountedonto a wall, glass or other smooth surface, or
connect to any number of popular VESA mountswith the included mounting
bracket & hardware.
The VARIA-150 converts to a tabletop touch panel when used in conjunction with
a tabletop stand accessory (sold separately).
TABLETOP STAND ACCESSORIES
VARIA--A ACS150
(--) AMXUMT1511
AMX Varia Angle- Select Tabletop Stand
for VARIA--15 150 & VARIA0N
Power Over Ethernet
Power is supplied via Power Over Ethernet (PoE), utilizing an AMX certified PoE
injector such as the PS---POEAFTC PoE Injector (FG423-83) or compatible
network switch which is classified as ES1 and PS2 output in accordance with
IEC/EN/UL 62368-1. Connect the incoming Ethernet cable to the RJ-45 port on
the VARIA-150.
Mounting Plate
The included mounting plate hole pattern,contains a x 100100VESA set screw,
and dedicated area for the included adhesive pad.
Set Screw
Adhesive Pad x 100100VESA
FIG. 2 Mounting Plate
STEP 1: Installation Prer equisites
Prior to touch panel installation, identify a proper installation surface in
accordance with local laws and building codes.Ensure that your category cable
(networking cable) has access to the location.
STEP 2: Install the Mounting Plate
If installing on wall, mark your surface using the included installation template
for thefour (4)VESA holes and one (1) - desired cable passthrulocation. Drill
holes as required and screw the mounting bracket o, nto the surfaceusing
appropriate hardware for the surface (ie. drywall, concrete, brick, etc.).
If installing on glass or other smooth surface using the adhesive pad, first apply
the adhesive pad to the mounting bracket, only exposing one side of the pad.
Then adhere the mounting bracket to the surface with the set screw hole facing
UP and the two tabs on the BOTTOM. Make sure it is a secure fit, but do not
apply too much pressure as glass may break.
STEP 3 : Route Category Cable
Remove the panel’s lower touch rear cover by removing two (2) screws and then
sliding the cover off. Press therectangular holes to push the cover away from
you.
FIG. 3 Lower CoverHoles
P lug in the networking cableand route it outone (1) (3) of the three available
openings in the lower coverOnce fully seated, : left, right, or bottom. reattach
the lower rear cover.
Screw Location
Screw Location
Produktspezifikationen
| Marke: | AMX |
| Kategorie: | Nicht kategorisiert |
| Modell: | VARIA-150 |
Brauchst du Hilfe?
Wenn Sie Hilfe mit AMX VARIA-150 benötigen, stellen Sie unten eine Frage und andere Benutzer werden Ihnen antworten
Bedienungsanleitung Nicht kategorisiert AMX

18 September 2025
18 September 2025
18 September 2025
17 September 2025
17 September 2025
17 September 2025
16 September 2025
15 September 2025
15 September 2025
15 September 2025
Bedienungsanleitung Nicht kategorisiert
Neueste Bedienungsanleitung für -Kategorien-
3 April 2026
3 April 2026
3 April 2026
3 April 2026
3 April 2026
3 April 2026
3 April 2026
3 April 2026
3 April 2026
3 April 2026