Audio-Technica AT-LPA2 Bedienungsanleitung
Audio-Technica Plattenspieler AT-LPA2
Lies die bedienungsanleitung für Audio-Technica AT-LPA2 (47 Seiten) kostenlos online; sie gehört zur Kategorie Plattenspieler. Dieses Handbuch wurde von 41 Personen als hilfreich bewertet und erhielt im Schnitt 4.5 Sterne aus 2 Bewertungen. Hast du eine Frage zu Audio-Technica AT-LPA2 oder möchtest du andere Nutzer dieses Produkts befragen? Stelle eine Frage
Seite 1/47
●
For information about items included in the package that are not explained in the quick start guide, refer to the user
manual on our website.
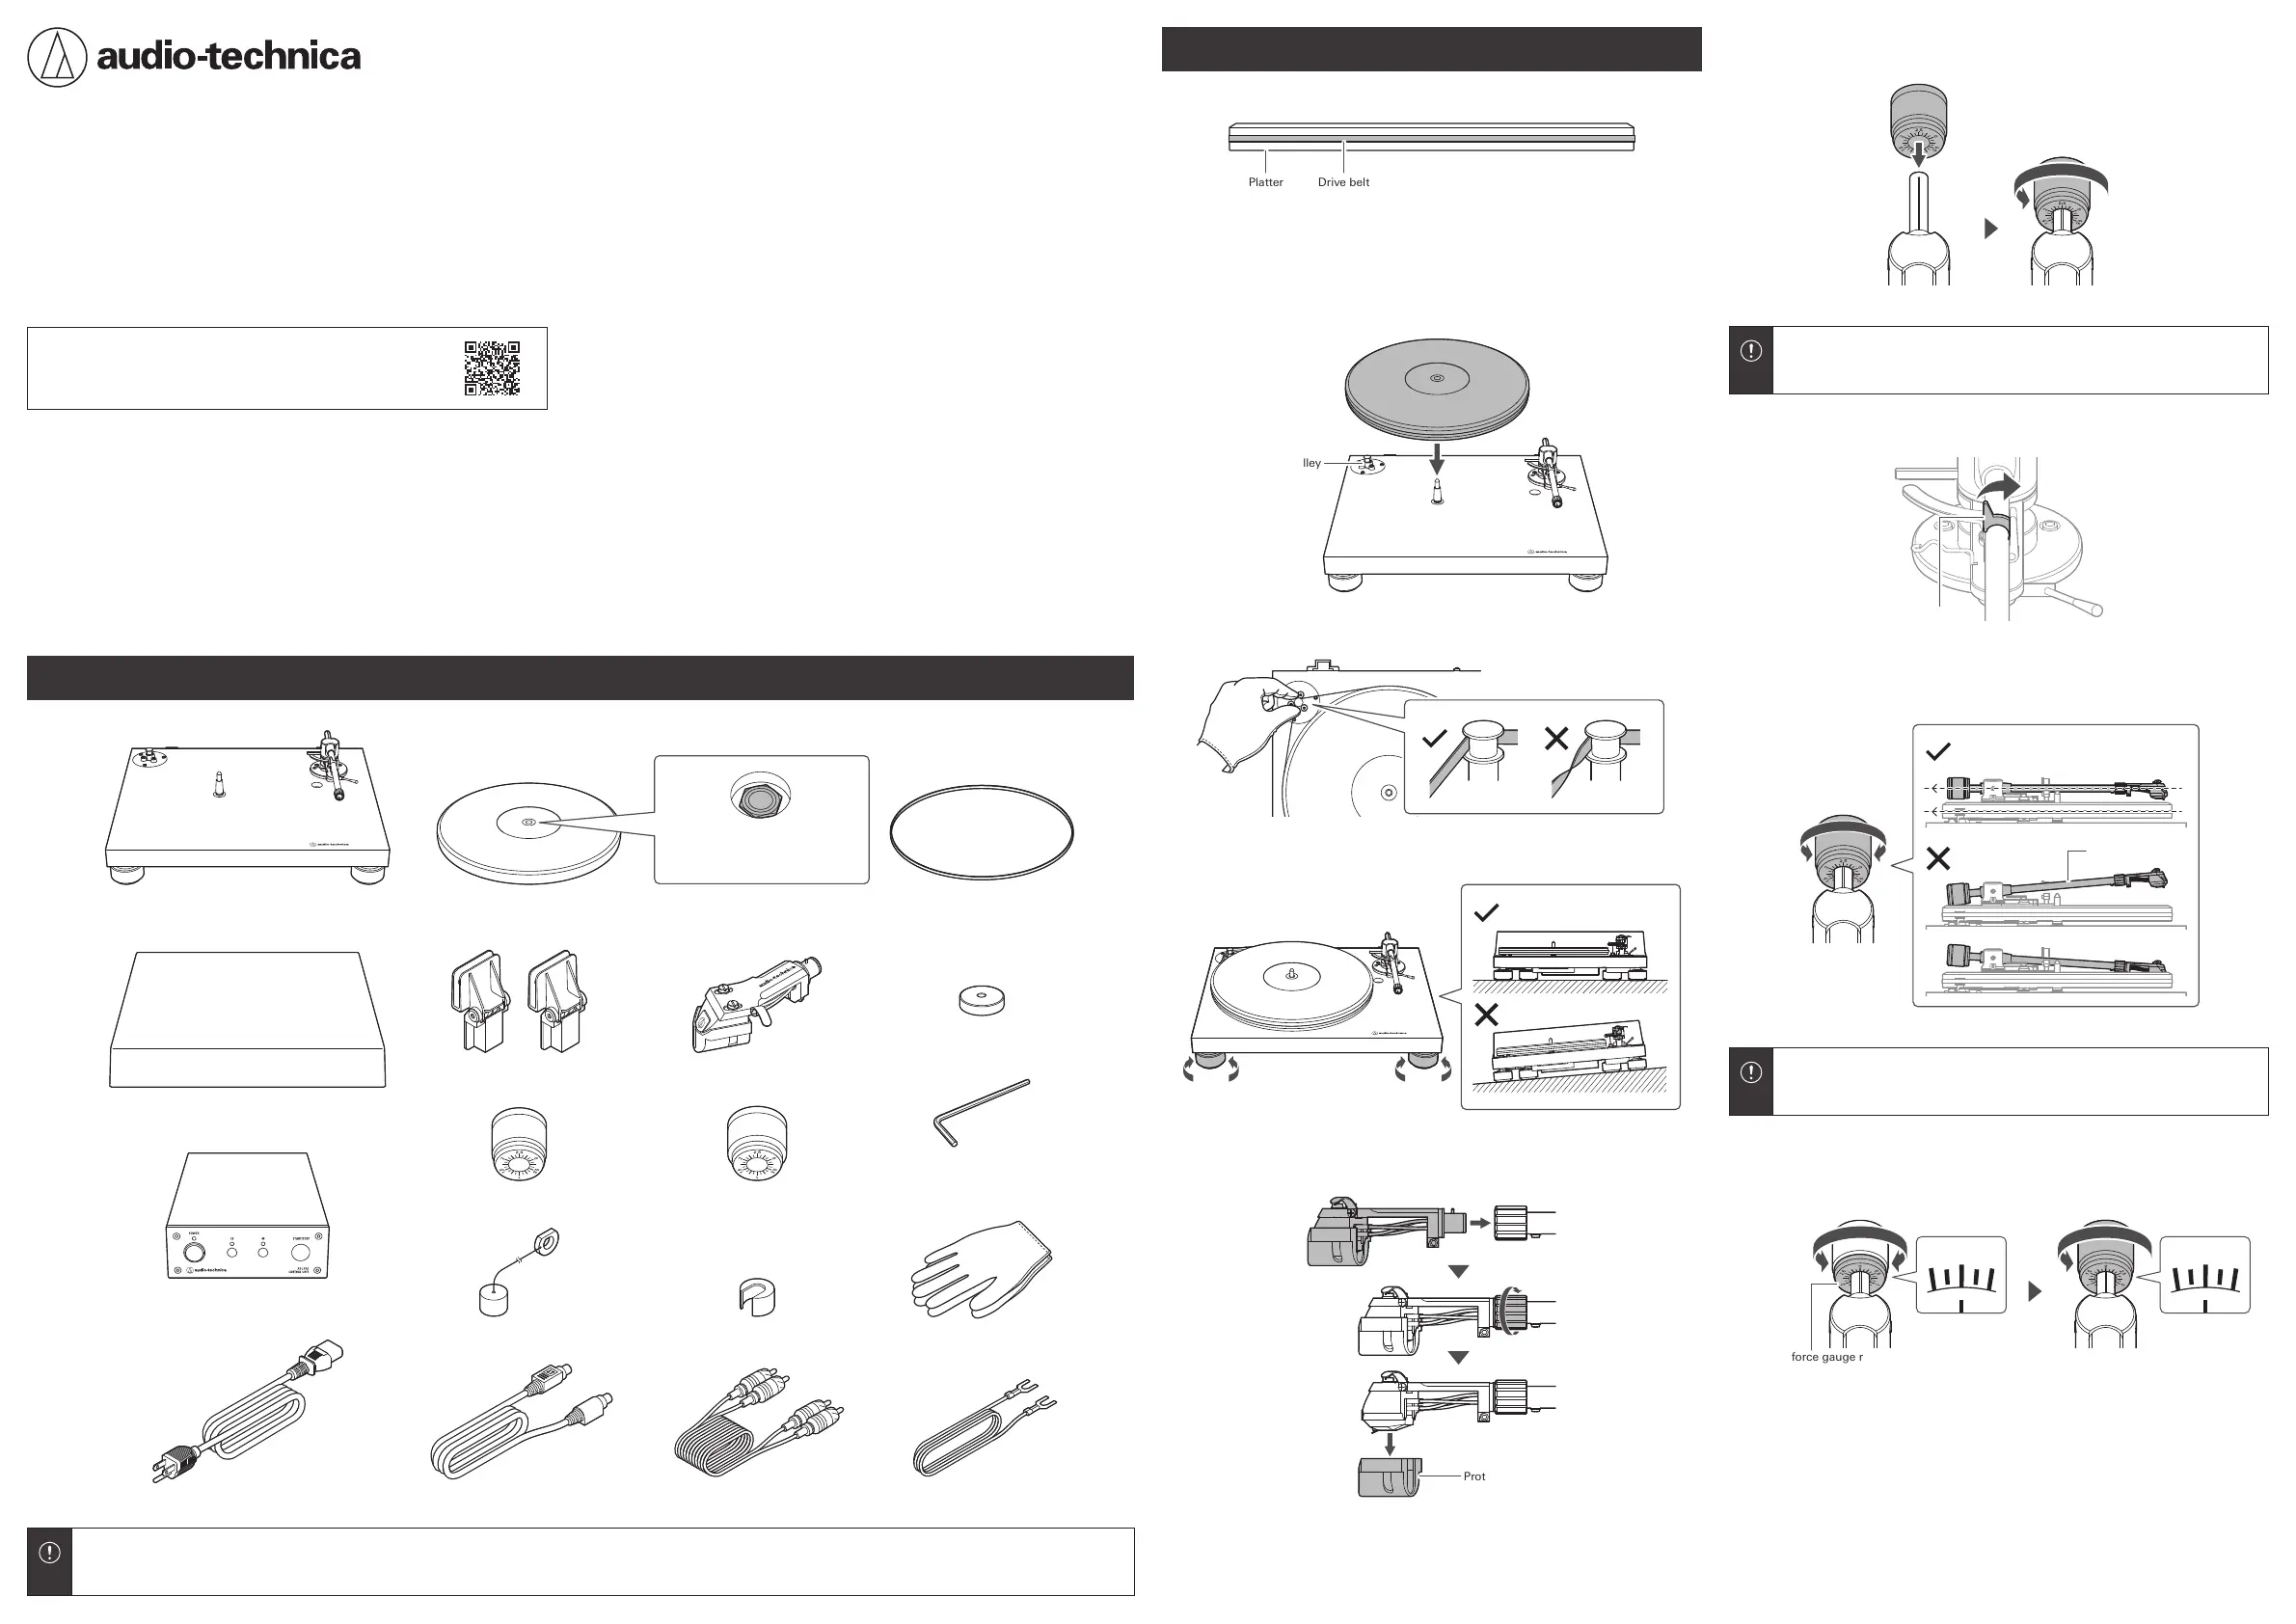
Contents
Preparation
1
Attach the drive belt to the side of the platter.
Drive beltPlatter
2
Use the included gloves to avoid fingerprints on the turntable,
and then remove the protective sheets from the platter and
turntable body.
3
With the turntable turned off, set the platter.
Motor pulley
4
Attach the drive belt to the motor pulley.
5
Level the turntable.
6
Attach the headshell into the tonearm, and remove the
cartridge’s protector.
Protector
7
Attach the counterweight (light) to the back of the tonearm,
and slowly turn it counterclockwise (to the left).
●
Refer to the user manual on our website for
information on using the counterweight (heavy).
8
Unlatch the clamp.
Clamp
9
Turn the counterweight to adjust the tonearm’s balance so that
the tonearm is level when you release the headshell.
Tonearm
●
Make sure that the stylus tip does not touch the
platter or turntable body.
10
Set the tracking force gauge ring to the “0” position. After
that, turn the counterweight and the tracking force gauge ring
together counterclockwise (to the left) to the “2” position.
0
2
Tracking force gauge ring
Dust cover hinges Headshell with MC stereo cartridge
Counterweight (light)
Weight for anti-skate Auxiliary weight for anti-skate
Counterweight (heavy)
45 RPM adapter
Power cable Control cable RCA audio cable Earth cable
Hexagonal wrench
(For tonearm height adjustment)
Gloves
Turntable body
Dust cover
Control unit
Quick Start Guide
Belt-Drive Turntable
Guide de démarrage rapide
Tourne-disque à entraînement par courroie
Kurzanleitung
Riemenbetriebener Plattenspieler
Guida rapida
Giradischi
Guía de inicio rápido
Giradiscos de tracción por correa
Guia de início rápido
Toca-discos acionado por correia
Краткое руководство по установке
Проигрыватель с ременным приводом
快速启动指南
皮带传动唱盘机
快速入門指南
皮帶驅動式黑膠唱機
간편 사용 설명서
벨트 드라이브 턴테이블
Back side with hexagonal nut
Platter
Drive belt
User Manual (Online Manual)
https://www.audio-technica.co.jp/document/AT-LPA2/
Default.html
AT-LPA2
Audio-Technica Corporation
2-46-1 Nishi-naruse, Machida, Tokyo 194-8666, Japan
www.audio-technica.com
©2025 Audio-Technica Corporation
Global Support Contact: www.at-globalsupport.com
351718580-01-02 ver.2 2025.02.15
ver.1 2024.11.01
Produktspezifikationen
| Marke: | Audio-Technica |
| Kategorie: | Plattenspieler |
| Modell: | AT-LPA2 |
Brauchst du Hilfe?
Wenn Sie Hilfe mit Audio-Technica AT-LPA2 benötigen, stellen Sie unten eine Frage und andere Benutzer werden Ihnen antworten
Bedienungsanleitung Plattenspieler Audio-Technica

27 Februar 2026
4 Dezember 2025
28 September 2025
6 September 2025
12 August 2025
12 August 2025
12 August 2025
12 August 2025
12 August 2025
12 August 2025
Bedienungsanleitung Plattenspieler
Neueste Bedienungsanleitung für -Kategorien-
28 März 2026
26 März 2026
21 März 2026
20 März 2026
19 März 2026
19 März 2026
18 März 2026
13 März 2026
28 Februar 2026
28 Februar 2026