Daikin EKHWSP180D3V3 Bedienungsanleitung
Daikin
Durchlauferhitzer und Boiler
EKHWSP180D3V3
Lies die bedienungsanleitung für Daikin EKHWSP180D3V3 (20 Seiten) kostenlos online; sie gehört zur Kategorie Durchlauferhitzer und Boiler. Dieses Handbuch wurde von 5 Personen als hilfreich bewertet und erhielt im Schnitt 4.8 Sterne aus 3 Bewertungen. Hast du eine Frage zu Daikin EKHWSP180D3V3 oder möchtest du andere Nutzer dieses Produkts befragen? Stelle eine Frage
Seite 1/20

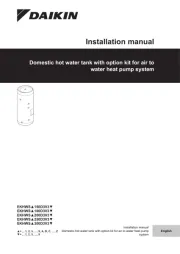
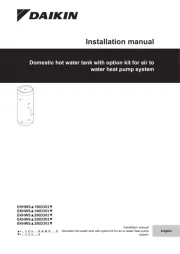
Installation manual
Domestic hot water tank with option kit for air to water heat pump
system
English
Installation manual
Domestic hot water tank with option kit for air to
water heat pump system
EKHWS▲150D3V3▼
EKHWS▲180D3V3▼
EKHWS▲200D3V3▼
EKHWS▲250D3V3▼
EKHWS▲300D3V3▼
▲= , , 1, 2, 3, …, 9, A, B, C, …, Z
▼= , , 1, 2, 3, …, 9

Table of contents
Installation manual
2
EKHWS150~300D3V3
Domestic hot water tank with option kit for air to water heat pump
system
4P510672-1C – 2023.02
Table of contents
1 General safety precautions 2
1.1 About the documentation .......................................................... 2
1.1.1 Meaning of warnings and symbols.............................. 2
1.2 For the installer.......................................................................... 3
1.2.1 General ....................................................................... 3
1.2.2 Installation site ............................................................ 3
1.2.3 Water .......................................................................... 3
1.2.4 Electrical ..................................................................... 3
2 Specific installer safety instructions 4
3 About the documentation 5
3.1 About this document.................................................................. 5
4 About the box 5
4.1 Domestic hot water tank............................................................ 5
4.1.1 To unpack the domestic hot water tank ...................... 5
4.1.2 To remove the accessories from the domestic hot
water tank ................................................................... 6
5 About the units and options 6
5.1 Identification .............................................................................. 6
5.1.1 Identification label: Domestic hot water tank............... 6
6 Preparation 6
6.1 Overview: Preparation............................................................... 6
6.2 Preparing the installation site .................................................... 6
6.2.1 Installation site requirements of the domestic hot
water tank ................................................................... 6
6.3 Preparing water piping .............................................................. 7
6.3.1 Water circuit requirements.......................................... 7
6.4 Preparing electrical wiring ......................................................... 7
6.4.1 About preparing electrical wiring................................. 7
6.4.2 Safety device requirements ........................................ 8
7 Installation 8
7.1 Overview: Installation ................................................................ 8
7.2 Opening the units ...................................................................... 8
7.2.1 To open the switch box cover of the domestic hot
water tank ................................................................... 8
7.3 Mounting the domestic hot water tank....................................... 8
7.3.1 Precautions when mounting the indoor unit................ 8
7.3.2 To install the domestic hot water tank......................... 8
7.4 Connecting water piping............................................................ 8
7.4.1 About connecting the water piping.............................. 8
7.4.2 Precautions when connecting the water piping........... 8
7.4.3 To connect the water piping........................................ 8
7.4.4 To fill the domestic hot water tank .............................. 9
7.4.5 To insulate the water piping........................................ 9
7.4.6 To connect the 3-way valve ........................................ 9
7.5 Connecting the electrical wiring................................................. 10
7.5.1 About connecting the electrical wiring......................... 10
7.5.2 To connect the electrical wiring to the indoor unit....... 10
7.5.3 To connect the electrical wiring to the outdoor unit..... 11
7.5.4 To connect the electrical wiring on the domestic hot
water tank ................................................................... 12
7.6 Finishing the domestic hot water tank installation ..................... 13
7.6.1 To close the domestic hot water tank ......................... 13
8 Commissioning 13
8.1 Checklist before commissioning................................................ 13
8.2 Checklist during commissioning ................................................ 14
9 Hand-over to the user 14
10 Maintenance and service 14
10.1 Maintenance safety precautions................................................ 14
10.2 Checklist for yearly maintenance of the domestic hot water
tank............................................................................................ 14
11 Troubleshooting 15
11.1 Overview: Troubleshooting......................................................... 15
11.2 Precautions when troubleshooting ............................................. 15
11.3 Solving problems based on symptoms....................................... 15
11.3.1 Symptom: No water flow from hot taps........................ 15
11.3.2 Symptom: The water from the hot taps is cold............. 15
11.3.3 Symptom: Intermittent water discharge ....................... 15
11.3.4 Symptom: Continuous water discharge ....................... 15
12 Disposal 16
13 Technical data 16
13.1 Components: Domestic hot water tank ...................................... 16
13.2 Wiring diagram: Domestic hot water tank................................... 16
14 Glossary 17
1 General safety precautions
1.1 About the documentation
▪ The original documentation is written in English. All other
languages are translations.
▪ The precautions described in this document cover very important
topics, follow them carefully.
▪ The installation of the system, and all activities described in the
installation manual and in the installer reference guide MUST be
performed by an authorised installer.
1.1.1 Meaning of warnings and symbols
DANGER
Indicates a situation that results in death or serious injury.
DANGER: RISK OF ELECTROCUTION
Indicates a situation that could result in electrocution.
DANGER: RISK OF BURNING/SCALDING
Indicates a situation that could result in burning/scalding
because of extreme hot or cold temperatures.
DANGER: RISK OF EXPLOSION
Indicates a situation that could result in explosion.
WARNING
Indicates a situation that could result in death or serious
injury.
WARNING: FLAMMABLE MATERIAL
CAUTION
Indicates a situation that could result in minor or moderate
injury.
NOTICE
Indicates a situation that could result in equipment or
property damage.
INFORMATION
Indicates useful tips or additional information.
Symbols used on the unit:
Symbol Explanation
Before installation, read the installation and
operation manual, and the wiring instruction sheet.

1 General safety precautions
Installation manual
3
EKHWS150~300D3V3
Domestic hot water tank with option kit for air to water heat pump
system
4P510672-1C – 2023.02
Symbol Explanation
Before performing maintenance and service tasks,
read the service manual.
For more information, see the installer and user
reference guide.
The unit contains rotating parts. Be careful when
servicing or inspecting the unit.
Symbols used in the documentation:
Symbol Explanation
Indicates a figure title or a reference to it.
Example: " 1–3 Figure title" means "Figure 3 in
chapter 1".
Indicates a table title or a reference to it.
Example: " 1–3 Table title" means "Table 3 in
chapter 1".
1.2 For the installer
1.2.1 General
If you are NOT sure how to install or operate the unit, contact your
dealer.
DANGER: RISK OF BURNING/SCALDING
▪ Do NOT touch the refrigerant piping, water piping or
internal parts during and immediately after operation. It
could be too hot or too cold. Give it time to return to
normal temperature. If you MUST touch it, wear
protective gloves.
▪ Do NOT touch any accidental leaking refrigerant.
WARNING
Improper installation or attachment of equipment or
accessories could result in electrical shock, short-circuit,
leaks, fire or other damage to the equipment. ONLY use
accessories, optional equipment and spare parts made or
approved by Daikin unless otherwise specified.
WARNING
Make sure installation, testing and applied materials
comply with applicable legislation (on top of the
instructions described in the Daikin documentation).
WARNING
Tear apart and throw away plastic packaging bags so that
nobody, especially NOT children, can play with them.
Possible consequence: suffocation.
WARNING
Provide adequate measures to prevent that the unit can be
used as a shelter by small animals. Small animals that
make contact with electrical parts can cause malfunctions,
smoke or fire.
CAUTION
Wear adequate personal protective equipment (protective
gloves, safety glasses,…) when installing, maintaining or
servicing the system.
CAUTION
Do NOT touch the air inlet or aluminium fins of the unit.
CAUTION
▪ Do NOT place any objects or equipment on top of the
unit.
▪ Do NOT sit, climb or stand on the unit.
In accordance with the applicable legislation, it might be necessary
to provide a logbook with the product containing at least: information
on maintenance, repair work, results of tests, stand-by periods,…
Also, at least, following information MUST be provided at an
accessible place at the product:
▪ Instructions for shutting down the system in case of an emergency
▪ Name and address of fire department, police and hospital
▪ Name, address and day and night telephone numbers for
obtaining service
In Europe, EN378 provides the necessary guidance for this logbook.
1.2.2 Installation site
▪ Provide sufficient space around the unit for servicing and air
circulation.
▪ Make sure the installation site withstands the weight and vibration
of the unit.
▪ Make sure the area is well ventilated. Do NOT block any
ventilation openings.
▪ Make sure the unit is level.
Do NOT install the unit in the following places:
▪ In potentially explosive atmospheres.
▪ In places where there is machinery that emits electromagnetic
waves. Electromagnetic waves may disturb the control system,
and cause malfunction of the equipment.
▪ In places where there is a risk of fire due to the leakage of
flammable gases (example: thinner or gasoline), carbon fibre,
ignitable dust.
▪ In places where corrosive gas (example: sulphurous acid gas) is
produced. Corrosion of copper pipes or soldered parts may cause
the refrigerant to leak.
1.2.3 Water
If applicable. See the installation manual or installer reference guide
of your application for more information.
NOTICE
Make sure water quality complies with EU directive
2020/2184.
1.2.4 Electrical
DANGER: RISK OF ELECTROCUTION
▪ Turn OFF all power supply before removing the switch
box cover, connecting electrical wiring or touching
electrical parts.
▪ Disconnect the power supply for more than 10minutes,
and measure the voltage at the terminals of main circuit
capacitors or electrical components before servicing.
The voltage MUST be less than 50 V DC before you
can touch electrical components. For the location of the
terminals, see the wiring diagram.
▪ Do NOT touch electrical components with wet hands.
▪ Do NOT leave the unit unattended when the service
cover is removed.
Produktspezifikationen
| Marke: | Daikin |
| Kategorie: | Durchlauferhitzer und Boiler |
| Modell: | EKHWSP180D3V3 |
Brauchst du Hilfe?
Wenn Sie Hilfe mit Daikin EKHWSP180D3V3 benötigen, stellen Sie unten eine Frage und andere Benutzer werden Ihnen antworten
Bedienungsanleitung Durchlauferhitzer und Boiler Daikin
9 Juli 2025
8 Juli 2025
8 Juli 2025
7 Juli 2025
6 Juli 2025
25 Juni 2025
25 Juni 2025
25 Juni 2025
24 Juni 2025
24 Juni 2025
Bedienungsanleitung Durchlauferhitzer und Boiler
- Inventum
- Stiebel Eltron
- Gorenje
- Joven
- LERAN
- Midea
- Oertli
- Schäfer Heiztechnik
- Hotpoint
- Adler
- Atlantic
- EvoHeat
- Kelvinator
- AEG
- Thermona
Neueste Bedienungsanleitung für -Kategorien-
29 Juli 2025
28 Juli 2025
28 Juli 2025
28 Juli 2025
28 Juli 2025

28 Juli 2025
28 Juli 2025
28 Juli 2025
28 Juli 2025

28 Juli 2025