DCS BND-CNR Bedienungsanleitung
Lies die bedienungsanleitung für DCS BND-CNR (294 Seiten) kostenlos online; sie gehört zur Kategorie Grill. Dieses Handbuch wurde von 69 Personen als hilfreich bewertet und erhielt im Schnitt 4.4 Sterne aus 8 Bewertungen. Hast du eine Frage zu DCS BND-CNR oder möchtest du andere Nutzer dieses Produkts befragen? Stelle eine Frage
Seite 1/294
BNDCNR BEND CORNER BRACKET
INSTALLATION INSTRUCTIONS
Before you begin, read these instructions completely and carefully.
Getting Started
Remove packaging ■
CONTENTS
Eye Goggles
Screwdriver - Phillips #2
7/16” Socket and Ratchet Driver
7/16” Box or Open End Wrench
DescriptionQty
Bracket Top1
Bracket Leg2
Machine Screw #10-24 x 3/4” Phillips4
Hex Nut 1/4-204
Washer 5/16 ID x 3/4 OD4
Hex Bolt 1/4-20 x 3/4”4
BND-CNR :
The BND-CNR is composed of three main pieces (one large 1.
brackettop and two bracket legs) that are held together using
four bolts and nuts. The bracket is mounted to the bend units
with four screws (Fig. 01).
Mounting of the BND-CNR bracket requires two CAD-BND 2.
bend units mounted with a CAD-30 cart between them and
any size CAD cart or refrigeration unit with wrapper on the
outer sides. When assembled, this conguration will provide
a solid base to which the BND-CNR bracket can be safely
mounted. The assembly should look similar to the image
below (Fig. 02).
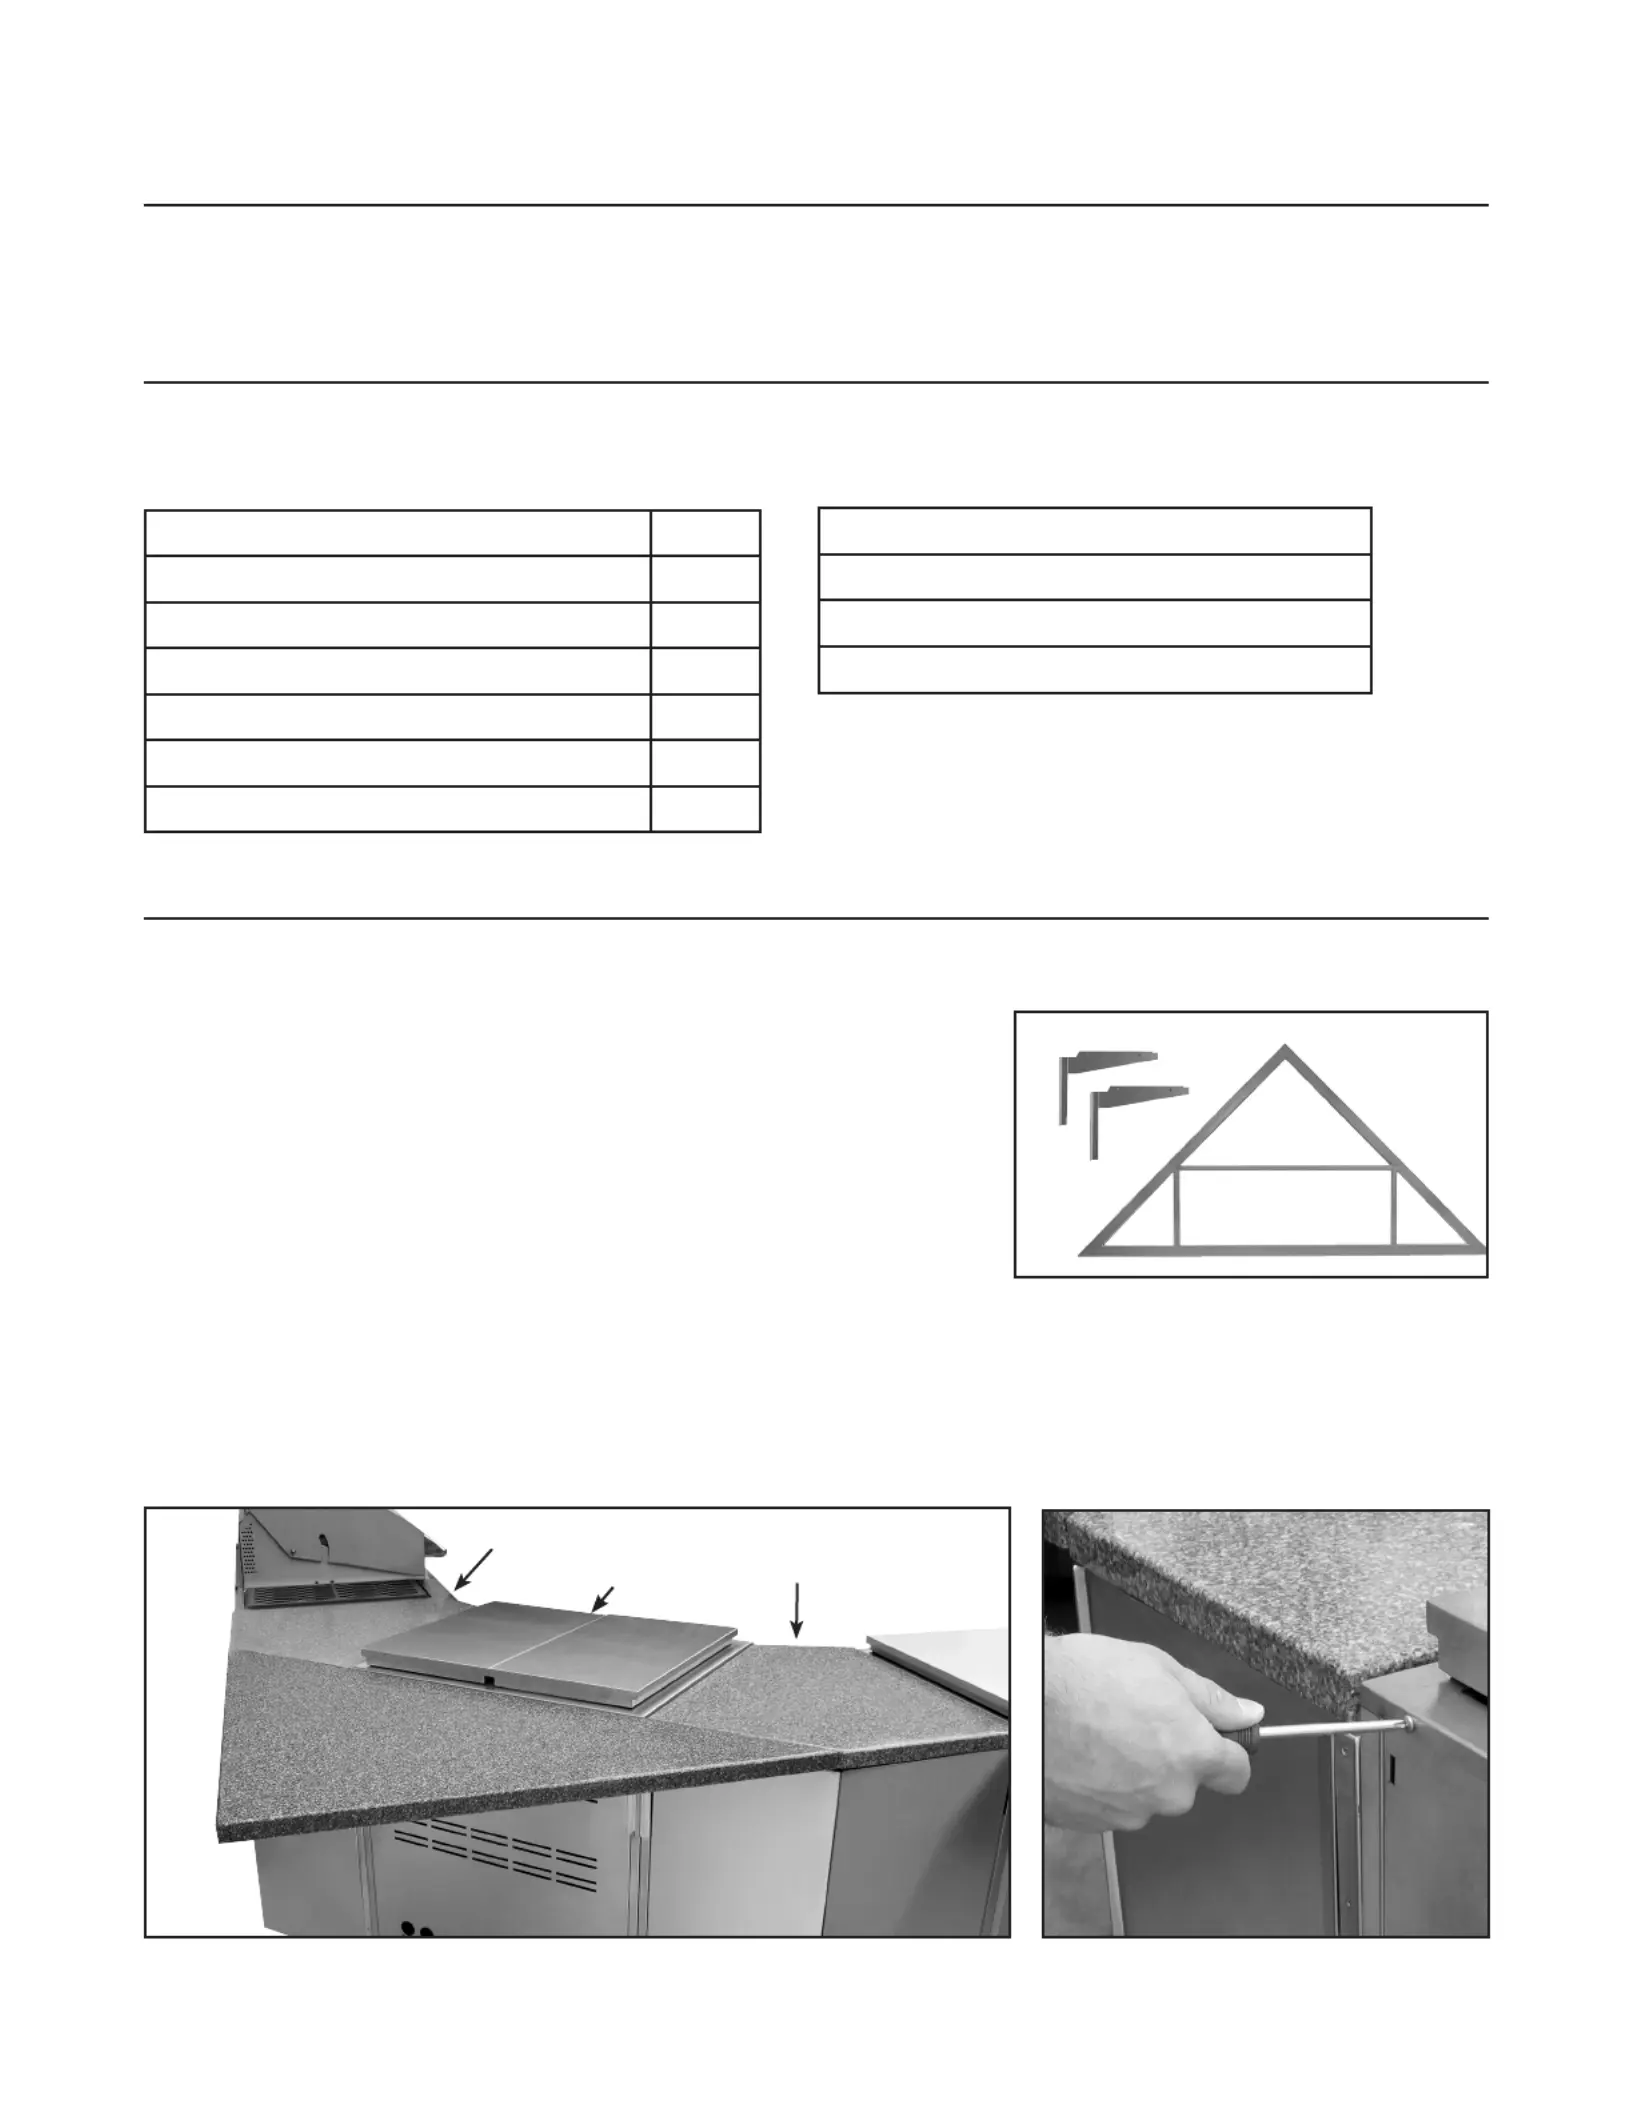
Note: Before beginning installation, remove screws holding the rear of the center outdoor appli-
ance and cart to prevent damage (Fig. 03). Ensure the grill head is secured to the front of the
cart behind the drip pan.
Fig. 02
TOOLS NEEDED
Installation Instructions
Fig. 01
Fig. 03
Over. . .
CAD-BNDCAD30 with
outdoor
appliance
CAD-BND
Produktspezifikationen
| Marke: | DCS |
| Kategorie: | Grill |
| Modell: | BND-CNR |
Brauchst du Hilfe?
Wenn Sie Hilfe mit DCS BND-CNR benötigen, stellen Sie unten eine Frage und andere Benutzer werden Ihnen antworten
Bedienungsanleitung Grill DCS

30 August 2025
30 August 2025
30 August 2025
30 August 2025
30 August 2025
30 August 2025
28 August 2025
25 Juli 2025
24 Juli 2025
23 Juli 2025
Bedienungsanleitung Grill
Neueste Bedienungsanleitung für -Kategorien-
2 April 2026
2 April 2026
1 April 2026
31 März 2026
29 März 2026
28 März 2026
28 März 2026
26 März 2026