Digitus DN-10134 Bedienungsanleitung
Digitus Netzwerkkarte/Adapter DN-10134
Lies die bedienungsanleitung für Digitus DN-10134 (2 Seiten) kostenlos online; sie gehört zur Kategorie Netzwerkkarte/Adapter. Dieses Handbuch wurde von 21 Personen als hilfreich bewertet und erhielt im Schnitt 5.0 Sterne aus 7 Bewertungen. Hast du eine Frage zu Digitus DN-10134 oder möchtest du andere Nutzer dieses Produkts befragen? Stelle eine Frage
Seite 1/2
2-PORT GIGABIT ETHENET
MINI PCI EXPRESS CARD
Manual
DN-10134
Product Introduction
This 2-Port Gigabit Ethernet Mini PCI Express Card is a high performance
10/100/1000 BASE-T Ethernet LAN controller, it supports the IEEE802.3u
specification for 10/100Mbps Ethernet and the IEEE802.3ab specification for
1000Mbps Ethernet, it also supports an auxiliary power
auto-detect function, and will auto-configure related bits of the PCI power
management registers in PCI configuration space.
Specification
Support existing CAT-5 UTP cabling with automatic crossover detection
Fully compliant with PCI-Express Base Specification Revision1.1
Single-Lane(x1)PCI-Express with throughput up to 2.5Gbps
Compatible with PCI-E MINI Card Electromechanical specification
revision1.2
Compatible with Full size MINI card type form factor
Fully Plug and Play compatible
Support Dual-Port Network
A high performance 1000BASE-T Ethernet controller card
Backwards compatible to 10/100BASE-T networking
10/100/1000Mbps data rate auto negotiation operation
Fully compliant with IEEE802.3, 802.3u,and 802.3ab
Support full duplex flow control(IEEE802.3x)
Support IEEE802.1P Layer 2 Priority Encoding
Support IEEE802.Q VLAN tagging
Support jumbo frame to 9K bytes
Crossover Detection and Auto Correction operation
Package content
1 x 2-Port Gigabit Ethernet Mini PCI Express Card - main card
1 x 2-Port Gigabit Ethernet Mini PCI Express Card - daughter card
2 x 10-Pin network cable
1 x 4-Pin LED cable
1 x User’s Manual
1 x CD
1 x Low profile bracket
System Requirements
Windows ME, 98SE, 2000, XP, Vista, 7, 8 and 10 (32/64bit)
Windows server 2003, 2008, and 2012 (32/64bit)
Linux, DOS , MAC OS X10.4.X or above
One available MINI PCIe slot
Hardware installation
1.Turn off your computer and all external devices connected to it.
2.Open the computer case. Refer to your computer user manual for more
details
3.Find an available Mini PCIe slot and remove the slot bracket. Save the
bracket screw for later use.
4.Insert the main card to the Mini PCIe slot firmly and evenly. Take care not
to force it into the slot. Once you have properly positioned the main card
into the slot, secure it with the screw you have just saved.
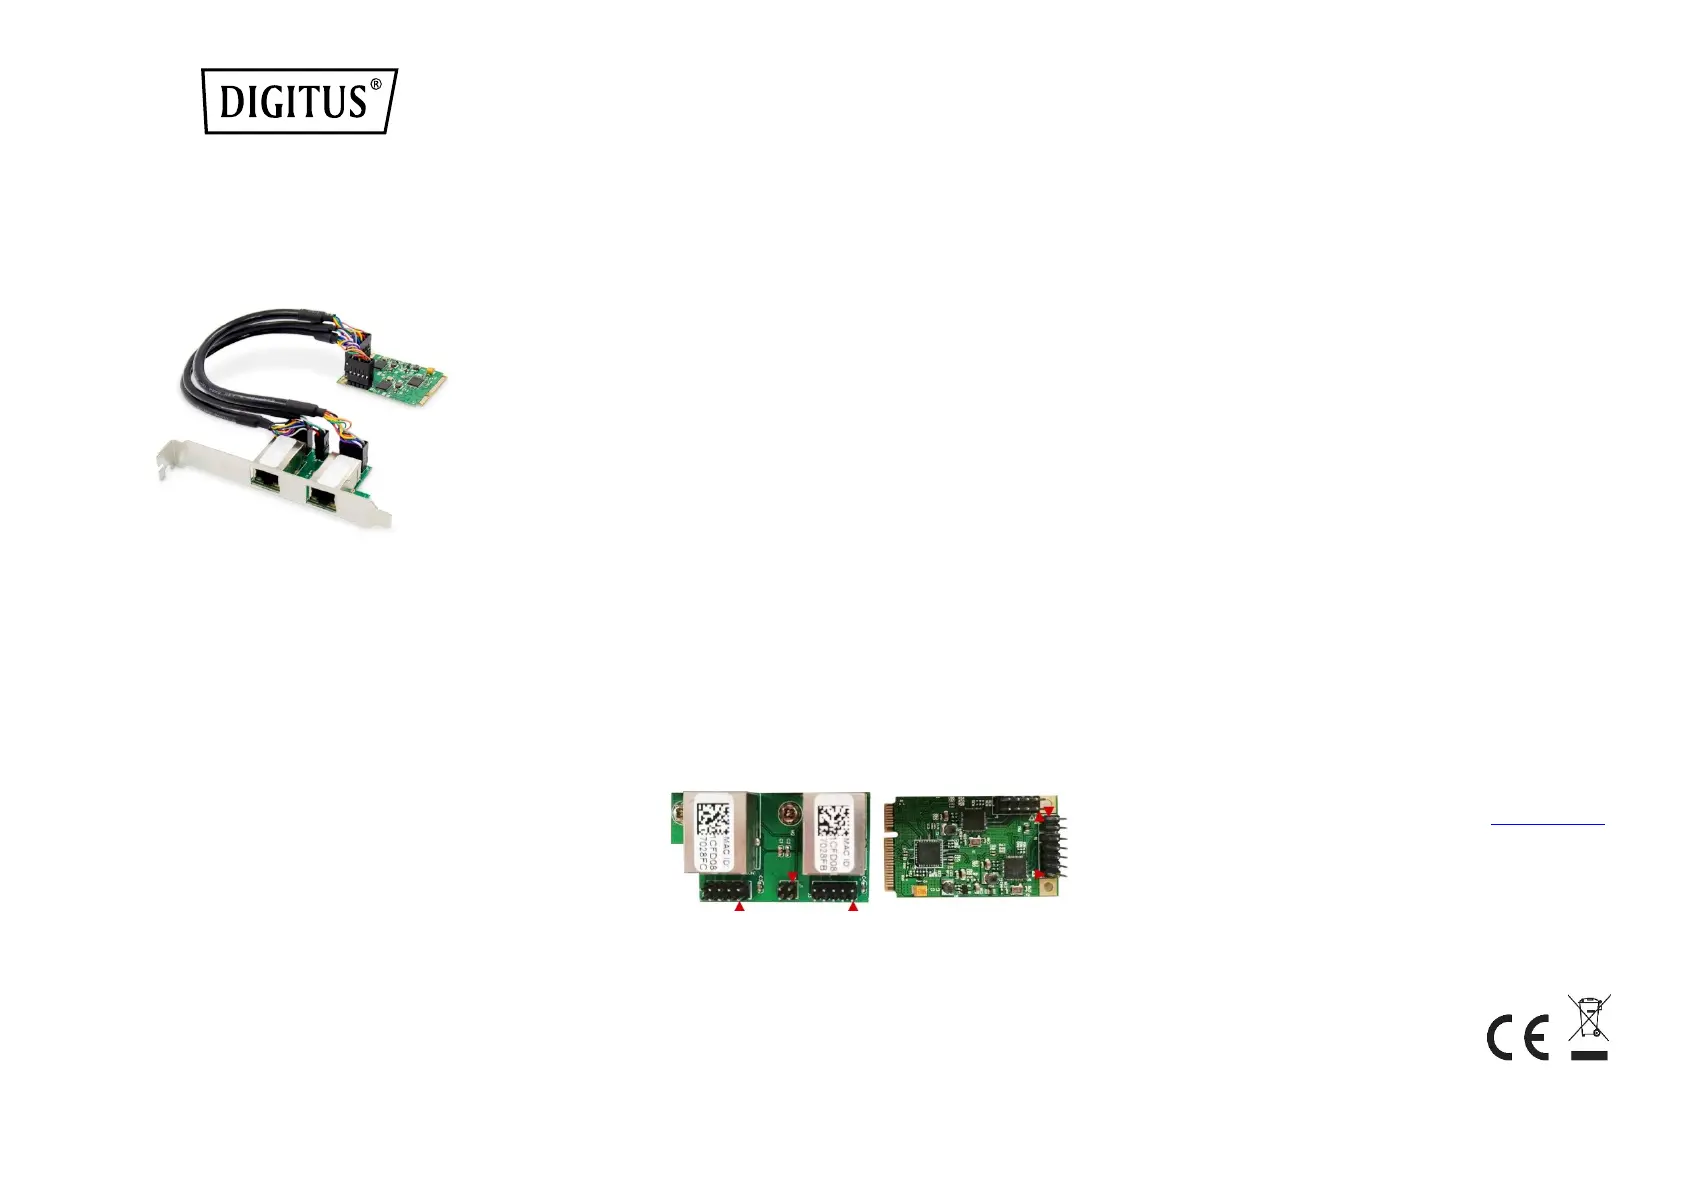
5.Connect the network cable and LED cable between the main card and the
daughter card. The orientation of the cable socket must be same as the
header which are shown as below:
The cable socket should always be inserted onto the header with the same
orientation and the triangle ark on the PCB showing Pin 1 of the cable and
the header.
6.Find an empty expansion slot on the back panel of the computer case and
remove the metal bracket. Save the bracket for later use.
7.Place the bracket of the daughter card on the expansion slot on the back
panel and secure it with the bracket screw you have just saved.
8.Connect the system to network by inserting the CAT-5 or above cable into
RJ45 Port on the daughter card.
9.Secure the computer case and switch on your computer.
Install Drivers
Windows® Operating Systems
1.Please insert the CD driver bound into your CD-ROM Drive.
2.At the Windows desktop, click Start, Run.
2.1.For Windows® WIN98SE, WinME,
Type
“RTL8168,RTL8111C,RTL8111E\Windows\WIN98SE,WINM
E\PCIE_Install_5708_1119\setup. exe“,
Double click it.
2.2.For Windows® WIN2K, XP, Server 2003 (32/64 bit)
Type
“RTL8168,RTL8111C,RTL8111E\Windows\WIN2K,XP,2003\
PCIE_Install_5790_11182011\setup.exe ”,
Double click it.
2.3.For Windows® Vista, WIN2008 (32/64 bit)
Type
“RTL8168,RTL8111C,RTL8111E\Windows\VISTA,WIN2008\
Install_Vista_6250_11182011\setup.exe”,
Double click it.
2.4.For Windows® Win7, WIN2008 (32/64 bit)
Type
“RTL8168,RTL8111C,RTL8111E\Windows\WIN7,WIN2008\
Install_Win7_7049_11182011\setup.exe”,
Double click it.
2.5.For Windows® Win8, Win8.1 (32/64 bit)
Type
“RTL8168,RTL8111C,RTL8111E\Windows\Win8,Win8.1\In
stall_Win8_8.1_8020_09182013\setup.exe”,
Double click it.
2.6.For Windows® Win10 (32/64 bit)
Type
“RTL8168,RTL8111C,RTL8111E\Windows\Win10\Install_
Win10_10003_08202015\setup.exe”,
Double click it.
3.Follow the on-screen instructions to complete the installation
Support:
If you have further questions, please contact our customer support and
you can find more information on our homepage: www.assmann.com
Declaration:
Hereby Assmann Electronic GmbH declares that the Declaration of
Conformity is part of the shipping content. If the Declaration of
Conformity is missing, you can request it by post under the below
mentioned manufacturer address.
www.assmann.com
Assmann Electronic GmbH
Auf dem Schüffel 3
58513 Lüdenscheid
Germany
Produktspezifikationen
| Marke: | Digitus |
| Kategorie: | Netzwerkkarte/Adapter |
| Modell: | DN-10134 |
| Mitgelieferte Kabel: | LAN (RJ-45) |
| Übertragungstechnik: | Kabelgebunden |
| Netzstandard: | IEEE 802.3, IEEE 802.3ab, IEEE 802.3u, IEEE 802.3x |
| Vollduplex: | Ja |
| Anzahl Ethernet-LAN-Anschlüsse (RJ-45): | 2 |
| Warentarifnummer (HS): | 85176990 |
| Ursprungsland: | China |
| Plug & Play: | Ja |
| Maximale Datenübertragungsrate: | 1000 Mbit/s |
| Ethernet LAN Datentransferraten: | 10,100,1000 Mbit/s |
| Eingebaut: | Ja |
| Unterstützt Windows-Betriebssysteme: | Ja |
| Unterstützt Mac-Betriebssysteme: | Ja |
| Schnittstelle: | Ethernet |
| Schnellinstallationsanleitung: | Ja |
| Komponente für: | PC |
| Ethernet Schnittstellen Typ: | Gigabit Ethernet |
| LAN-Controller: | Realtek RTL8111F |
| Unterstützte Linux-Betriebssysteme: | Ja |
| Montageblöcke enthalten: | Ja |
| Ressourcen-CD: | Ja |
| Hostschnittstelle: | Mini PCI Express |
| Wake-on-LAN bereit: | Ja |
| Ethernet/LAN: | Ja |
Brauchst du Hilfe?
Wenn Sie Hilfe mit Digitus DN-10134 benötigen, stellen Sie unten eine Frage und andere Benutzer werden Ihnen antworten
Bedienungsanleitung Netzwerkkarte/Adapter Digitus

19 September 2024
19 September 2024
5 September 2024
3 September 2024
28 August 2024
25 August 2024
21 August 2024
21 August 2024
21 August 2024
21 August 2024
Bedienungsanleitung Netzwerkkarte/Adapter
Neueste Bedienungsanleitung für -Kategorien-
16 Oktober 2024
16 Oktober 2024
9 Oktober 2024
5 Oktober 2024
4 Oktober 2024
4 Oktober 2024
3 Oktober 2024
3 Oktober 2024
3 Oktober 2024
2 Oktober 2024