Dormakaba 9100 Bedienungsanleitung
Lies die bedienungsanleitung für Dormakaba 9100 (23 Seiten) kostenlos online; sie gehört zur Kategorie Nicht kategorisiert. Dieses Handbuch wurde von 49 Personen als hilfreich bewertet und erhielt im Schnitt 4.6 Sterne aus 25 Bewertungen. Hast du eine Frage zu Dormakaba 9100 oder möchtest du andere Nutzer dieses Produkts befragen? Stelle eine Frage
Seite 1/23

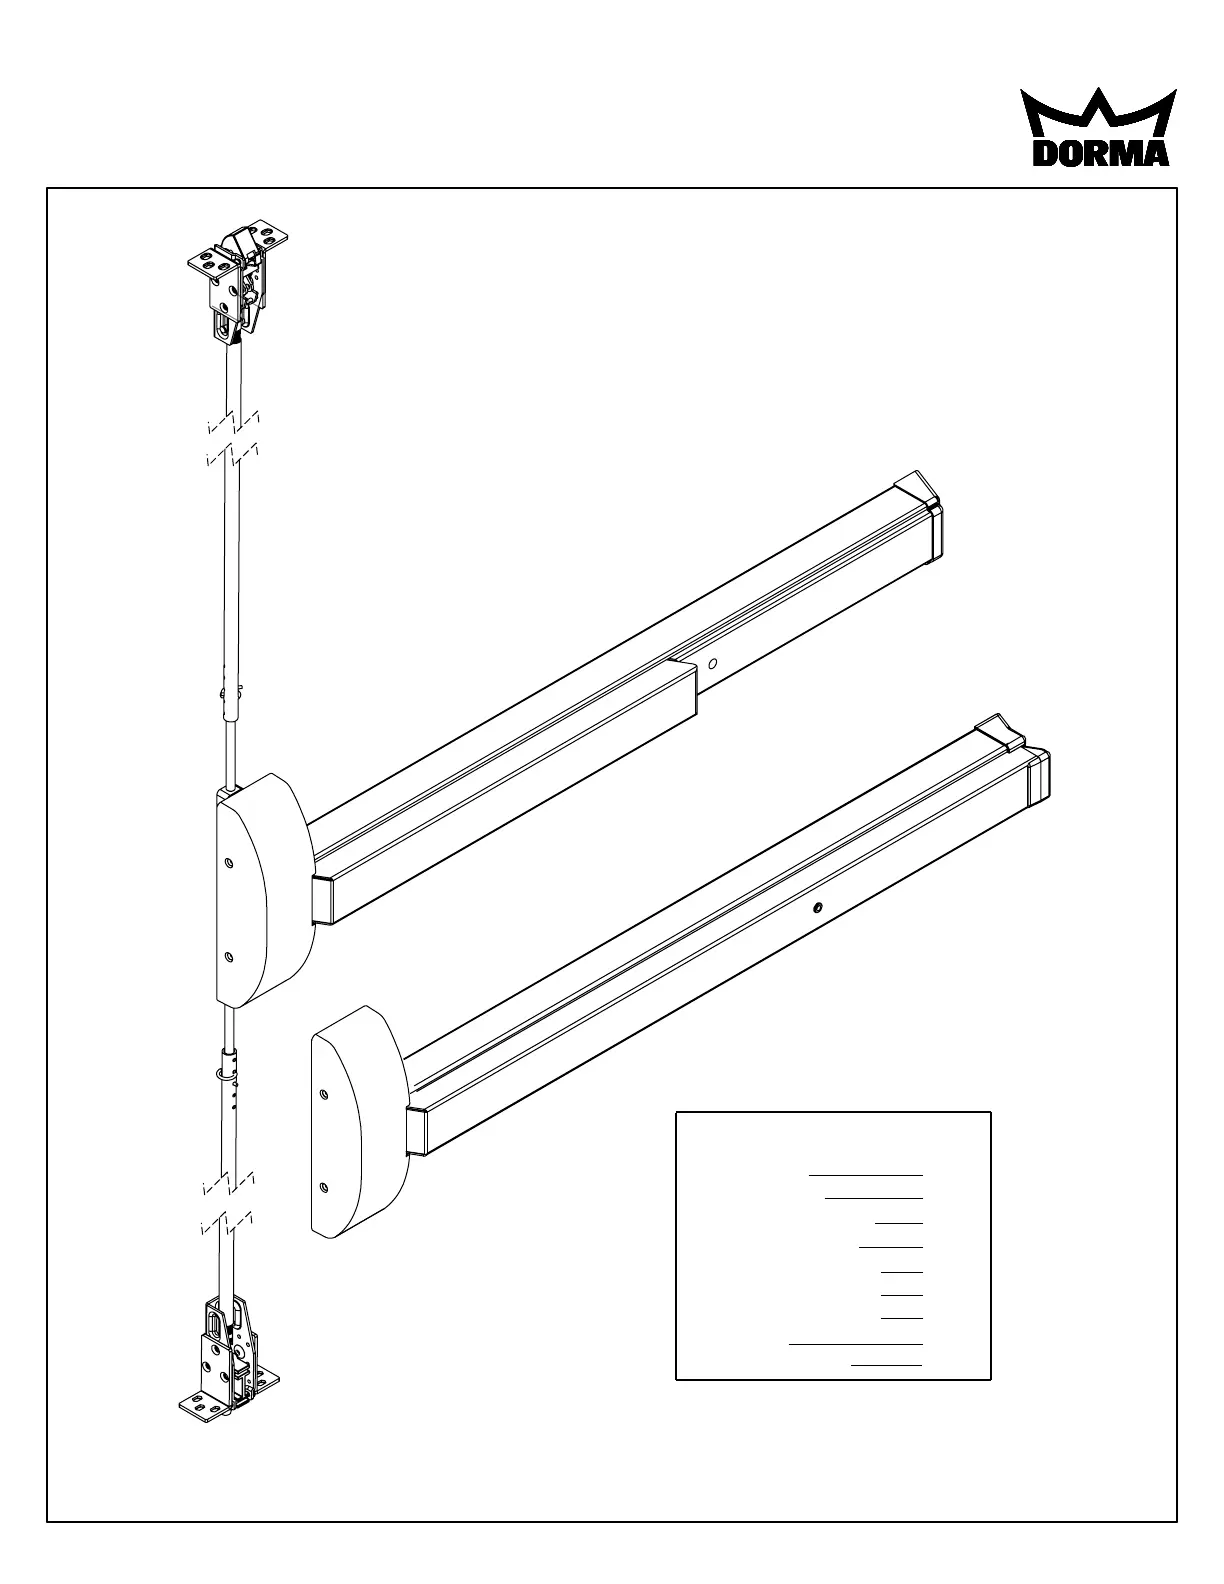
INSTALLATION INSTRUCTIONS
9100/F9100 & 9100FL/F9100FL SERIES
CONCEALED VERTICAL ROD EXIT DEVICE
Index:
Screw chart
Tools required
Outside trim options
Device installation
Frame & strike preps
Final rod adjustment
Options available
Rod Chart
Spotting template
1
2
4
5-15
13-14
15
16-19
20
21
I9100-11 1/2015
1135-26 95011755 www.dorma-usa.com 1-800-523-8483
Note: One set of instructions should be left
with building owner after device has been
installed.

1
SCREW CHART
(2) #12 x 1 1/4" R.H.P.T.S. (Wood Door)
(2) 12-24 x 1" R.H.P.M.S. (Metal or Thru Bolts)
(12) 8-32 x 1/4" F.H.P.M.S.
Mounting Bracket (2)
(Medium Stile Aluminum Doors)
Standard Mounting Brackets (4)
(Wood or Steel)
(4) 10-32 x 1/4" F.H.P.M.S. (Aluminum)
(12) #10 x 1" F.H.P.T.S. (Wood Door)
(12) 10-32 x 3/8" F.H.P.M.S. (Metal Door)
Locking Screw
(2) 10-32 x 3/8" F.H.P.M.S.
(6) 8-32 x 1/4" F.H.P.M.S.
Chassis Mounting
End Cap Bracket
Bracket To Latch
Bracket To Door
Connecting Link Screw
#418 Strike Pack
Chassis Cover
& End Cap
Chassis Mounting
End Cap Bracket
Bracket To Door
Bracket To Door
#439 Bottom Strike
(Cement or Grout
In Place)
(8) 8-32 x 1/4" F.H.P.M.S. Bracket To Latch
(4) #12 x 1 1/4" R.H.P.T.S. (Wood Door)
(4) 12-24 x 1" R.H.P.M.S. (Metal or Thru Bolts)
(2) 8-32 x 5/8" R.H.P.M.S.
(2) 8-32 x 1/4" P.H.P.M.S.
(2) #10 x 1" F.H.P.T.S. End Cover Mounting
"FL" Full length touch bar & rail series.
(2) 8-32 x 1/4" F.H.P.M.S. Chassis Cover
& End Cap

2
RHR LHR
HANDING OF DOOR
HANDING OF DOOR
HANDING OF DOOR
HANDING OF DOORHANDING OF DOOR
TYPICAL APPLICATIONS
TYPICAL APPLICATIONSTYPICAL APPLICATIONS
SPECIAL TOOLS FOR INSTALLATION
SPECIAL TOOLS FOR INSTALLATIONSPECIAL TOOLS FOR INSTALLATION
9100
Series
Device
9300
Series
Device
9100
Series
Device
9500
Series
Device
9100
Series
Device
9100
Series
Device
9100
Series
Device
Read the entire instruction sheet prior to installation.
Before installing hardware:
2. Device should be installed and preliminary adjustments made prior
to hanging door(s) in frame. (Door typically lying on saw horses at
this time).
1. Verify door width, handing and product with carton label for correct exit device and length.
3. For hand reversal of chassis assembly see Step 3.
4. For hand reversal of trim assembly see Step 4.
Note: If device is to be installed over glass lite panels, shim kit may be required, order DORMA No.
GK9000.
Note: Device shipped standard for 7' (2134 mm) high door opening. For doors up to but not over
10' (3048 mm) order "ETR" (Extended to rod) device.
12-24 Tap, 10-32 Tap
Drill bits: 1/8", #25, #16, #21 & 3/8"
Hole saws: 1", 1 1/4", & 2 1/8" diameter for trim (if required).
Jig saw or router may be required for thumbpiece trims.
Set of saw horses.
Produktspezifikationen
Marke: | Dormakaba |
Kategorie: | Nicht kategorisiert |
Modell: | 9100 |
Brauchst du Hilfe?
Wenn Sie Hilfe mit Dormakaba 9100 benötigen, stellen Sie unten eine Frage und andere Benutzer werden Ihnen antworten
Bedienungsanleitung Nicht kategorisiert Dormakaba
22 August 2024
22 August 2024
22 August 2024
21 August 2024
21 August 2024
21 August 2024
21 August 2024
21 August 2024
21 August 2024
21 August 2024
Bedienungsanleitung Nicht kategorisiert
- KKT Kolbe
- Buffalo
- ELAC
- Vaddio
- Crane Song
- MSW
- Easyrig
- EVE
- Pyle
- CRU
- Waldbeck
- Triumph Sports
- Royal Catering
- Eden
- Wiha
Neueste Bedienungsanleitung für -Kategorien-
17 Juni 2025
17 Juni 2025
17 Juni 2025
17 Juni 2025
17 Juni 2025
17 Juni 2025
17 Juni 2025
17 Juni 2025
17 Juni 2025
17 Juni 2025