Hikvision ISD-SC6040S-H4CVL Bedienungsanleitung
Hikvision
Nicht kategorisiert
ISD-SC6040S-H4CVL
Lies die bedienungsanleitung für Hikvision ISD-SC6040S-H4CVL (19 Seiten) kostenlos online; sie gehört zur Kategorie Nicht kategorisiert. Dieses Handbuch wurde von 2 Personen als hilfreich bewertet und erhielt im Schnitt 4.3 Sterne aus 1.5 Bewertungen. Hast du eine Frage zu Hikvision ISD-SC6040S-H4CVL oder möchtest du andere Nutzer dieses Produkts befragen? Stelle eine Frage
Seite 1/19

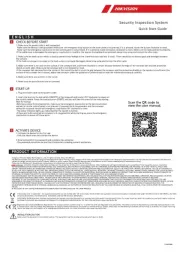
Security Inspection System
Quick Start Guide
E N G L I S H
PRODUCT INFORMATION
1
CHECK BEFORE START
START-UP
2
ACTIVATE DEVICE
3
Hangzhou Hikvision Digital Technology Co., Ltd. All rights reserved. About thisManual
The Manual includes instructions for using and managing the Product. Pictures, charts,images and all other information hereinafterare for description and explanation only.The information contained in the Manualis
subject to change, without notice, dueto firmware updates or other reasons.Please find the latest version ofthis Manual at the Hikvision website(https://www.hikvision.com/).
Please use this Manual with theguidance and assistance of professionals trainedin supporting the Product.
and other Hikvision's trademarks and logosare the properties of Hikvision invarious jurisdictions. Other trademarks and logosmentioned are the properties of theirrespective owners. Disclaimer
TO THE MAXIMUM EXTENT PERMITTED BYAPPLICABLE LAW, THIS MANUAL AND THEPRODUCT DESCRIBED, WITH ITS HARDWARE, SOFTWAREAND FIRMWARE, ARE PROVIDED “AS IS”AND “WITH ALL FAULTS AND
ERRORS”. HIKVISION MAKES NO WARRANTIES, EXPRESSOR IMPLIED, INCLUDING WITHOUT LIMITATION, MERCHANTABILITY,SATISFACTORY QUALITY, OR FITNESS FOR APARTICULAR PURPOSE. THE USE OF THEPRODUCT
BY YOU IS AT YOUR OWNRISK. IN NO EVENT WILL HIKVISIONBE LIABLE TO YOU FOR ANYSPECIAL, CONSEQUENTIAL, INCIDENTAL, OR INDIRECT DAMAGES,INCLUDING, AMONG OTHERS, DAMAGES FOR LOSSOF BUSINESS
PROFITS, BUSINESS INTERRUPTION, OR LOSS OFDATA, CORRUPTION OF SYSTEMS, OR LOSSOF DOCUMENTATION, WHETHER BASED ON BREACHOF CONTRACT, TORT (INCLUDING NEGLIGENCE), PRODUCTLIABILITY, OR
OTHERWISE, IN CONNECTION WITH THE USEOF THE PRODUCT, EVEN IF HIKVISIONHAS BEEN ADVISED OF THE POSSIBILITYOF SUCH DAMAGES OR LOSS.
YOU ACKNOWLEDGE THAT THE NATURE OFTHE INTERNET PROVIDES FOR INHERENT SECURITYRISKS, AND HIKVISION SHALL NOT TAKEANY RESPONSIBILITIES FOR ABNORMAL OPERATION, PRIVACYLEAKAGE OR OTHER
DAMAGES RESULTING FROM CYBER-ATTACK, HACKER ATTACK, VIRUS INFECTION, OR OTHER INTERNET SECURITYRISKS; HOWEVER, HIKVISION WILL PROVIDE TIMELYTECHNICAL SUPPORT IF REQUIRED.
YOU AGREE TO USE THIS PRODUCTIN COMPLIANCE WITH ALL APPLICABLE LAWS,AND YOU ARE SOLELY RESPONSIBLE FORENSURING THAT YOUR USE CONFORMS TOTHE APPLICABLE LAW. ESPECIALLY, YOU ARE
RESPONSIBLE, FOR USING THIS PRODUCT IN A MANNER THAT DOES NOT INFRINGE ON THE RIGHTS OF THIRD PARTIES,INCLUDING WITHOUT LIMITATION, RIGHTS OF PUBLICITY,INTELLECTUAL PROPERTY RIGHTS, OR DATA
PROTECTION AND OTHER PRIVACY RIGHTS. YOUSHALL NOT USE THIS PRODUCT FORANY PROHIBITED END-USES, INCLUDING THE DEVELOPMENTOR PRODUCTION OF WEAPONS OF MASSDESTRUCTION, THE
DEVELOPMENT OR PRODUCTION OF CHEMICAL OR BIOLOGICAL WEAPONS, ANY ACTIVITIES IN THECONTEXT RELATED TO ANY NUCLEAR EXPLOSIVEOR UNSAFE NUCLEAR FUEL-CYCLE, OR INSUPPORT OF HUMAN RIGHTS
ABUSES.
IN THE EVENT OF ANY CONFLICTSBETWEEN THIS MANUAL AND THE APPLICABLE LAW, THE LATER PREVAILS.
This product and - if applicable - the supplied accessories too are marked with "CE" and comply therefore with the applicable harmonized European standards listed under the EMC Directive 2014/30/EU, the RoHS
Directive 2011/65/EU, the LVD Directive 2014/35/EU and the MD Directive 2006/42/EC.
2012/19/EU (WEEE directive): Products marked with this symbol cannot be disposed of as unsortedmunicipal waste in the European Union. For proper recycling, return this product to yourlocal supplier upon the
purchase of equivalent new equipment, ordispose of it at designated collectionpoints. For more information see: www.recyclethis.info
Regulation (EU) 2023/1542(Battery Regulation): This product contains a battery and it is in conformity with the Regulation (EU) 2023/1542. The battery cannot be disposed of as unsorted municipal waste in the
European Union. See the product documentation for specific battery information. The battery is marked with this symbol, which may include lettering to indicate cadmium (Cd), or lead (Pb). For proper recycling,
return the battery to your supplier or to a designated collection point. For more information see: www.recyclethis.info.
INSTALLATION CAUTION
Never place the equipment in an unstable location. The equipment may fall,causing serious personal injury or death.
1. Plug the power cable to the power socket.
2. Insert the key into the key switch (ON/OFF) of the keyboard and rotate it 90° clockwise to power on
the control system. Press the startup button (START), and you will hear the sound of the relay closing.
Wait for startup.
-Before you press the startup button, make sure the emergency stop button at the device entrance
and exit or on the control panel is not pressed. If pressed, the X-ray generator and the conveyor
cannot be activated. Rotate the emergency stop button 30° clockwise to reset.
-The power indicator lights up, indicating that the system is started.
-If there are faults occurred on conveyor or X-ray generator while starting up, press the emergency
stop button to power off those parts.
1. Activate the device for the first use.
- Only the Admin user can activate the device.
2.Enter and confirm the password and complete the activation.
- The password should not be less than 8 characters including numeric and letters.
1. Make sure the power cable is well connected.
Make sure the device is well grounded. Make sure the emergency stop button on the cover plate is not pressed. If it is pressed, rotate the button clockwise to reset.
Make sure the emergency stop button on the control panel is not pressed. If it is pressed, rotate the button clockwise to reset. Make sure the keyboard works properly.
-If the cable cover is damaged, the emergency stop button is invalid or the keys on the keyboard are jammed, please stop using and contact the after-sales.
2. Make sure the lead curtain which is used to prevent X-ray leakage at the tunnel entrance and exit is intact: There should be no obvious gaps and damages between
the curtains.
-If the lead curtain gap is too large or the lead curtain is seriously damaged, please stop using and contact the after-sales.
3. Make sure there is no crack on the surface of the conveyor belt, and there should be a certain distance between the edge of the conveyor belt and the protective
shields on both sides. Make sure the conveyor belt is not deviated or stuck.
-If the conveyor belt deviates from the center of the tunnel (the belt is stuck the gap between the conveyor and the protective shields) or the tension is insufficient (the
surface of the conveyor belt is loose), adjust the conveyor under the guidance of professionals or read the maintenance manual carefully.
4. Make sure there are no items in the tunnel.
5. Make sure the panic buttons are not pressed.
UD40668B
Scan the QR code to
view the user manual.

F R A N Ç A I S
INFORMATIONS SUR LE PRODUIT
VÉRIFICATIONS AVANT LE DÉMARRAGE
1. Assurez-vous que le câble d’alimentation est correctement branché.
- Assurez-vous que l’appareil est correctement mis à la terre. Assurez-vous que le bouton d’arrêt d’urgence de la plaque de protection n’est pas enfoncé. S’il est enfoncé,
tournez-le dans le sens horaire pour réinitialiser.
- Assurez-vous que le bouton d’arrêt d’urgence du panneau de contrôle n’est pas enfoncé. S’il est enfoncé, tournez-le dans le sens horaire pour réinitialiser. Assurez-vous
que le clavier fonctionne correctement.
- Si la gaine du câble est endommagée, si le bouton d’arrêt d’urgence n’est pas valide ou si les touches du clavier sont bloquées, arrêtez d’utiliser l’appareil et contactez le
service après-vente.
2. Assurez-vous que le rideau de plomb utilisé pour empêcher les fuites de rayons X à l’entrée et à la sortie du tunnel est intact : Les rideaux ne doivent pas présenter
d’espaces ou de dommages évidents.
- Si l’espace entre les rideaux de plomb est trop grand ou si les rideaux de plomb sont gravement endommagés, arrêtez d’utiliser l’appareil et contactez le service
après-vente.
3. Assurez-vous que la surface de la bande transporteuse ne présente aucune fissure et qu’il existe une certaine distance entre les bords de la bande transporteuse et les
plaques de protection des deux côtés. Assurez-vous que la bande transporteuse n’est pas déviée ou coincée.
- Si la bande transporteuse dévie du centre du tunnel (la bande est coincée dans l’espace entre la bande transporteuse et les plaques de protection) ou si la tension est
insuffisante (la surface de la bande transporteuse est lâche), réglez la bande transporteuse sous la direction de professionnels ou lisez attentivement le manuel d’entretien.
4. Assurez-vous qu’aucun objet n’est présent dans le tunnel.
5. Assurez-vous que les boutons de panique ne sont pas enfoncés.
DÉMARRAGE
1. Branchez le câble d’alimentation à la prise de courant.
2. Insérez la clé dans l’interrupteur à clé (ON/OFF) du clavier et tournez-la de 90° dans le sens horaire pour mettre en marche le système de contrôle. Appuyez sur le
bouton de démarrage (START), et vous entendrez le son de fermeture du relais. Attendez la fin du démarrage.
- Avant d’appuyer sur le bouton de démarrage, assurez-vous que le bouton d’arrêt d’urgence à l’entrée et à la sortie de l’appareil ou sur le panneau de contrôle n’est pas
enfoncé. S’il est enfoncé, le générateur de rayons X et la bande transporteuse ne peuvent pas être activés. Tournez le bouton d’arrêt d’urgence de 30° dans le sens horaire
pour réinitialiser.
- Le voyant d’alimentation s’allume, indiquant que le système est démarré.
- Si des défauts apparaissent sur la bande transporteuse ou le générateur de rayons X lors du démarrage, appuyez sur le bouton d’arrêt d’urgence pour mettre ces pièces
hors tension.
3. Accédez à la page « Clean Tunnel » dans le système logiciel et sélectionnez le mode de nettoyage de tunnel.
- Si des objets se trouvent dans le tunnel, cliquez sur « Back » ou « Forward » sur la page « Clean Tunnel » pour les retirer. Cliquez sur « Stop » pour arrêter le
fonctionnement de la bande transporteuse.
ACTIVATION DE L’APPAREIL
1. Activez l’appareil pour la première utilisation.
- Seul l’utilisateur administrateur peut activer l’appareil.
2.Saisissez et confirmez le mot de passe, puis terminez l’activation.
- Le mot de passe ne doit pas comporter moins de 8 caractères, y compris les chiffres et les lettres.
Hangzhou Hikvision Digital Technology Co., Ltd. Tous droits réservés. À propos de ce manuel
Ce manuel fournitdes instructions d’utilisationet de gestiondu produit. Lesimages, les tableaux,les figures ettoutes les autresinformations ci-après nesont donnés qu’àtitre de descriptionet d’explication. Les informations
contenues dans ce manuel sont modifiables sans préavis, en raison d’une miseà jour d’un micrologiciel ou pour d’autres raisons. Veuillez trouver la dernière version de ce manuel sur le site Internet de Hikvision (https://
www.hikvision.com/).
Veuillez utiliser ce mode d’emploi avecles conseils et l’assistance de professionnelsspécialement formés dans la prise en charge de ce produit.
et les autres marques et logos de Hikvision sont la propriété de Hikvision dans diverses juridictions. Toutes lesautres marques et tous les logos mentionnés appartiennent à leurs propriétaires respectifs.
Clause d’exclusion de responsabilité
DANS LES LIMITES AUTORISÉES PAR LALOI EN VIGUEUR, LE PRÉSENT MANUELET LE PRODUIT DÉCRIT, AINSI QUESON MATÉRIEL, SES LOGICIELS ET SES MICROLOGICIELS, SONT FOURNIS « EN L’ÉTAT» ET « AVEC TOUS LES
DÉFAUTS ET ERREURS ». HIKVISION NEFAIT AUCUNE GARANTIE, EXPLICITE OU IMPLICITE, Y COMPRIS, MAIS SANS S’Y LIMITER,DE QUALITÉ MARCHANDE, DE QUALITÉ SATISFAISANTE,OU D’ADÉQUATION À UN USAGE
PARTICULIER. VOUS UTILISEZ LE PRODUITÀ VOS PROPRES RISQUES. EN AUCUN CAS HIKVISION NE SERA TENU RESPONSABLE POUR TOUTDOMMAGE SPÉCIAL, CONSÉCUTIF, ACCESSOIRE OU INDIRECT, Y COMPRIS, ENTRE
AUTRES, LES DOMMAGES RELATIFSÀ LAPERTE DE PROFITS D’ENTREPRISE, À L’INTERRUPTION D’ACTIVITÉS COMMERCIALES, OU LA PERTEDES DONNÉES, LA CORRUPTION DES SYSTÈMES,OU LA PERTE DES DOCUMENTS,
S’ILS SONT BASÉS SUR UNE VIOLATIONDE CONTRAT, UNE FAUTE (Y COMPRISLA NÉGLIGENCE), LA RESPONSABILITÉ EN MATIÈREDE PRODUITS, OU AUTRE, EN RAPPORT AVEC L’UTILISATION DU PRODUIT, MÊME SI
HIKVISION A ÉTÉ INFORMÉ DE LAPOSSIBILITÉ D’UN TEL DOMMAGE OU D’UNETELLE PERTE.
VOUS RECONNAISSEZ QUE LA NATURE D’INTERNET EST SOURCE DE RISQUES DE SÉCURITÉ INHÉRENTS, ET HIKVISION SE DÉGAGE DETOUTE RESPONSABILITÉ EN CAS DE FONCTIONNEMENTANORMAL, DIVULGATION
D’INFORMATIONS CONFIDENTIELLES OU AUTRES DOMMAGES DÉCOULANTD’UNE CYBERATTAQUE, D’UN PIRATAGE INFORMATIQUE,D’UNE INFECTION PAR DES VIRUS, OU AUTRESRISQUES DE SÉCURITÉ LIÉS À INTERNET ;
TOUTEFOIS, HIKVISION FOURNIRA UNE ASSISTANCE TECHNIQUEDANS LES DÉLAIS, LE CAS ÉCHÉANT.
VOUS ACCEPTEZ D’UTILISER CE PRODUIT CONFORMÉMENT À L’ENSEMBLEDES LOIS EN VIGUEUR. IL EST DE VOTRE RESPONSABILITÉ EXCLUSIVEDE VEILLER À CE QUE VOTREUTILISATION SOIT CONFORME À LA LOI
APPLICABLE. IL VOUS APPARTIENT SURTOUT D’UTILISER CE PRODUIT D’UNE MANIÈRE QUI NE PORTE PAS ATTEINTE AUX DROITS DETIERS, Y COMPRIS, MAIS SANS S’Y LIMITER, LES DROITS DE PUBLICITÉ, LESDROITS DE
PROPRIÉTÉ INTELLECTUELLE, OU LA PROTECTION DES DONNÉES ET D’AUTRES DROITS À LA VIE PRIVÉE. VOUS NE DEVEZ PASUTILISER CE PRODUIT POUR TOUTE UTILISATIONFINALE INTERDITE, NOTAMMENT LA MISE AU
POINT OU LA PRODUCTION D’ARMES DEDESTRUCTION MASSIVE, LA MISE AU POINT OU LA FABRICATION D’ARMES CHIMIQUES OU BIOLOGIQUES, LES ACTIVITÉS DANS LE CONTEXTELIÉ AUX EXPLOSIFS NUCLÉAIRES OU AU
CYCLE DU COMBUSTIBLE NUCLÉAIRE DANGEREUX, OUSOUTENANT LES VIOLATIONS DES DROITS DE L’HOMME.
EN CAS DE CONFLIT ENTRE CEMANUEL ET LES LOIS EN VIGUEUR, CES DERNIÈRES PRÉVALENT.
Ce produit et, le cas échéant, les accessoires fournis sont également marqués « CE » et sont donc conformes aux normes européennes harmonisées applicables énumérées dans la directive EMC 2014/30/UE, la
directive RoHS 2011/65/UE, la directive LVD 2014/35/UE et la directive MD 2006/42/CE.
2012/19/UE (directive DEEE) : Dans l’Unioneuropéenne, les produits portant ce pictogrammene doivent pas être déposés dansune décharge municipale où le trides déchets n’est pas pratiqué. Pourun recyclage
adéquat, remettez ce produit à votre revendeurlors de l’achat d’un nouvel équipementéquivalent, ou déposez-le dans un lieu de collecte prévu à cet effet.Pour de plus amples informations, consultez:
www.recyclethis.info.
Règlement (UE) 2023/1542 (Règlement sur les piles/batteries) : Ce produit contient une batterie et est conforme au règlement (UE) 2023/1542. La batterie ne peut pas être déposée dans une décharge municipale
où le tri des déchets n'est pas pratiqué, dans l'Union européenne. Pour plus de précisions sur la pile, reportez-vous à sa documentation. La batterie porte ce symbole qui peut inclure la mention cadmium (Cd) ou
plomb (Pb). Pour la recycler correctement, renvoyez-la à votre revendeur ou déposez-la dans un point de collecte prévu à cet effet. Pour plus de précisions, rendez-vous sur: www.recyclethis.info.
PRÉCAUTION D’INSTALLATION
N’installez jamais l’équipement sur un support instable. L’équipement pourrait tomber, entraînant desblessures graves voire la mort.

D E U T S C H
PRODUKTINFORMATIONEN
VOR DEM BEGINN PRÜFEN
1. Stellen Sie sicher, dass das Stromkabel korrekt angeschlossen ist.
- Stellen Sie sicher, dass das Gerät ordnungsgemäß geerdet ist. Stellen Sie sicher, dass der Not-Aus-Knopf auf der Abdeckplatte nicht gedrückt ist. Wenn er gedrückt ist,
drehen Sie den Knopf im Uhrzeigersinn, um ihn zurückzusetzen.
- Stellen Sie sicher, dass der Not-Aus-Knopf auf dem Bedienfeld nicht gedrückt ist. Wenn er gedrückt ist, drehen Sie den Knopf im Uhrzeigersinn, um ihn zurückzusetzen.
Stellen Sie sicher, dass die Tastatur ordnungsgemäß funktioniert.
- Wenn die Kabelummantelung beschädigt ist, der Not-Aus-Knopf nicht funktioniert oder die Tasten auf der Tastatur verklemmt sind, verwenden Sie die Anlage nicht
mehr und wenden Sie sich an den Kundendienst.
2. Stellen Sie sicher, dass der Bleivorhang am Tunneleingang und -ausgang zur Verhinderung des Austritts von Röntgenstrahlung intakt ist. Es dürfen keine offensichtlichen
Lücken und Beschädigungen zwischen den Vorhangelementen vorhanden sein.
- Wenn der Spalt zwischen den Elementen des Bleivorhangs zu groß ist oder der Bleivorhang stark beschädigt ist, verwenden Sie die Anlage nicht mehr und wenden Sie
sich an den Kundendienst.
3. Stellen Sie sicher, dass die Oberfläche des Förderbands keinen Riss aufweist und dass ein gewisser Abstand zwischen den Rändern des Förderbands und den
Schutzwänden auf beiden Seiten besteht. Stellen Sie sicher, dass das Förderband nicht schief läuft oder festsitzt.
- Wenn das Förderband nicht in der Mitte des Tunnels läuft (das Förderband klemmt im Spalt zwischen dem Förderer und den Schutzwänden) oder die Spannung
unzureichend ist (die Oberfläche des Förderbandes ist locker), stellen Sie den Förderer unter Anleitung von Fachleuten ein oder schlagen Sie im Wartungshandbuch nach.
4. Stellen Sie sicher, dass sich keine Gegenstände im Tunnel befinden.
5. Stellen Sie sicher, dass die Not-Aus-Knöpfe nicht gedrückt sind.
EINSCHALTEN
1. Schließen Sie das Netzkabel an die Steckdose an.
2. Stecken Sie den Schlüssel in den Schlüsselschalter (ON/OFF) der Tastatur und drehen Sie ihn im Uhrzeigersinn um 90°, um die Steuerung einzuschalten. Drücken Sie die
Starttaste (START). Darauf können Sie hören, wie sich das Relais schließt. Warten Sie, bis der Startvorgang abgeschlossen ist.
- Stellen Sie sicher, dass die Not-Aus-Knöpfe am Eingang und Ausgang der Anlage sowie aufdem Bedienfeld nicht gedrückt sind, bevor Sie die Starttaste drücken. Wenn einer
dieser Knöpfe gedrückt ist, können der Röntgengenerator und das Förderband nicht aktiviert werden. Drehen Sie den Not-Aus-Knopf um 30° im Uhrzeigersinn, um ihn
zurückzusetzen.
- Die Betriebsanzeige leuchtet auf und zeigt damit an, dass das System gestartet wird.
- Wenn während des Startvorgangs Störungen am Förderband oder Röntgengenerator auftreten, drücken Sie den Not-Aus-Knopf, um diese Komponenten auszuschalten.
3. Rufen Sie die Seite „Clean Tunnel“ in der Software auf und wählen Sie den „Tunnel leeren“-Modus.
- Wenn sich Gegenstände im Tunnel befinden, klicken Sie auf der Seite „Clean Tunnel“ auf „Back“ oder „Forward“, um die Gegenstände aus dem Tunnel zu entfernen.
Klicken Sie auf „Stop“, um das Förderband anzuhalten.
GERÄT AKTIVIEREN
1. Aktivieren Sie das Gerät für die erstmalige Verwendung. - Nur der Administrator-Benutzer kann das Gerät aktivieren.
2. Geben Sie das Passwort ein, bestätigen Sie es und schließen Sie die Aktivierung ab. - Das Passwort muss aus mindestens 8 Zeichen (Ziffern und Buchstaben) bestehen.
Hangzhou Hikvision Digital Technology Co., Ltd. Alle Rechte vorbehalten. Hinweise zu dieser Bedienungsanleitung
Die Bedienungsanleitung beinhaltet Anleitungen zur Verwendungund Verwaltung des Produkts. Bilder, Diagramme,Abbildungen und alle sonstigen Informationen dienennur der Beschreibung und Erklärung. Die
Änderung der in der Bedienungsanleitung enthaltenenInformationen ist aufgrund von Firmware-Aktualisierungen oder aus anderen Gründen vorbehalten. Die neuesteVersion dieser Bedienungsanleitung finden Sie auf
der Hikvision-Website (https://www.hikvision.com/).
Bitte verwenden Sie diese Bedienungsanleitung unterAnleitung und Unterstützung von Fachleuten, die für den Support des Produkts geschultsind.
und andere Marken und Logos vonHikvision sind das Eigentum von Hikvisionin verschiedenen Ländern. Andere hier erwähnteMarken und Logos sind Eigentum ihrerjeweiligen Inhaber.
Haftungsausschluss
DIESE BEDIENUNGSANLEITUNG UNDDAS BESCHRIEBENE PRODUKTMIT SEINER HARDWARE,SOFTWARE UND FIRMWARE WERDEN, SOWEIT GESETZLICH ZULÄSSIG, IN DER „VORLIEGENDEN FORM“ UND MIT „ALLEN FEHLERN
UND IRRTÜMERN“ BEREITGESTELLT. HIKVISION ÜBERNIMMT KEINE AUSDRÜCKLICHEN ODER STILLSCHWEIGENDEN GARANTIEN, EINSCHLIEßLICH, ABERNICHT BESCHRÄNKT AUF DIE MARKTGÄNGIGKEIT,
ZUFRIEDENSTELLENDE QUALITÄT ODER EIGNUNG FÜR EINENBESTIMMTEN ZWECK. DIE NUTZUNG DES PRODUKTSDURCH SIE ERFOLGT AUF IHRE EIGENEGEFAHR. IN KEINEM FALL IST HIKVISIONIHNEN GEGENÜBER
HAFTBAR FÜR BESONDERE, ZUFÄLLIGE, DIREKTE ODERINDIREKTE SCHÄDEN, EINSCHLIEßLICH, JEDOCH NICHT DARAUFBESCHRÄNKT, VERLUST VON GESCHÄFTSGEWINNEN, GESCHÄFTSUNTERBRECHUNG, DATENVERLUST,
SYSTEMBESCHÄDIGUNG, VERLUST VON DOKUMENTATIONEN, SEI ESAUFGRUND VON VERTRAGSBRUCH, UNERLAUBTER HANDLUNG (EINSCHLIEßLICHFAHRLÄSSIGKEIT), PRODUKTHAFTUNG ODER ANDERWEITIG, IN
VERBINDUNG MIT DER VERWENDUNG DIESES PRODUKTS,SELBST WENN HIKVISION ÜBER DIE MÖGLICHKEIT DERARTIGER SCHÄDEN ODER VERLUSTE INFORMIERT WAR.
SIE ERKENNEN AN, DASS DIE NATURDES INTERNETS DAMIT VERBUNDENE SICHERHEITSRISIKEN BEINHALTET.HIKVISION ÜBERNIMMT KEINE VERANTWORTUNG FÜR ANORMALEN BETRIEB, DATENVERLUST ODER ANDERE
SCHÄDEN, DIE SICH AUS CYBERANGRIFFEN, HACKERANGRIFFEN, VIRUSINFEKTION ODER ANDEREN SICHERHEITSRISIKEN IM INTERNETERGEBEN. HIKVISION WIRDJEDOCH BEI BEDARFZEITNAH TECHNISCHEN SUPPORTLEISTEN.
SIE STIMMEN ZU, DIESES PRODUKT INÜBEREINSTIMMUNG MIT ALLEN GELTENDEN GESETZEN ZUVERWENDEN, UND SIE SIND ALLEIN DAFÜRVERANTWORTLICH, DASS IHRE VERWENDUNG GEGEN KEINEGELTENDEN
GESETZE VERSTÖßT. INSBESONDERE SIND SIE DAFÜRVERANTWORTLICH, DIESES PRODUKT SO ZU VERWENDEN,DASS DIE RECHTE DRITTER NICHT VERLETZT WERDEN, EINSCHLIEßLICH, ABER NICHT BESCHRÄNKT AUF
VERÖFFENTLICHUNGSRECHTE, DIE RECHTE AN GEISTIGEM EIGENTUMODER DEN DATENSCHUTZ UND ANDERE PERSÖNLICHKEITSRECHTE.SIE DÜRFEN DIESES PRODUKT NICHT FÜRVERBOTENE ENDANWENDUNGEN
VERWENDEN, EINSCHLIESSLICH DER ENTWICKLUNG ODER HERSTELLUNGVON MASSENVERNICHTUNGSWAFFEN, DER ENTWICKLUNG ODER HERSTELLUNGCHEMISCHER ODER BIOLOGISCHER WAFFEN, JEGLICHER
AKTIVITÄTEN IM ZUSAMMENHANG MIT EINEM NUKLEARENSPRENGKÖRPER ODER UNSICHEREN NUKLEAREN BRENNSTOFFKREISLAUF BZW. ZUR UNTERSTÜTZUNG VON MENSCHENRECHTSVERLETZUNGEN.
IM FALL VON WIDERSPRÜCHEN ZWISCHEN DIESERBEDIENUNGSANLEITUNG UND GELTENDEM RECHT IST LETZTERESMAßGEBLICH.
Dieses Produkt und - falls zutreffend - auch das mitgelieferte Zubehör sind mit dem Kennzeichen „CE“ versehen und entsprechen somit den geltenden harmonisierten europäischen Normen, die unter der EMC-
Richtlinie 2014/30/EU, der RoHS-Richtlinie 2011/65/EU, der LVD-Richtlinie 2014/35/EU und der MD-Richtlinie 2006/42/EG aufgeführt sind.
2012/19/EU (Elektroaltgeräte-Richtlinie): Produkte, die mit diesem Symbol gekennzeichnet sind, dürfen innerhalb derEuropäischen Union nicht mit dem Hausmüll entsorgt werden. Für korrektes Recycling geben
Sie dieses Produkt an Ihren örtlichenFachhändler zurück oder entsorgen Sie esan einer der Sammelstellen. Weitere Informationenfinden Sie unter: www.recyclethis.info
Verordnung (EU) 2023/1542 (Batterieverordnung): Dieses Produkt enthält eine Batterie und ist konform mit der Verordnung (EU) 2023/1542. Die Batterie darf in der Europäischen Union nicht als unsortierter
kommunaler Abfall entsorgt werden. Siehe Produktdokumentation für spezifische Hinweise zu Batterie. Die Batterie ist mit diesem Symbol gekennzeichnet, das zusätzlich die Buchstaben Cd für Cadmium oder Pb
für Blei enthalten kann. Für korrektes Recycling geben Sie die Batterie an Ihren örtlichen Fachhändler zurück oder entsorgen Sie sie an einer der Sammelstellen. Weitere Informationen finden Sie unter:
www.recyclethis.info.
SICHERHEITSHINWEISE ZUR INSTALLATION
Stellen Sie das Gerät niemals aneinem instabilen Ort auf. Es könnte umfallen und schwere oder sogar tödlicheVerletzungen verursachen.
Produktspezifikationen
| Marke: | Hikvision |
| Kategorie: | Nicht kategorisiert |
| Modell: | ISD-SC6040S-H4CVL |
Brauchst du Hilfe?
Wenn Sie Hilfe mit Hikvision ISD-SC6040S-H4CVL benötigen, stellen Sie unten eine Frage und andere Benutzer werden Ihnen antworten
Bedienungsanleitung Nicht kategorisiert Hikvision
22 Juni 2025
22 Juni 2025
22 Juni 2025
22 Juni 2025
14 Juni 2025

30 September 2024

29 September 2024

23 September 2024

22 September 2024

19 September 2024
Bedienungsanleitung Nicht kategorisiert
- Astropet
- Sagitter
- Volcano
- Prism Sound
- Phil And Teds
- Maretron
- SmartAVI
- Rovo Kids
- FeiyuTech
- TSC
- Clage
- IPEGA
- Edwards
- Sortimo
- Tonar
Neueste Bedienungsanleitung für -Kategorien-

22 Juni 2025
22 Juni 2025

22 Juni 2025
22 Juni 2025
22 Juni 2025
22 Juni 2025
22 Juni 2025
22 Juni 2025
22 Juni 2025
