Hotpoint H8F HP51BS UK Bedienungsanleitung
Hotpoint Spülmaschine H8F HP51BS UK
Lies die bedienungsanleitung für Hotpoint H8F HP51BS UK (8 Seiten) kostenlos online; sie gehört zur Kategorie Spülmaschine. Dieses Handbuch wurde von 24 Personen als hilfreich bewertet und erhielt im Schnitt 4.8 Sterne aus 8 Bewertungen. Hast du eine Frage zu Hotpoint H8F HP51BS UK oder möchtest du andere Nutzer dieses Produkts befragen? Stelle eine Frage
Seite 1/8
EN
Daily Reference Guide
1
THANK YOU FOR BUYING AHOTPOINT PRODUCT.
In order to receive amore complete assistance, please
register your appliance on:www.hotpoint.eu/register
PLEASE SCAN THE
QR CODE ON YOUR
APPLIANCE IN
ORDER TO HAVE
MORE DETAILED
INFORMATION
Before using the appliance carefully read Safety and Installation Instructions.
After installation, please remember to remove all transport protection parts from
the dishwasher.
APPLIANCE
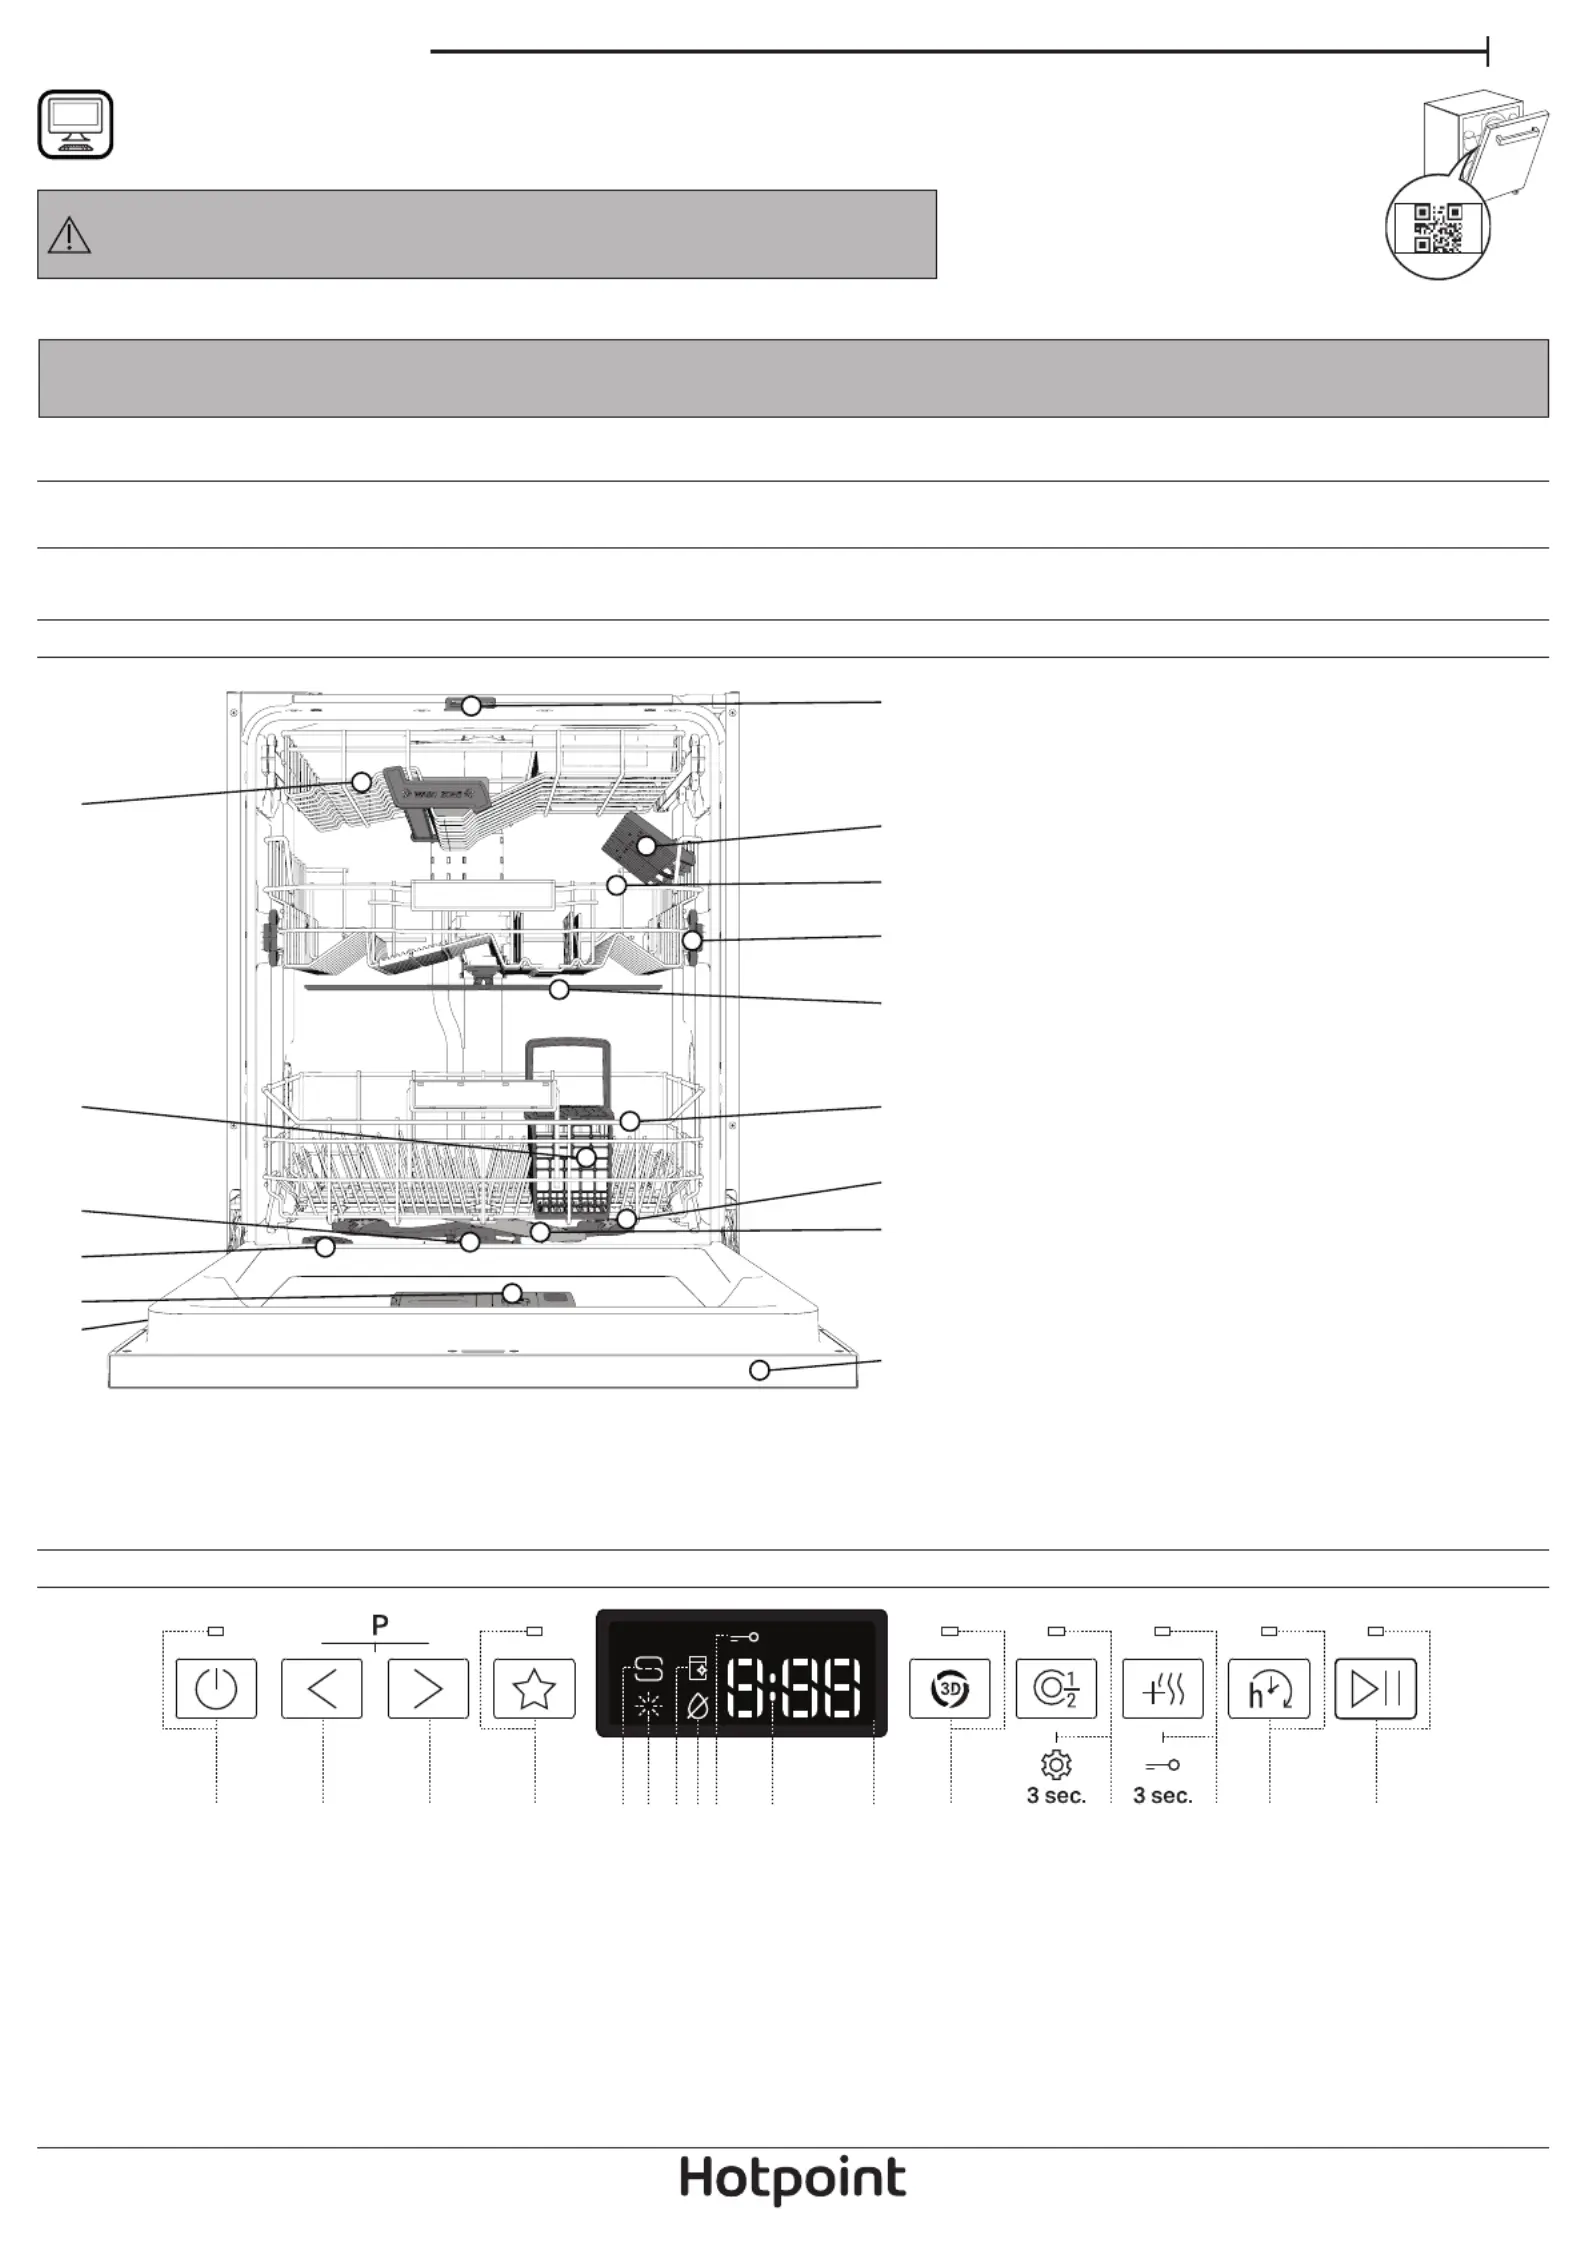
PRODUCT DESCRIPTION
CONTROL PANEL
1. ON-OFF/Reset button
with indicator light
2. PREVIOUS program button
3. NEXT program button
4. FAVOURITE program button with indicator light
5. Salt reservoir empty indicator light
6. Rinse Aid reservoir empty indicator light
7. DESCALE indicator light
8. ClosedWater Tap indicator light
9. Key lock indicator light
10. Program numberremaining time and indicator
11. Display
12. 3D Zone Wash option button with indicator light
13. Half Load optionSettings button with indicator light/ - 3 sec. press
14. Extra Dry Option buttonwith indicator light- 3 sec. press/ Keylock
15. Delay option button with indicator light
16. START/Pause button with indicator light
The control panel of this dishwasher activates pushing by ON/OFF button.
For energy saving the control panel deactivates automatically after 10 minutes if no cycle has started.
1234
1213
14
15
16
11
5678910
1. ActiveDry
2. Top rack
3. Foldable aps
4. Upper rack
5. Upper rack height adjuster
6. Upper sprayer arm
7. Lower rack
8. Cutlery basket
9. 3D Zone Wash
10. Lower sprayer arm
11. Filter Assembly
12. Salt reservoir
13. Detergent and Rinse Aid dispensers
14. Rating plate
15. Control panel
1
2
3
4
5
6
7
8
9
10
11
12
13
1414
15
Produktspezifikationen
| Marke: | Hotpoint |
| Kategorie: | Spülmaschine |
| Modell: | H8F HP51BS UK |
Brauchst du Hilfe?
Wenn Sie Hilfe mit Hotpoint H8F HP51BS UK benötigen, stellen Sie unten eine Frage und andere Benutzer werden Ihnen antworten
Bedienungsanleitung Spülmaschine Hotpoint

17 Dezember 2025
29 November 2025
7 Oktober 2025
7 Oktober 2025
23 September 2025
18 September 2025
30 August 2025
30 August 2025
30 August 2025
1 August 2025
Bedienungsanleitung Spülmaschine
Neueste Bedienungsanleitung für -Kategorien-
3 April 2026
2 April 2026
2 April 2026
1 April 2026
1 April 2026
1 April 2026
31 März 2026
31 März 2026
31 März 2026
31 März 2026