Moultrie Game Spy I40XT Bedienungsanleitung
Lies die bedienungsanleitung für Moultrie Game Spy I40XT (6 Seiten) kostenlos online; sie gehört zur Kategorie Kamera. Dieses Handbuch wurde von 43 Personen als hilfreich bewertet und erhielt im Schnitt 5.0 Sterne aus 2 Bewertungen. Hast du eine Frage zu Moultrie Game Spy I40XT oder möchtest du andere Nutzer dieses Produkts befragen? Stelle eine Frage
Seite 1/6
THANK YOU for your purchase of the Model I40XT GameSpy Digital Camera.
Please read this booklet before using the unit. If you should have any questions
about this product or any other Moultrie product, please contact us using the
information on the back of this sheet. Please register your camera at
www.moultriefeeders.com to activate your warranty.
Instructions for I40XT
GameSpy Digital Camera
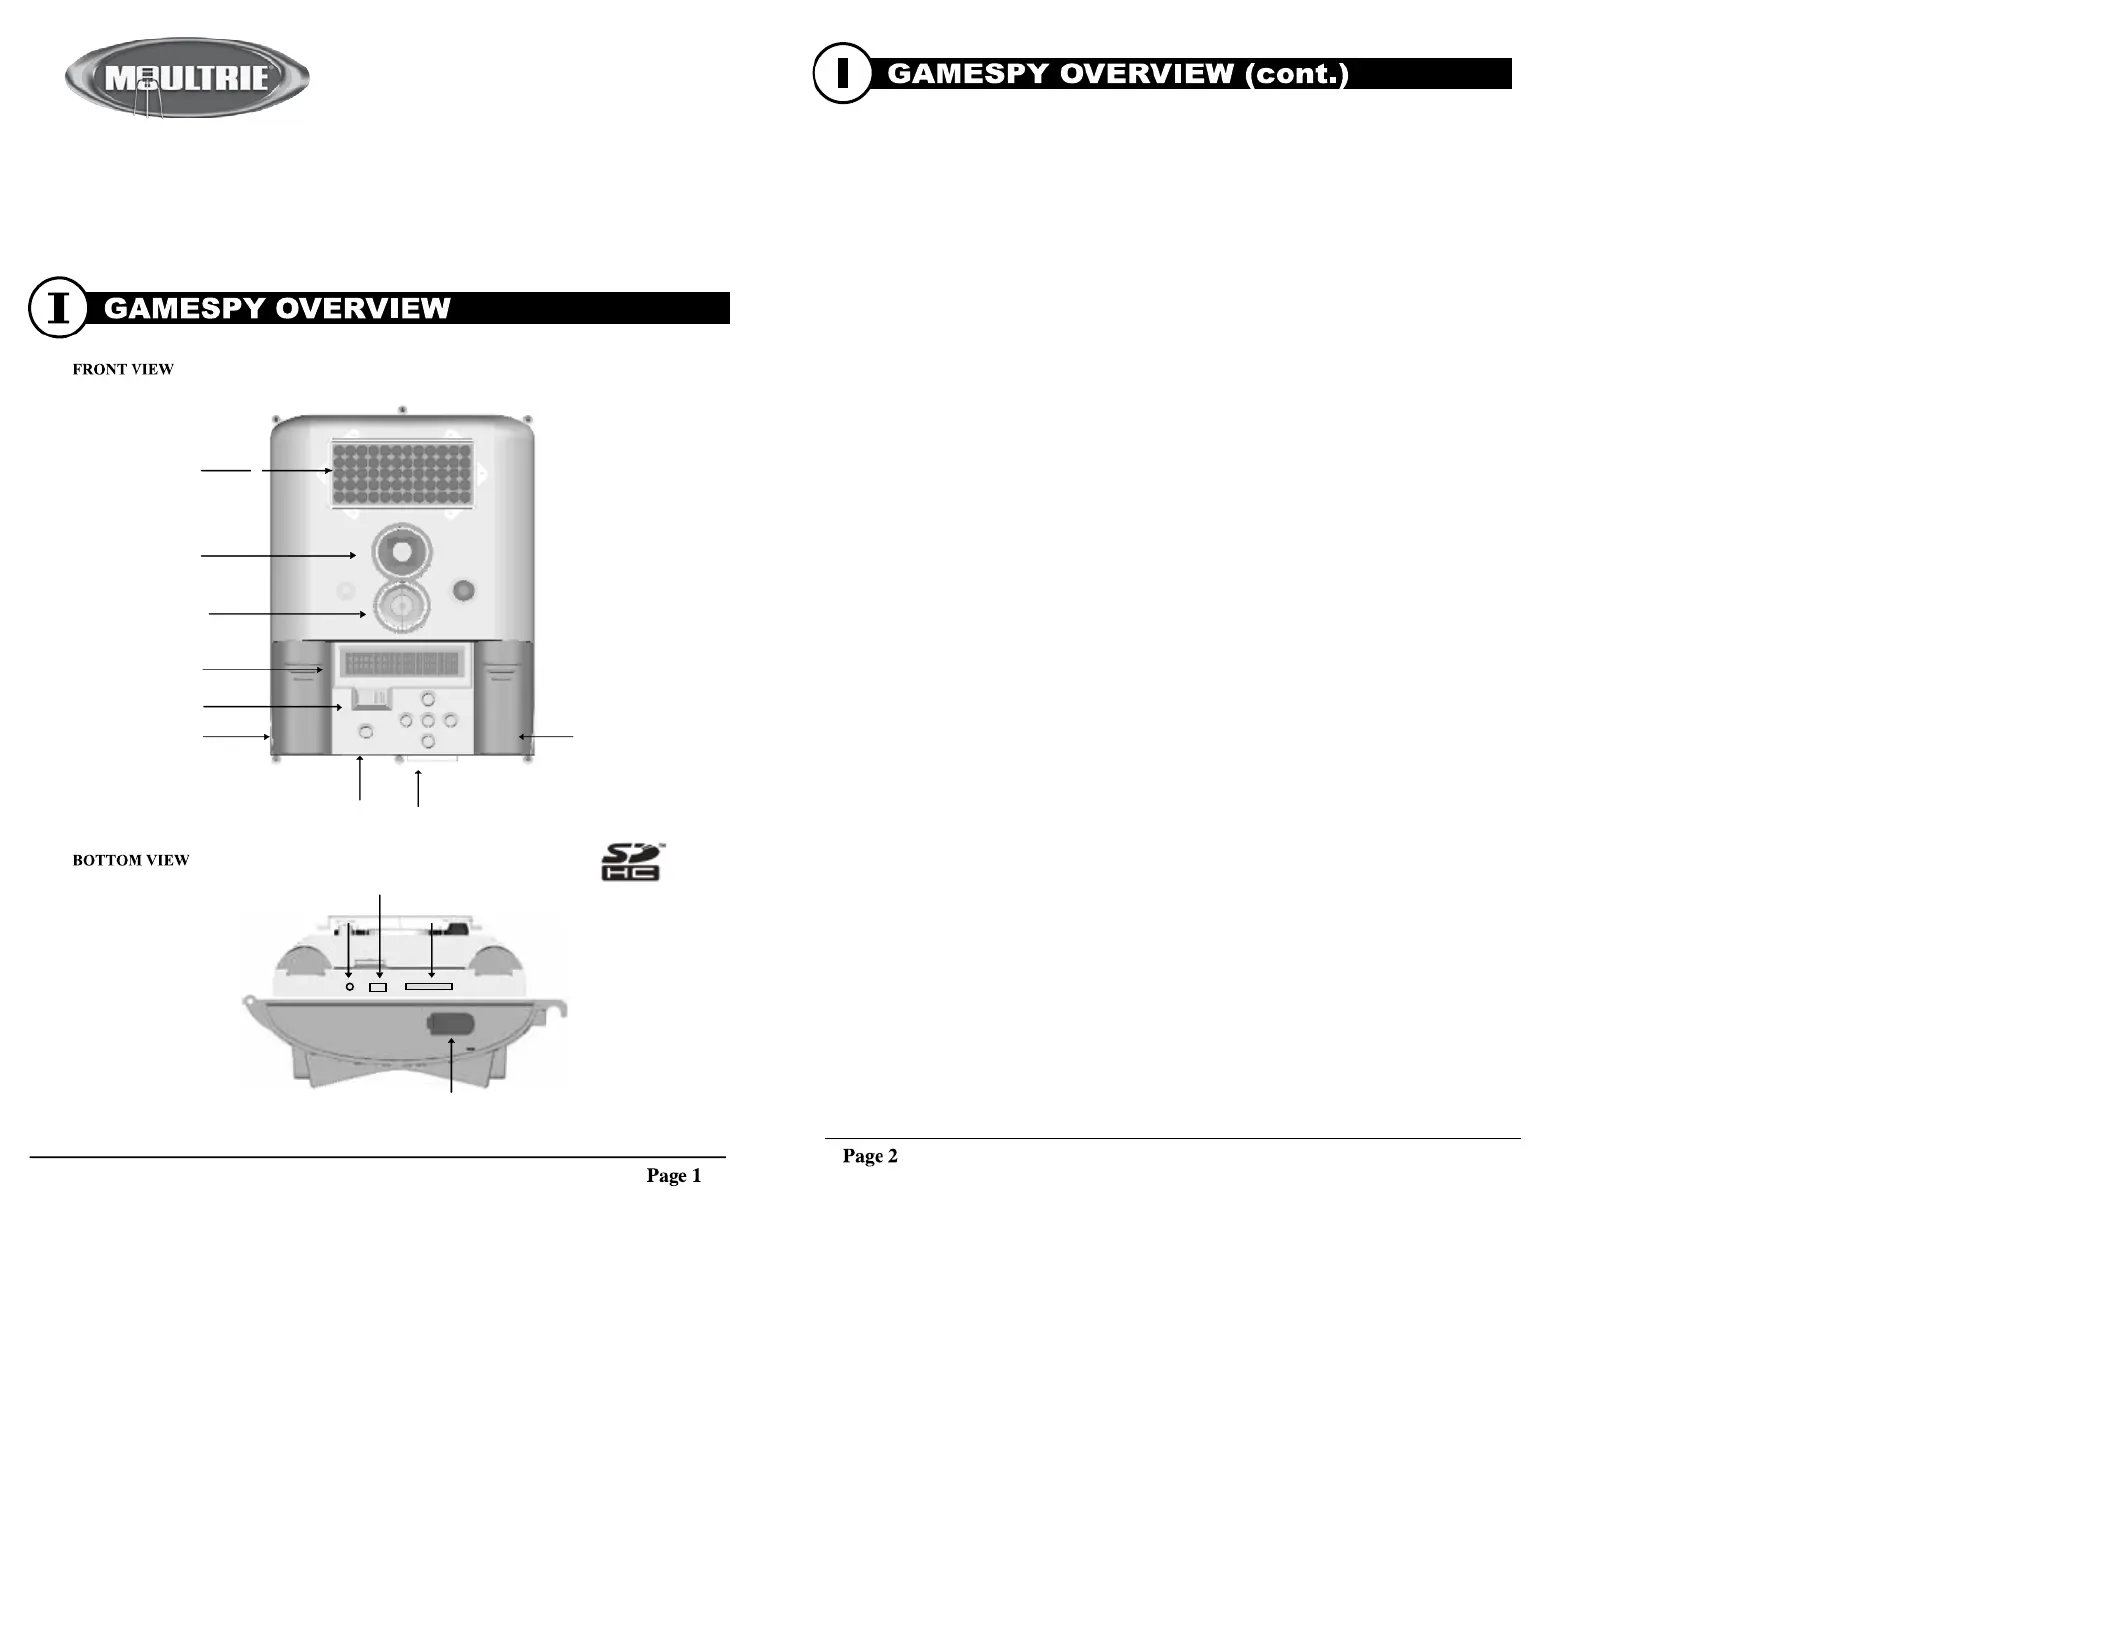
I40XT GameSpy Digital Camera
ON/OFF/AIM
LCD Display
Battery Compartment
Camera Lens
Motion Sensor
LED Flash
TV Out
USB Port
SD Card Slot
Aux Power
Battery Compartment
Navigation ButtonsMode Button
I40XT GameSpy Digital Camera
ON / OFF / AIM SWITCH
Used for turning On, turning Off, or Aiming the camera. When in AIM position the
red LED light on the front of the camera will illuminate. To help find the center field
of view for the camera, stand out in front of the camera and move left or right as you
observe the AIM LED - as you walk away from direct center the LED light will be
less bright. As you walk towards center the LED will appear brighter.
MODE BUTTON
The Mode Button selects the three modes of the camera -Auto, Camera Setup Menu, and
Cellular Setup Menu. When either of the Menu modes are selected, the UP and DOWN
buttons navigate through the menu options. The Mode Button is also used to wake-up
the camera and turn on the display when the camera is in a power saving mode
.
MENU NAVIGATION BUTTONS
The menu navigation buttons are used to navigate around the LCD display.
UP/DOWN moves to the next menu option, OK selects the menu option to be
changed. The LEFT/RIGHT buttons select the parameter field to be changed. When a
parameter field is selected it will flash on the LCD display. When a parameter field is
selected, the UP/DOWN buttons navigate through the options for the field and the OK
button selects the parameter value indicated on the display. The OK button is also used
to manually take a picture.
SD MEMORY CARD SLOT
Accepts up to a 16GB SD Card for photo storage. Note: An SD Card must be installed
for the camera to operate.
USB PORT
Download still pictures and video onto your computer by connecting provided cable
POWERPANEL PORT
Accepts the Moultrie PowerPanel accessory (sold separately) only. Refer to
www.moultriefeeders.com for more information.
TV OUT JACK
View still pictures and videos on your TV by connecting a 2.5mm video cable
(sold separately).
Produktspezifikationen
| Marke: | Moultrie |
| Kategorie: | Kamera |
| Modell: | Game Spy I40XT |
Brauchst du Hilfe?
Wenn Sie Hilfe mit Moultrie Game Spy I40XT benötigen, stellen Sie unten eine Frage und andere Benutzer werden Ihnen antworten
Bedienungsanleitung Kamera Moultrie

3 März 2026
2 Februar 2026
4 November 2025
4 November 2025
3 November 2025
3 November 2025
3 November 2025
3 November 2025
1 August 2025
1 August 2025
Bedienungsanleitung Kamera
Neueste Bedienungsanleitung für -Kategorien-
29 März 2026
28 März 2026
25 März 2026
23 März 2026
22 März 2026
22 März 2026
19 März 2026
13 März 2026
13 März 2026
11 März 2026