Panasonic CY-VMX6800U Bedienungsanleitung
Panasonic Nicht kategorisiert CY-VMX6800U
Lies die bedienungsanleitung für Panasonic CY-VMX6800U (10 Seiten) kostenlos online; sie gehört zur Kategorie Nicht kategorisiert. Dieses Handbuch wurde von 6 Personen als hilfreich bewertet und erhielt im Schnitt 4.9 Sterne aus 3.5 Bewertungen. Hast du eine Frage zu Panasonic CY-VMX6800U oder möchtest du andere Nutzer dieses Produkts befragen? Stelle eine Frage
Seite 1/10
E
N
G
L
I
S
H
2
CY-VMX6800U
17
E
N
G
L
I
S
H
1
CY-VMX6800U
16
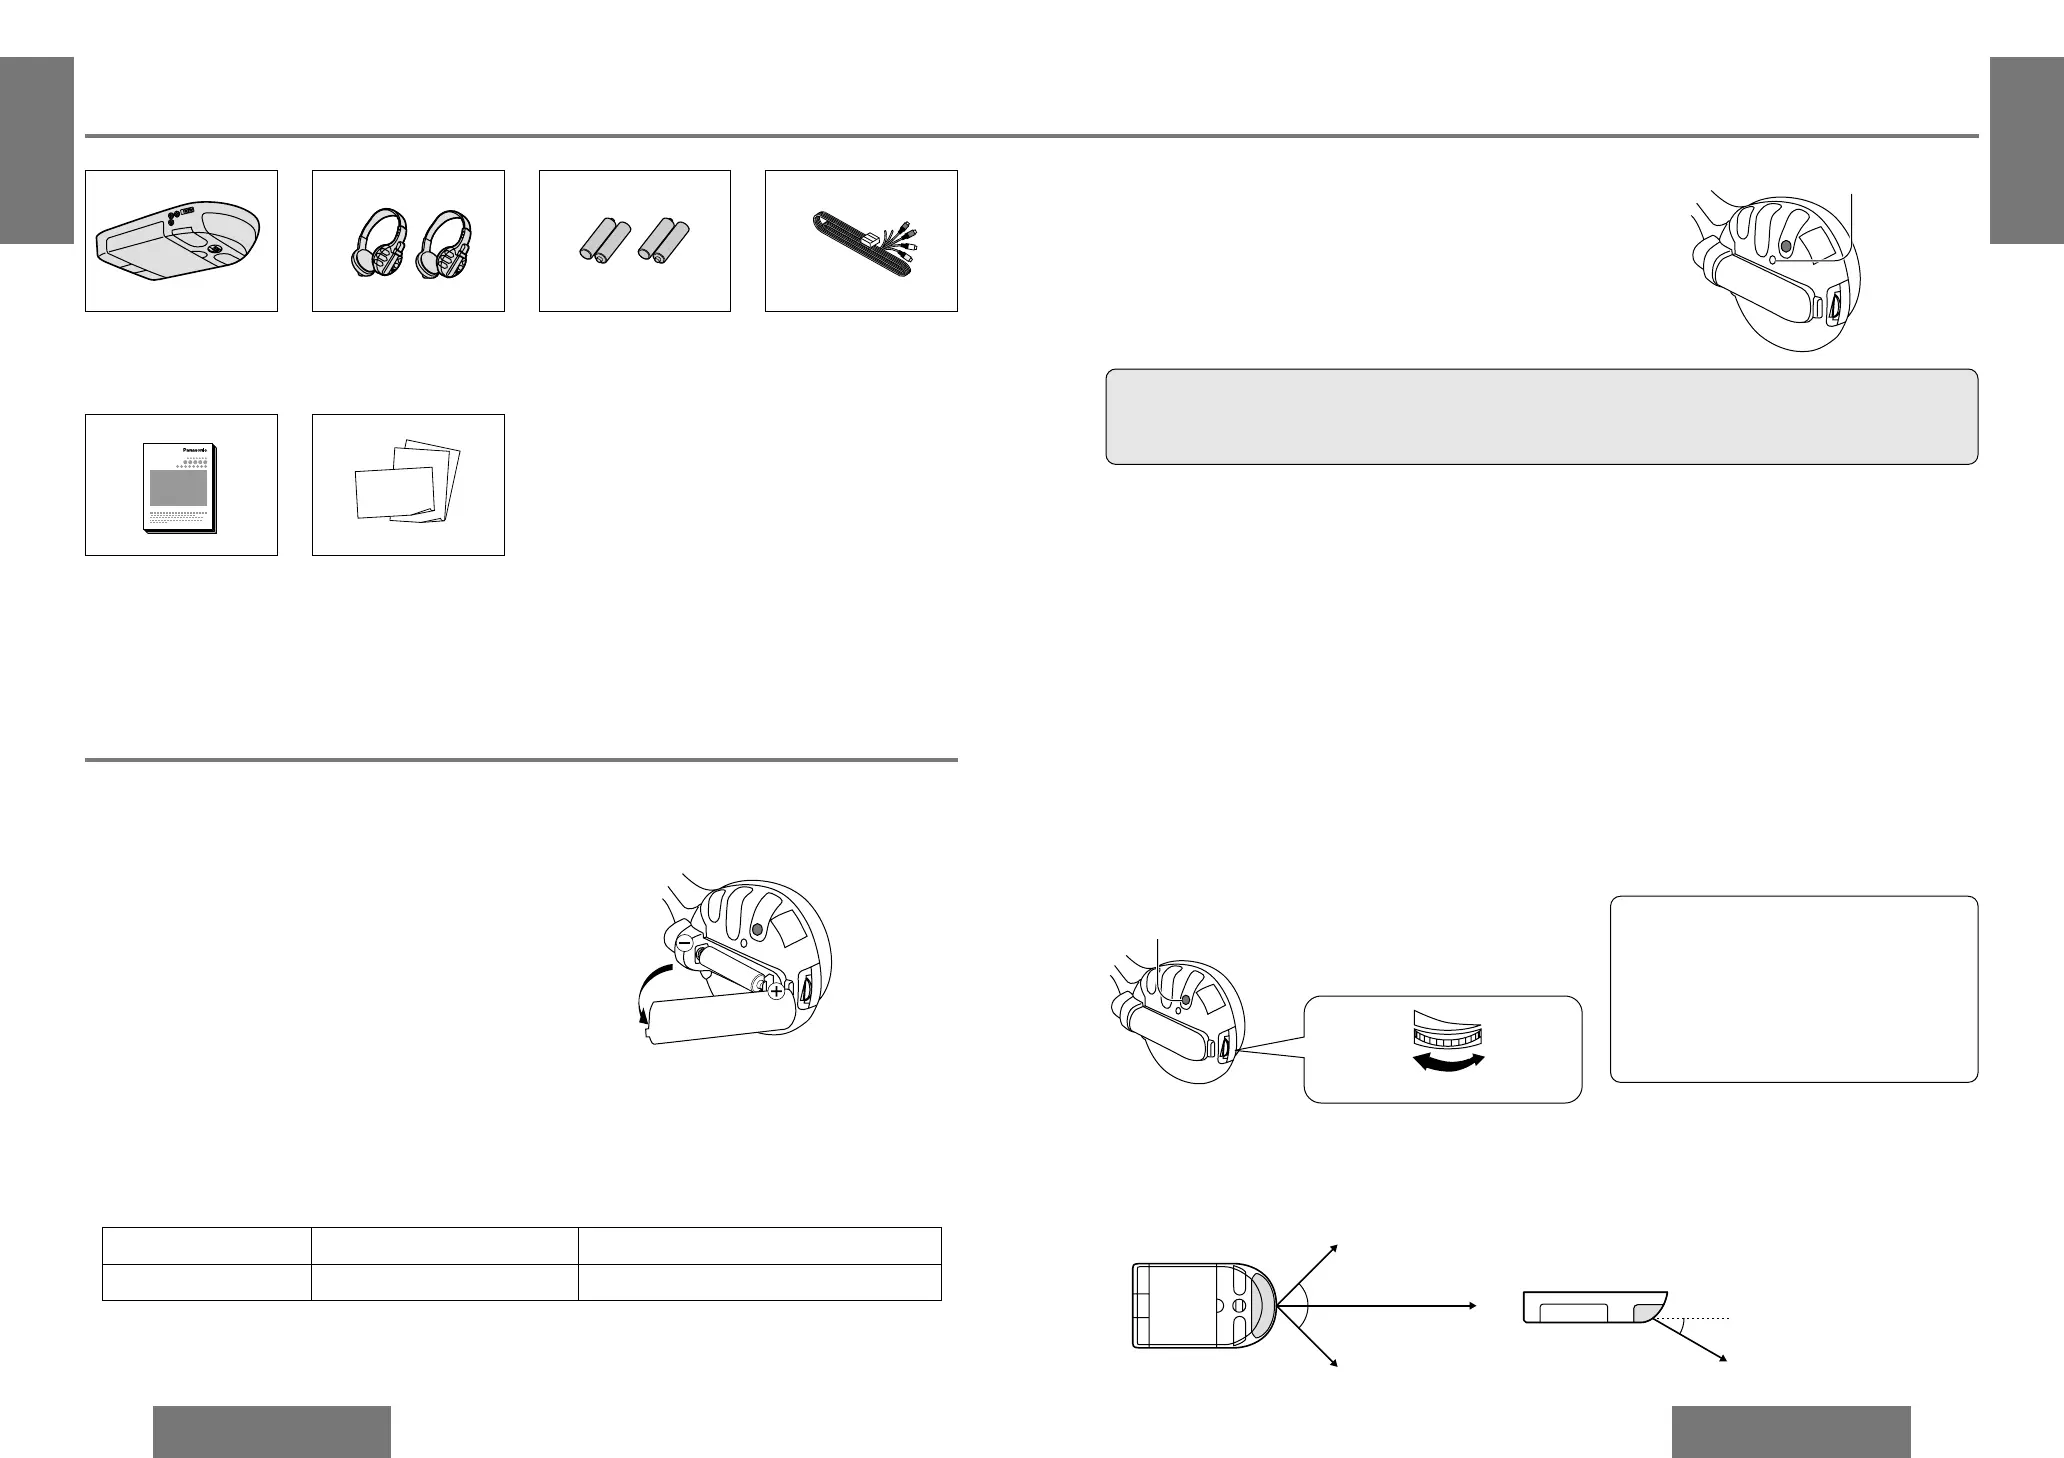
Components
≥Display unit (1)≥Infrared wireless
stereo headphones (2)
≥Batteries (R03/LR03,
AAA, UM-4) for wire-
less headphones (4)
≥Power connector (1)
≥Operating instructions
(1)
≥Warranty card, etc.
Battery Installation (Inserting/Replacing the Batteries)
Battery Notes
How to Use the Wireless Headphone
❐The Use of Range
These headphones use infrared rays for operation.
Use them within the range shown in the figure.
1. Open the battery holder cover.
2. Insert the battery.
Insert the battery in the correct direction, making sure that its
positive and negative ends match the same symbols in the bat-
tery holder.
3. Replace the cover.
The cover is fixed in place with a click.
Remove and dispose of an old battery immediately.
Battery information:
≥Battery type: Manganese R03/LR03, AAA, UM-4 dry cells
≥Battery life: Approximately 18 hours of continuous operation
Caution:
≥Improper use of batteries may cause overheating, an explosion or ignition, resulting in injury or a fire.
Battery leakage may damage the unit.
≥Do not use alkaline dry cells. (There is the danger of liquid leakage.)
≥Do not disassemble or short the battery. Do not throw a battery into a fire.
≥Keep batteries away from children to avoid the risk of accidents.
≥Be careful to the local disposal rules when you dispose of batteries.
≥If the batteries are used in the wrong way, there is the danger of liquid leakage, rupture, injuries, and failure.
Wireless Headphone Preparation
POWER
To check the remaining battery strength:
The POWER indicator on the right hand earpiece (R)
dims or fails to light when the batteries are weak.
Noise and interference also increase.
Change the batteries if any of these occur.
POWER
Volume upVolume down
Battery life When operation is possibleWhen the battery needs to be replaced
POWER indicator Lights up green. Dims or fails to light.
POWER indicator
POWER
(Right side)
❐Operations
Press the POWER button before wearing headphones.
Turn the volume on the headphones all the way down, then press the POWER button.
≥The POWER indicator lights up.
❐After Use
Press the POWER button to switch off.
❐Volume Control
Notes:
≥Do not play your headphones at a high
volume.
Hearing experts advise against continu-
ous extended play.
≥Refer to the precautions for the head-
phones of “Use this Product Safely”.
POWER button
45e
45e
30e
Plane view:Vertical view:
Approximately 5 m
Approximately 2.5 m
Approximately 2.5 m
Approximately 2.5 m
≥Installation hardware
(screws, cords, etc.)
(➡page 26)
Produktspezifikationen
| Marke: | Panasonic |
| Kategorie: | Nicht kategorisiert |
| Modell: | CY-VMX6800U |
Brauchst du Hilfe?
Wenn Sie Hilfe mit Panasonic CY-VMX6800U benötigen, stellen Sie unten eine Frage und andere Benutzer werden Ihnen antworten
Bedienungsanleitung Nicht kategorisiert Panasonic

11 Januar 2026
22 Dezember 2025
21 Dezember 2025
9 November 2025
8 Oktober 2025
7 Oktober 2025
2 Oktober 2025
26 September 2025
18 September 2025
16 September 2025
Bedienungsanleitung Nicht kategorisiert
Neueste Bedienungsanleitung für -Kategorien-
21 Januar 2026
21 Januar 2026
21 Januar 2026
21 Januar 2026
21 Januar 2026
21 Januar 2026
21 Januar 2026
21 Januar 2026
21 Januar 2026
21 Januar 2026