Pioneer 12.301300-10 Bedienungsanleitung
Pioneer Nicht kategorisiert 12.301300-10
Lies die bedienungsanleitung für Pioneer 12.301300-10 (30 Seiten) kostenlos online; sie gehört zur Kategorie Nicht kategorisiert. Dieses Handbuch wurde von 23 Personen als hilfreich bewertet und erhielt im Schnitt 4.1 Sterne aus 2 Bewertungen. Hast du eine Frage zu Pioneer 12.301300-10 oder möchtest du andere Nutzer dieses Produkts befragen? Stelle eine Frage
Seite 1/30
2-DIN 12.301300-10
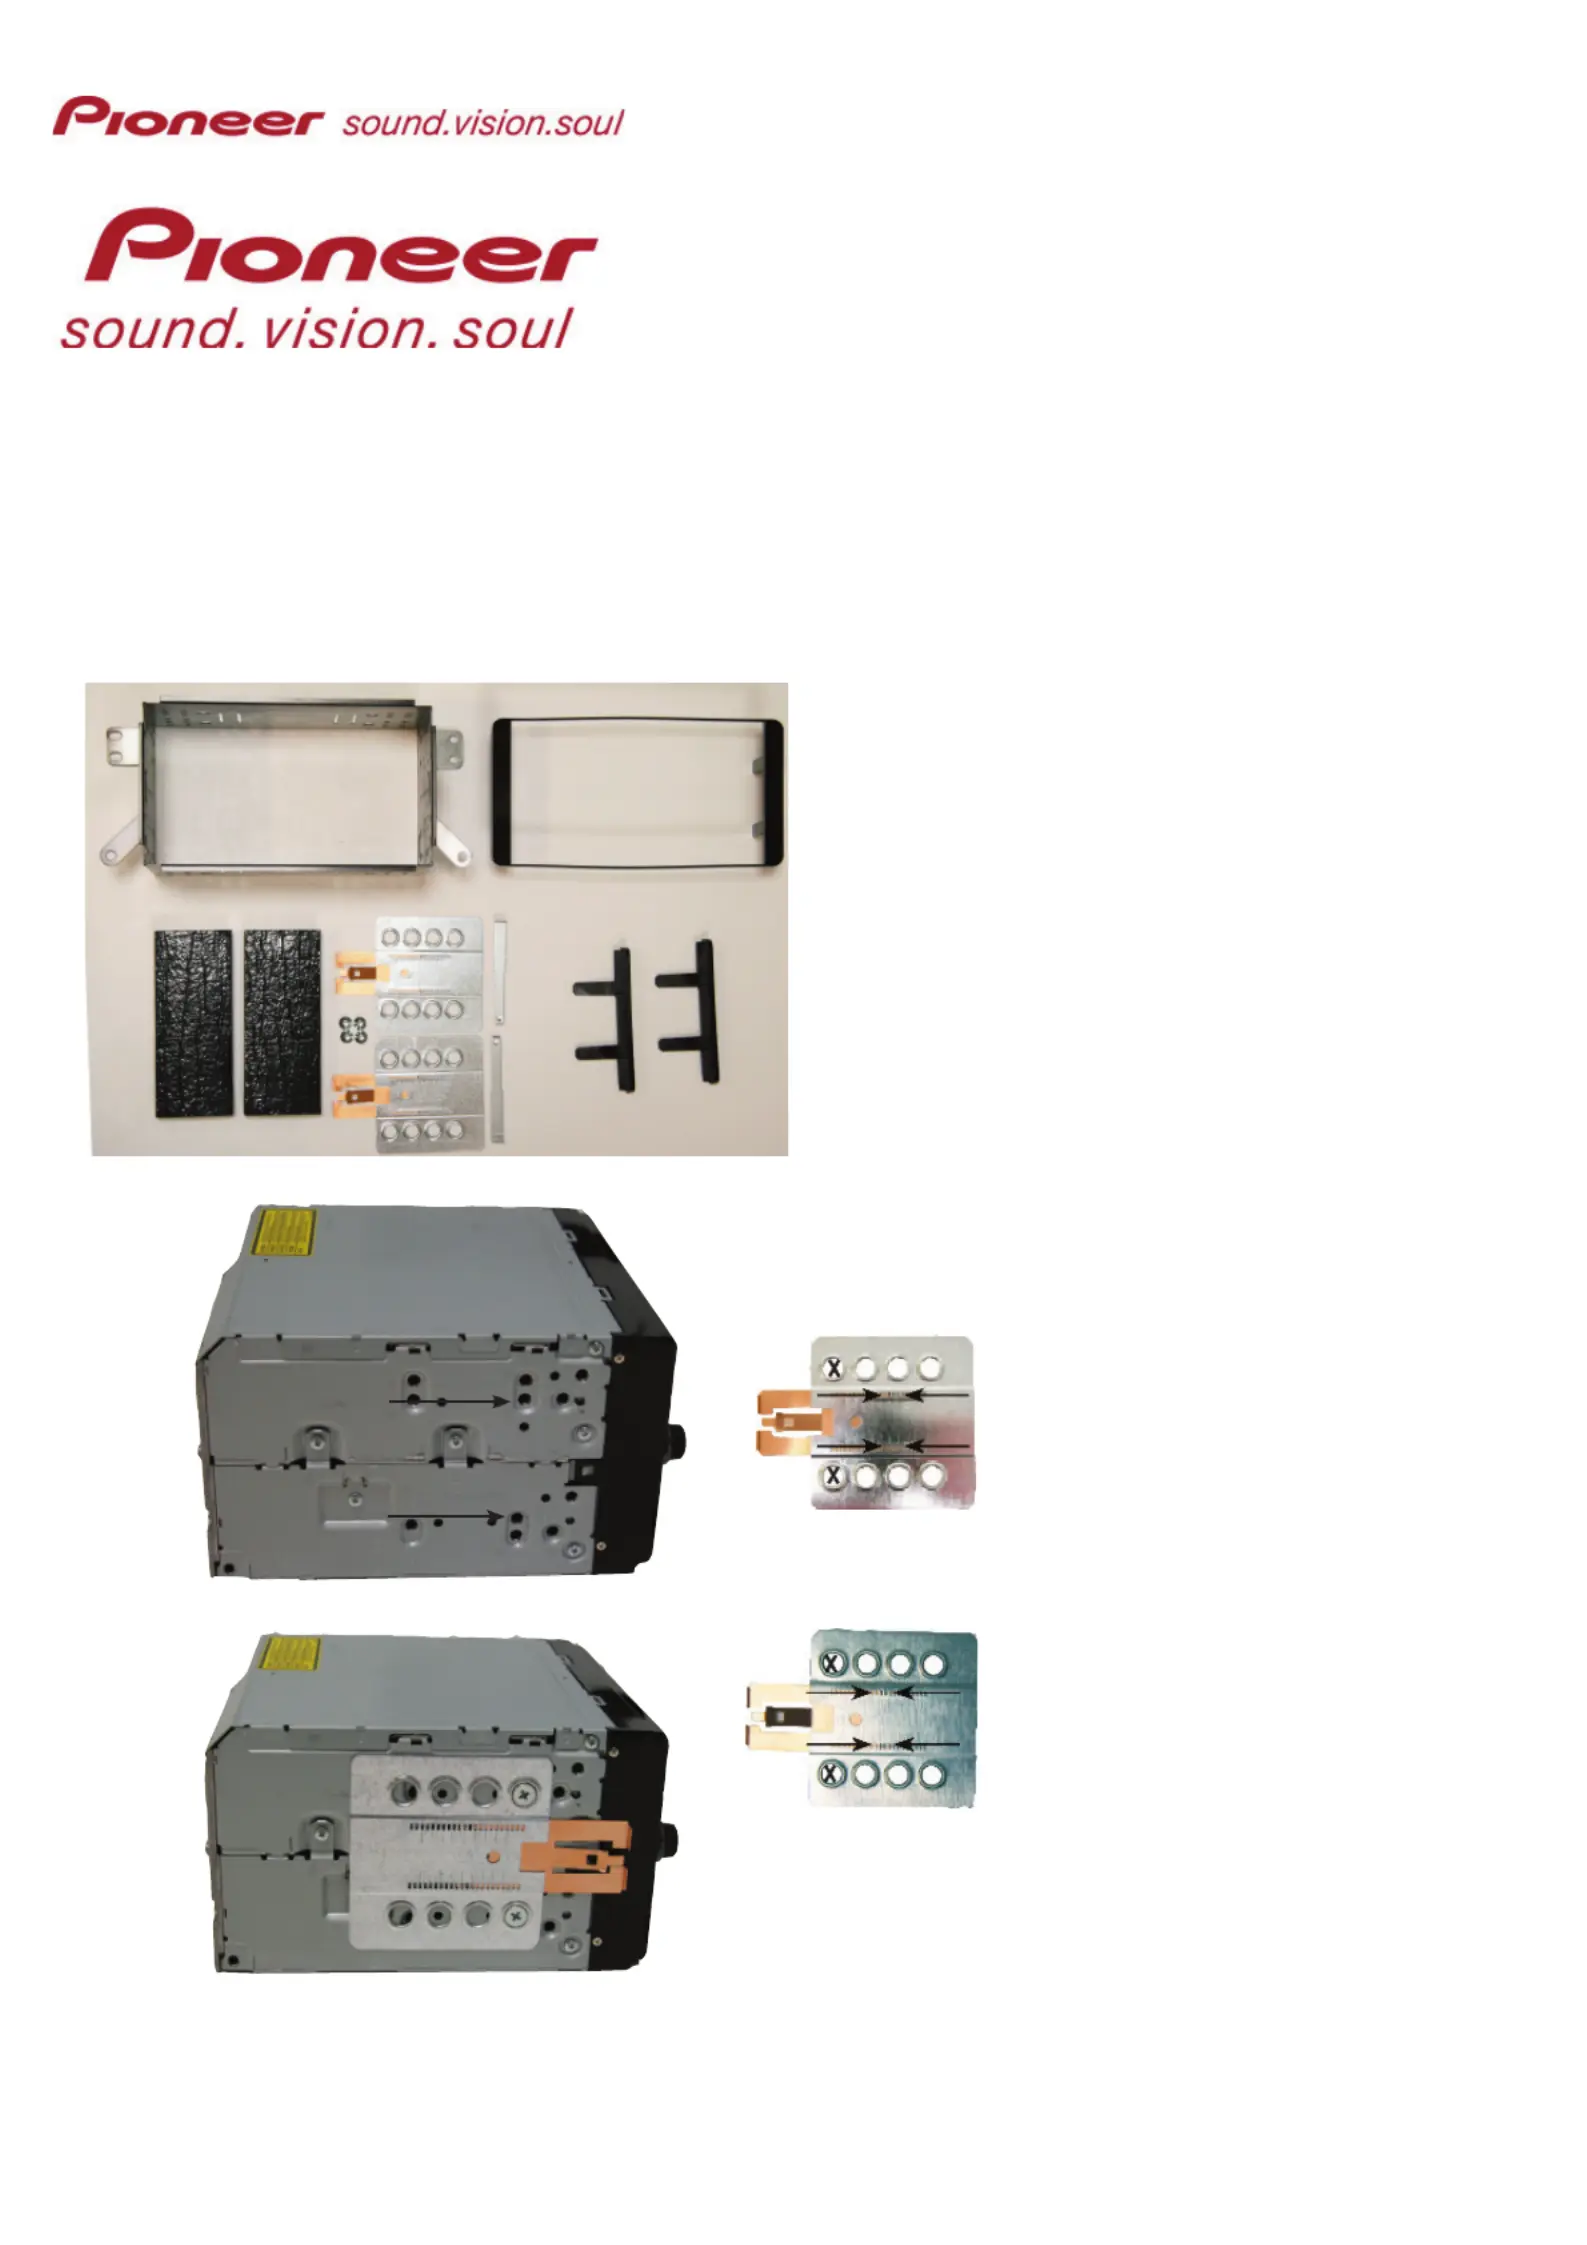
Installation kit includes the following items:
* 1X 2-ISO 100 mm. metal bracket
* 1x Replacement panel for non motorized screen
* 2X Replacement panel for motorized screen
* 2X Mounting plates
* 2X Mounting spaces
* 2X Radio keys
* 4X Screws
* 2X Cushion
Installation manual for:
Toyota Hilux
* Mount the plates.
Use this hole
Use this hole
Pioneer HD1BT
We advice to use the following positions.
Other positions are also possible.
Use position 1 marked with a cross.
Use position 14 & 16 marked with an arrow.
Measured from left to right.
Pioneer Avic D3
We advice to use the following positions.
Other positions are also possible.
Use position 1 marked with a cross.
Use position 8 & 10 marked with an arrow
Measured from left to right.
Produktspezifikationen
| Marke: | Pioneer |
| Kategorie: | Nicht kategorisiert |
| Modell: | 12.301300-10 |
Brauchst du Hilfe?
Wenn Sie Hilfe mit Pioneer 12.301300-10 benötigen, stellen Sie unten eine Frage und andere Benutzer werden Ihnen antworten
Bedienungsanleitung Nicht kategorisiert Pioneer

6 Februar 2026
5 Februar 2026
1 Februar 2026
31 Januar 2026
31 Januar 2026
30 Januar 2026
27 Januar 2026
27 Januar 2026
26 Januar 2026
26 Januar 2026
Bedienungsanleitung Nicht kategorisiert
Neueste Bedienungsanleitung für -Kategorien-
3 April 2026
3 April 2026
3 April 2026
3 April 2026
3 April 2026
3 April 2026
3 April 2026
3 April 2026
3 April 2026
3 April 2026