Pioneer CA-HR-FD-EVO.002 Bedienungsanleitung
Pioneer Nicht kategorisiert CA-HR-FD-EVO.002
Lies die bedienungsanleitung für Pioneer CA-HR-FD-EVO.002 (4 Seiten) kostenlos online; sie gehört zur Kategorie Nicht kategorisiert. Dieses Handbuch wurde von 26 Personen als hilfreich bewertet und erhielt im Schnitt 4.6 Sterne aus 8 Bewertungen. Hast du eine Frage zu Pioneer CA-HR-FD-EVO.002 oder möchtest du andere Nutzer dieses Produkts befragen? Stelle eine Frage
Seite 1/4
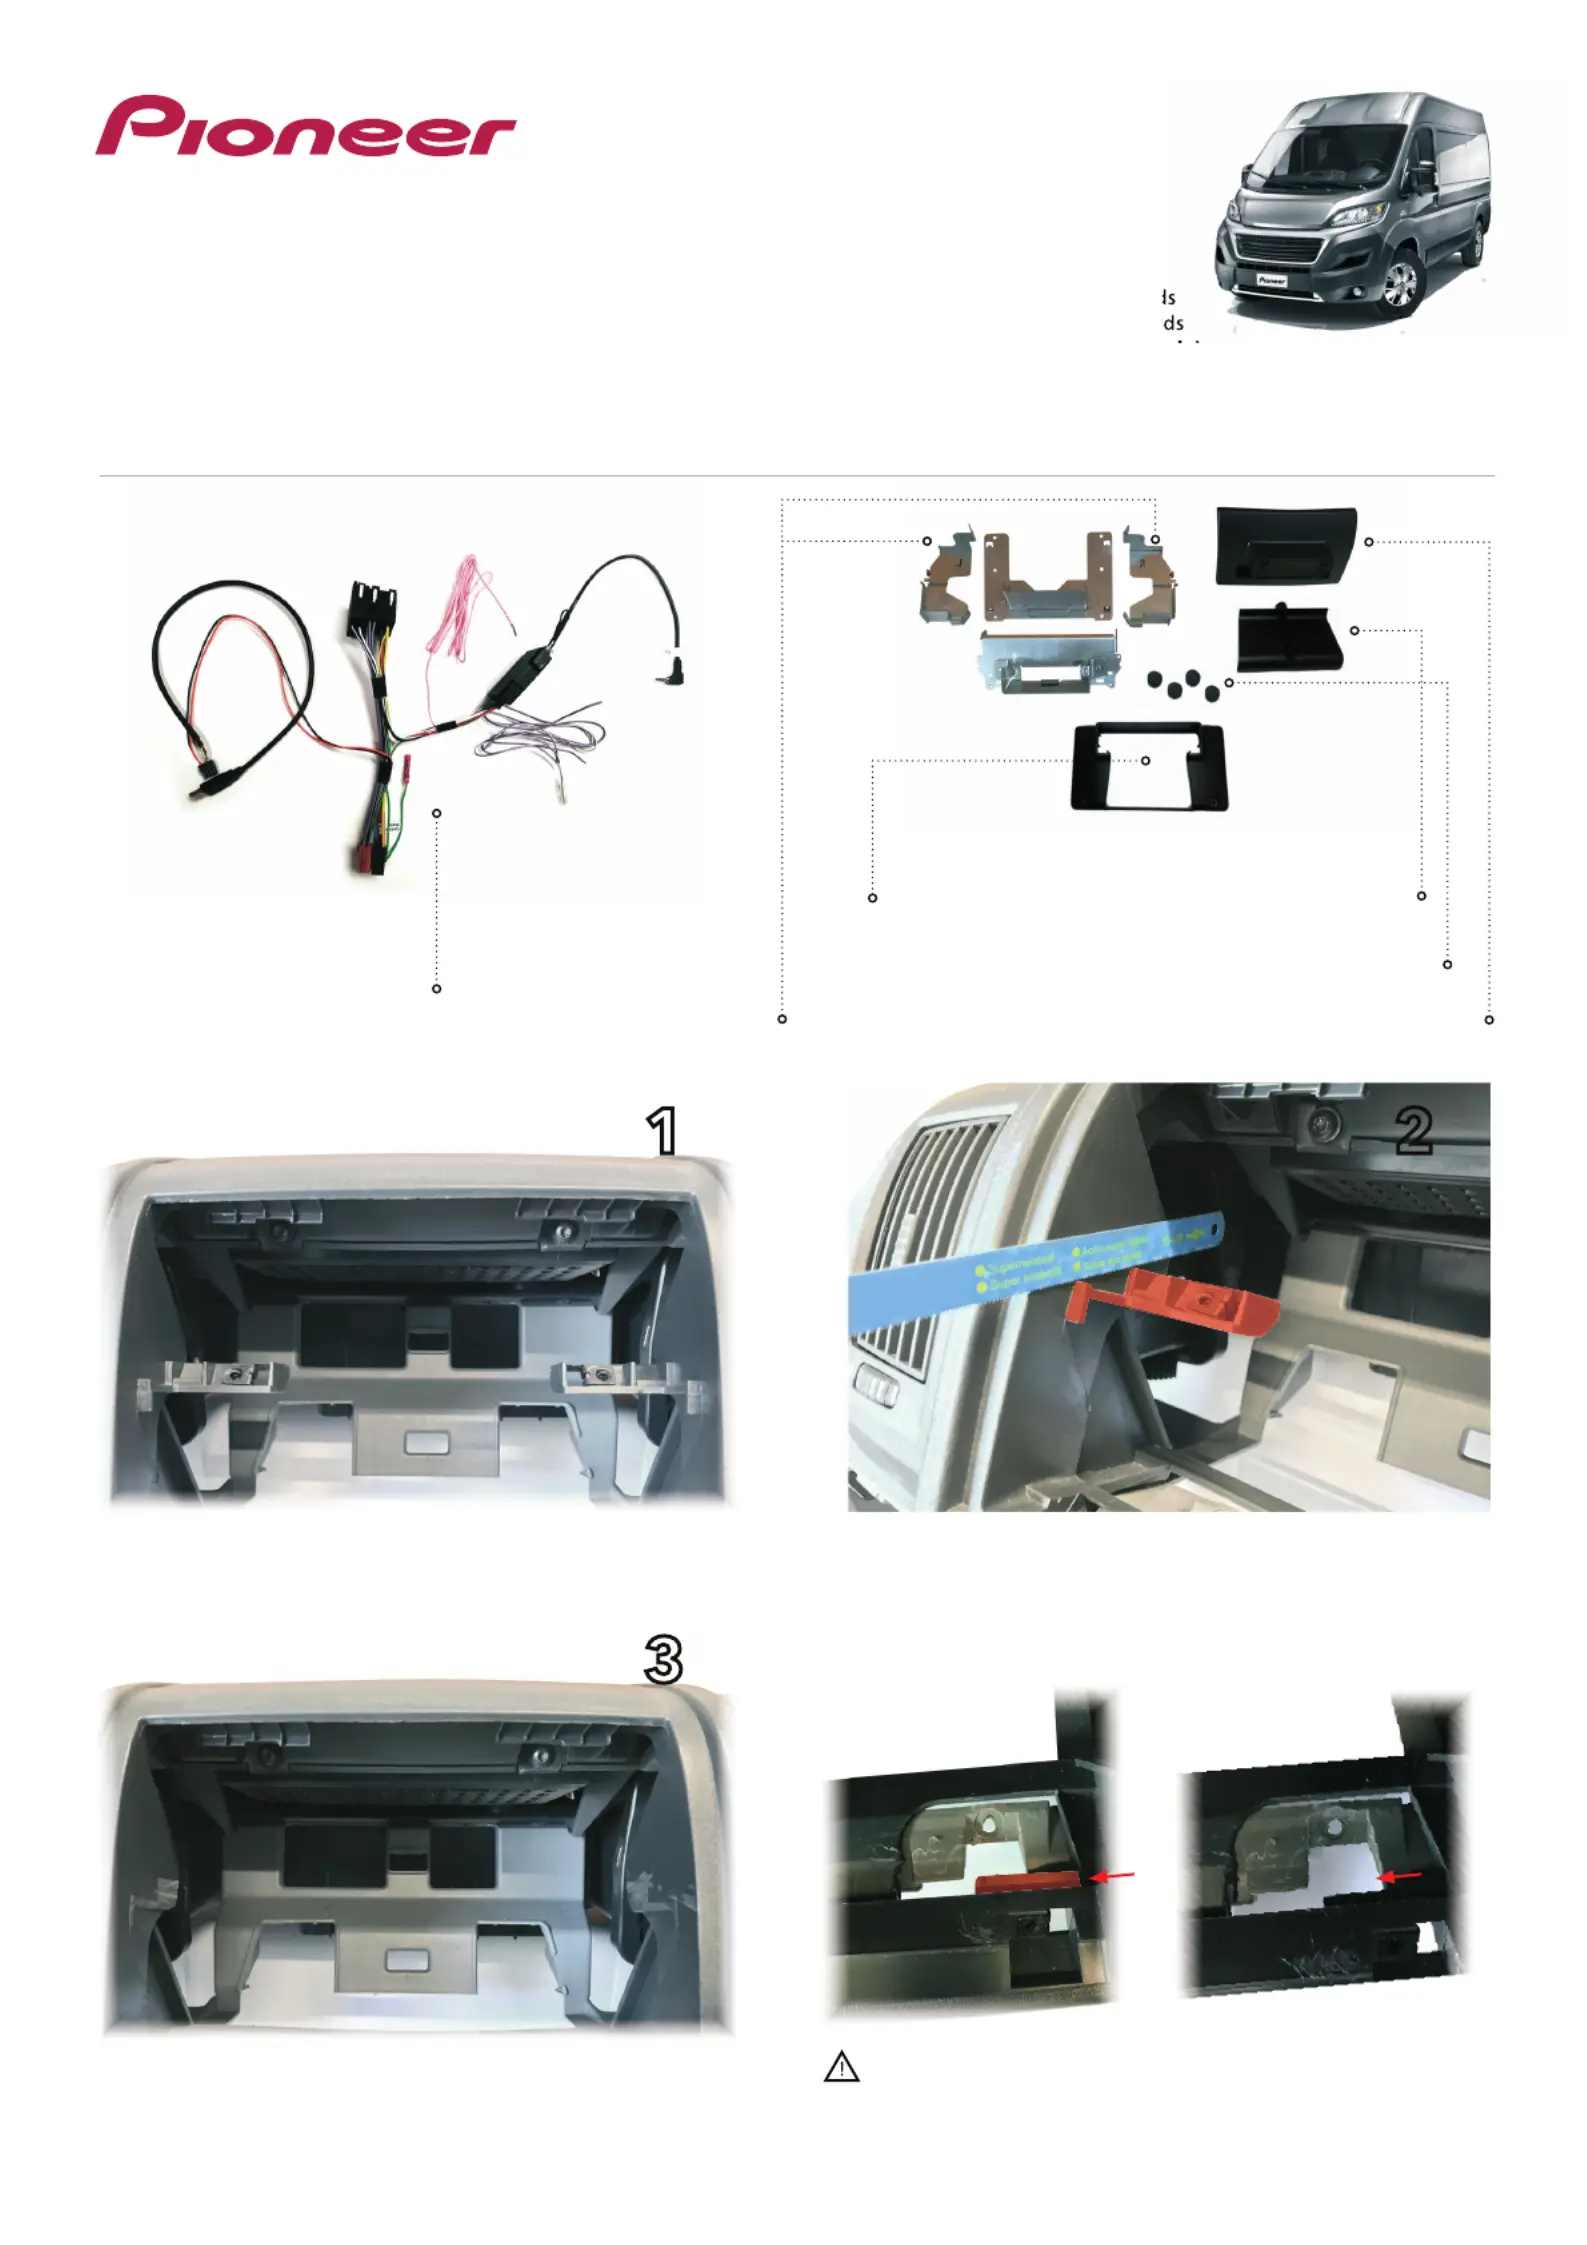
Installation manual SPH-EVO93DAB-DUC | Version 1.0
EN - Installation Manual
Original dashboard
Screen brackets
Interface
Dashboard cover
Screw covers
Cable cover
Screen cover
Result after the modification
Cut out the center supports / support bar
12
3
CA-HR-FD-EVO.002
INSTALLATION KIT FOR SPH-EVO93DAB-DUC
Compatibility:
• Fiat Ducato from 2007 onwards
• Peugeot Boxer from 2007 onward
• Citroen Jumper from 2007 onwar
(open dash platform with ISO only)
Result after the cut
If the van comes with these ridges, please remove by cutting
to make space for the metal brackets.
Produktspezifikationen
| Marke: | Pioneer |
| Kategorie: | Nicht kategorisiert |
| Modell: | CA-HR-FD-EVO.002 |
Brauchst du Hilfe?
Wenn Sie Hilfe mit Pioneer CA-HR-FD-EVO.002 benötigen, stellen Sie unten eine Frage und andere Benutzer werden Ihnen antworten
Bedienungsanleitung Nicht kategorisiert Pioneer

6 Februar 2026
5 Februar 2026
1 Februar 2026
31 Januar 2026
31 Januar 2026
30 Januar 2026
27 Januar 2026
27 Januar 2026
26 Januar 2026
26 Januar 2026
Bedienungsanleitung Nicht kategorisiert
Neueste Bedienungsanleitung für -Kategorien-
3 April 2026
3 April 2026
3 April 2026
3 April 2026
3 April 2026
3 April 2026
3 April 2026
3 April 2026
3 April 2026
3 April 2026