Pioneer CA-HR-REN-EVO.001 Bedienungsanleitung
Pioneer Nicht kategorisiert CA-HR-REN-EVO.001
Lies die bedienungsanleitung für Pioneer CA-HR-REN-EVO.001 (3 Seiten) kostenlos online; sie gehört zur Kategorie Nicht kategorisiert. Dieses Handbuch wurde von 16 Personen als hilfreich bewertet und erhielt im Schnitt 4.6 Sterne aus 3 Bewertungen. Hast du eine Frage zu Pioneer CA-HR-REN-EVO.001 oder möchtest du andere Nutzer dieses Produkts befragen? Stelle eine Frage
Seite 1/3
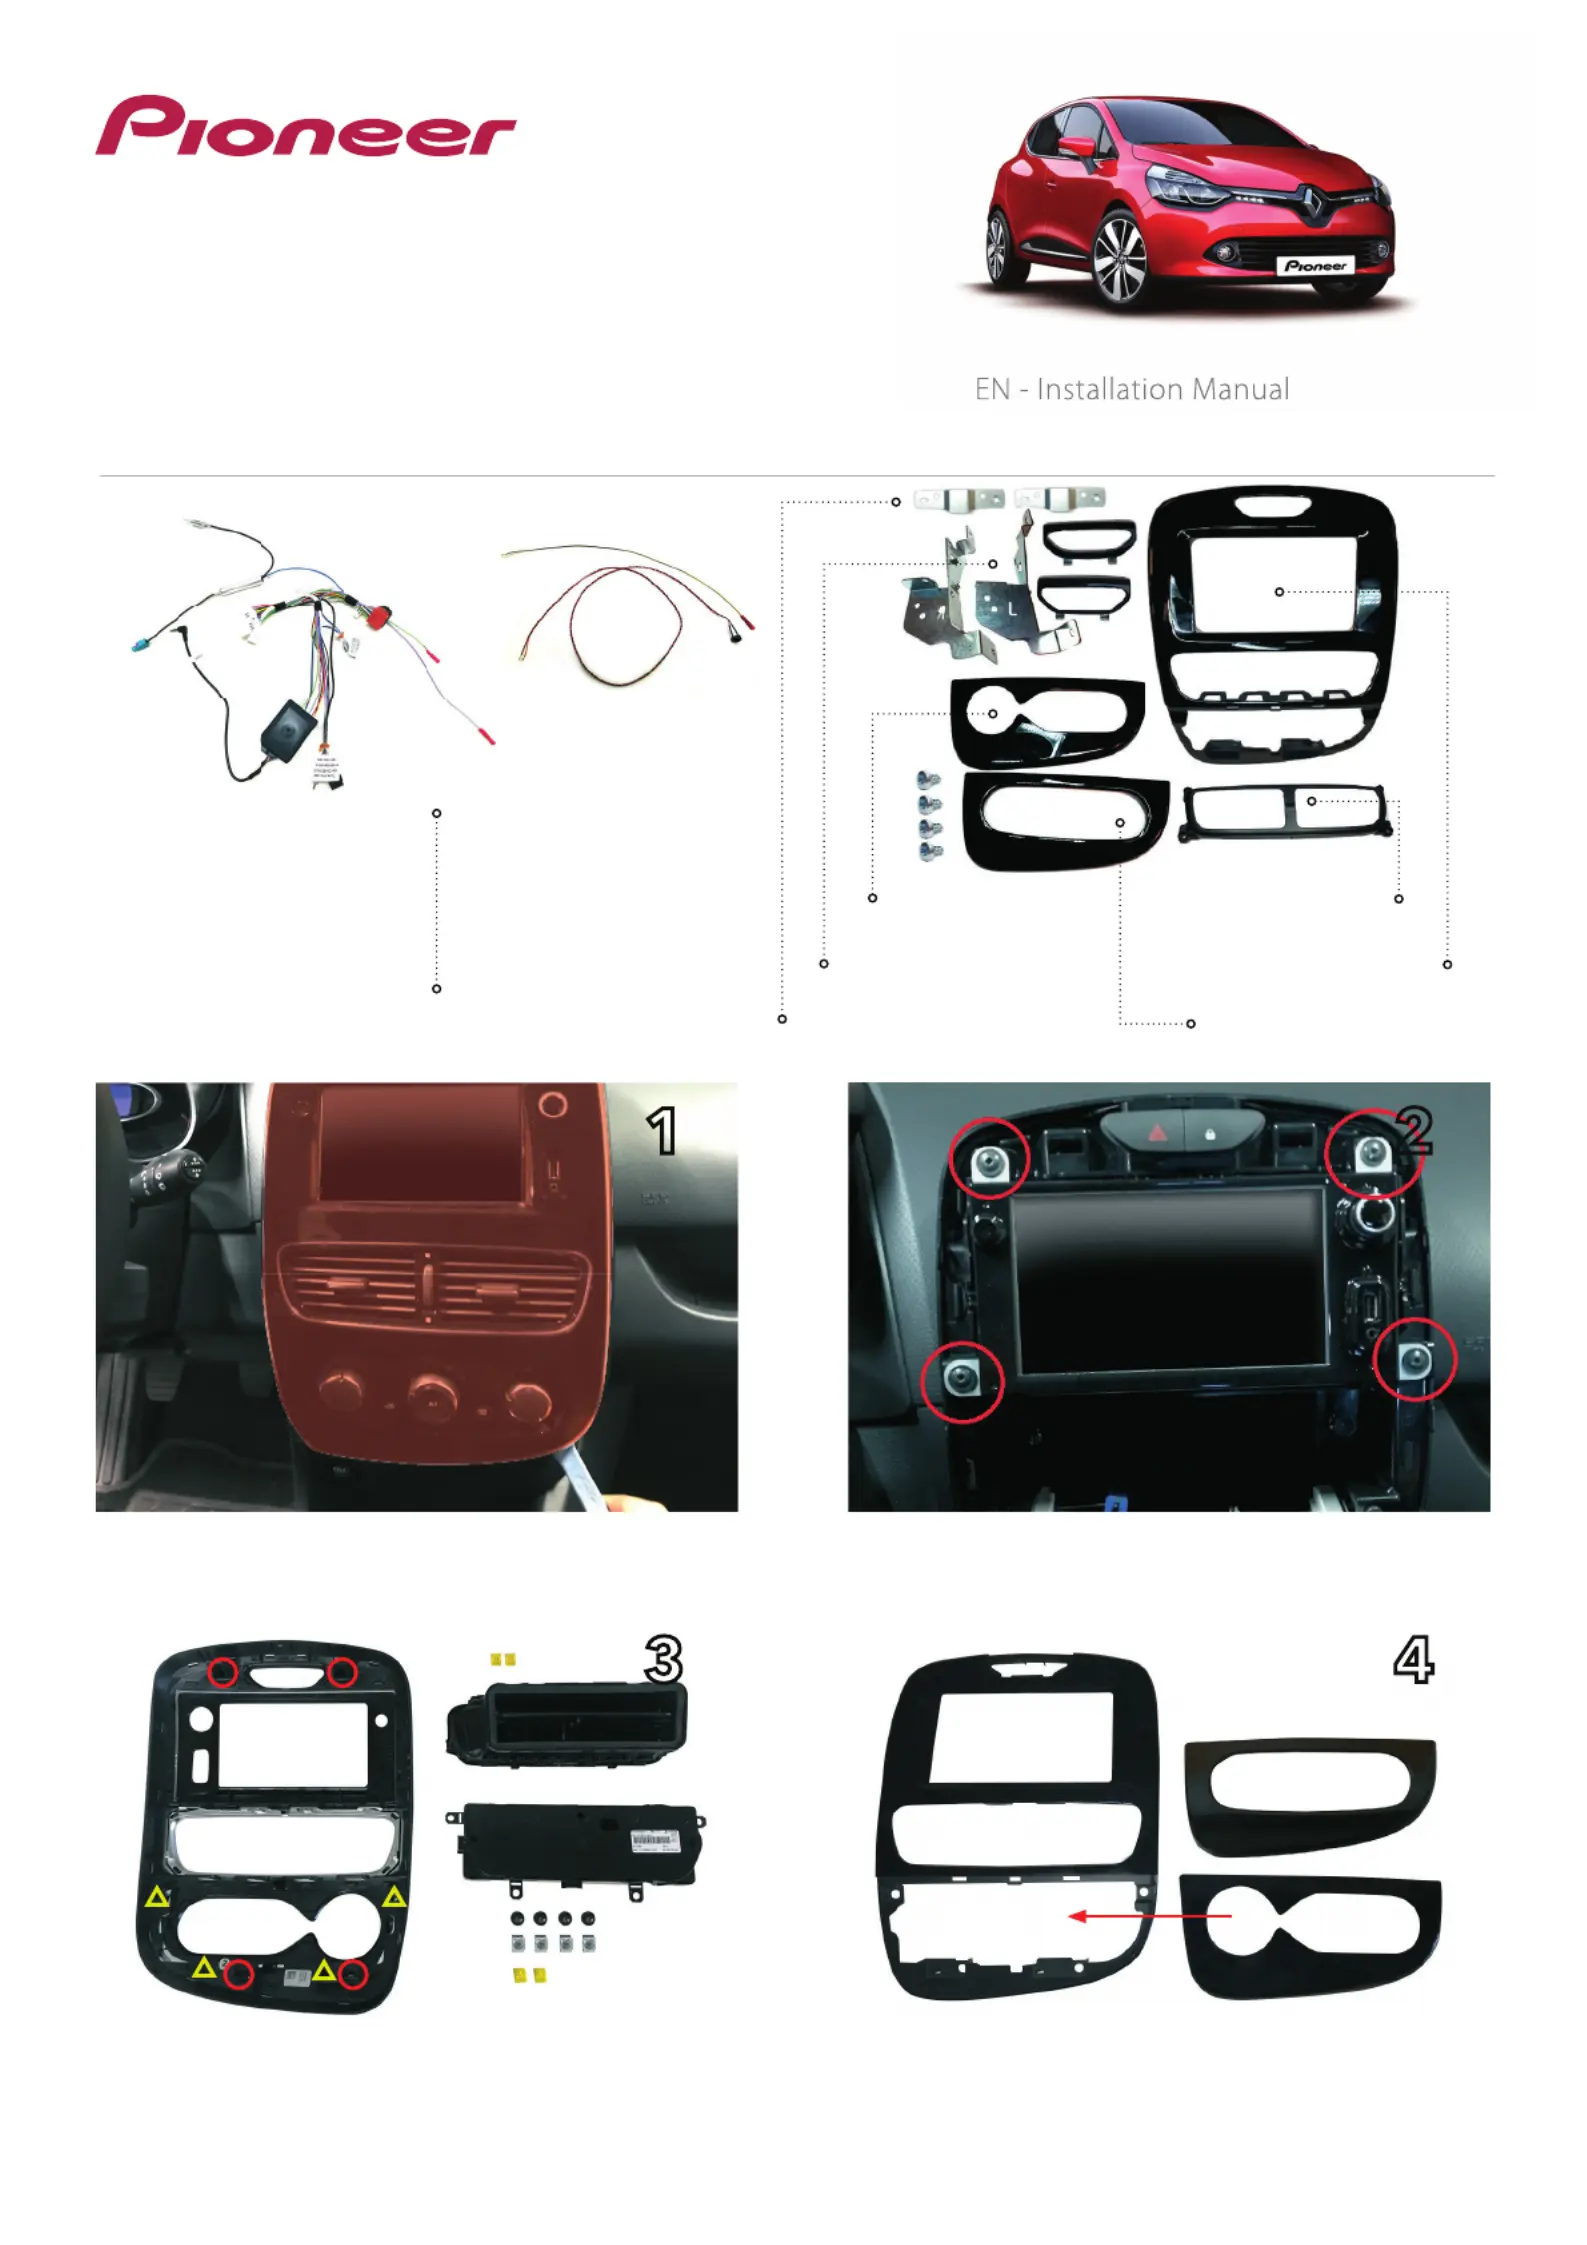
Installation manual CA-HR-REN-EVO.001 | Version 2.0
Remove the front panel using a trim tool
Hazard Switch coversManual airco cover
Interface
Installation bracketsFascia
Automatic airco coverPre-facelift vent holder
Remove the original clips (marked with red circles)
and screw retainers (marked with yellow triangles),
afterwards re-install on the new fascia
Remove the four indicated screws and take out the OEM receiver
Choose the correct airco panel and click it onto the main fascia,
mount airco unit
12
43
CA-HR-REN-EVO.001
INSTALLATION KIT FOR SPH-EVO62DAB-CLIO
Manual airco
Automatic airco
Produktspezifikationen
| Marke: | Pioneer |
| Kategorie: | Nicht kategorisiert |
| Modell: | CA-HR-REN-EVO.001 |
Brauchst du Hilfe?
Wenn Sie Hilfe mit Pioneer CA-HR-REN-EVO.001 benötigen, stellen Sie unten eine Frage und andere Benutzer werden Ihnen antworten
Bedienungsanleitung Nicht kategorisiert Pioneer

6 Februar 2026
5 Februar 2026
1 Februar 2026
31 Januar 2026
31 Januar 2026
30 Januar 2026
27 Januar 2026
27 Januar 2026
26 Januar 2026
26 Januar 2026
Bedienungsanleitung Nicht kategorisiert
Neueste Bedienungsanleitung für -Kategorien-
3 April 2026
3 April 2026
3 April 2026
3 April 2026
3 April 2026
3 April 2026
3 April 2026
3 April 2026
3 April 2026
3 April 2026