Sauermann KIRAY 200 Bedienungsanleitung
Lies die bedienungsanleitung für Sauermann KIRAY 200 (4 Seiten) kostenlos online; sie gehört zur Kategorie Messung. Dieses Handbuch wurde von 12 Personen als hilfreich bewertet und erhielt im Schnitt 4.3 Sterne aus 8 Bewertungen. Hast du eine Frage zu Sauermann KIRAY 200 oder möchtest du andere Nutzer dieses Produkts befragen? Stelle eine Frage
Seite 1/4
KIRAY 200
Infrared thermometer
USER MANUAL
Spectral response8 - 14 μm
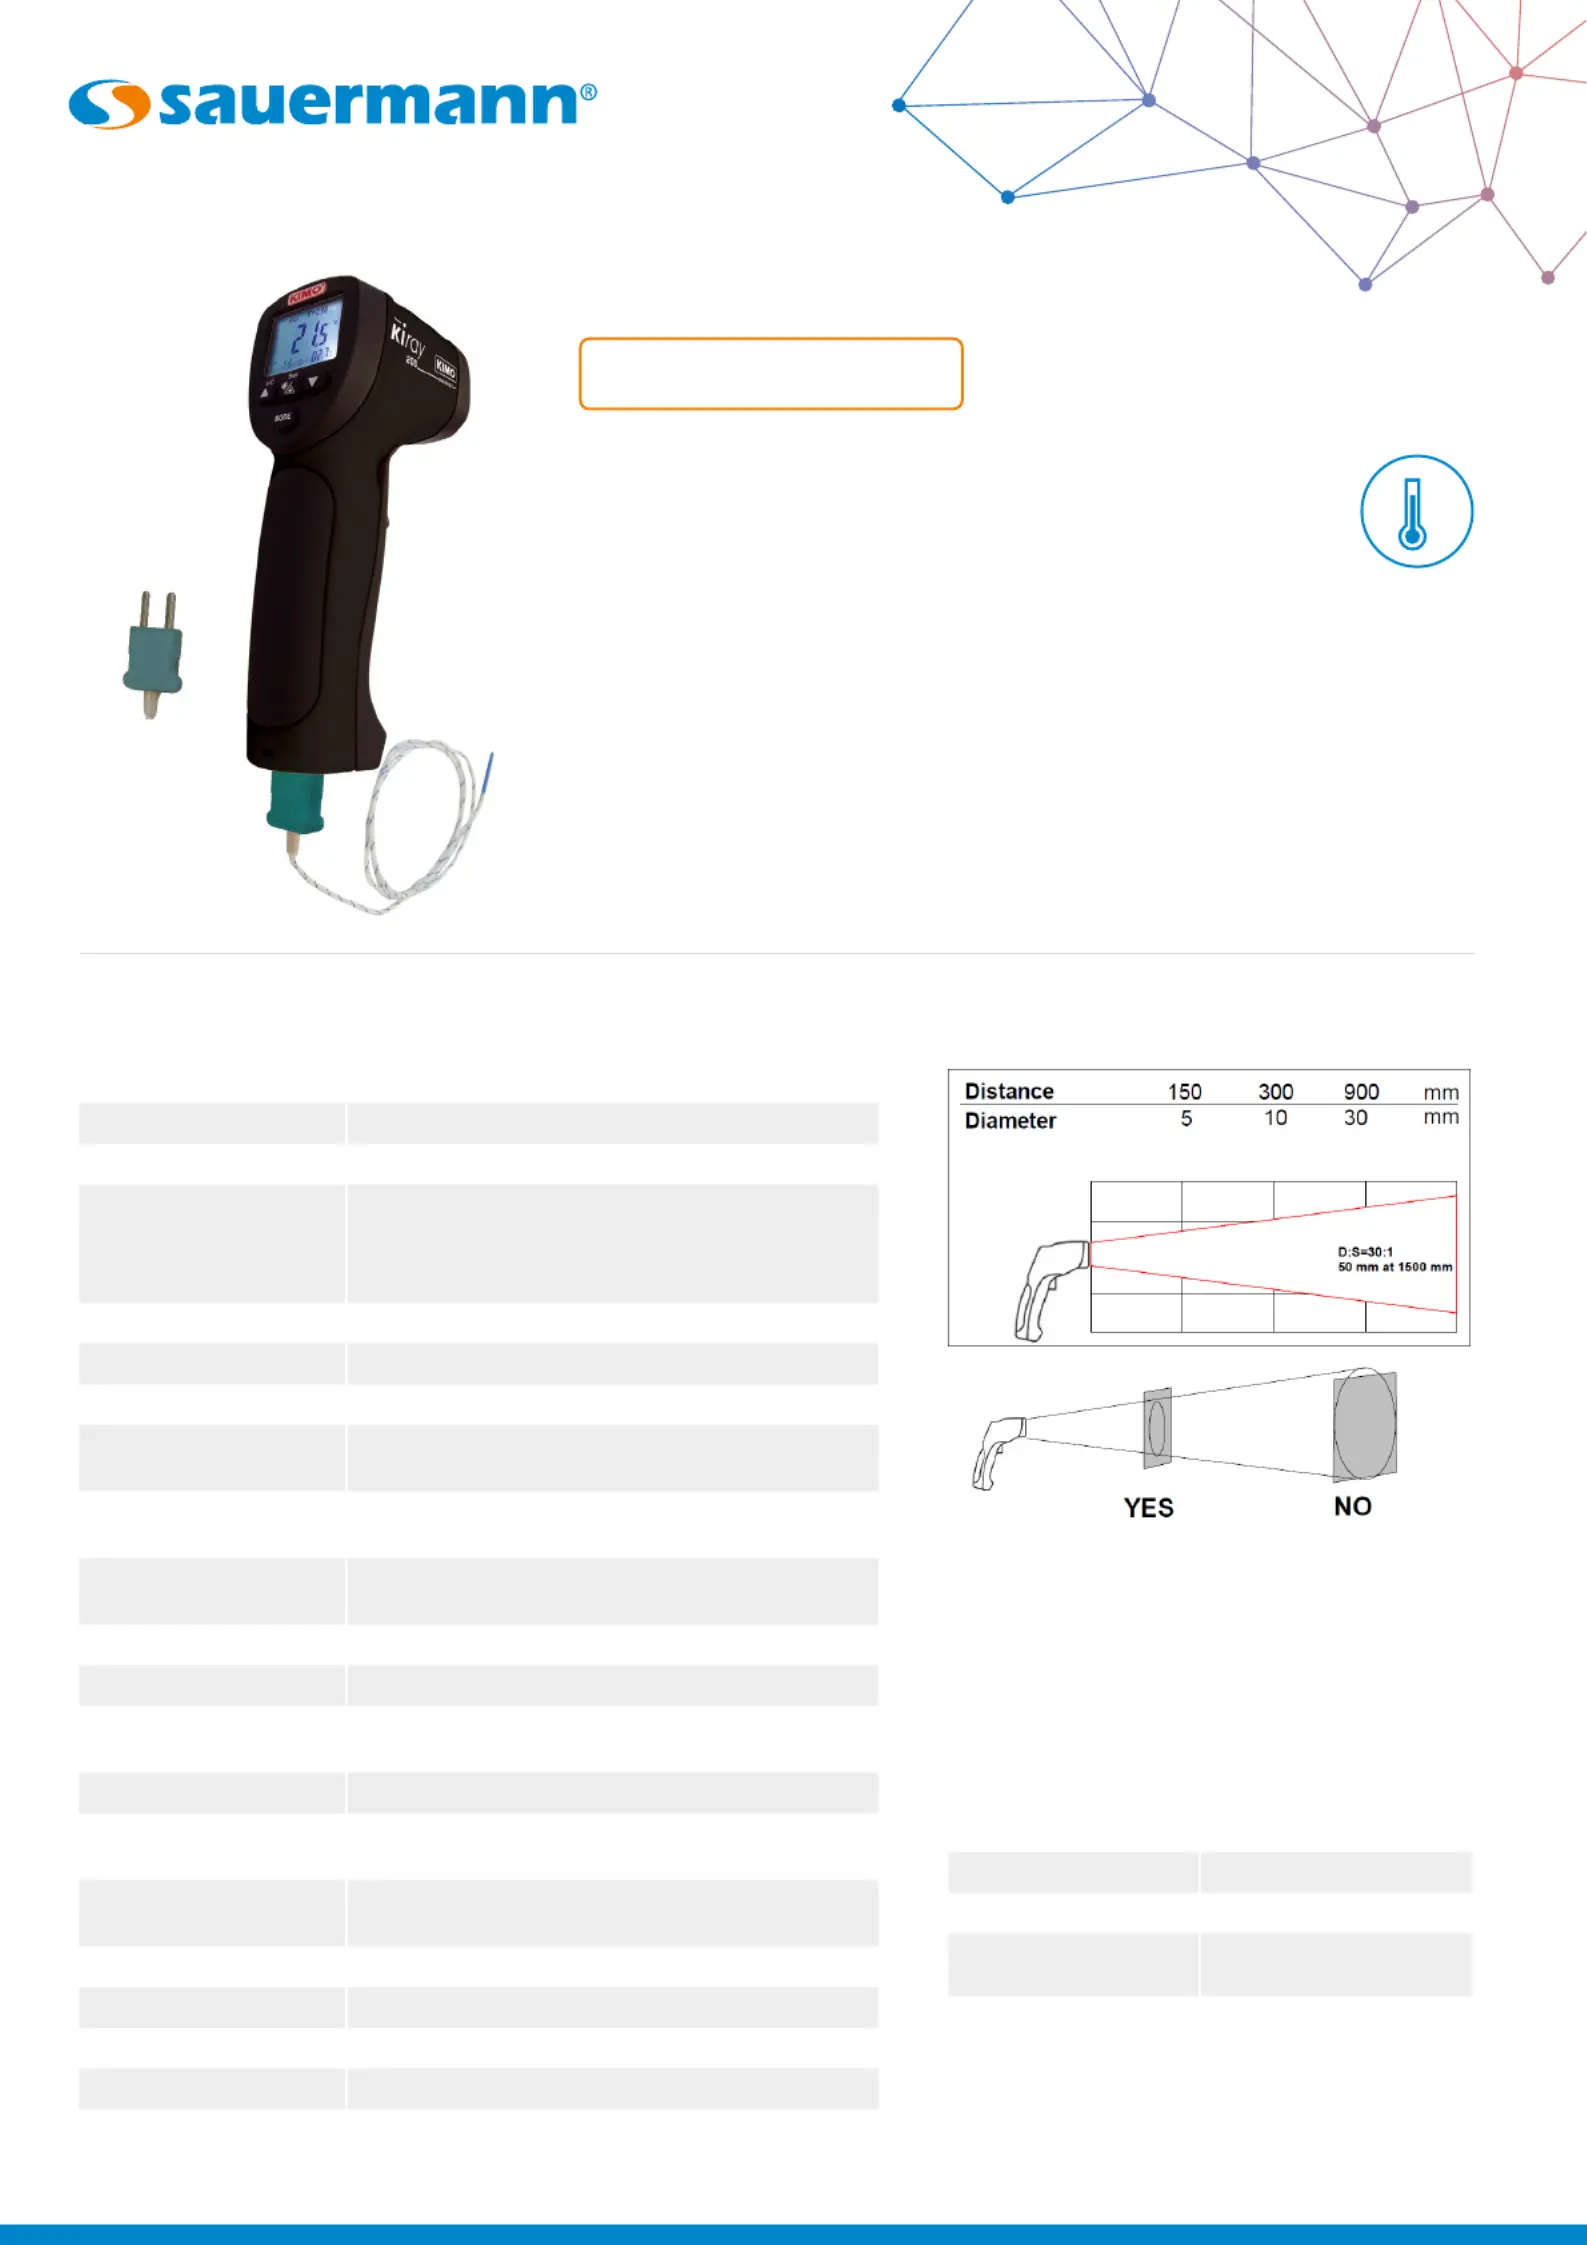
OpticalD.S: 30:1 (50 mm at 1500 mm)
Temperature rangeFrom -50 to +850 °C
Accuracy*
From -50 to -20°C: ±5 °C
From -20 to +200 °C: ±1.5% of reading ±2 °C
From +200 to +538 °C: ±2% of reading ±2 °C
From +538 to +850 °C: ±3.5% of reading ±5 °C
Display resolution0.1 °C
Response timeLess than 1 second
EmissivityAdjustable from 0.10 to 1.00 (pre-set at 0.95)
Over range indication
Display indication: "-0L" for a negative over range,
"0L" for a positive over range.
Laser sighting
Wavelength: 630-670 nm
Output < 1mW, Class 2 (II)
Positive or negative
temperature indication
Automatic (no indication for a positive temperature)
(-) sign for a negative temperature
Display4 ½ digits with LCD backlighted display
Auto-extinctionAutomatic after 7 seconds of inactivity
High/low alarm
Flashing signal on display and beep signal with
adjustable thresholds
Power supplyAlkaline 9 V battery
Autonomy
38 h (inactive laser and backlight)
15 h (active laser and backlight)
Operating temperature
From 0 to +10 °C for a short period
From 11 to +50 °C for a long period
Storage temperatureFrom -20 °C to +60 °C
Relative humidityFrom 10% to 90%RH in operating mode and >80%RH in storage
Dimensions175 x 110 x 45 mm
Weight230 g (included battery)
Memory20 temperature values with unit of measurement (°C or °F)
*Accuracy for an ambient temperature from 18 to 28 °C (with a relative humidity lower than 80% RH)
Infrared thermometer KIRAY 200 is an infrared thermometer used to diagnose,
inspect and check any temperature. Thanks to its elaborated optical system, it
allows an easy and accurate measurement of little distant targets. KIRAY 200
instrument has an internal memory which can save up to 20 measurements.
Technical specications
°C
°F
Distance from target
Make sure that the target is larger than the
size of the laser sighting.
Thermocouple K probe features
Temperature rangeFrom -40 to +400 °C
Display rangeFrom -50 to +1370 °C
Resolution0.1 °C
Accuracy±1.5% of reading ±3 °C
Cable length1 m
Supplied with
thermocouple K probe
Produktspezifikationen
| Marke: | Sauermann |
| Kategorie: | Messung |
| Modell: | KIRAY 200 |
Brauchst du Hilfe?
Wenn Sie Hilfe mit Sauermann KIRAY 200 benötigen, stellen Sie unten eine Frage und andere Benutzer werden Ihnen antworten
Bedienungsanleitung Messung Sauermann

25 September 2025
24 September 2025
24 September 2025
24 September 2025
24 September 2025
29 August 2025
28 August 2025
28 August 2025
28 August 2025
28 August 2025
Bedienungsanleitung Messung
Neueste Bedienungsanleitung für -Kategorien-
1 April 2026
31 März 2026
31 März 2026
31 März 2026
30 März 2026
30 März 2026
30 März 2026
30 März 2026
29 März 2026
29 März 2026