Whirlpool W9I 4S2 OP2 H Bedienungsanleitung
Lies die bedienungsanleitung für Whirlpool W9I 4S2 OP2 H (180 Seiten) kostenlos online; sie gehört zur Kategorie Backöfen. Dieses Handbuch wurde von 6 Personen als hilfreich bewertet und erhielt im Schnitt 3.9 Sterne aus 3.5 Bewertungen. Hast du eine Frage zu Whirlpool W9I 4S2 OP2 H oder möchtest du andere Nutzer dieses Produkts befragen? Stelle eine Frage
Seite 1/180
EN
Quick guide
THANK YOU FOR BUYING A WHIRLPOOL PRODUCT
In order to receive a more complete assistance, please
register your product on www . whirlpool . eu/ register
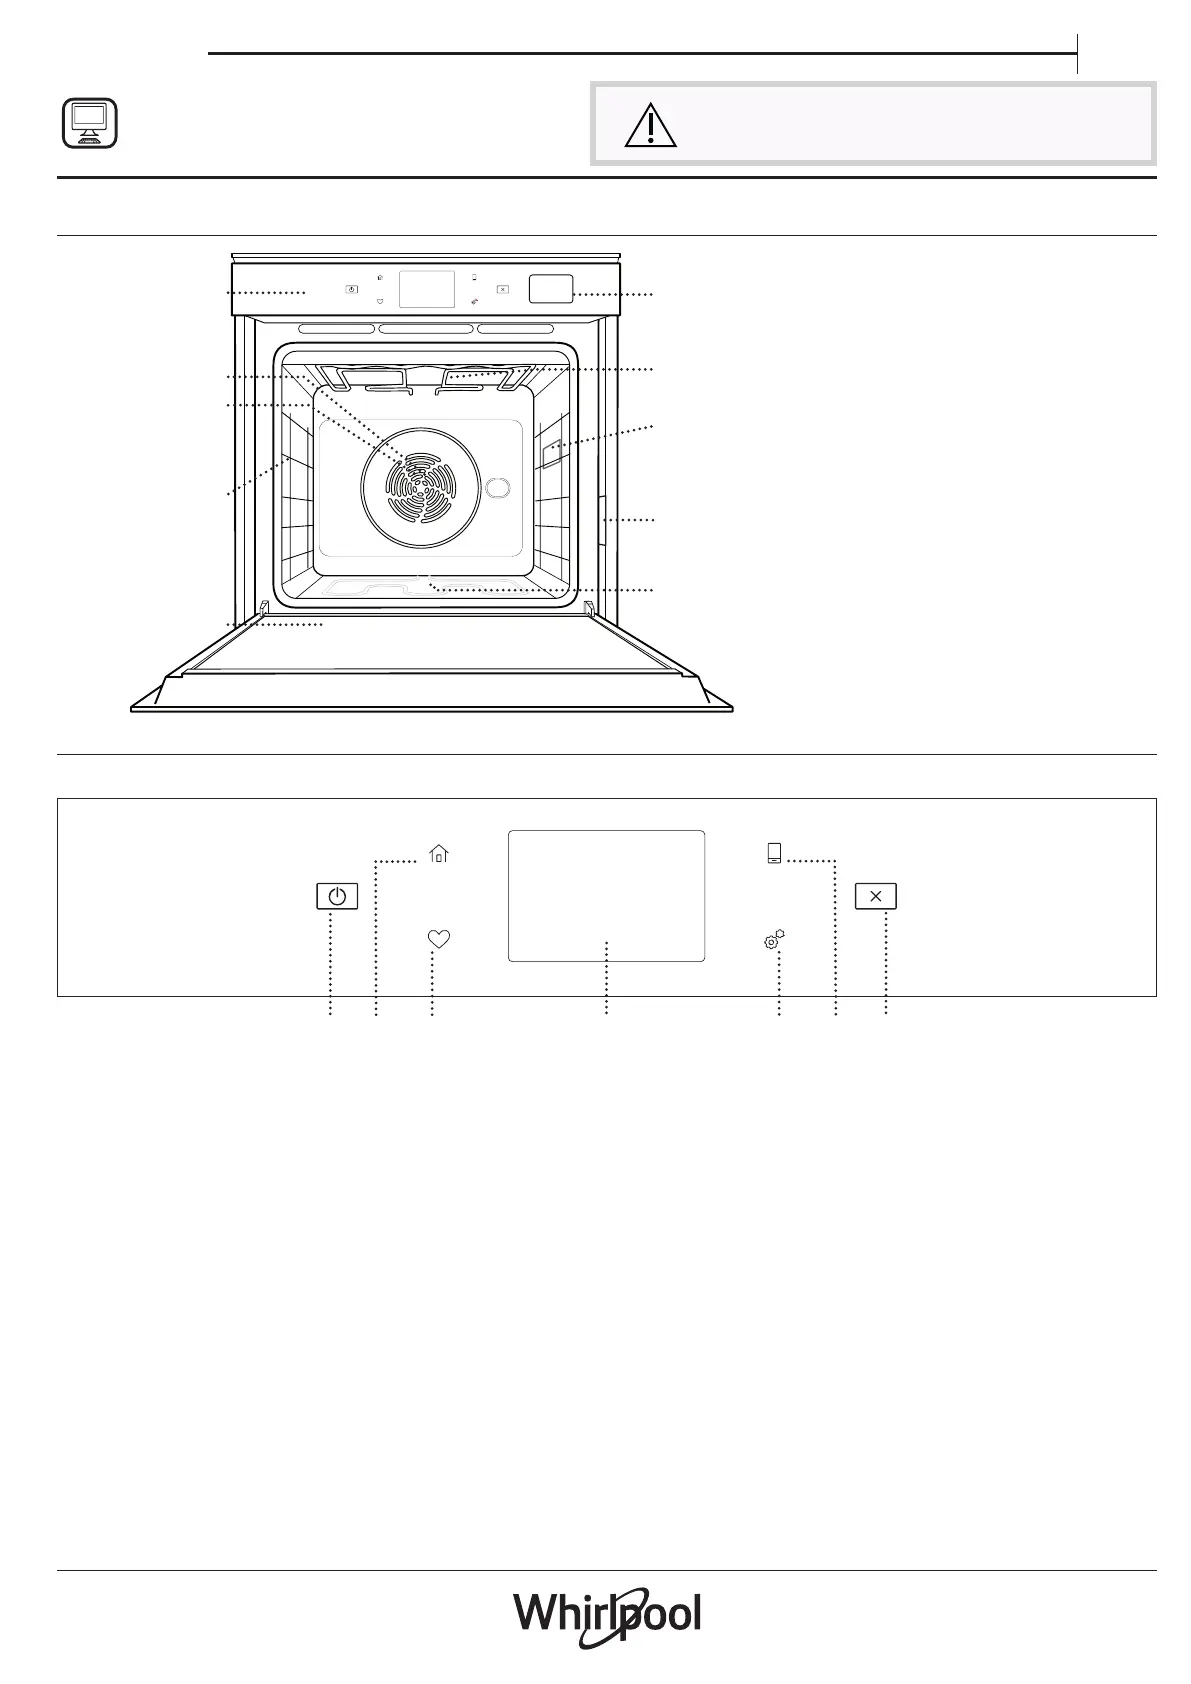
PRODUCT DESCRIPTION
5
4
3
2
1
5
4
3
2
1
1
2
3
4
8
9
10
5
7
6
1.Control panel
2.Fan
3.Circular heating element
(not visible)
4.Shelf guides
(the level is indicated on the
front of the oven)
5.Door
6.Water drawer
7.Upper heating element/grill
8.Lamp
9.Identification plate
(do not remove)
10.Lower heating element
(not visible)
CONTROL PANEL DESCRIPTION
1
23
4
65
7
1.ON / OFF
For switching the oven on and off.
2.HOME
For gaining quick access to the
main menu.
3.FAVORITE
For retrieving up the list of your
favorite functions.
4.DISPLAY
5.TOOLS
To choose from several options
and also change the oven settings
and preferences.
6.REMOTE CONTROL
To enable use of the 6
th
Sense Live
Whirlpool app.
7.CANCEL
To stop any oven function except
the Clock, Kitchen Timer and
Control Lock.
Before using the appliance carefully read the Safety
Instruction.
1
Produktspezifikationen
| Marke: | Whirlpool |
| Kategorie: | Backöfen |
| Modell: | W9I 4S2 OP2 H |
Brauchst du Hilfe?
Wenn Sie Hilfe mit Whirlpool W9I 4S2 OP2 H benötigen, stellen Sie unten eine Frage und andere Benutzer werden Ihnen antworten
Bedienungsanleitung Backöfen Whirlpool

18 Januar 2026
10 Januar 2026
9 Januar 2026
9 Januar 2026
6 Januar 2026
6 Januar 2026
6 Januar 2026
6 Januar 2026
5 Januar 2026
5 Januar 2026
Bedienungsanleitung Backöfen
Neueste Bedienungsanleitung für -Kategorien-
22 Januar 2026
22 Januar 2026
21 Januar 2026