Whirlpool WFES3330RS Bedienungsanleitung
Lies die bedienungsanleitung für Whirlpool WFES3330RS (64 Seiten) kostenlos online; sie gehört zur Kategorie Herd. Dieses Handbuch wurde von 8 Personen als hilfreich bewertet und erhielt im Schnitt 5.0 Sterne aus 4.5 Bewertungen. Hast du eine Frage zu Whirlpool WFES3330RS oder möchtest du andere Nutzer dieses Produkts befragen? Stelle eine Frage
Seite 1/64

W11617173A
IMPORTANT:
Save for local electrical inspector's use.
IMPORTANT :
À conserver pour consultation par l'inspecteur local des installations électriques.
IMPORTANT:
Guarde para tener a disposición del inspector de electricidad local.
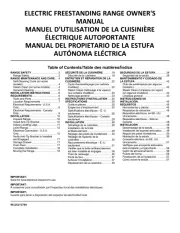
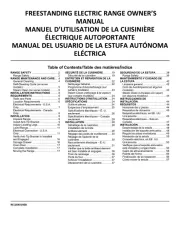
ELECTRIC FREESTANDING RANGE OWNER'S
MANUAL
MANUEL D’UTILISATION DE LA CUISINIÈRE
ÉLECTRIQUE AUTOPORTANTE
MANUAL DEL PROPIETARIO DE LA ESTUFA
AUTÓNOMA ELÉCTRICA
Table of Contents/Table des matières/Índice
RANGE SAFETY ..............................2
Range Safety.................................2
RANGE MAINTENANCE AND CARE....4
Self-Cleaning Cycle (on some
models) ........................................4
Steam Clean (on some models) .........4
General Cleaning............................5
INSTALLATION INSTRUCTIONS .........6
REQUIREMENTS..............................6
Tools and Parts ..............................6
Location Requirements ....................7
Electrical Requirements - U.S.A.
Only.............................................8
Electrical Requirements - Canada
Only.............................................9
INSTALLATION .............................. 10
Unpack Range ............................. 10
Install Anti-Tip Bracket ................... 10
Adjust Leveling Legs ..................... 11
Level Range ................................ 12
Electrical Connection - U.S.A.
Only........................................... 12
Verify Anti-Tip Bracket Is Installed
and Engaged ............................... 17
Storage Drawer ............................ 17
Oven Door .................................. 17
Complete Installation ..................... 18
Moving the Range......................... 18
SÉCURITÉ DE LA CUISINIÈRE ......... 19
Sécurité de la cuisinière ................. 19
ENTRETIEN ET RÉPARATION DE LA
CUISINIÈRE................................... 22
Cycle d’autonettoyage (sur certains
modèles)..................................... 22
Steam Clean (nettoyage à la vapeur)
(sur certains modèles) ................... 23
Nettoyage général ........................ 23
INSTRUCTIONS D’INSTALLATION .... 25
SPÉCIFICATIONS ........................... 25
Outils et pièces............................. 25
Exigences d’emplacement .............. 25
Spécifications électriques – É.-U.
seulement ................................... 26
Spécifications électriques – Canada
seulement ................................... 28
INSTALLATION .............................. 28
Déballage de la cuisinière............... 28
Installation de la bride
antibasculement ........................... 29
Réglage des pieds de nivellement .... 30
Réglage de l’aplomb de la
cuisinière .................................... 30
Raccordement électrique – É.-U.
seulement ................................... 31
Vérifier que la bride antibasculement
est bien installée et engagée ........... 36
Tiroir de remisage ......................... 36
Porte du four................................ 37
Achever l’installation...................... 37
Déplacement de la cuisinière........... 38
SEGURIDAD DE LA ESTUFA............ 39
Seguridad de la estufa ................... 39
MANTENIMIENTO Y CUIDADO DE
LA ESTUFA ................................... 42
Ciclo de autolimpieza (en algunos
modelos)..................................... 42
Steam Clean (Limpieza con vapor)
(en algunos modelos) .................... 43
Limpieza general .......................... 43
INSTRUCCIONES DE
INSTALACIÓN................................ 45
REQUISITOS ................................. 45
Herramientas y piezas ................... 45
Requisitos de ubicación ................. 45
Requisitos eléctricos, en EE. UU.
Únicamente................................. 46
Requisitos eléctricos – Sólo en
Canadá ...................................... 48
INSTALACIÓN................................ 48
Desembalaje de la estufa ............... 48
Instalación del soporte antivuelco..... 49
Regule las patas niveladoras........... 50
Nivelación de la estufa ................... 50
Conexión eléctrica, en EE. UU.
Únicamente................................. 51
Verifique que el soporte antivuelco
esté instalado y enganchado ........... 56
Cajón de almacenamiento .............. 56
Puerta del horno........................... 56
Finalización de la instalación ........... 57
Cómo mover la estufa.................... 57

2
RANGE SAFETY
Your safety and the safety of others are very important.
We have provided many important safety messages in this manual and on your appliance. Always read and obey all safety
messages.
This is the safety alert symbol.
This symbol alerts you to potential hazards that can kill or hurt you and others.
All safety messages will follow the safety alert symbol and either the word “DANGER” or “WARNING.” These
words mean:
DANGER
You can be killed or seriously injured if you don't
immediately follow instructions.
WARNING
You can be killed or seriously injured if you don’t follow
instructions.
All safety messages will tell you what the potential hazard is, tell you how to reduce the chance of injury, and tell you what can
happen if the instructions are not followed.
The range will not tip during normal use. However, the range can tip if you apply too much force or weight to the open door without having
the anti-tip bracket fastened down properly.
WARNING
Tip Over Hazard
A child or adult can tip the range and be killed.
Install anti-tip bracket to floor or wall per installation instructions.
Slide range back so rear range foot is engaged in the slot of the anti-tip bracket.
Re-engage anti-tip bracket if range is moved.
Do not operate range without anti-tip bracket installed and engaged.
Failure to follow these instructions can result in death or serious burns to children and adults.
To verify the anti-tip bracket is properly installed and engaged:
• Slide range forward.
• Look for the anti-tip bracket securely attached to floor or wall.
• Slide range back so rear range foot is under the anti-tip bracket.
• See Installation Instructions for details.
IMPORTANT SAFETY INSTRUCTIONS
WARNING: To reduce the risk of fire, electric shock, or injury to persons when using the appliance, follow basic precautions,
including the following:
�
WARNING: TO REDUCE THE RISK OF TIPPING OF
THE RANGE, THE RANGE MUST BE SECURED BY
PROPERLY INSTALLED ANTI-TIP DEVICES. TO CHECK
IF THE DEVICES ARE INSTALLED PROPERLY, SLIDE
RANGE FORWARD, LOOK FOR ANTI-TIP BRACKET
SECURELY ATTACHED TO FLOOR OR WALL, AND
SLIDE RANGE BACK SO REAR RANGE FOOT IS
UNDER ANTI-TIP BRACKET.
� CAUTION: Do not store items of interest to children in
cabinets above an appliance or on the backguard of an
appliance - children climbing on the appliance to reach
items could be seriously injured.
SAVE THESE INSTRUCTIONS
Produktspezifikationen
| Marke: | Whirlpool |
| Kategorie: | Herd |
| Modell: | WFES3330RS |
Brauchst du Hilfe?
Wenn Sie Hilfe mit Whirlpool WFES3330RS benötigen, stellen Sie unten eine Frage und andere Benutzer werden Ihnen antworten
Bedienungsanleitung Herd Whirlpool

17 Juni 2025

17 Juni 2025
17 Juni 2025
16 Juni 2025
16 Juni 2025

16 Juni 2025

16 Juni 2025

16 Juni 2025
15 Juni 2025
15 Juni 2025
Bedienungsanleitung Herd
- Fagor
- Arçelik
- Saey
- Wanders
- Duux
- Logik
- Ernesto
- Café
- Zelmer
- Imperial
- DeLonghi
- Cookology
- Jøtul
- EasyMaxx
- Grundig
Neueste Bedienungsanleitung für -Kategorien-
20 Juni 2025
20 Juni 2025

20 Juni 2025

20 Juni 2025
20 Juni 2025

20 Juni 2025

20 Juni 2025

20 Juni 2025

20 Juni 2025
20 Juni 2025