Yamaha T-CHIME Bedienungsanleitung
Yamaha musikinstrument T-CHIME
Lies die bedienungsanleitung für Yamaha T-CHIME (6 Seiten) kostenlos online; sie gehört zur Kategorie musikinstrument. Dieses Handbuch wurde von 34 Personen als hilfreich bewertet und erhielt im Schnitt 5.0 Sterne aus 17.5 Bewertungen. Hast du eine Frage zu Yamaha T-CHIME oder möchtest du andere Nutzer dieses Produkts befragen? Stelle eine Frage
Seite 1/6
T-CHIME ASSEMBLY GUIDE
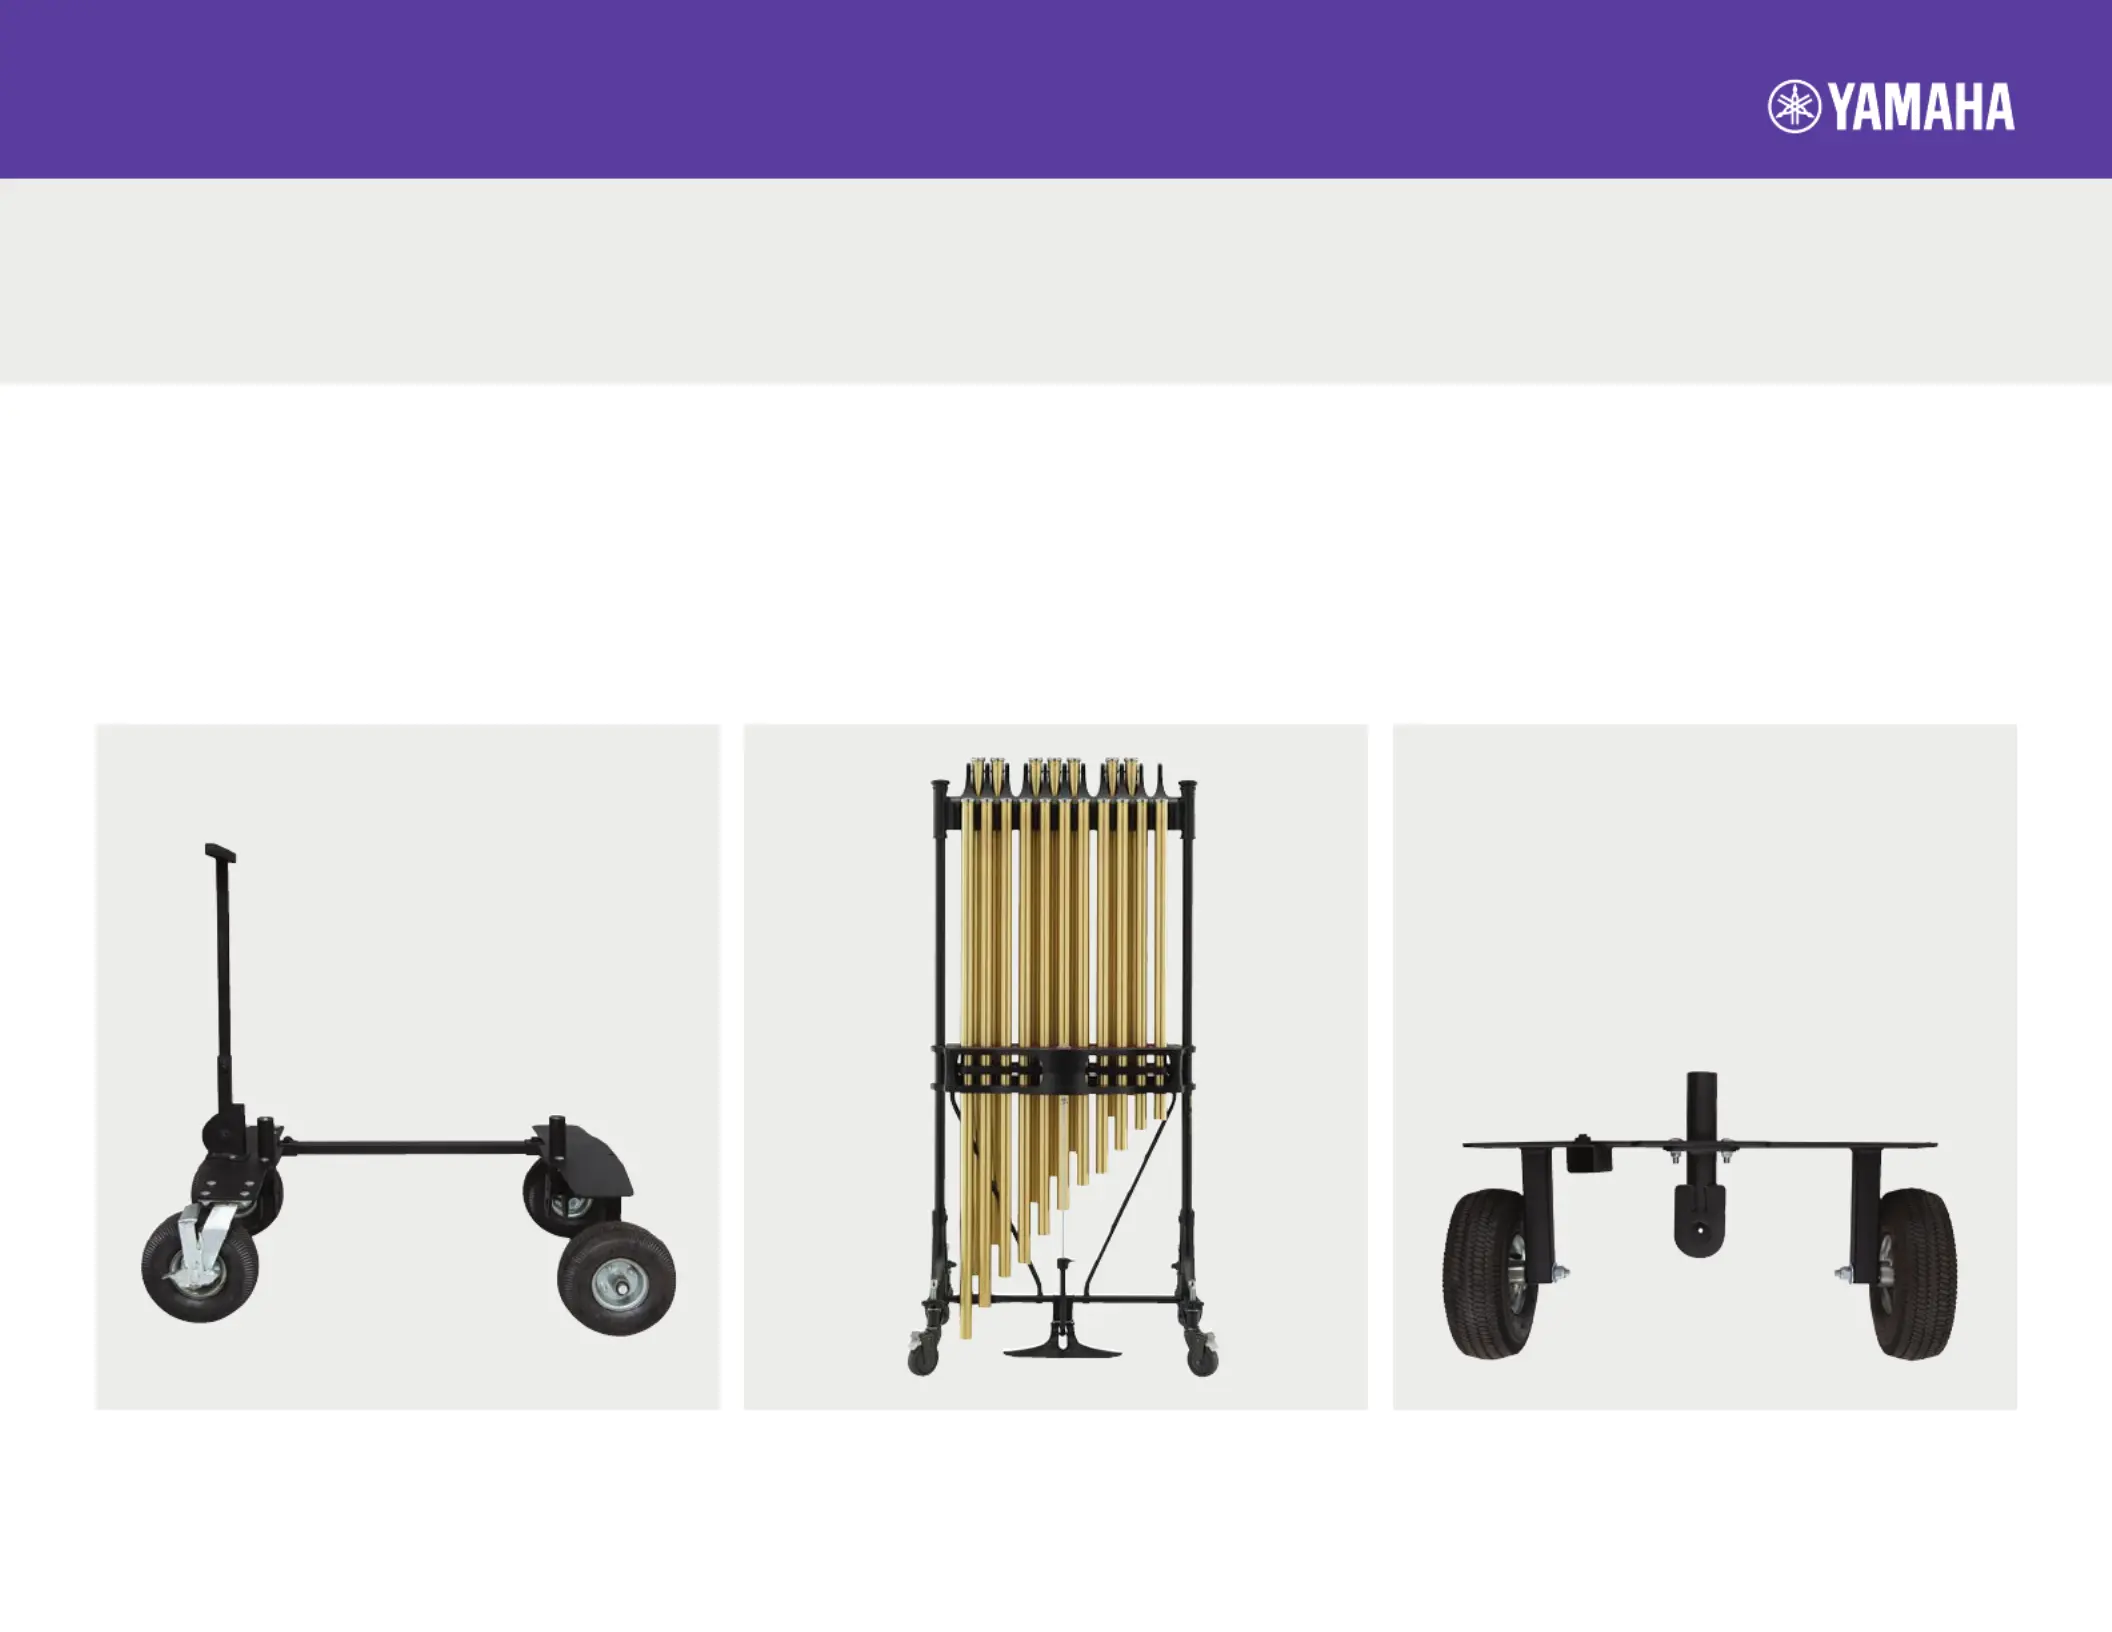
PARTS:
• High-end wheel assembly with stationary wheel
• Low-end wheel assembly with swivel wheels
• Lower crossbar
• Handle
YOU WILL NEED:
1. Hex key provided with the T-CHIME
2. Hex keys provided with the Yamaha YCH-6018
and YCH-7018 chimes
Yamaha T-CHIME Assembly Guide V1.0 - March 2021
Page 1 of 6
Assembly guide online: yamaha.io/tchime
1. The T-CHIME will arrive in a separate box from the
YCH-6018 or YCH-7018 chimes. As you unbox the
Tough-Terrain Frame, you will see that the T-CHIME
handle is not attached. Additionally, a small metal bar
will be located between the low-end and high-end
wheel assembly. This bar is for shipping purposes only
and may be discarded.
2. The concert frame for Yamaha chimes will come fully
assembled. If you have already purchased the YCH-6018
or YCH-7018 chimes, it will need to be disassembled for
reassembly on the T-CHIME frame.
3. Remove the T-CHIME from the box. Place the high-end
wheel assembly with stationary wheels on the ground.
1.2.3.
Produktspezifikationen
| Marke: | Yamaha |
| Kategorie: | musikinstrument |
| Modell: | T-CHIME |
Brauchst du Hilfe?
Wenn Sie Hilfe mit Yamaha T-CHIME benötigen, stellen Sie unten eine Frage und andere Benutzer werden Ihnen antworten
Bedienungsanleitung musikinstrument Yamaha

24 September 2025
24 August 2025
24 August 2025
24 August 2025
23 August 2025
23 August 2025
23 August 2025
23 August 2025
23 August 2025
23 August 2025
Bedienungsanleitung musikinstrument
Neueste Bedienungsanleitung für -Kategorien-
11 Januar 2026
7 Januar 2026
21 Dezember 2025
28 November 2025
25 November 2025
25 November 2025
25 November 2025
23 November 2025
23 November 2025
23 November 2025