Amer AMRDCP100KIT Bedienungsanleitung
Amer Unterstützung für Flachbildschirme AMRDCP100KIT
Lies die bedienungsanleitung für Amer AMRDCP100KIT (2 Seiten) kostenlos online; sie gehört zur Kategorie Unterstützung für Flachbildschirme. Dieses Handbuch wurde von 43 Personen als hilfreich bewertet und erhielt im Schnitt 4.7 Sterne aus 6 Bewertungen. Hast du eine Frage zu Amer AMRDCP100KIT oder möchtest du andere Nutzer dieses Produkts befragen? Stelle eine Frage
Seite 1/2
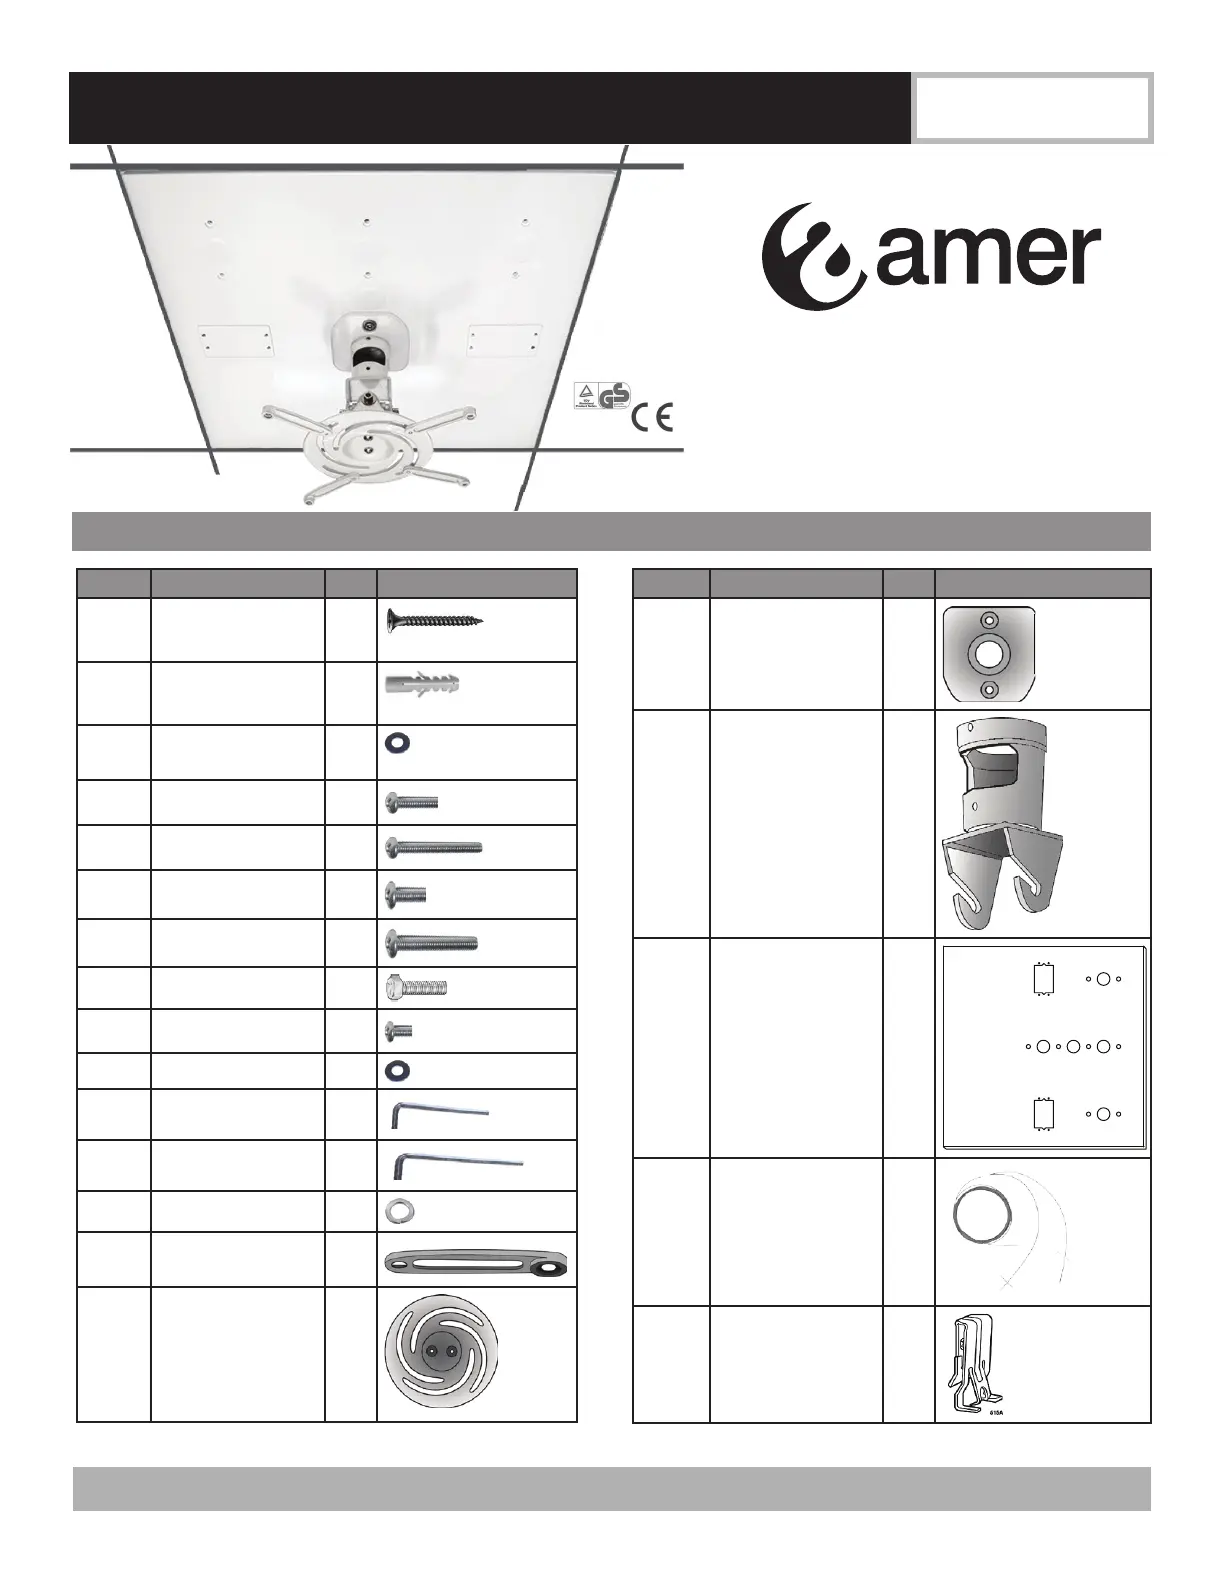
Installation & Assembly:Universal Drop Ceiling Mount
Model Number:
AMRDCP100KIT
IMPORTANT! Read instruction sheet be-
fore you start installation and assembly.
Before you start make sure all parts listed
are included with your product.
Part #Parts DescriptionQty.Part Image
AM5x45 Drywall
Screw
2
Not used with 2x2 plate
BPlastic Anchor2
Not used with 2x2 plate
CM6.5 Washer2
Not used with 2x2 plate
DM4x16 screw4
EM4x40 screw4
FM6x16 screw4
GM6x40 screw4
H8MM hex bolts2
IM5x16 arm screw4
JM5 washer4
KS=3mm Allen
wrench
1
LS=6mm Allen
wrench
1
MM5 washer4
NArm4
OUniversal Spider1
Part #Parts DescriptionQty.Part Image
PMount plate1
QMiddle Piece1
RCeiling Plate1
S
Caddy® Speed Link
1
THold Down Clips 2
Parts List
www.amer.comFor assistance, call 1-800-241-1644
Produktspezifikationen
| Marke: | Amer |
| Kategorie: | Unterstützung für Flachbildschirme |
| Modell: | AMRDCP100KIT |
| Breite: | 609.6 mm |
| Tiefe: | 609.6 mm |
| Gewicht: | 4070 g |
| Produktfarbe: | Weiß |
| Höhe: | 218 mm |
| Befestigungstyp: | Zimmerdecke |
| Höchstgewichtskapazität: | 13.61 kg |
| Neigungswinkelbereich: | 0 - 180 ° |
| Drehungswinkel: | 360 ° |
Brauchst du Hilfe?
Wenn Sie Hilfe mit Amer AMRDCP100KIT benötigen, stellen Sie unten eine Frage und andere Benutzer werden Ihnen antworten
Bedienungsanleitung Unterstützung für Flachbildschirme Amer

30 August 2024
Bedienungsanleitung Unterstützung für Flachbildschirme
Neueste Bedienungsanleitung für -Kategorien-
16 Oktober 2024
15 Oktober 2024
4 Oktober 2024
2 Oktober 2024
2 Oktober 2024
2 Oktober 2024
1 Oktober 2024
1 Oktober 2024
1 Oktober 2024
1 Oktober 2024