AmpliVox Beltblaster S206 Bedienungsanleitung
AmpliVox Nicht kategorisiert Beltblaster S206
Lies die bedienungsanleitung für AmpliVox Beltblaster S206 (12 Seiten) kostenlos online; sie gehört zur Kategorie Nicht kategorisiert. Dieses Handbuch wurde von 16 Personen als hilfreich bewertet und erhielt im Schnitt 4.1 Sterne aus 2 Bewertungen. Hast du eine Frage zu AmpliVox Beltblaster S206 oder möchtest du andere Nutzer dieses Produkts befragen? Stelle eine Frage
Seite 1/12
AmpliVox 650 Anthony Trail Suite D, Northbrook, IL 60062 Phone: (800)267-• • 5486 • Fax: (800)267-5489 www.ampli.com
S206 BELT BLASTER /
S207 BELT BLASTER PRO
WAISTBAND AMPLIFIER
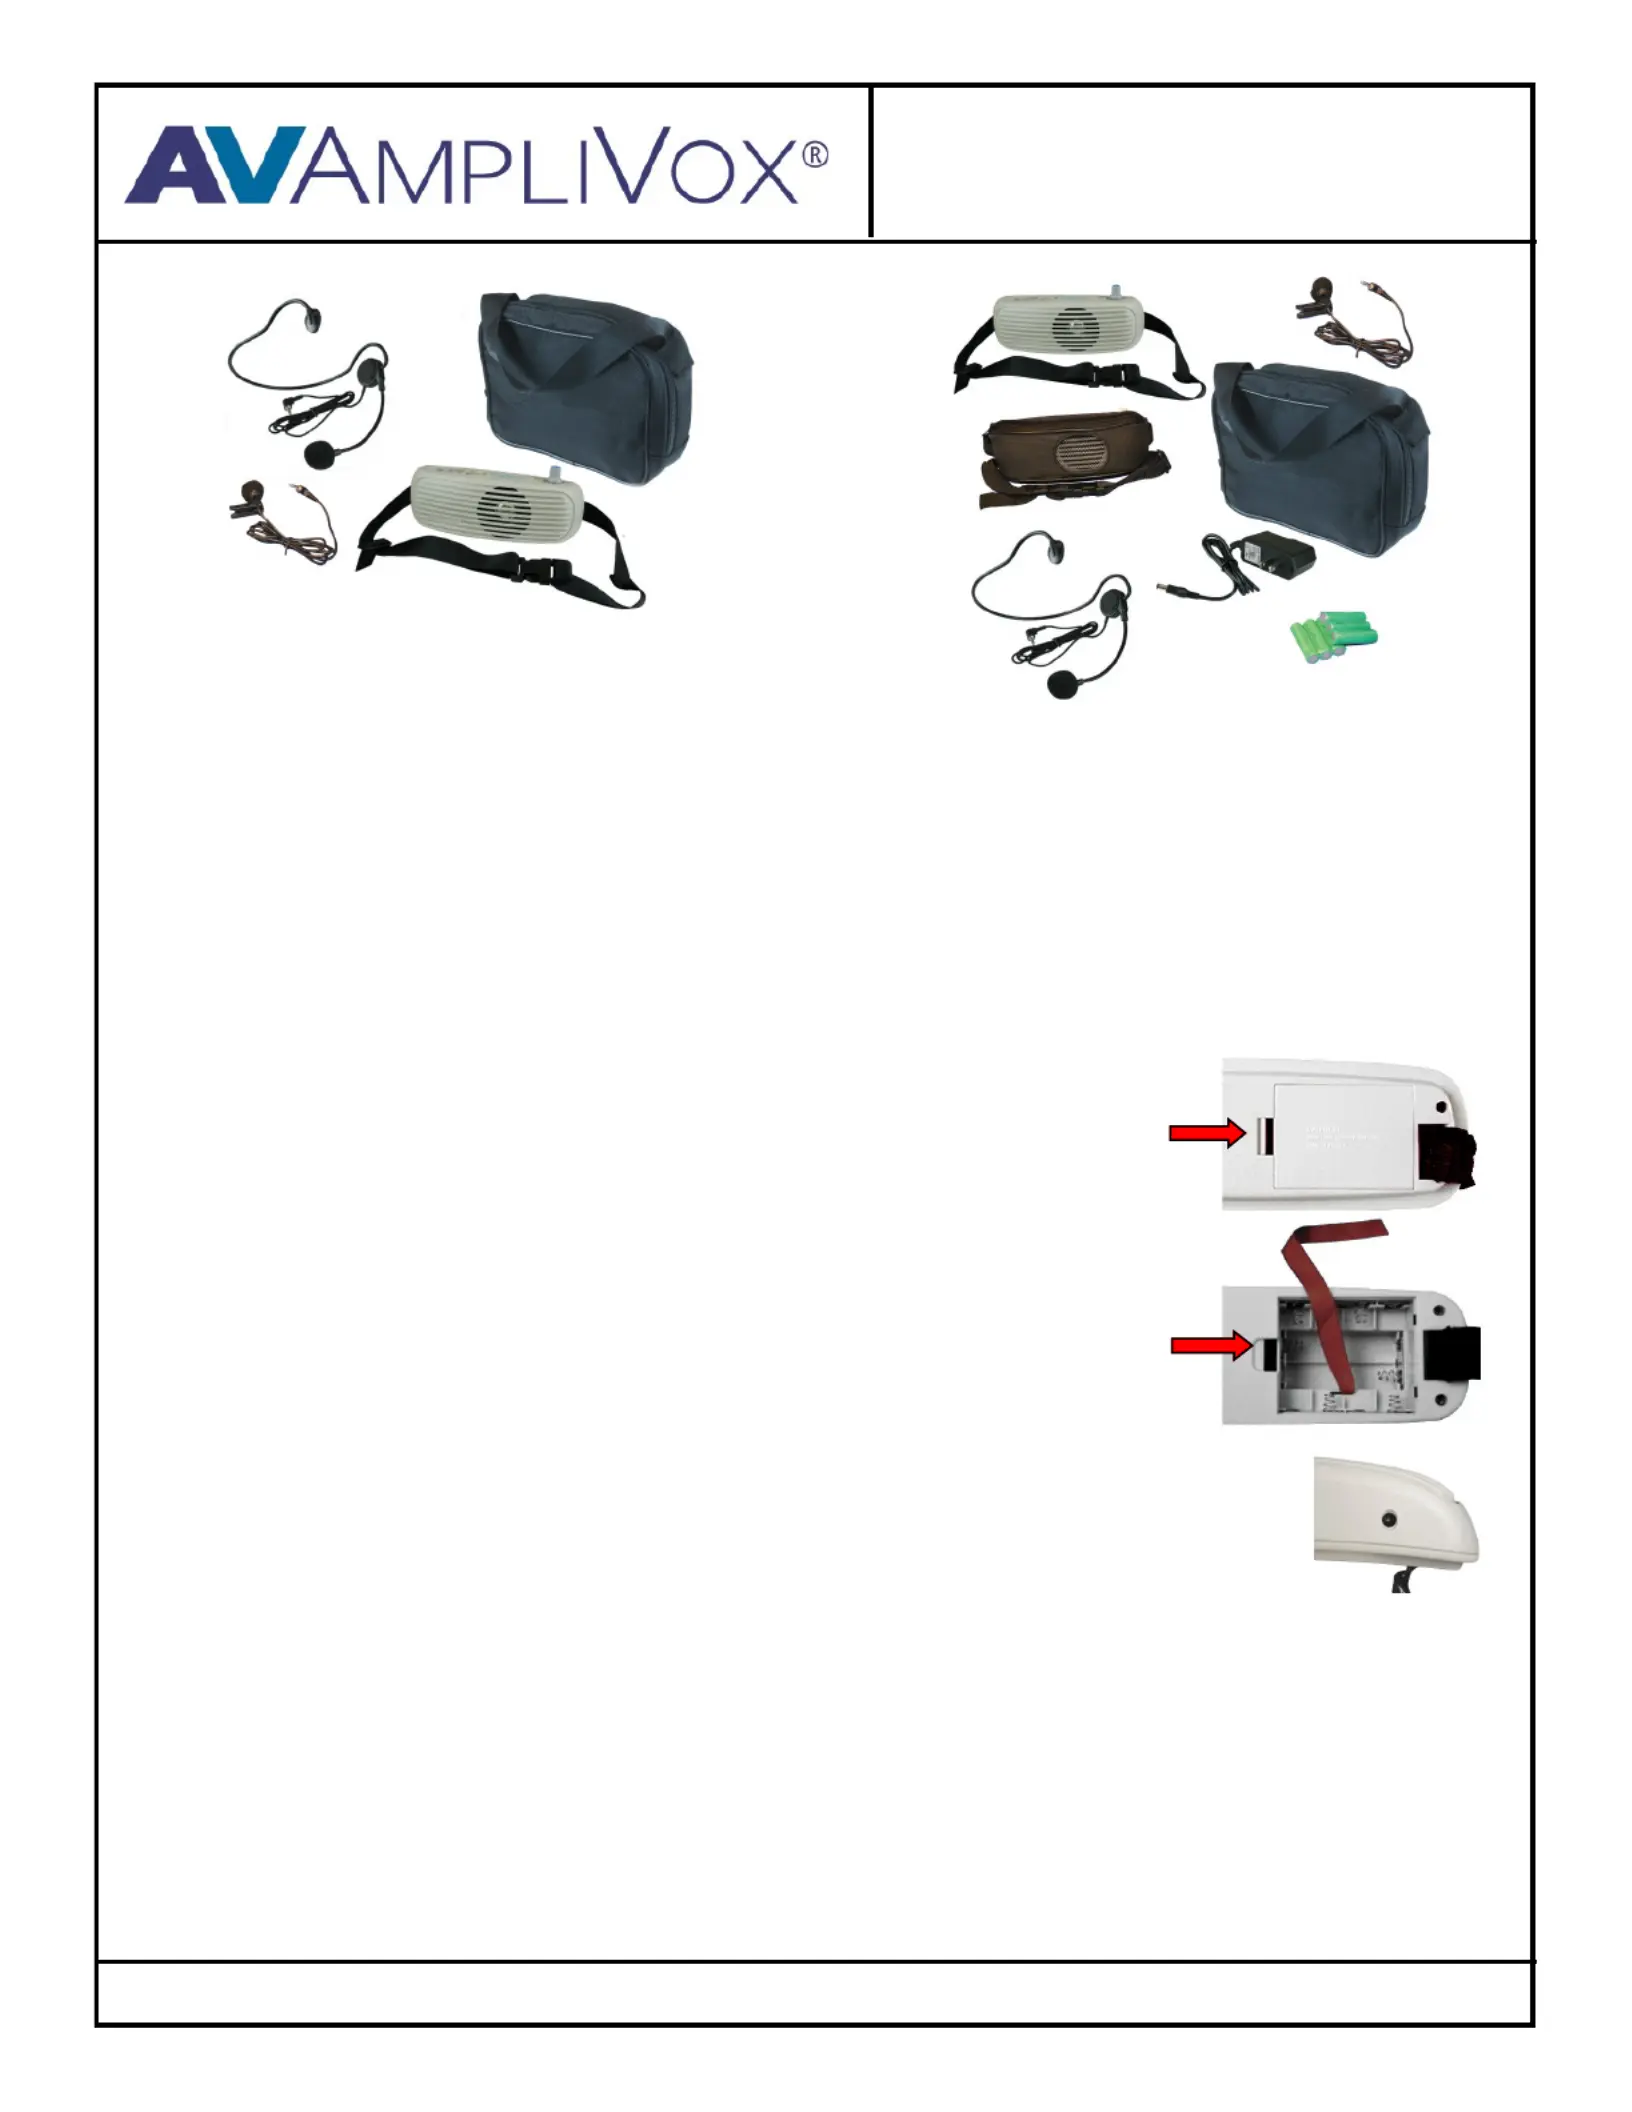
INCLUDED:
1. Belt Blaster Pro Personal Waistband Amplifier
2. 44″ Adjustable Belt
3. Headset and Lapel Microphone
4. AC Adapter/Recharger
5. Storage Case
6. Waistband Case
7.6 - NiMH rechargeable batteries
S206 Batteries: Insert six (6) standard ʺAAʺ batteries (not included) as show below.
Install Batteries:
1. Locate the battery compartment on the right rear side of the amplifier.
2. Press (do not pry) the cover locking tab to the right and lift to remove battery cover.
3.Install the 6 batteries . Follow the picture of battery direction as seen in the bottom of
the holder. Negative () flat side of battery toward spring. -
4. Insert battery cover and press back into place.
BATTERY REPLACEMENT
When batteries will no longer hold a charge, all 6 batteries be replaced at the same (S207) MUST
time. Mixing old and new batteries can lead to battery failure.
CHARGING BATTERIES FOR FIRST USE (S207)
Your new Belt Blaster Pro is shipped with 6 NiMH rechargeable batteries. Once they have been installed,
they must receive a deep charge (24 hours) before being used.
1. Insert battery charger mini plug (AC adapter) into the charging port located on the bottom of the amplifier.
2.Plug the adapter into a working power outlet. Charge the Belt Blaster Pro for 24 hours for the first charge.
After this, only 8 14 hour charge is necessary-
.
S207 Rechargeable Batteries: S207 The rechargeable Nickel Metal Hydride batteries of the Belt Blaster Pro will have a life
expectancy of approximately 2 years. Actual life will vary significantly depending on your usage and charging habits. There may
be a time when you need to use backup power to get through a presentation. The Belt Blaster PRO was intentionally designed
to accommodate standard batteries for just such occasions.″AA″
NOTE:
The AC Adapter/Charger can be used to recharge the batteries . Can not power the amplifier simultaneously.ONLY
CAUTION! NEVER PLUG IN AC ADAPTER/CHARGER WITH NONRECHARGEABLE BATTERIES INSIDE AMPLIFIER. -
SERIOUS DAMAGE MAY BE CAUSED TO BATTERIES AND AMPLIFIER.
1. Belt Blaster Personal Waistband Amplifier
2. 44″ Adjustable Belt
3. Headset and Lapel Microphone
4. Storage Case
INCLUDED:
S206S207
INSERTING/CHANGING THE BATTERIES
CHARGER PORT
Produktspezifikationen
| Marke: | AmpliVox |
| Kategorie: | Nicht kategorisiert |
| Modell: | Beltblaster S206 |
Brauchst du Hilfe?
Wenn Sie Hilfe mit AmpliVox Beltblaster S206 benötigen, stellen Sie unten eine Frage und andere Benutzer werden Ihnen antworten
Bedienungsanleitung Nicht kategorisiert AmpliVox

15 Oktober 2025
25 September 2025
8 Juli 2025
26 Juni 2025
26 Juni 2025
12 Juni 2025
11 Juni 2025
11 Juni 2025
11 Juni 2025
10 Juni 2025
Bedienungsanleitung Nicht kategorisiert
Neueste Bedienungsanleitung für -Kategorien-
3 April 2026
3 April 2026
3 April 2026
3 April 2026
3 April 2026
3 April 2026
3 April 2026
3 April 2026
3 April 2026
3 April 2026