AXESS AXDSPL-CH8 Bedienungsanleitung
AXESS Nicht kategorisiert AXDSPL-CH8
Lies die bedienungsanleitung für AXESS AXDSPL-CH8 (16 Seiten) kostenlos online; sie gehört zur Kategorie Nicht kategorisiert. Dieses Handbuch wurde von 31 Personen als hilfreich bewertet und erhielt im Schnitt 4.9 Sterne aus 6 Bewertungen. Hast du eine Frage zu AXESS AXDSPL-CH8 oder möchtest du andere Nutzer dieses Produkts befragen? Stelle eine Frage
Seite 1/16
AXDSPL-CH8
INSTALLATION INSTRUCTIONS
AxxessInterfaces.com © COPYRIGHT 2024 METRA ELECTRONICS CORPORATION REV. 7/24/24 INSTAXDSPL-CH8
INTERFACE FEATURES
TOOLS & INSTALLATION ACCESSORIES REQUIRED
• Crimping tool and connectors, or solder gun,
solder, and heat shrink • Tape • Wire cutter
• Zip-ties • Multimeter
TABLE OF CONTENTS
Installation & Installation Options
........................2
Connections ........................................................3-4
Rebooting the U-Connect Radio ..........................5
Mobile App: Quick Setup ...................................6-7
Specifications .........................................................8
•Includes a DSP (Digital Signal Processor)
•Selectable 15 Band graphic EQ or 5 Band Parametric EQ
•4 inputs and 6 individually assignable outputs
•Independent equalization for front, rear, and sub
•Selectable low pass, band pass, and high pass filters
•Selectable crossover slopes; 12db, 24db, 36db, 48db
•Each channel can be delayed independently up to 10ms
•Clipping detection and limiting circuits
•Designed for both amplified and non-amplified models
•Easy behind the radio installation with pre-wired harness
(Features continued on next page)
APPLICATIONS
VisitAxxessInterfaces.com for current application list
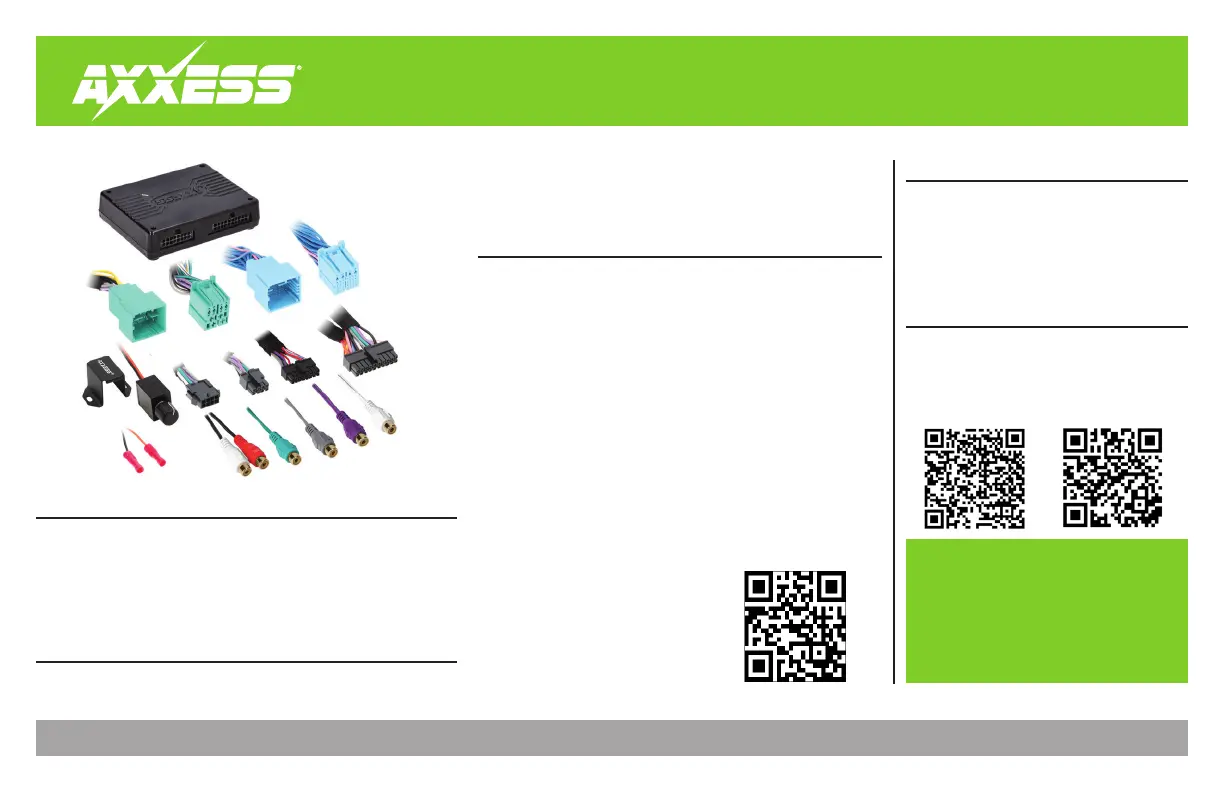
INTERFACE COMPONENTS
• AXDSPL-CH8 interface
• AXDSPL-CH8 interface harness
• AXDSPL-CH8 vehicle T-harness
• Bass knob
Chrysler DSP Interface (with Pre-Wired Harness)
2020-Up
www.MetraOnline.com
MetraOnline.com may be used to assist
with dash assembly instructions. Simply
enter your Year, Make, Model vehicle
into the vehicle fit guide and look for the
Dash Kit Installation Instructions.
Google Play Store
Apple App Store
iOS 12.1 or higher
ATTENTION: With the key out of the ignition, disconnect
the negative battery terminal before installing this
product. Ensure that all installation connections,
especially the air bag indicator lights, are plugged in
before reconnecting the battery or cycling the ignition
to test this product.
NOTE: Refer also to the instructions included with the
aftermarket accessory before installing this device.
Produktspezifikationen
| Marke: | AXESS |
| Kategorie: | Nicht kategorisiert |
| Modell: | AXDSPL-CH8 |
Brauchst du Hilfe?
Wenn Sie Hilfe mit AXESS AXDSPL-CH8 benötigen, stellen Sie unten eine Frage und andere Benutzer werden Ihnen antworten
Bedienungsanleitung Nicht kategorisiert AXESS

31 Juli 2025
31 Juli 2025
14 Juli 2025
14 Juli 2025
14 Juli 2025
14 Juli 2025
14 Juli 2025
14 Juli 2025
14 Juli 2025
14 Juli 2025
Bedienungsanleitung Nicht kategorisiert
Neueste Bedienungsanleitung für -Kategorien-
3 April 2026
3 April 2026
3 April 2026
3 April 2026
3 April 2026
3 April 2026
3 April 2026
3 April 2026
3 April 2026
3 April 2026