AXESS AXTO-CH2 Bedienungsanleitung
AXESS
Nicht kategorisiert
AXTO-CH2
Lies die bedienungsanleitung für AXESS AXTO-CH2 (8 Seiten) kostenlos online; sie gehört zur Kategorie Nicht kategorisiert. Dieses Handbuch wurde von 26 Personen als hilfreich bewertet und erhielt im Schnitt 4.8 Sterne aus 13.5 Bewertungen. Hast du eine Frage zu AXESS AXTO-CH2 oder möchtest du andere Nutzer dieses Produkts befragen? Stelle eine Frage
Seite 1/8

AXTO-CH2
I N S TA L L A T I O N I N S T R U C T I O N S
AxxessInterfaces.com © COPYRIGHT 2019 METRA ELECTRONICS CORPORATION REV. 10/10/19 INSTAXTO-CH2
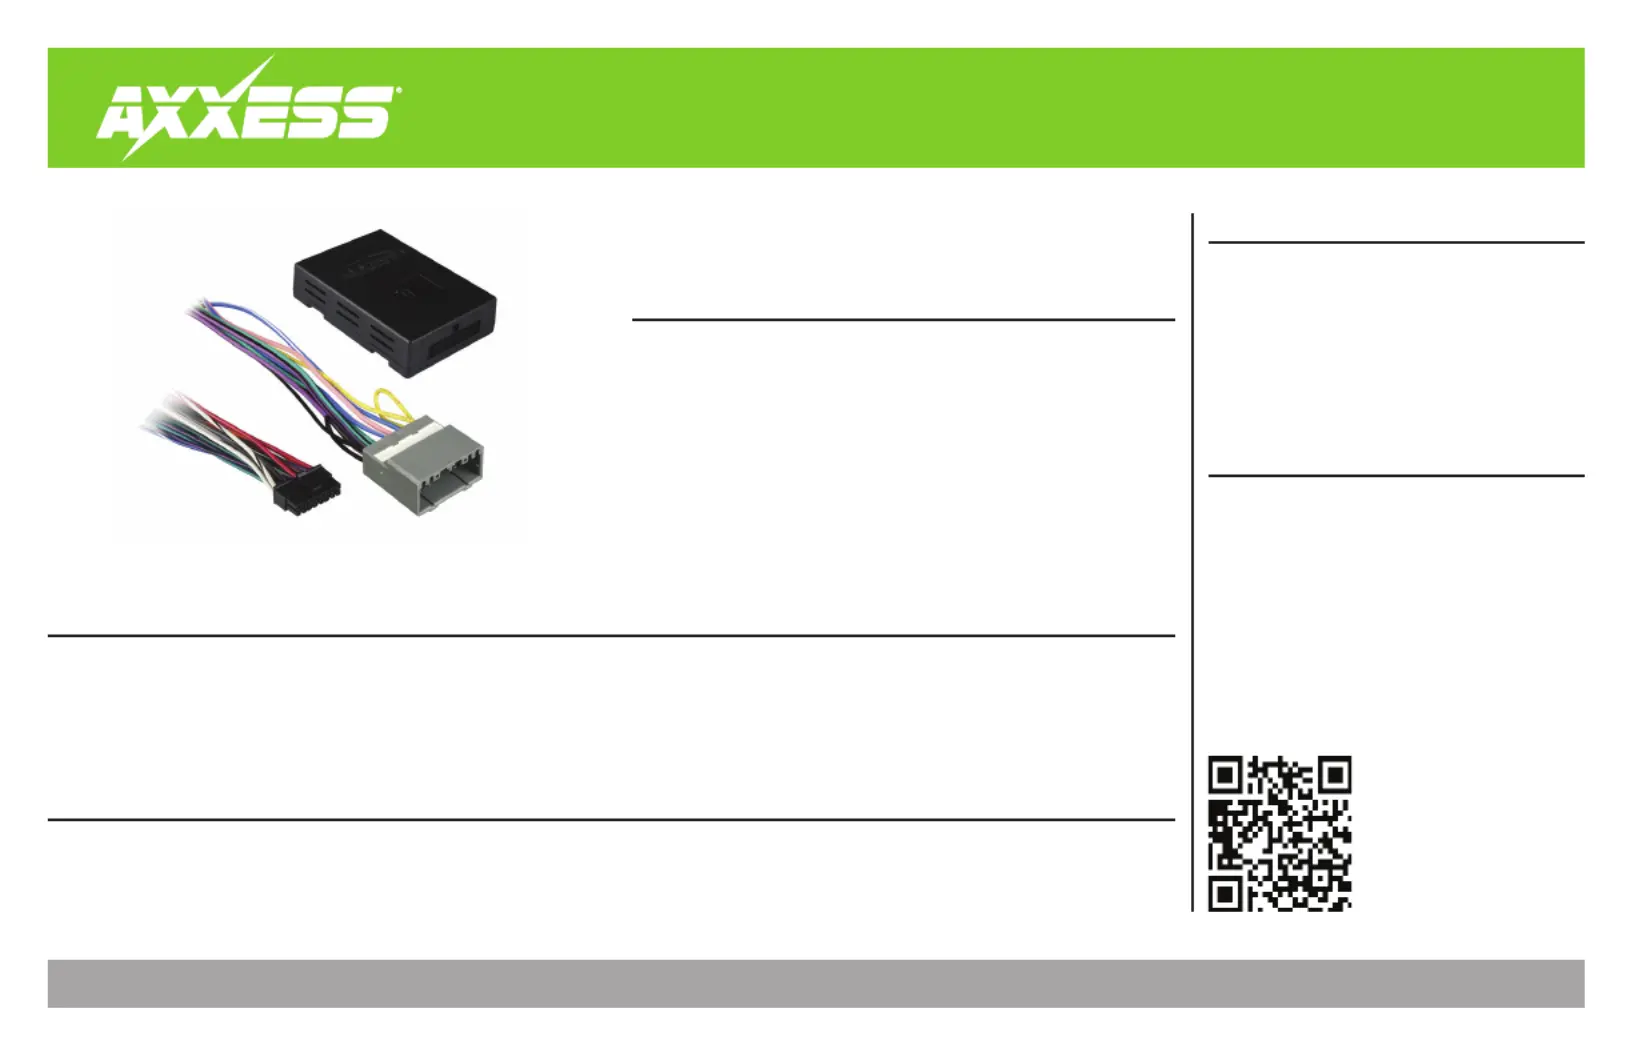
Product Info
INTERFACE FEATURES
INTERFACE COMPONENTS
• AXTO-CH2 interface
• AXTO-CH2 harness
• 16-pin harness
TOOLS REQUIRED
• Cutting tool • Crimping tool • Tape
• Connectors (example: butt-connectors, bell
caps, etc.) • Small flat-blade screwdriver
TABLE OF CONTENTS
Connections ............................................................2
Installation .............................................................3
Programming .........................................................3
Audio level adjustment .........................................3
Chrysler/Dodge Data Interface 2002-2008
APPLICATIONS
• Provides accessory power (12-volt 10-amp)
• Retains R.A.P. (retained accessory power)
• Designed for amplified systems
• Provides NAV outputs (parking brake, reverse, speed sense)
• Pre-wired AXSWC harness (AXSWC sold separately)
• Adjustable gain control for overall volume
• High level speaker input
• Retains balance and fade
• Micro-B USB updatable
CHRYSLER
Pacifica 2004-2008
DODGE
Ram 1500 2002-2004
Ram 2500/3500 2003-2004

2
CONNECTIONS
From the 16-pin harness to the aftermarket radio, connect the:
• wire to the accessory wire.Red
• Blue/White wire to the amp turn on wire.
• wire to the front right positive speaker output.Gray
• Gray/Black wire to the front right negative speaker output.
• White wire to the front left positive speaker output.
• White/Black wire to the front left negative speaker output.
• wire to the rear right positive speaker output.Purple
• wire to the rear right negative speaker output.Purple/Black
• Green wire to the rear left positive speaker output.
• Green/Black wire to the rear left negative speaker output.
The following (3) wires are only for multimedia/navigation radios that require these wires.
• wire to the VSS/speed sense wire.Blue/Pink
• Green/Purple wire to the reverse wire.
• Light Green wire to the parking brake wire
• Tape off and disregard the following (2) wires, they will not be used in this application:
Brown Orange/White,
From the AXTO-CH2 harness to the aftermarket radio, connect the:
• wire to the ground wire.Black
• Yellow wire to the battery wire.
• Orange wire to the illumination wire (if applicable).
12-pin AXSWC harness & 3.5mm jack:
• The 12-pin harness & 3.5mm jack is to be used with the (sold separately) to AXSWC AXSWC
retain steering wheel audio controls. If the is not being used, disregard this harness. AXSWC
If it is to be used, refer to the AXSWC instructions for radio connections and programming.
Disregard the harness that comes with the .AXSWC

3
REV. 10/10/2019 INSTAXTO-CH2
INSTALLATION AUDIO LEVEL ADJUSTMENT
1. Connect the , and the 16-pin harness AXTO-CH2 harness, to the AXTO-CH2 interface.
2. Connect the AXTO-CH2 harness to the wiring harness in the vehicle.
Attention! If the interface loses power for any reason, the following steps will need to be
performed again.
1. Cycle the ignition on and wait until the radio comes on.
If the radio doesn’t come on within 60 seconds, cycle the key off, then unplug the Note:
interface. Check all connections, reconnect the interface, then try again.
2. Cycle the ignition off, then back on.
3. Test all functions of the installation for proper operation.
1. With the vehicle and radio turned on, turn the volume up 3/4 of the way.
2. With a small flat-blade screwdriver, adjust the potentiometer clockwise to raise the audio
level; counterclockwise to lower the audio level.
3. Once at a desired level, audio level adjustment is complete.
PROGRAMMING
Produktspezifikationen
Marke: | AXESS |
Kategorie: | Nicht kategorisiert |
Modell: | AXTO-CH2 |
Brauchst du Hilfe?
Wenn Sie Hilfe mit AXESS AXTO-CH2 benötigen, stellen Sie unten eine Frage und andere Benutzer werden Ihnen antworten
Bedienungsanleitung Nicht kategorisiert AXESS
10 September 2024
6 September 2024
6 September 2024
6 September 2024
6 September 2024
6 September 2024
6 September 2024
6 September 2024
6 September 2024
6 September 2024
Bedienungsanleitung Nicht kategorisiert
- JBC
- AddLiving
- Auriol
- GFI System
- Fine Dine
- Orbegozo
- Kinderkraft
- AMS Neve
- ViewCast
- Syrp
- Pawa
- Suzuki
- Burigotto
- Lumag
- Pressalit
Neueste Bedienungsanleitung für -Kategorien-
15 Juni 2025
15 Juni 2025
15 Juni 2025
15 Juni 2025
15 Juni 2025
15 Juni 2025
15 Juni 2025
15 Juni 2025
15 Juni 2025
15 Juni 2025