Boss B65LED Bedienungsanleitung
Boss Autolautsprecher B65LED
Lies die bedienungsanleitung für Boss B65LED (19 Seiten) kostenlos online; sie gehört zur Kategorie Autolautsprecher. Dieses Handbuch wurde von 34 Personen als hilfreich bewertet und erhielt im Schnitt 5.0 Sterne aus 2 Bewertungen. Hast du eine Frage zu Boss B65LED oder möchtest du andere Nutzer dieses Produkts befragen? Stelle eine Frage
Seite 1/19
B65LED
Installation Instructions
300 Watts / 6.5” (165 mm)
3-Way Full Range Speakers (1 Pair)
Thank you for purchasing a BOSS Audio Systems product. Please read through these
instructions carefully so you will know how to install this product properly.
Package Contents
•2x Speakers with grilles
•2x Speaker wires with polarity connectors
•8x Mounting screws and clip nuts
•Installation Instructions/ Cut-out Template/
Warranty
Specications
•3-way full range system
Woofer: 6.5” (165 mm)
polypropylene cone, rubber surround
Midrange: 1” (25 mm)
Tweeter: 0.5” (13 mm)
•Output power: max 300 W
•Nominal impedance: 4 Ω
•Frequency response: 75 Hz – 20 kHz
•Sensitivity: 87 dB (1 watt/1 meter)
•LED Power supply: 12 V/DC
•LED current consumption: 20 mA
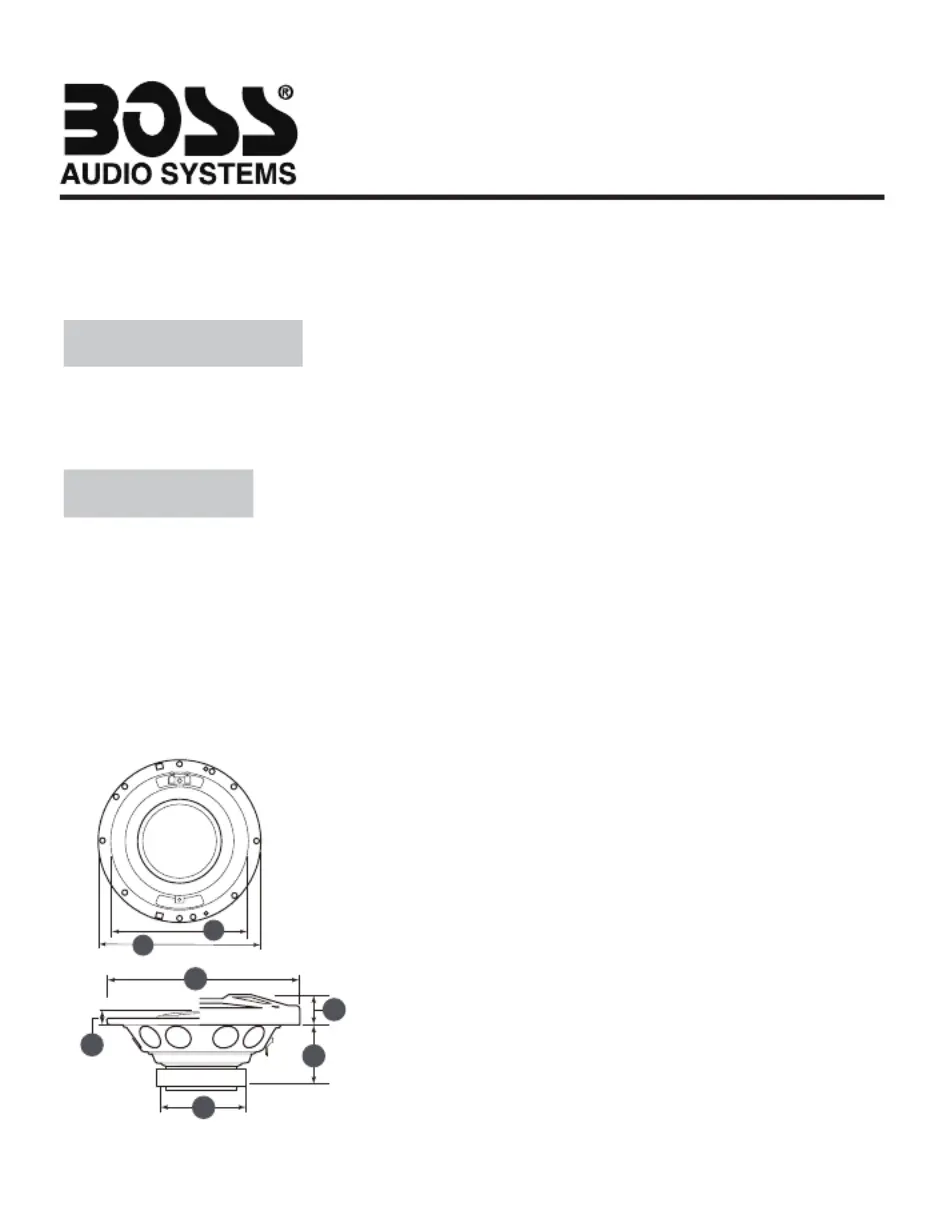
Speaker dimensions
A
B
A. Overall diameter: 6.61” (168 mm)
B. Mounting hole diameter: 5.59” / (142 mm)
C.Mounting depth: 2.13” (54 mm)
D. Grill protrusion: 0.79” (20 mm)
E.Overall speaker with grill: 6.89” (175 mm)
F. Tweeter protrusion: 0.5” (13 mm)
G. Outer motor diameter: 3.15” (80 mm)
C
D
E
F
G
- 1 -
Produktspezifikationen
| Marke: | Boss |
| Kategorie: | Autolautsprecher |
| Modell: | B65LED |
Brauchst du Hilfe?
Wenn Sie Hilfe mit Boss B65LED benötigen, stellen Sie unten eine Frage und andere Benutzer werden Ihnen antworten
Bedienungsanleitung Autolautsprecher Boss

5 September 2024
31 August 2024
19 August 2024
17 August 2024
15 August 2024
14 August 2024
14 August 2024
13 August 2024
11 August 2024
10 August 2024
Bedienungsanleitung Autolautsprecher
Neueste Bedienungsanleitung für -Kategorien-
15 Oktober 2024
14 Oktober 2024
14 Oktober 2024
10 Oktober 2024
8 Oktober 2024
7 Oktober 2024
7 Oktober 2024
7 Oktober 2024
2 Oktober 2024
2 Oktober 2024