Boyo VTB201MA Bedienungsanleitung
Lies die bedienungsanleitung für Boyo VTB201MA (1 Seiten) kostenlos online; sie gehört zur Kategorie Dashcam. Dieses Handbuch wurde von 45 Personen als hilfreich bewertet und erhielt im Schnitt 4.9 Sterne aus 5 Bewertungen. Hast du eine Frage zu Boyo VTB201MA oder möchtest du andere Nutzer dieses Produkts befragen? Stelle eine Frage
Seite 1/1
VTB201MAQUICK INSTALLATION GUIDE
Quick Installation Guide
1.System Overview
One VTB201MAhigh resolution HD CMOScolor camera
with the following features:
yWeatherproof and water reistant
yMirror/ Non-Mirror image selectable switch
yWide-angle lens170°
yBuilt-in Microphone
y360-degree adjustable mounting angle
yAuto-iris lens that automatically adjusts to light conditions
yInfrared light for improved image quality in low-light
situations
yNightvision distance of approx 8M
20M Extension Cable Included
Supplied installation accessories
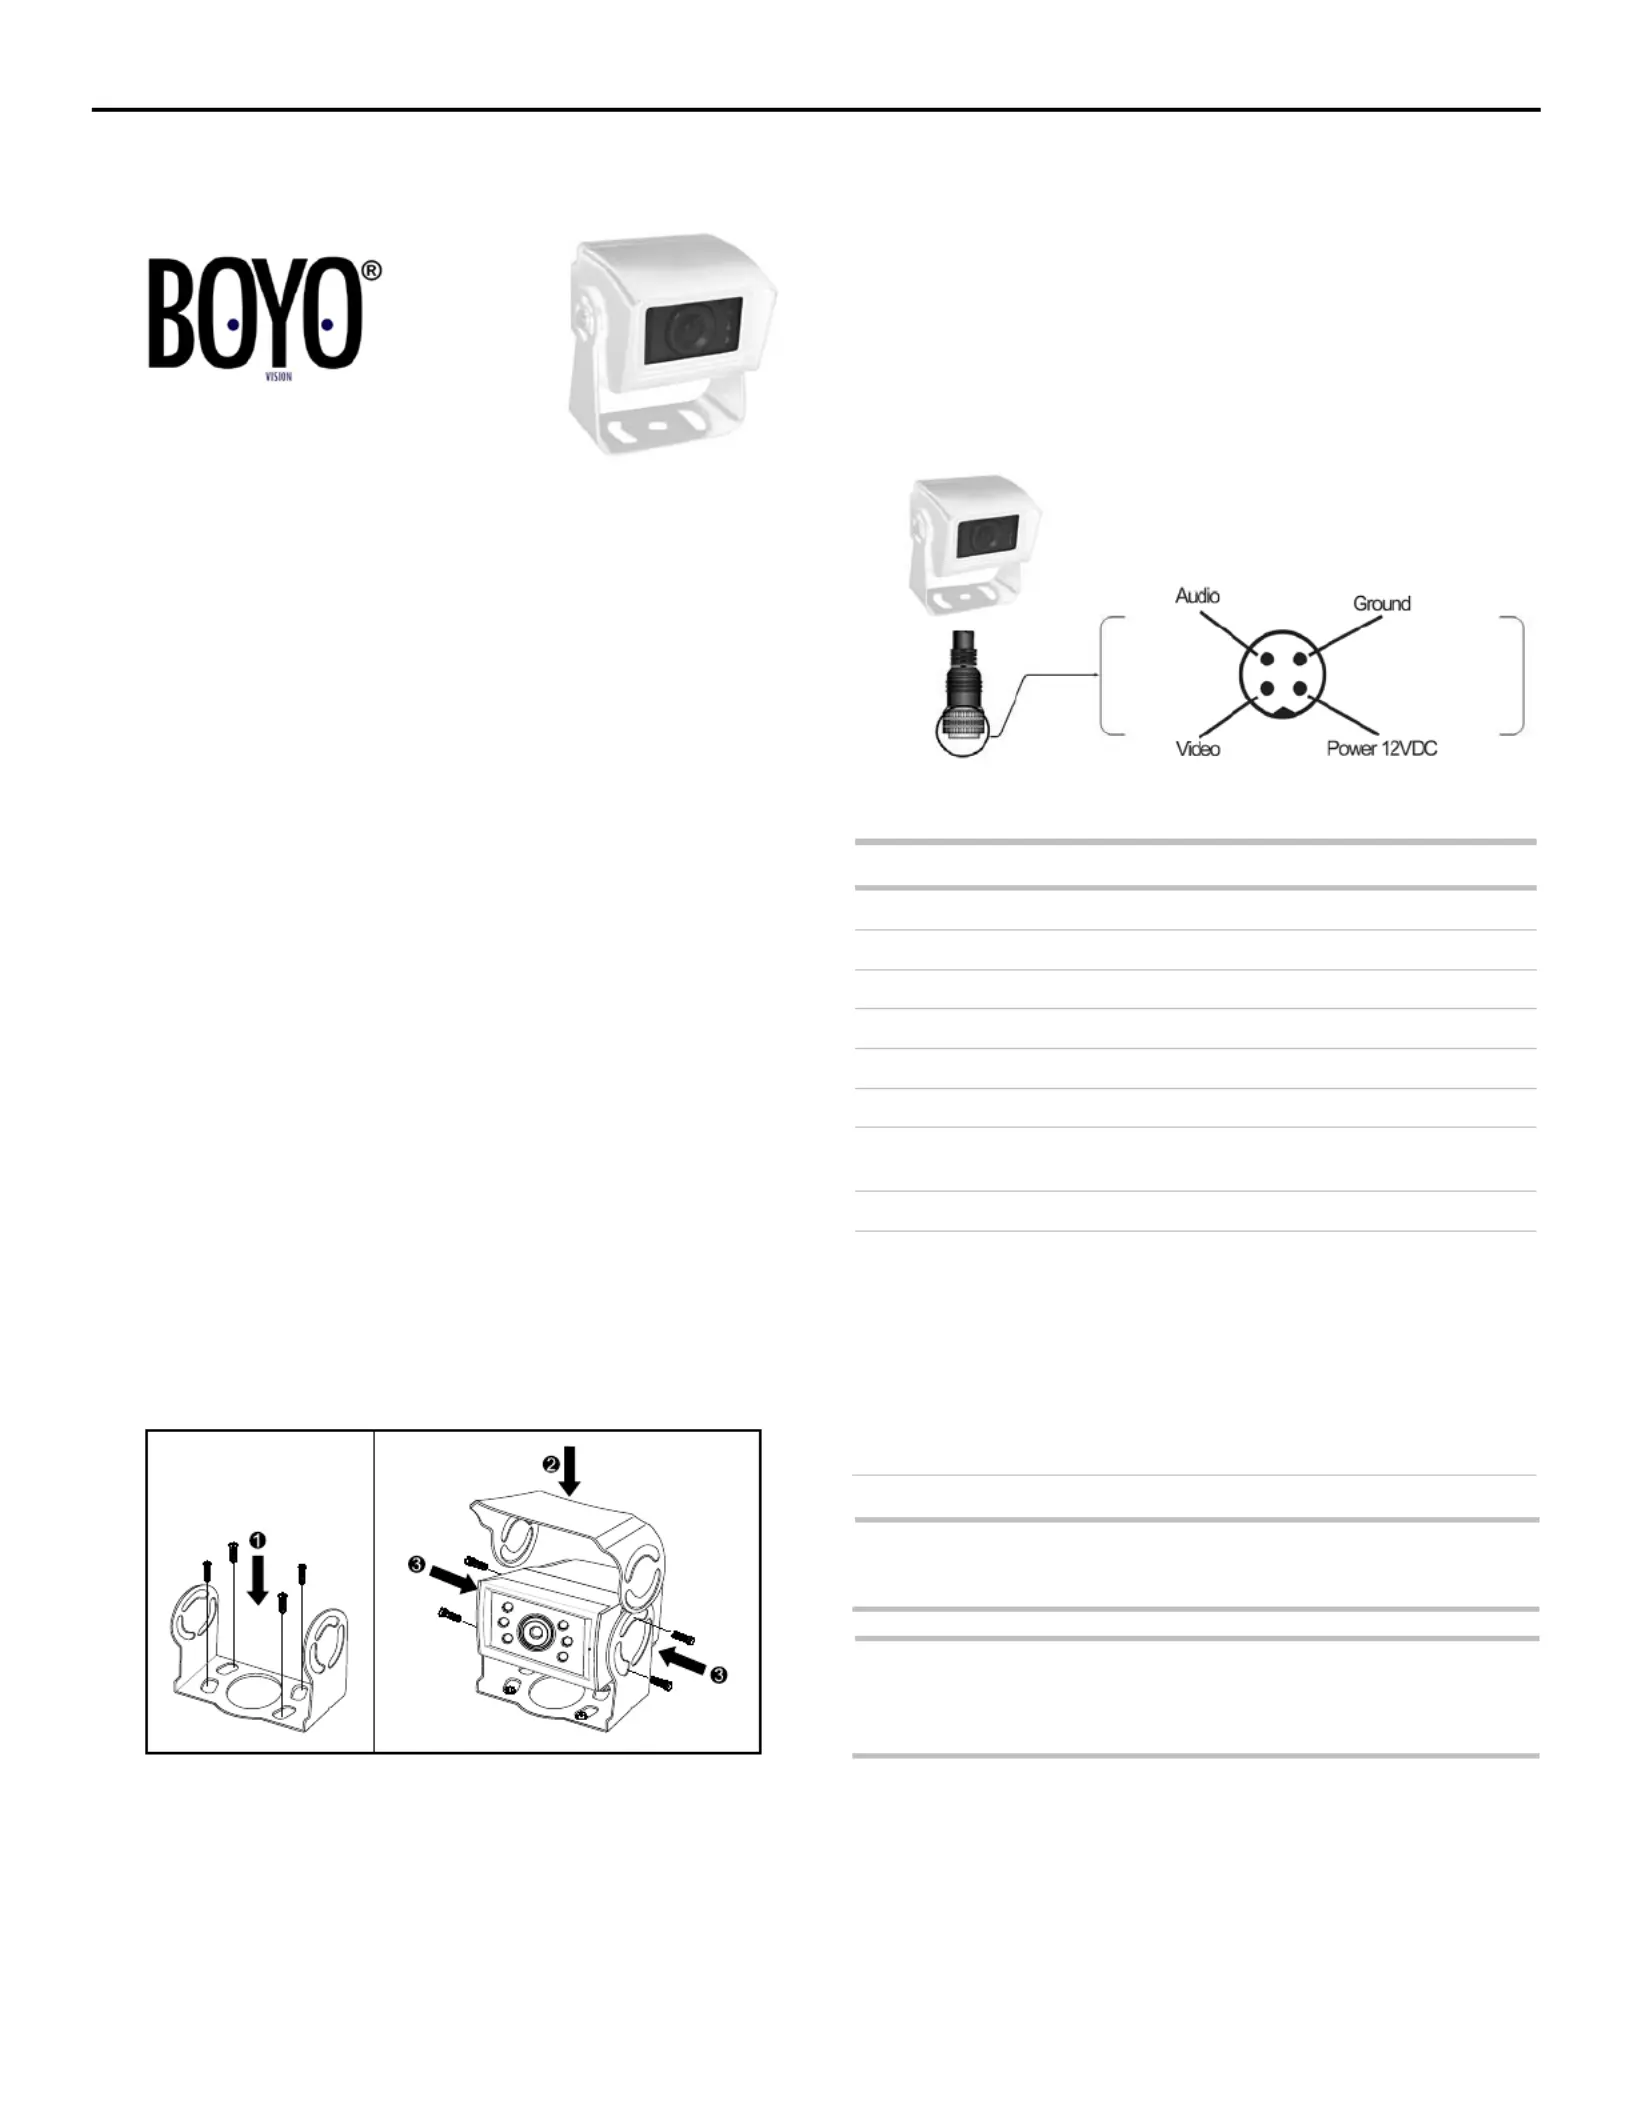
2.Installation
Install theVTB201MAas follows:
a.Install the VTB201MAcamera in the desired location, as
follows:
1)Fasten the camera mounting bracket, using the 4 self-
tapping Philips screws, to the desired mounting
surface, as shown in the Step 1 arrows of Figure 1.
2)Position the camera in the camera mounting bracket.
Adjust the camera to the proper angle, and then attach
the camera and sun visor to the camera mounting
bracket using the 4 supplied hex-head machine screws
(with washers), as shown in the Step2and Step 3
arrows of Figure 1.
Figure 1. Installing the Camera
b.Route the extension cable from the camera location to the
location of the output device (not supplied), such as a
monitor or switcher.
c.Insert the male connector of the extension cable into the
appropriate female audio/video port of the output device
(not supplied), such as a monitor or switcher.
3.Normal/Mirror Selector
The camera default setting is in reverse viewing. To change to
non-mirror viewing, unplug the jumper plug with the green wires
andre-power the camera for the changes to take effect.
4.Grid Line Selector
The camera default setting is grid line on. To turn off the grid
lines, unplug the jumper plug with the blue wires and re-power
the camera for the changes to take effect.
5.Specifications
ItemSpecification
Image Sensor1/3 1089
TV SystemNTSC
Effective Pixels720 x 480
Minimum Illumination0.0Lux
Power Consumption12 VDC, 250mA Max
Operating Temperature-20°C to 70°C
Dimensions
(Width x Height x Depth)
3 inches x 3 inchesx 2.25inches
Lens Angle170°
Supplied AccessoriesManual
Screws
20M Extension cable
DC Power cable
2 Jumper terminals
Warranty card
Registration card
CAUTION:
To reduce the risk of electrical shock, disconnect the
battery from the electrical system of the vehicle before
starting the installation.
CAUTION:
Before inserting screws into the mounting surface,
ensure that the underside of the mounting surface is
clear of equipment that might be damaged by the
screws.
Produktspezifikationen
| Marke: | Boyo |
| Kategorie: | Dashcam |
| Modell: | VTB201MA |
Brauchst du Hilfe?
Wenn Sie Hilfe mit Boyo VTB201MA benötigen, stellen Sie unten eine Frage und andere Benutzer werden Ihnen antworten
Bedienungsanleitung Dashcam Boyo

14 September 2025
28 August 2024
21 August 2024
21 August 2024
21 August 2024
21 August 2024
21 August 2024
20 August 2024
20 August 2024
20 August 2024
Bedienungsanleitung Dashcam
Neueste Bedienungsanleitung für -Kategorien-
25 März 2026
21 März 2026
8 März 2026
5 Februar 2026
20 Januar 2026
19 Januar 2026
19 Januar 2026
17 Januar 2026