Canon imagePROGRAF iPF700 Bedienungsanleitung
Lies die bedienungsanleitung für Canon imagePROGRAF iPF700 (8 Seiten) kostenlos online; sie gehört zur Kategorie Drucker. Dieses Handbuch wurde von 26 Personen als hilfreich bewertet und erhielt im Schnitt 4.4 Sterne aus 2 Bewertungen. Hast du eine Frage zu Canon imagePROGRAF iPF700 oder möchtest du andere Nutzer dieses Produkts befragen? Stelle eine Frage
Seite 1/8
Introductory Information
Introductory Information
Quick Start Guide
USA
AB7-5374-V1©CANON INC. 2006 Printed in JAPAN
1
Canon and the Canon logo as well as imagePROGRAF and the imagePROGRAF logo are trademarks or registered trademarks of Canon, Inc.
Installation Overview
These are the steps in printer installation.
For instructions on installing the IEEE 1394 (FireWire) expansion board, refer to the manuals provided with these accessories.
If an error message is displayed or problems occur, refer to Section 9, "Responding to Messages" (page 8).
•
•
Apple and the Apple logo are registered trademarks of Apple Computer, Inc.
Microsoft and Windows are trademarks or registered trademarks of Microsoft Corporation in the United States and other countries.
Assemble the Stand
Attach the Output Stacker
Install the Printer
Remove the Packaging Material
Install the Printhead
Details for each step are given in this Quick Start Guide. Simply follow the instructions to
install the printer.
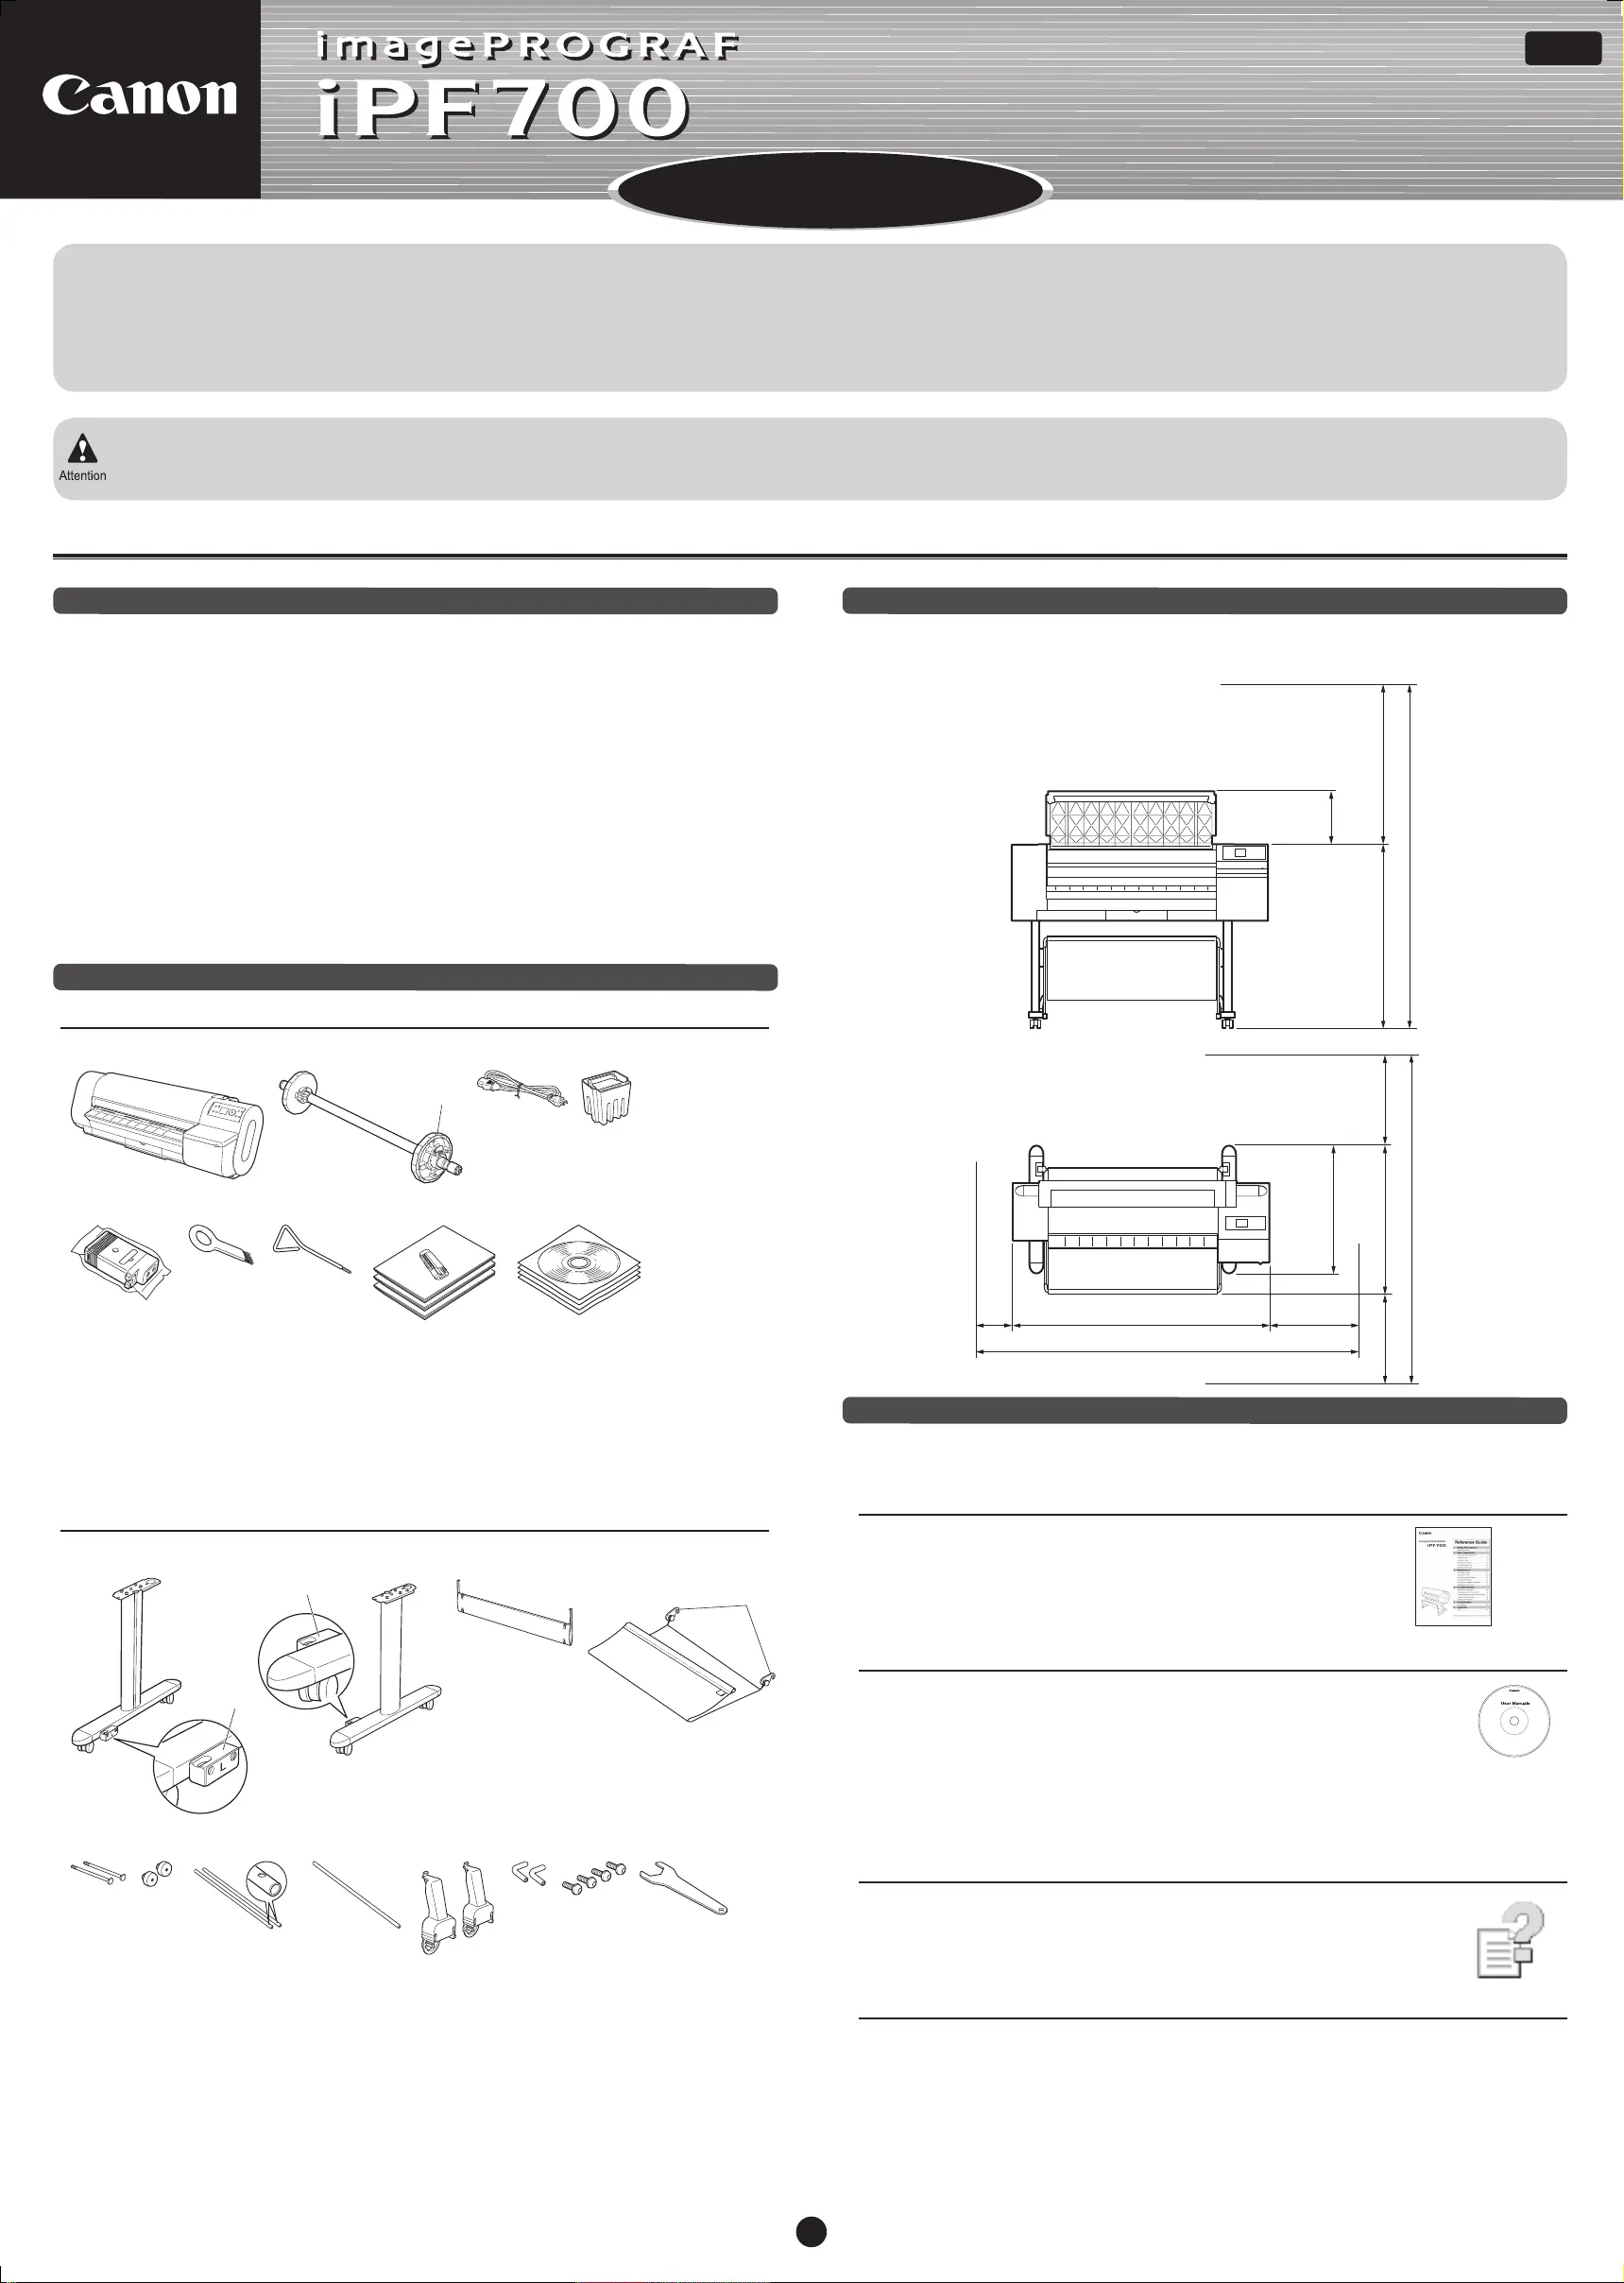
Package Contents
abde
fghij
a
Stand La.
Other documentation may also be included in the package.
Introduction
Space Required for Installation
Printer Documentation
After installing the printer as shown in this Quick Start Guide, refer to the other
documentation for instructions on operation and maintenance.
Everyday Operation
Detailed Instructions
The Reference Guide includes the following information.
Instructions on basic operation
Maintenance procedures
Troubleshooting tips
•
•
•
The User Manuals CD-ROM includes the following information.
Printer operating instructions
Printer driver instructions
Printing instructions
•
•
•
Maintenance procedures
Instructions for network printing
•
•
Printer Driver Functions
The printer driver help includes the following information.
Printer driver function details
Printer driver instructions
•
•
Troubleshooting tips
Printer menu descriptions
Printer driver function details
•
•
•
Specifications, details on consumables and
optional accessories, and other information
•
Supported Paper
The Media Guide provides information about paper. The Media Guide is installed on your
computer from the User Software CD-ROM when you install the Media Conguration
Tool.
To access the guide in Windows, choose Start > All Programs > iPF700 Media
Conguration Tool > Media Guide.
On a Macintosh computer, double-click the Media Guide shortcut icon (iPF700) on the
desktop.
•
•
Install an Ink Tank
Load a Roll
Install the Printer Driver
1.
2.
3.
4.
5.
6.
7.
8.
Printer
Printera.
b.Roll Holder: Preinstalled on the printer
c.Holder Stopper: Preinstalled on the
printer
d.Power Cord
e.
f.
Printhead
g.
h.
i.
j.
Starter Ink Tanks: Bk, MBk (2), C, M, and Y
Cleaning Brush
Allen Wrench
Documentation
Set of CD-ROMs
Stand
bef
hijoknml
Stand Rb.
Basket Fastener Lc.
Basket Fastener Rd.
Stand Staye.
Output Stackerf.
Basket Fastener Ag.
Basket Bolts (2)h.
Basket Decorative Nuts (2)i.
Basket Rod #1 (2)j.
Basket Rod #2k.
Basket Holder (2)l.
Basket Rod Caps (2)m.
Main Unit Securing Bolts (4)n.
Wrencho.
Ensure that ample space is available before installing the printer, somewhat more than the
following measurements.
Height
Width and Depth
Intel is a registered trademark of Intel Corporation in the United States and other countries.
g
303mm
(11.9 in)
906mm
(35.7 in)
1094mm(H)
(43.1 in)
2000mm
(78.7 in)
600mm
(23.6 in)
200mm
(7.9 in)
1507mm(W)
(59.3 in)
2071mm
(81.5 in)
600mm
(23.6 in)
600mm
(23.6 in)
871mm(D)
(34.3 in)
752mm
(29.6 in)
2307mm
(90.8 in)
c
d
c
000_AB7-5374-V1_J531QSG_E.indd 12006/05/26 13:40:39
Produktspezifikationen
| Marke: | Canon |
| Kategorie: | Drucker |
| Modell: | imagePROGRAF iPF700 |
Brauchst du Hilfe?
Wenn Sie Hilfe mit Canon imagePROGRAF iPF700 benötigen, stellen Sie unten eine Frage und andere Benutzer werden Ihnen antworten
Bedienungsanleitung Drucker Canon

20 Februar 2026
18 Februar 2026
25 Januar 2026
24 Januar 2026
23 Januar 2026
9 Dezember 2025
8 Dezember 2025
24 November 2025
21 November 2025
20 November 2025
Bedienungsanleitung Drucker
Neueste Bedienungsanleitung für -Kategorien-
31 März 2026
30 März 2026
30 März 2026
29 März 2026
25 März 2026
23 März 2026
16 März 2026
16 März 2026
15 März 2026
15 März 2026