Chapin 41013 Bedienungsanleitung
Chapin
Nicht kategorisiert
41013
Lies die bedienungsanleitung für Chapin 41013 (16 Seiten) kostenlos online; sie gehört zur Kategorie Nicht kategorisiert. Dieses Handbuch wurde von 2 Personen als hilfreich bewertet und erhielt im Schnitt 4.7 Sterne aus 1.5 Bewertungen. Hast du eine Frage zu Chapin 41013 oder möchtest du andere Nutzer dieses Produkts befragen? Stelle eine Frage
Seite 1/16

TM
Complete warranty details at
www.https://chapinmfg.com/pages/
chapinwarranties
Model: 41003, 41013
017400R1123
USE AND CARE MANUAL
Chapin International, Inc
P.O. Box 549 700 Ellicott St.
Batavia, NY 14021-0549 U.S.A.
1-800-950-4458 www.chapinmfg.com
CAREFULLY READ THESE INSTRUCTIONS BEFORE USE
Failure to do so may result in damage to property and/or person.
WARNING
BEFORE RETURNING THIS PRODUCT FOR ANY REASON, PLEASE CALL:
1-800-950-4458
When calling, please have the following information available: Sales receipt & model number. This number
connects you directly with the manufacturer of this product. Our Technical Support Team will be happy to
help you with any assembly, troubleshooting and replacement information you may need.
CONGRATULATIONS!
YOU HAVE JUST PURCHASED A QUALITY CHAPIN PRODUCT.
REGISTER YOUR PRODUCT ONLINE @ WWW.CHAPINMFG.COM
VISIT US ON THE INTERNET: WWW.CHAPINMFG.COM
DUAL ZONE WATER TIMER
Printed in Indonesia

1E
Instrucon Manual - English
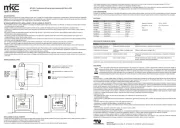
Battery compartment
3/4” adaptor
1” Connection
Filter
LCD display
Dial
Dial position indicator
+ Button
- Button
L/R Button
Manual ON/OFF Button
Cover
Sensor Connection Socket
1
2
3
4
5
6
7
8
9
10
11
12
13
INSTALLATION
REFERENCE THE NUMBERED COMPONENTS
WHEN READING INSTRUCTIONS
BATTERY COMPARTMENT
1. Slide out the battery compartment
1
and
insert 2 (LR6/AA) 1.5V alkaline batteries.
(not included)
CAUTION: Use only fresh alkaline batteries
at the beginning of the season. Do not use
rechargeable batteries. When batteries are
inserted, LCD display will show clock time.
If not, check if the batteries are installed
correctly. Turn Dial to OFF position before
connecting it to the tap/spiggot.
CONNECTING YOUR TIMER TO THE SPIGOT
1. To connect your timer to the spigot use 3/4’’
adaptor
2
or the 1’’ connector
3
.
2. For 3/4’’ taps: install the timer onto the
spigot with the 3/4’’ adaptor
2
included.
3. For 1’’ taps: remove the 3/4’’ adaptor and
attach the 1’’ connection
3
to the spigot
directly. Note: always keep the filter
4
in place.
CAUTION: To avoid damage to the timer,
tighten all connections by hand.
13
2
3
4
5
67
8
9
10
12
11
1
Produktspezifikationen
| Marke: | Chapin |
| Kategorie: | Nicht kategorisiert |
| Modell: | 41013 |
Brauchst du Hilfe?
Wenn Sie Hilfe mit Chapin 41013 benötigen, stellen Sie unten eine Frage und andere Benutzer werden Ihnen antworten
Bedienungsanleitung Nicht kategorisiert Chapin

5 Juli 2025
5 Juli 2025

5 Juli 2025
5 Juli 2025

5 Juli 2025

5 Juli 2025
5 Juli 2025

5 Juli 2025

5 Juli 2025
5 Juli 2025
Bedienungsanleitung Nicht kategorisiert
- TP-Link
- OXI Instruments
- Now TV
- Cresta
- Phil And Teds
- CRUX
- Atlona
- Gardenline
- Media-tech
- Ilve
- Trust
- Heaven Fresh
- Hughes & Kettner
- AVPro Edge
- West Elm
Neueste Bedienungsanleitung für -Kategorien-

5 Juli 2025
5 Juli 2025
5 Juli 2025
5 Juli 2025
5 Juli 2025

5 Juli 2025

5 Juli 2025

5 Juli 2025
5 Juli 2025

5 Juli 2025