DeLonghi DDSX220 Bedienungsanleitung
Lies die bedienungsanleitung für DeLonghi DDSX220 (3 Seiten) kostenlos online; sie gehört zur Kategorie lampe. Dieses Handbuch wurde von 42 Personen als hilfreich bewertet und erhielt im Schnitt 5.0 Sterne aus 5 Bewertungen. Hast du eine Frage zu DeLonghi DDSX220 oder möchtest du andere Nutzer dieses Produkts befragen? Stelle eine Frage
Seite 1/3
9
Read the safety warnings carefully before using the appliance.
1. DESCRIPTION
1.1 Description of appliance (A)
A1. Air outlet grill
A2. Lifting handles
A3. Room sensor air intake
A4. Castors
A5. Water level viewing window
A6. Condensate collection tank
A7. Condensate drain hose
A8. Silver ion dust lter
A9. Filter housing cover
A10. Continuous drain rubber stopper
A11. Continuous drain cap
1.2 Description of control panel (B)
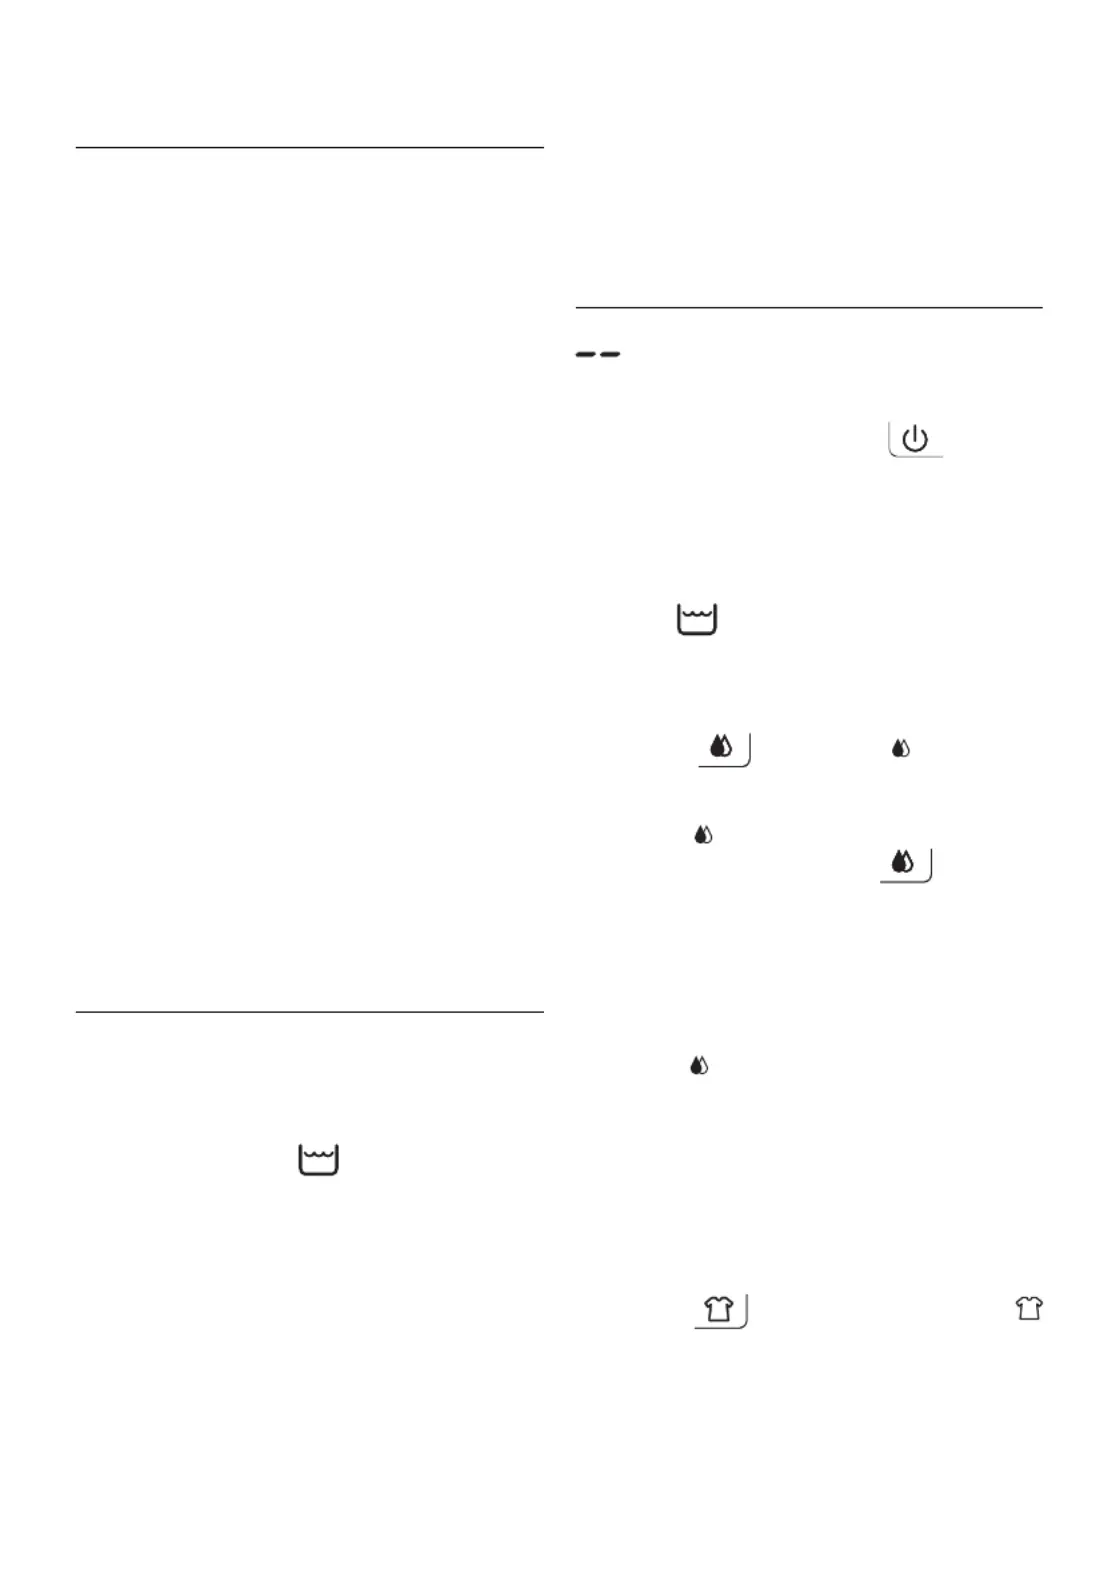
B1. ON/STAND-BY button
B2. Ventilation button
B3. Dehumidifying button
B4. Dry button
B5. Timer button
1.3 Description of display (C)
C1. Full tank alarm
C2. Ventilation mode active
C3. % Relative Humidity
C4. Dry mode active
C5. Hours
C6. Dehumidifying mode active
C7. Low temperature alarm
C8. Timer function active
2. DRAINING THE CONDENSATE WATER
The condensate can be drained in 2 ways:
2.1 Draining into the tank
The condensate is drained directly into the tank (A6).
When the tank is full, the appliance stops and the control panel
(C) displays the tank alarm (C1).
To restore operation of the appliance, proceed as follows:
1. Remove the tank (g. 1) and empty it into a sink or bathtub.
2. Replace the tank in its housing, making sure the handle is
properly positioned (g. 2).
2.2 Continuous external draining
If the appliance is used for long periods of time without the
possibility to regularly empty the tank, the continuous drain
function should be used. Proceed as follows:
1. Remove the continuous drain cap(A11) from the spout,
turning it in an anti-clockwise direction, then remove the
rubber stopper (A10) from the opening (g. 3). (Watch out
for any leaking water!)
2. Attach the condensate drain hose (A7) to the spout (g. 4).
3. Make sure the hose is positioned below the spout (g. 5),
or the water will ow back into the tank of the appliance.
Also make sure there are no kinks in the hose.
3. MODE SELECTION
Connect the appliance to the mains supply. Upon rst use, the
symbol will appear on the display and at the same time,
an acoustic signal will sound to indicate that the appliance is in
stand-by mode.
1. To turn the appliance on, touch the button (B1).
The appliance will operate in the previously set mode.
2. If there is a blackout, when the power is restored the
appliance will resume operation in the previously set
operating mode.
Please note:
• If the symbol (C1) appears on the display, the
tank (A6) needs to be emptied or properly positioned. (see
paragraph “2.1 Draining into the tank”).
3.1 Dehumidifying mode
1. Touch the button (B3). The symbol (C6) will
blink on the display (g. 6).
2. The display shows the previously set relative humidity value.
When the symbol blinks, the setting can be changed
by repeatedly touching the button. There are 5
dierent relative humidity settings ranging from 30% (dry
environment) to 70% (humid environment). Depending
on the ambient conditions, it may not be possible for the
appliance to reach the minimum settable value. In these
cases it is recommended to heat the environment needing
to be dehumidied.
3. When the symbol stops blinking, the display shows the
percentage of relative humidity in the room. The appliance
may take a few seconds to display the value of the relative
humidity in the room.
4. When the room reaches the preset relative humidity level,
the appliance stops dehumidifying and operates at a very
slow ventilation speed.
3.2 Dry mode
1. Touch the button (B4). The display shows the
symbol (C4) (g. 7).
Note:
The appliance automatically operates at the maximum
dehumidifying capacity. Recommended for particularly humid
environments or to dry laundry more quickly.
Produktspezifikationen
| Marke: | DeLonghi |
| Kategorie: | lampe |
| Modell: | DDSX220 |
| Breite: | 383 mm |
| Tiefe: | 255 mm |
| Produktfarbe: | Weiß |
| Höhe: | 600 mm |
| Platzierung: | Flur |
| Display: | LED |
| Fassungsvermögen Wassertank: | 5 l |
| Geräuschpegel: | 44 dB |
| Geeignet bis zu Zimmergrößen von: | 90 m³ |
| Entfeuchtungskapazität (max.): | 20 l/24h |
Brauchst du Hilfe?
Wenn Sie Hilfe mit DeLonghi DDSX220 benötigen, stellen Sie unten eine Frage und andere Benutzer werden Ihnen antworten
Bedienungsanleitung lampe DeLonghi

11 Februar 2026
18 August 2025
15 Juli 2025
3 September 2024
DeLonghi Tasciugo AriaDry Multi DEX212SF Bedienungsanleitung
31 August 2024 26 August 2024
1 Juni 2024
22 Mai 2024
Bedienungsanleitung lampe
Neueste Bedienungsanleitung für -Kategorien-
30 März 2026
17 März 2026
16 März 2026
16 März 2026
14 März 2026
13 März 2026
3 März 2026
2 März 2026
2 März 2026
28 Februar 2026