Dri Eaz F530 Bedienungsanleitung
Dri Eaz Luftreiniger F530
Lies die bedienungsanleitung für Dri Eaz F530 (1 Seiten) kostenlos online; sie gehört zur Kategorie Luftreiniger. Dieses Handbuch wurde von 37 Personen als hilfreich bewertet und erhielt im Schnitt 4.9 Sterne aus 6 Bewertungen. Hast du eine Frage zu Dri Eaz F530 oder möchtest du andere Nutzer dieses Produkts befragen? Stelle eine Frage
Seite 1/1
071916-0C F530 1 Legend Brands, Inc.
Duct Attachment Kit
Installation Instructions
F530
LEGEND BRANDS, INC.
15180 Josh Wilson Road, Burlington, WA 98233
Phone: 800--3030 Fax: 360--7950 932757LegendBrandsRestoration.com
The Duct Attachment Kit allows the user to secure layat ducting to the process air
outlet of the Revolution LGR, CMC200 and PHD200 Compact Dehumidiers.
KIT INCLUDES
Four oset screws
Four nylon spacers
Four oversize retaining washers
Four small washers
Duct retention ring
Two 10 ft. lengths of 16 in. layat ducting
TOOLS REQUIRED
Phillips screwdriver or cordless drill with Phillips bit
Scissors
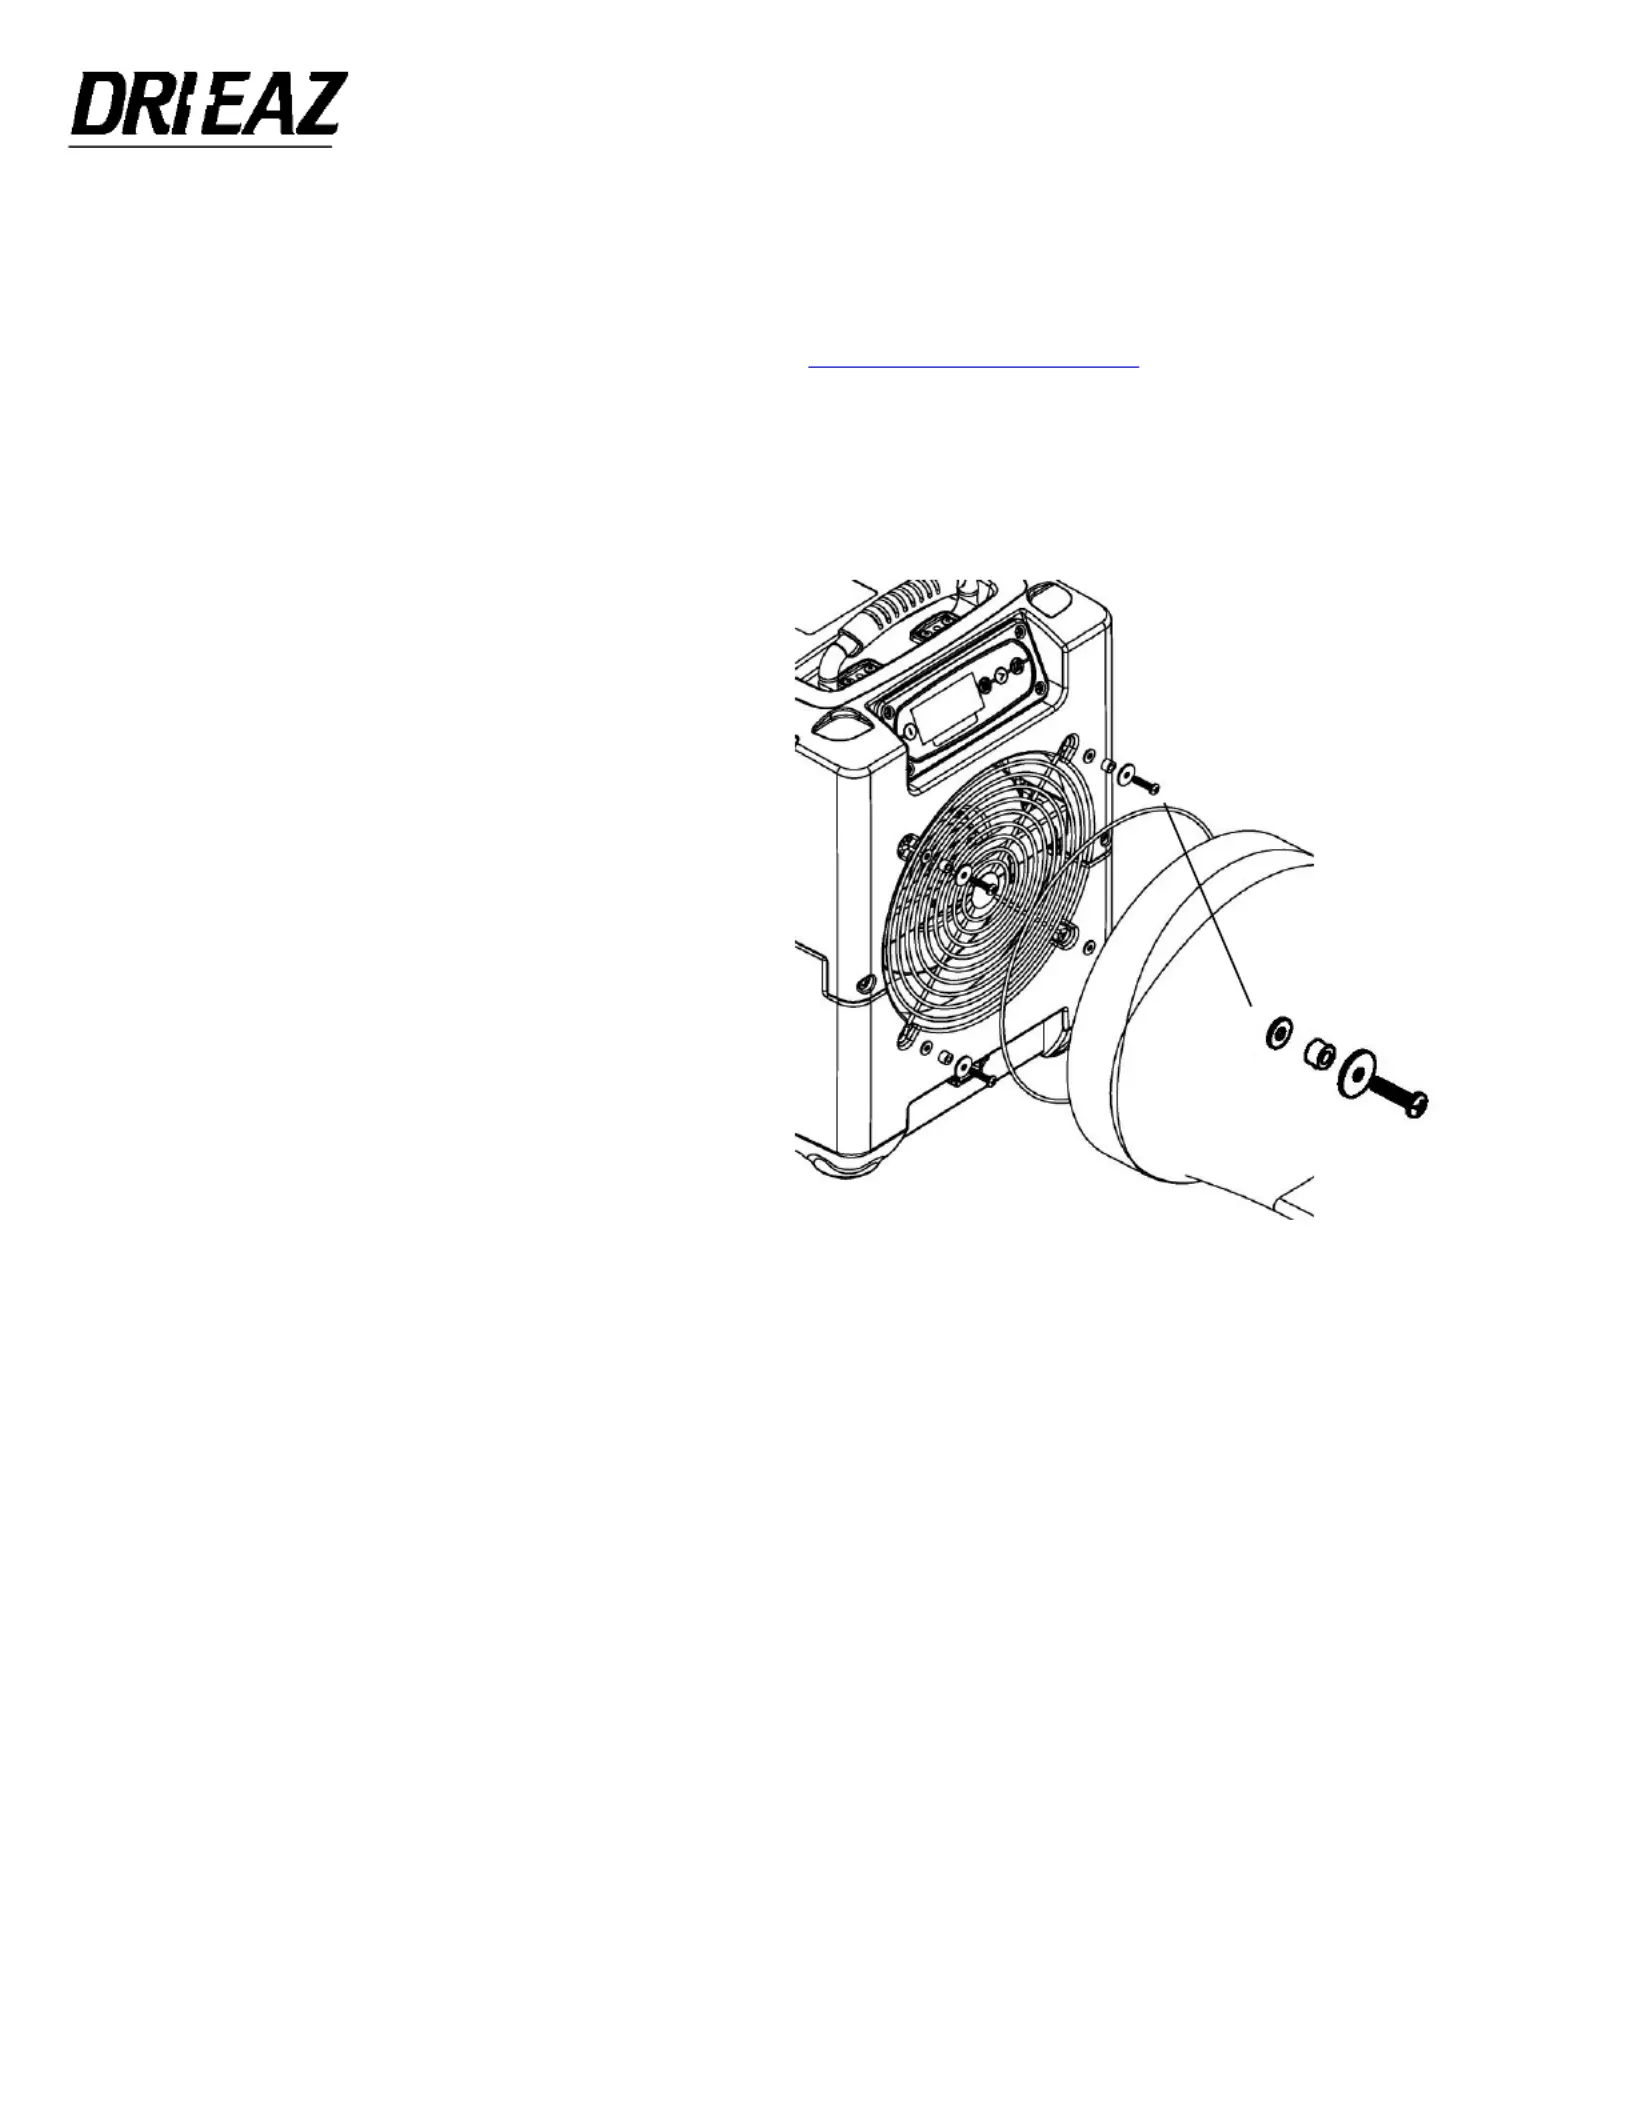
INSTALLING THE OFFSET SCREWS
Place the dehumidifier on a work bench or other
suitable location.
1. Remove one of the outlet grill retaining screws
and replace it with one of the oset screws
provided. Be sure to install the spacer and
washer in the correct sequence (Fig. A). Do not
overtighten.
2. Remove three remaining screws and replace
with oset screws.
INSTALLING THE DUCTING
3. Insert the end of the layat ducting provided through the inside of the metal ring until about 3 in. (6 cm)
of ducting protrudes. Fold the ducting back over the outside of the ring.
4. Place the duct ring inside one of the oset screws behind the oversize washer. Now gently squeeze the
duct ring just enough to t the ring side the remaining three oset screws and behind the oversize in
washers.
The duct attachment is now ready for use.
TIP: The oset screws may be left in place when not using the duct ring.
TIP: Do not use more than 10 ft. of ducting. Excessive ducting lengths will reduce airow and decrease
water removal performance.
IMPORTANT
Please refer to the dehumidier Owner’s Manual for important safety, operation and
maintenance instructions for your dehumidier equipment.
Fig. AScrews and ring installation detail. :
Replace 4 grill screws with
offset screws provided in
the kit.
Note correct placement
of spacers and washers
on each screw.
Produktspezifikationen
| Marke: | Dri Eaz |
| Kategorie: | Luftreiniger |
| Modell: | F530 |
Brauchst du Hilfe?
Wenn Sie Hilfe mit Dri Eaz F530 benötigen, stellen Sie unten eine Frage und andere Benutzer werden Ihnen antworten
Bedienungsanleitung Luftreiniger Dri Eaz

29 September 2025
24 August 2024
19 August 2024
4 Mai 2023
Bedienungsanleitung Luftreiniger
Neueste Bedienungsanleitung für -Kategorien-
30 März 2026
30 März 2026
29 März 2026
24 März 2026
21 März 2026
21 März 2026
20 März 2026
20 März 2026