Glemm PM 3 Bedienungsanleitung
Glemm Nicht kategorisiert PM 3
Lies die bedienungsanleitung für Glemm PM 3 (2 Seiten) kostenlos online; sie gehört zur Kategorie Nicht kategorisiert. Dieses Handbuch wurde von 57 Personen als hilfreich bewertet und erhielt im Schnitt 4.5 Sterne aus 4 Bewertungen. Hast du eine Frage zu Glemm PM 3 oder möchtest du andere Nutzer dieses Produkts befragen? Stelle eine Frage
Seite 1/2
23.1
RJ45
METAL
BLACK
200m
max
Manualediistruzioni
Articolo:
PM3
Caratteristichetecniche
Distanzamaxdaamplicatore200mtconcavoRG45CAT6
Lunghezzamicrofono41cm
Dimensionibase170x50x152mm(lxhxp)
Peso0,9Kg
PRODOTTODA/PRODUCEDBY:KARMAITALIANASrl
ViaGozzano38/bis21052BustoArsizio(VA)-www.karmaitaliana.it
Losmaltimentodelprodottodeve
essereeettuatoconferendoloadun
appositocentrodiraccolta
dierenziata(Dir.2012/19/UE).
Ilfabbricante,alloscopodimigliorareipropriprodotti,siriservaildirittodimodicarnelecaratteristichesiano
essetecnicheoestetiche,inqualsiasimomentoesenzaalcunpreavviso.
MadeinP.R.C.
www.glemm.eu
Ilmicrofonomultizonamod.PM3èstatoprogettatoperoperarein
abbinamentoall’amplicatoremod.PAA2240ePAA2480.
Noncollegateloadaltriamplicatoriperevitarepossibilidannialmicrofonoo
all’amplicatorestesso.
Questomicrofonononnecessitadialimentatoreesternoinquantoattinge
l’energianecessariadirettamentedall’amplicatorealqualeècollegato.
Conservatequestomanualediistruzioniperutilizzifuturi.Ricordatevichedi
vericarelapresenzadieventualiaggiornamentinellaschedaprodottosul
sitowww.glemm.eu.
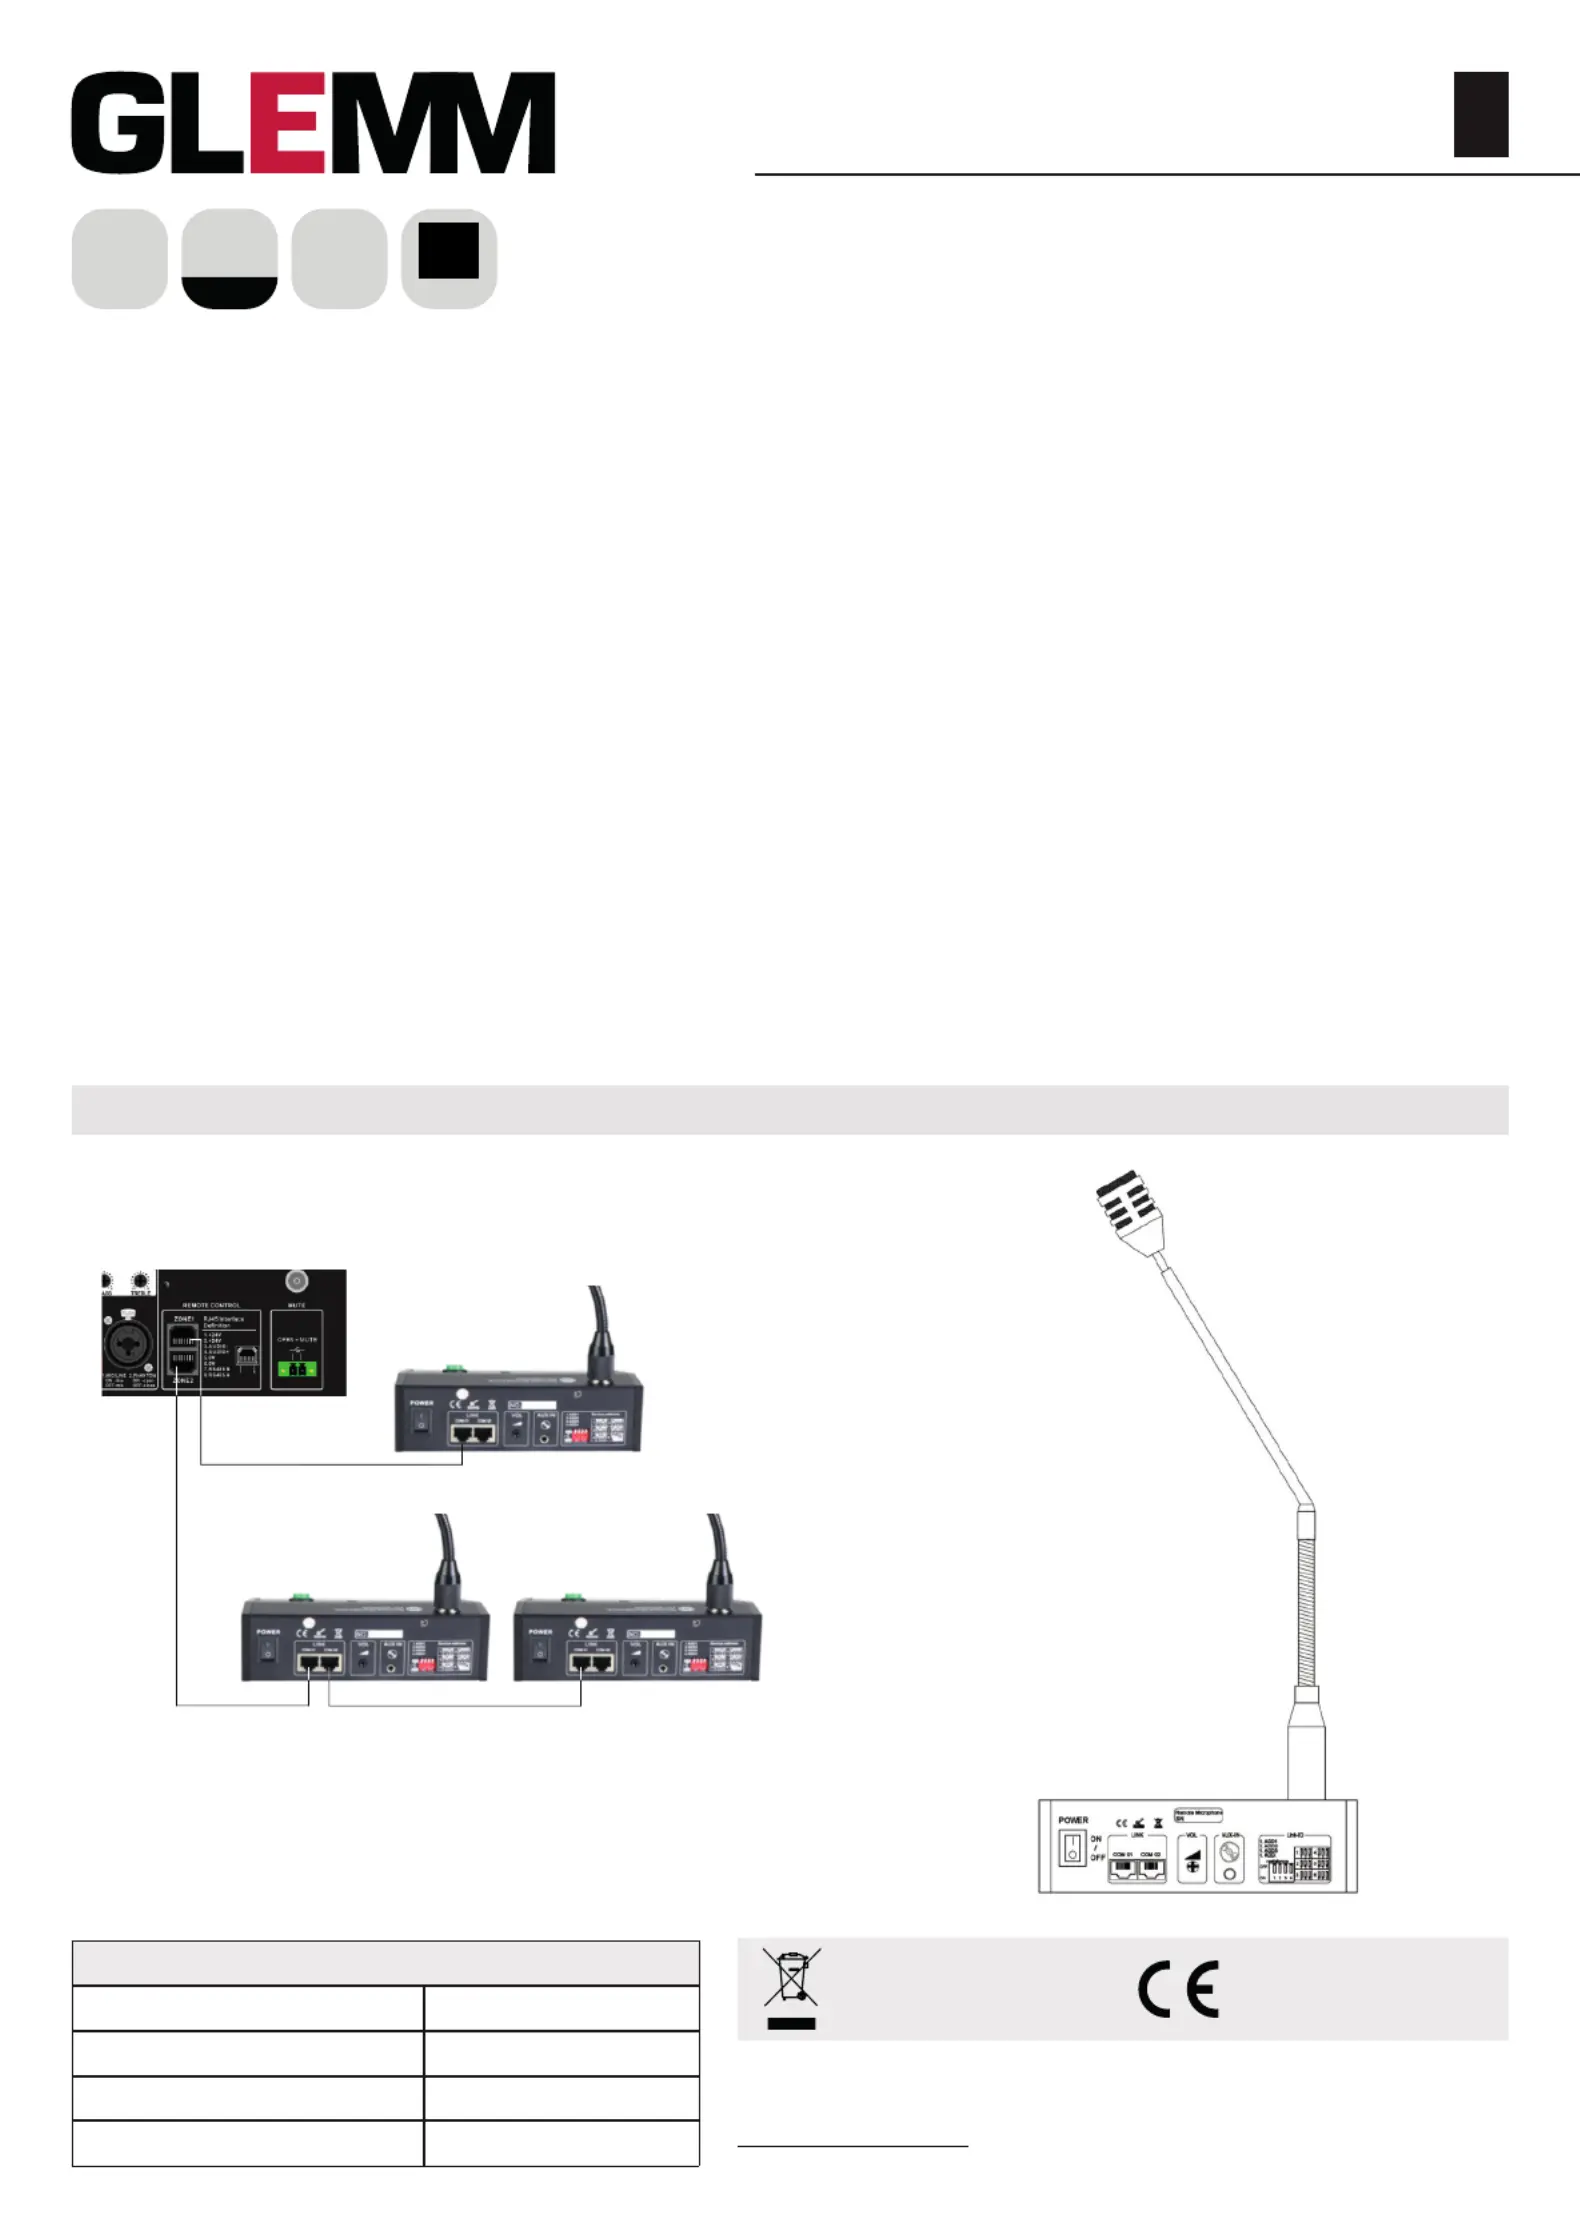
A.Collegamento
Attenzione:tuttiicollegamentieleimpostazionideiDipswitchvanno
eettuateadamplicatorespento.Percollegareilmicrofonoall’amplicatore
èsucienteutilizzareuncavoethernetRJ45sfruttandolaportadedicata
sull’amplicatore.L’amplicatoredisponedi2preseRJ45,ilmicrofonopotrà
esserecollegatoinqualunque.Eventualialtrimicrofonipotrannoessere
collegatiacascatasulprimo.
ImicrofonipossiedonodegliinterruttoriDIPSWITCHperimpostarnela
priorità.Ladistanzamassimatraamplicatoreemicrofono,utilizzandoun
cavoditipoCAT6,nondovràsuperarei200mt.
Sulretrodelmicrofonoèpresenteunapresa3,5mmpersegnaleditipoAUX.
Ognimicrofonoavràlapossibilitàdiinviareaunaopiùzoneilpropriosegnale
AUXinalternativaallavoce.
RetrodelmicrofonoSchemadicollegamento
CAT6CAT6
CAT6
AMPLIFICATORE
B.Utilizzo
Accendetel’amplicatoreeilmicrofono(utilizzandoiltastoposteriore).Per
inviareunmessaggio,cliccatesuitastidellezonechevoletecoinvolgere,
premeteunavoltailtastoCALLedopolanotamusicalepotreteparlare.
Terminatol’annunciopremetenuovamenteiltastoCALL.Sedesiderate
inviareilmessaggioatuttelezone,premeteiltastoALLprimadeltastoCALL.
Durantelatrasmissionediunmessaggiodapartediqualsiasimicrofono,illed
“Busy”siillumineràadindicarechelalineaèoccupata.Durantelefasiditest
potreteagiresulregolatorediguadagnoposterioreperregolareilvolumedel
microfonoelasensibilitàdellacapsula.
C.Conformità,garanziaeassistenza
IImarchioCEindicacheilprodottoèconformeairequisitiessenzialidelle
direttiveeuropeeerelativenormeadessoapplicabili.
Ilprodottoècopertodagaranziainbaseallevigentinormativenazionalied
Europee.
Perlecondizionicompletedigaranziaepereettuarerichiestediassistenza
visitateilsitointernet:www.glemm.eu.Visuggeriamoanchediprocederealla
registrazionedelprodotto,loggandovinell’areariservatadelsito.Avretecosì
lapossibilitàdiricevereaggiornamentieinformazionisuinostriarticoli.
Produktspezifikationen
| Marke: | Glemm |
| Kategorie: | Nicht kategorisiert |
| Modell: | PM 3 |
Brauchst du Hilfe?
Wenn Sie Hilfe mit Glemm PM 3 benötigen, stellen Sie unten eine Frage und andere Benutzer werden Ihnen antworten
Bedienungsanleitung Nicht kategorisiert Glemm

1 März 2026
6 September 2024
6 September 2024
6 September 2024
6 September 2024
6 September 2024
6 September 2024
6 September 2024
6 September 2024
6 September 2024
Bedienungsanleitung Nicht kategorisiert
Neueste Bedienungsanleitung für -Kategorien-
3 April 2026
3 April 2026
3 April 2026
3 April 2026
3 April 2026
3 April 2026
3 April 2026
3 April 2026
3 April 2026
3 April 2026