I-PRO WV-QAT501-S Bedienungsanleitung
I-PRO Nicht kategorisiert WV-QAT501-S
Lies die bedienungsanleitung für I-PRO WV-QAT501-S (1 Seiten) kostenlos online; sie gehört zur Kategorie Nicht kategorisiert. Dieses Handbuch wurde von 29 Personen als hilfreich bewertet und erhielt im Schnitt 4.3 Sterne aus 8 Bewertungen. Hast du eine Frage zu I-PRO WV-QAT501-S oder möchtest du andere Nutzer dieses Produkts befragen? Stelle eine Frage
Seite 1/1
Ambient operating temperature: –50 °C to +60 °C {–58 °F to +140 °F}
Dimensions: ø58 mm × 85 mm (H)
{ø2-9/32 inches × 3-11/32 inches (H)}
Mass: Approx. 200 g {0.44 lbs}
Finish: Aluminum alloy
Silver (WV-Q123A, WV-QAT501-S)
Light gray (WV-Q179)
i-PRO white (WV-QAT500-W)
Ns0520-2042
Printed in China
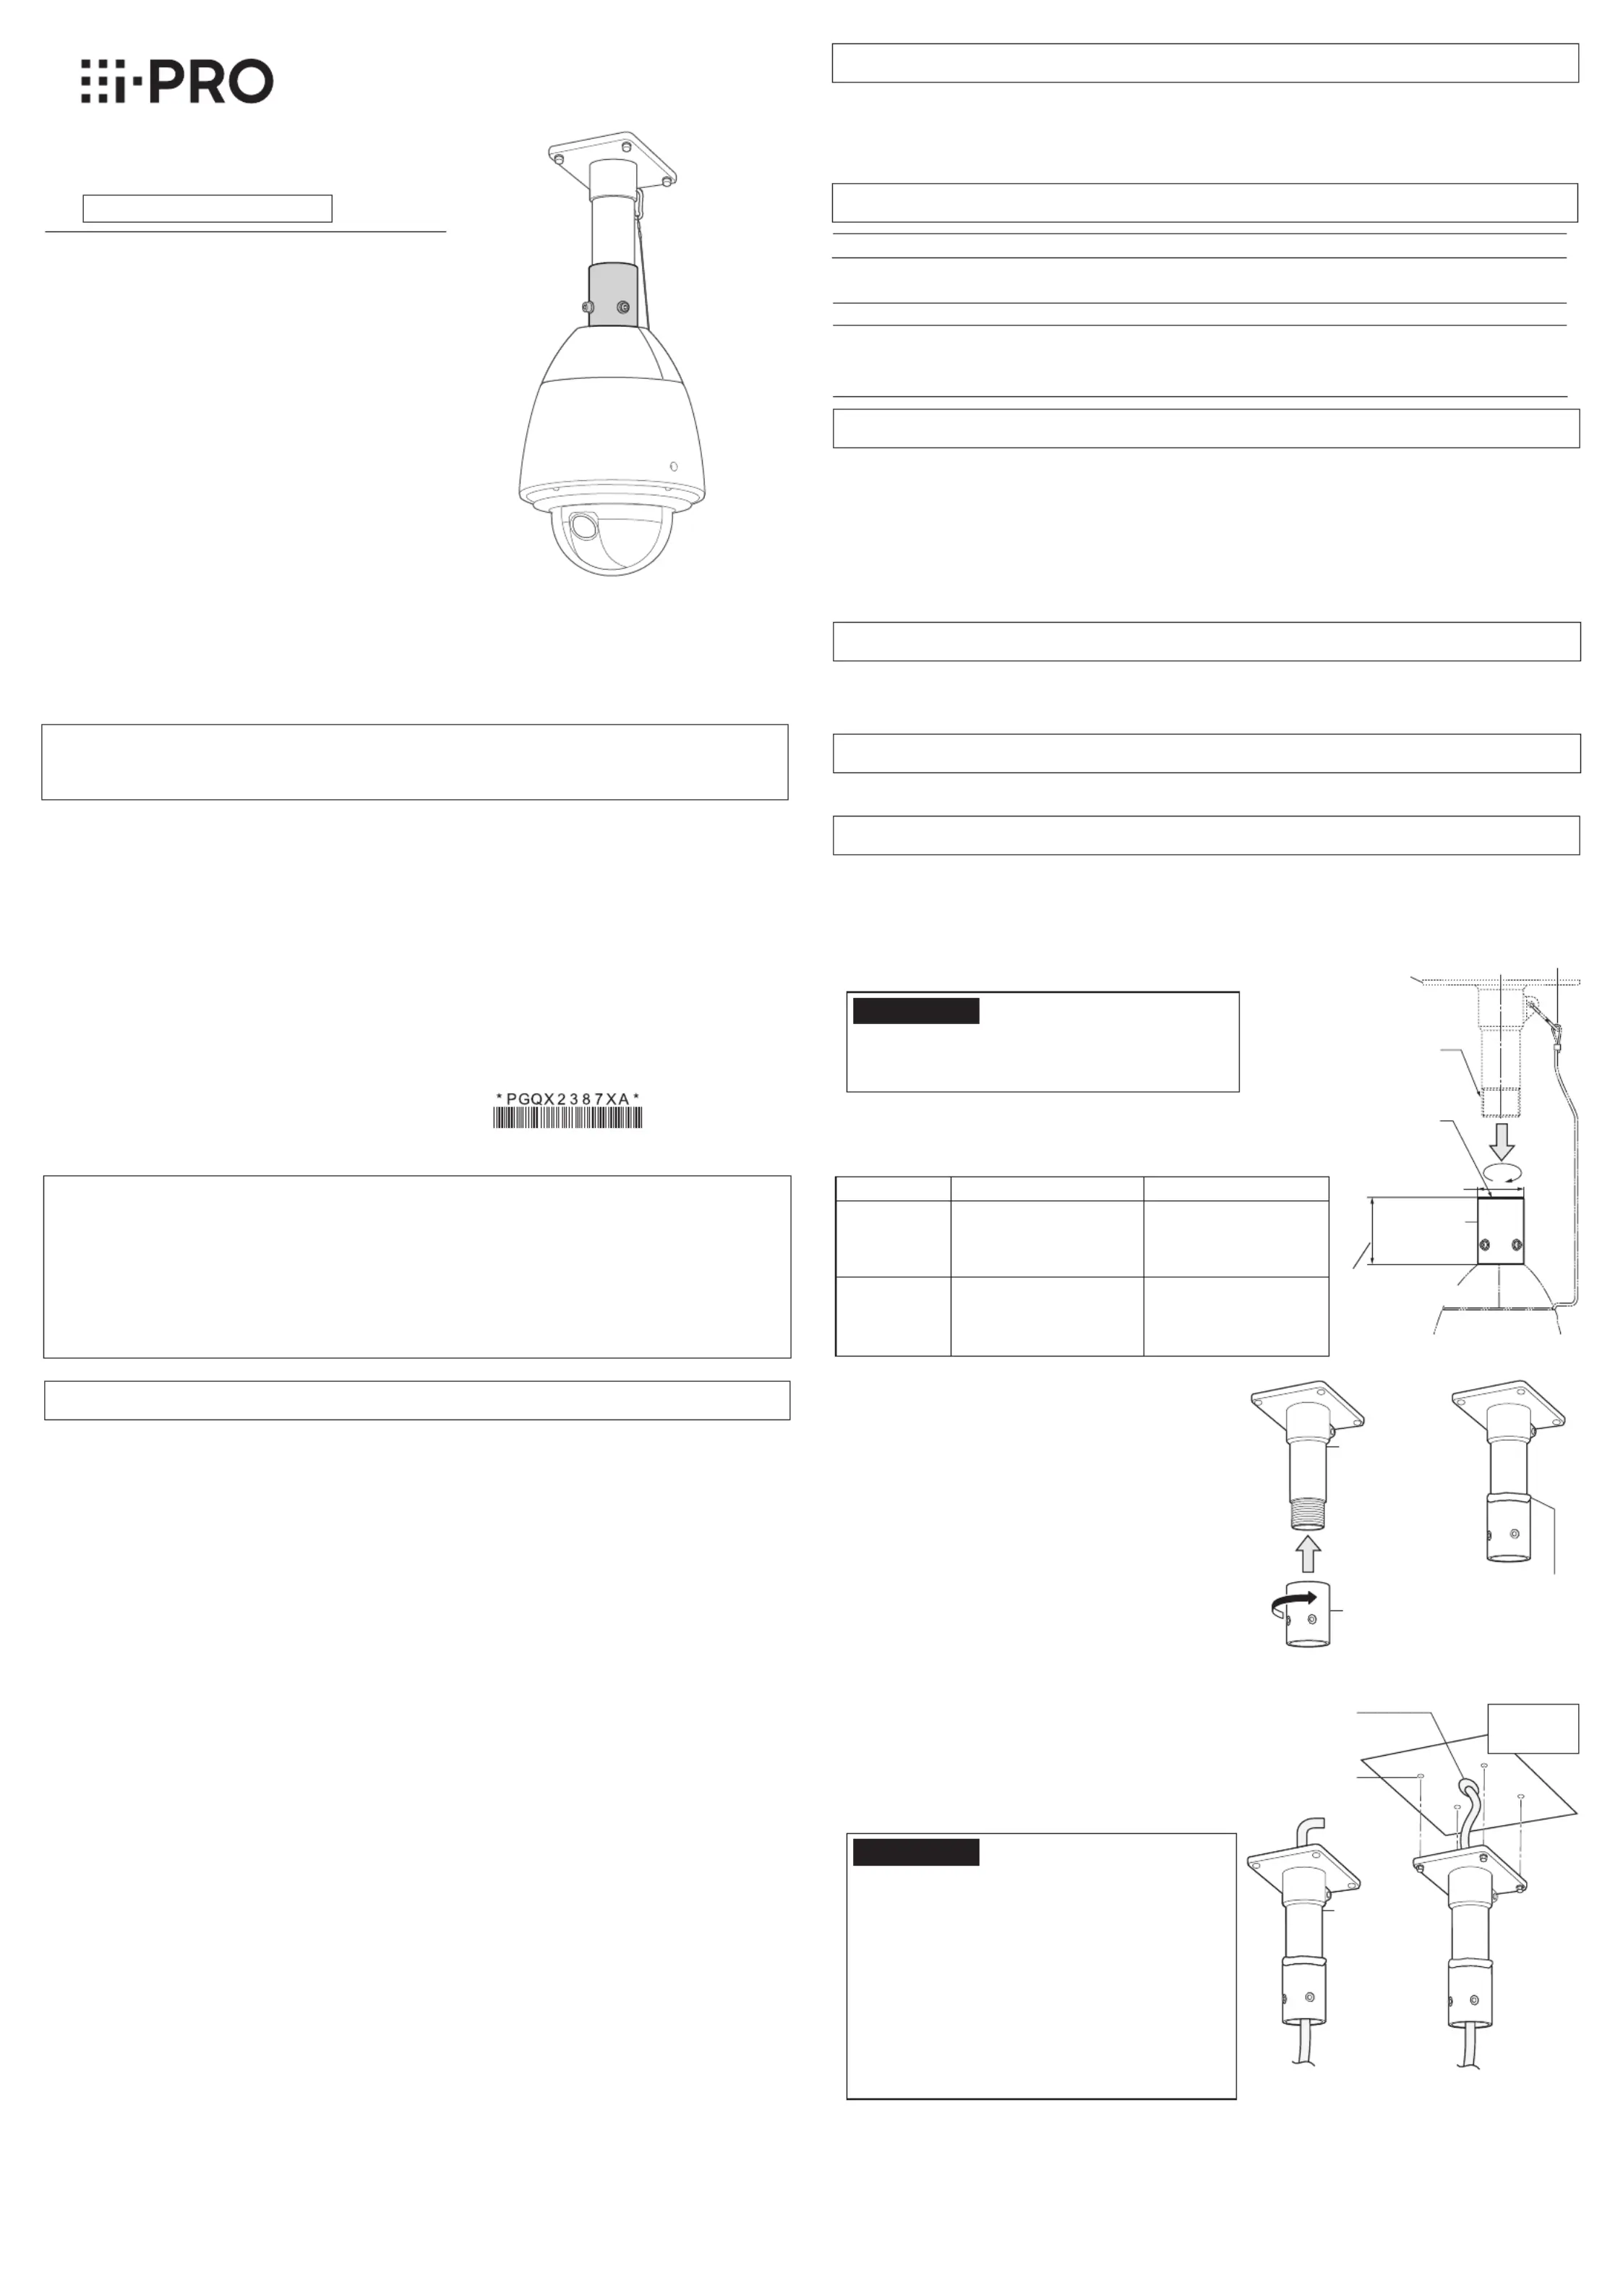
Attachment Pipe Bracket
Model No.WV-Q123A
WV-Q179
WV-QAT500-W
WV-QAT501-S
Operating Instructions
Included Installation Instructions
• Before attempting to connect or install this product, please read these instructions carefully and
save this manual for future use.
• The external appearance and other parts shown in this manual may differ from the actual product
within the scope that will not interfere with normal use due to improvement of the product.
Preface
This product is used to mount the camera on a locally procured mounting bracket.
For the latest information about the supported cameras, refer to our support website
(https://i-pro.com/global/en/surveillance/training_support/support/technical_information
<Control No.: C0501, C0112>).
Specifications
Refer installation work to the dealer.
Installation work requires technique and experience. Failure to observe this may cause fire, electric
shock, injury, or damage to the product.
Be sure to consult the dealer.
Do not use this bracket except with specified cameras or mount brackets.
Failure to observe this may cause a drop resulting in injury or accidents.
When using this product, also read the “Precautions” described in the operating
instructions for the camera to be attached.
Precautions
■In order to prevent injury, the product must be securely mounted to the mount bracket
(locally procured) according to the Installation Guide of the camera.
■Mounting method for this product
This product is designed to be used as a pendant mount camera. If the product is mounted on a
desktop or at a slant, it may not work correctly and its lifetime may be shortened.
■Make sure to remove this product if it will no longer be used.
Precautions for installation
Operating Instructions (this document) ................................................................................ 1 pc.
Camera mounting screw (hexagon screw (M6)) ................................. 5 pcs.(of them, 1 for spare)
Standard Accessories
【3】
Fix the mount bracket (locally procured) on the installation surface.
➡
①
Pass the cables through the mount bracket and
this product.
②
Fix a mount bracket to the installation surface by
using appropriate bolts, nuts or the like (locally
procured).
port for pulling
out the cable
Hole for fixing
mount bracket
【4】Attach the camera to this product.
IMPORTANT:
• For details on procedure for attaching mount
bracket, read the operating instructions of
mount bracket.
• After waterproofing the hole for fixing mount
bracket and the port for pulling out the cable
on the installation surface, fix the mount
bracket on the installation surface.
• Ensure the minimum pull-out strength that
has sufficient allowance for total mass of
mount bracket, this product, and camera etc.
Mount bracket
(locally procured)
(Attachment image)
Connect each cable to the camera, and attach the camera to this product with the camera
mounting screw (accessory) or the hexagon screw supplied with the camera. Refer to the
Installation Guide of the camera for details such as the recommended tightening torque for the
camera mounting screws.
Installation
The following explains an example of mounting the camera on a ceiling.
Prepare the mount bracket (locally procured) for
mounting the camera.
ø58 mm
{2-9/32 inches}
85 mm
【1】Preparations before installation
【2】
Fix
this product
to the mount bracket
(locally procured).
➡
①Fix this product to the mount bracket.
②
Fill the gap between the mount bracket and this
product with waterproof material (locally procured)
such as silicon clay.
This product
Mount bracket
(locally procured)
IMPORTANT:
• The mount bracket (locally procured) should
have the configuration that enables fixation of
safety wire from camera.
Mount bracket
(locally procured)
This product
Waterproof material
(locally procured)
Safety wire
installation
surface
i-PRO Co., Ltd. assumes no responsibility for injuries or property damage resulting from
failures arising out of improper installation, operation inconsistent with this documentation
or through use of parts other than this product, such as locally procured parts.
Caution:
• Before attempting to connect or operate this
product, please read these instructions care-
fully.
Notice:
• This product is not suitable for use in loca-
tions where children are likely to be present.
• Do not install this product in locations where
ordinary persons can easily reach.
• For information about screws and brackets
required for installation, refer to the corre-
sponding section of this document.
Mount bracket (locally procured) ......................................................................................... 1 set
Other items that are needed (not included)
AB
WV-Q123A
WV-Q179
WV-QAT500-W
40A, R 1-1/2, 11crest
length 30 mm
{1-3/16 inches} or more
(taper pipe thread)
40A, Rp 1-1/2, 11 crest
deep MAX. 30 mm
{1-3/16 inches}
(parallel thread)
WV-QAT501-S40A, NPT 1-1/2, 11.5
crest
length 30 mm
{1-3/16 inches} or more
(taper pipe thread)
40A, NPS 1-1/2, 11.5 crest
deep MAX. 30 mm
{1-3/16 inches}
(parallel thread)
A
B
{3-11/32 inches}
© i-PRO Co., Ltd. 2022
For U.S. and Canada:
i-PRO Americas Inc.
For Europe and other countries:
i-PRO EMEA B.V.
https://www.i-pro.com/
Produktspezifikationen
| Marke: | I-PRO |
| Kategorie: | Nicht kategorisiert |
| Modell: | WV-QAT501-S |
Brauchst du Hilfe?
Wenn Sie Hilfe mit I-PRO WV-QAT501-S benötigen, stellen Sie unten eine Frage und andere Benutzer werden Ihnen antworten
Bedienungsanleitung Nicht kategorisiert I-PRO

7 Oktober 2025
7 Oktober 2025
1 Oktober 2025
28 Juli 2025
28 Juli 2025
28 Juli 2025
28 Juli 2025
28 Juli 2025
28 Juli 2025
28 Juli 2025
Bedienungsanleitung Nicht kategorisiert
Neueste Bedienungsanleitung für -Kategorien-
3 April 2026
3 April 2026
3 April 2026
3 April 2026
3 April 2026
3 April 2026
3 April 2026
3 April 2026
3 April 2026
3 April 2026