Intermatic RC4G Bedienungsanleitung
Lies die bedienungsanleitung für Intermatic RC4G (2 Seiten) kostenlos online; sie gehört zur Kategorie Nicht kategorisiert. Dieses Handbuch wurde von 24 Personen als hilfreich bewertet und erhielt im Schnitt 4.8 Sterne aus 8 Bewertungen. Hast du eine Frage zu Intermatic RC4G oder möchtest du andere Nutzer dieses Produkts befragen? Stelle eine Frage
Seite 1/2
POOL/SPA CONTROL ACCESSORIES
INSTALLATION
& OPERATING
INSTRUCTIONS
Model: RC4G Air Button
for Gunite / In-Wall Applications
This Air Button is especially suited for gunite/concrete
type construction and it is designed to slip-fit inside of
a schedule 40 PVC conduit. Because of its low profile,
it is the perfect choice for both the vertical and the
horizontal mounting arrangements. It will operate any
Intermatic relay type Air Control up to 100 feet away.
1. Make sure the distance between the Air Control and
Air Button is not over 100 feet.
2. Install PVC conduit between the Air Control and Air
Button, using sweep elbows or forming large radius
curves with heat gun.
3. At pool/spa side, make sure the conduit is the 1 inch
I.D., either rigid or the flexible type, and extends well
beyond the intended finished surface.
4. When the pool/spa deck work is complete, cut
conduit flush with finished surface. Try Air Button for
fit. Due to irregularities and variations in conduit I.D.
some sanding of I.D. may be required.
5. Pull 1/8 inch I.D. vinyl tubing between Air Control
and Air Button, allowing 6 to 10 extra inches at both
ends. Make sure the tubing is especially formulated
for such an application (we recommend using tubing
supplied by ), free of kinks, splices and Intermatic
protected from chemicals and rough edges. Do
not allow water or other contaminants to enter
tubing.
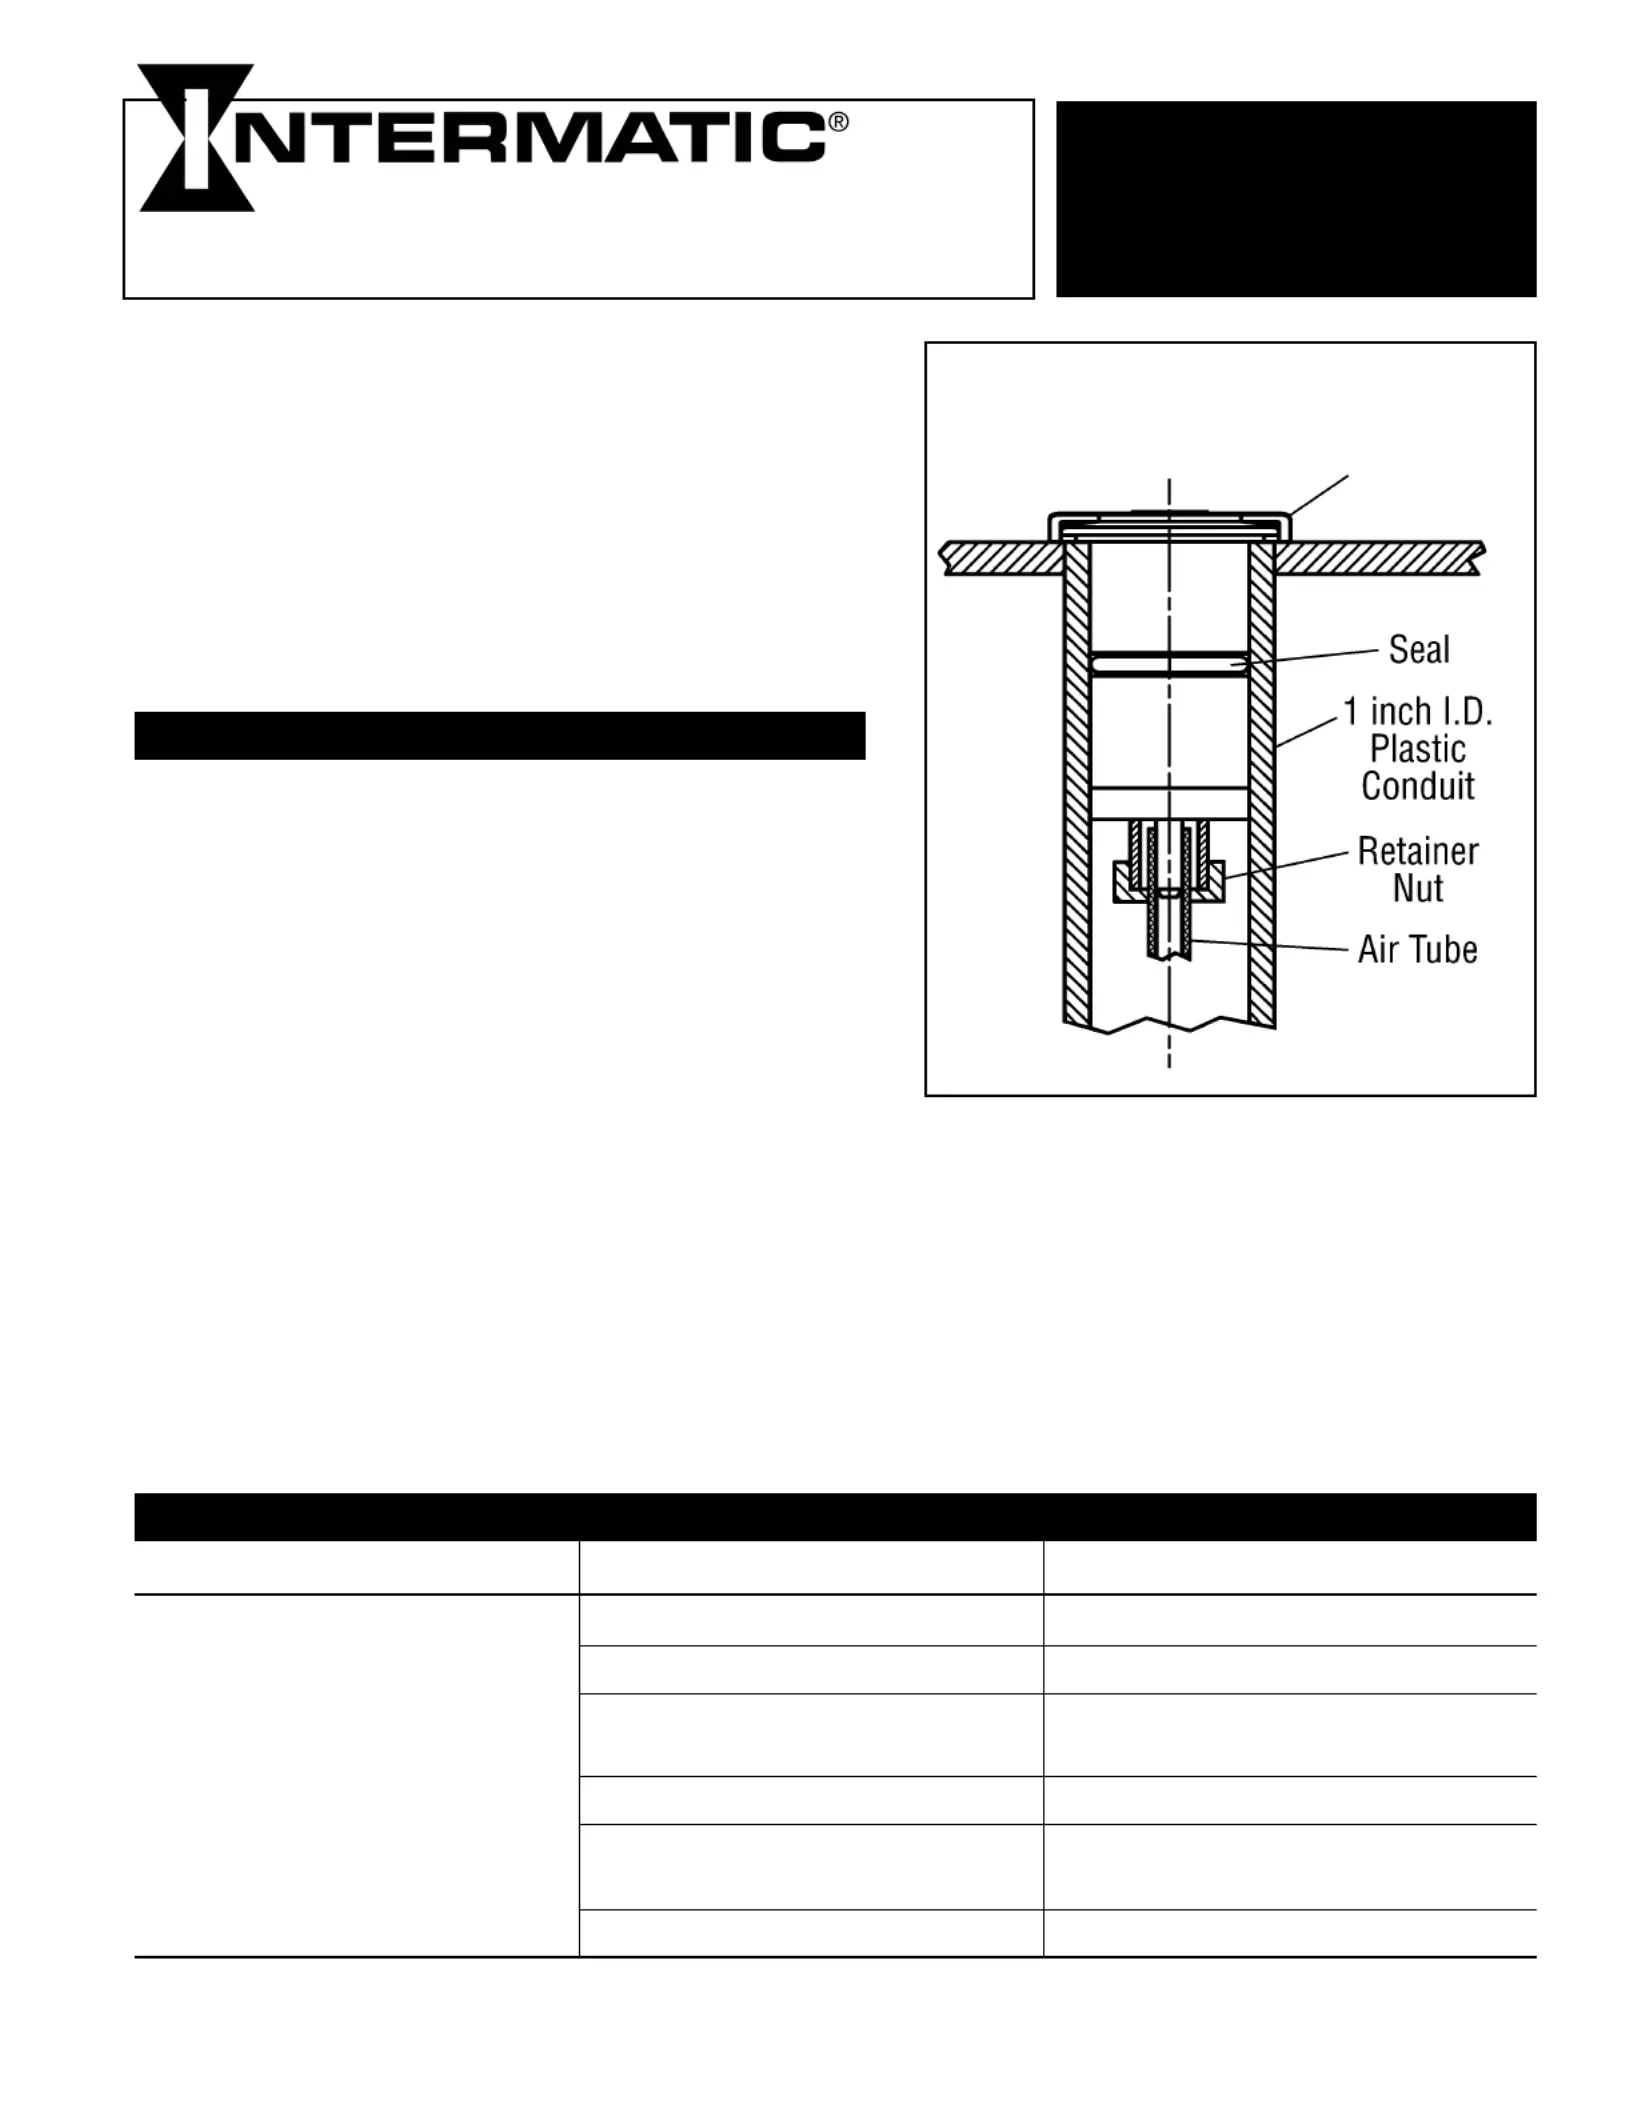
6. Slide retaining nut over tube and firmly
press tube over air buttons connecting
nipple. Hand tighten nut over the threaded
portion of Air Button (see illustration
above).
7. Push excess tubing back into conduit
and press Air Button into conduit. Apply
small amount of silicone sealer around the
flange of Air Button and snap bezel over
flange. The use of permanent glue is not
recommended.
1
Instructions
Troubleshooting
SYMPTOM CAUSE(S) CORRECTIVE ACTION
Air Button would not operate 1. Loose air tube connection. Check connections.
equipment. (See also “Useful
2. Water in air tube. Blow out tube.
Information” on back).
3. Air Control is too far from Change Air Button to larger size.
Air Button.
4. Defective Air Button. Change out Air Button.
5. Defective control and/or Check out installation.
equipment.
6. No power to control. Turn breaker ON.
Bezel
Produktspezifikationen
| Marke: | Intermatic |
| Kategorie: | Nicht kategorisiert |
| Modell: | RC4G |
Brauchst du Hilfe?
Wenn Sie Hilfe mit Intermatic RC4G benötigen, stellen Sie unten eine Frage und andere Benutzer werden Ihnen antworten
Bedienungsanleitung Nicht kategorisiert Intermatic

5 November 2025
5 November 2025
4 September 2025
3 September 2025
20 August 2025
20 August 2025
4 August 2025
2 August 2025
2 August 2025
2 August 2025
Bedienungsanleitung Nicht kategorisiert
Neueste Bedienungsanleitung für -Kategorien-
3 April 2026
3 April 2026
3 April 2026
3 April 2026
3 April 2026
3 April 2026
3 April 2026
3 April 2026
3 April 2026
3 April 2026