Klein Tools 60523 Bedienungsanleitung
Lies die bedienungsanleitung für Klein Tools 60523 (4 Seiten) kostenlos online; sie gehört zur Kategorie Nicht kategorisiert. Dieses Handbuch wurde von 16 Personen als hilfreich bewertet und erhielt im Schnitt 4.4 Sterne aus 8 Bewertungen. Hast du eine Frage zu Klein Tools 60523 oder möchtest du andere Nutzer dieses Produkts befragen? Stelle eine Frage
Seite 1/4
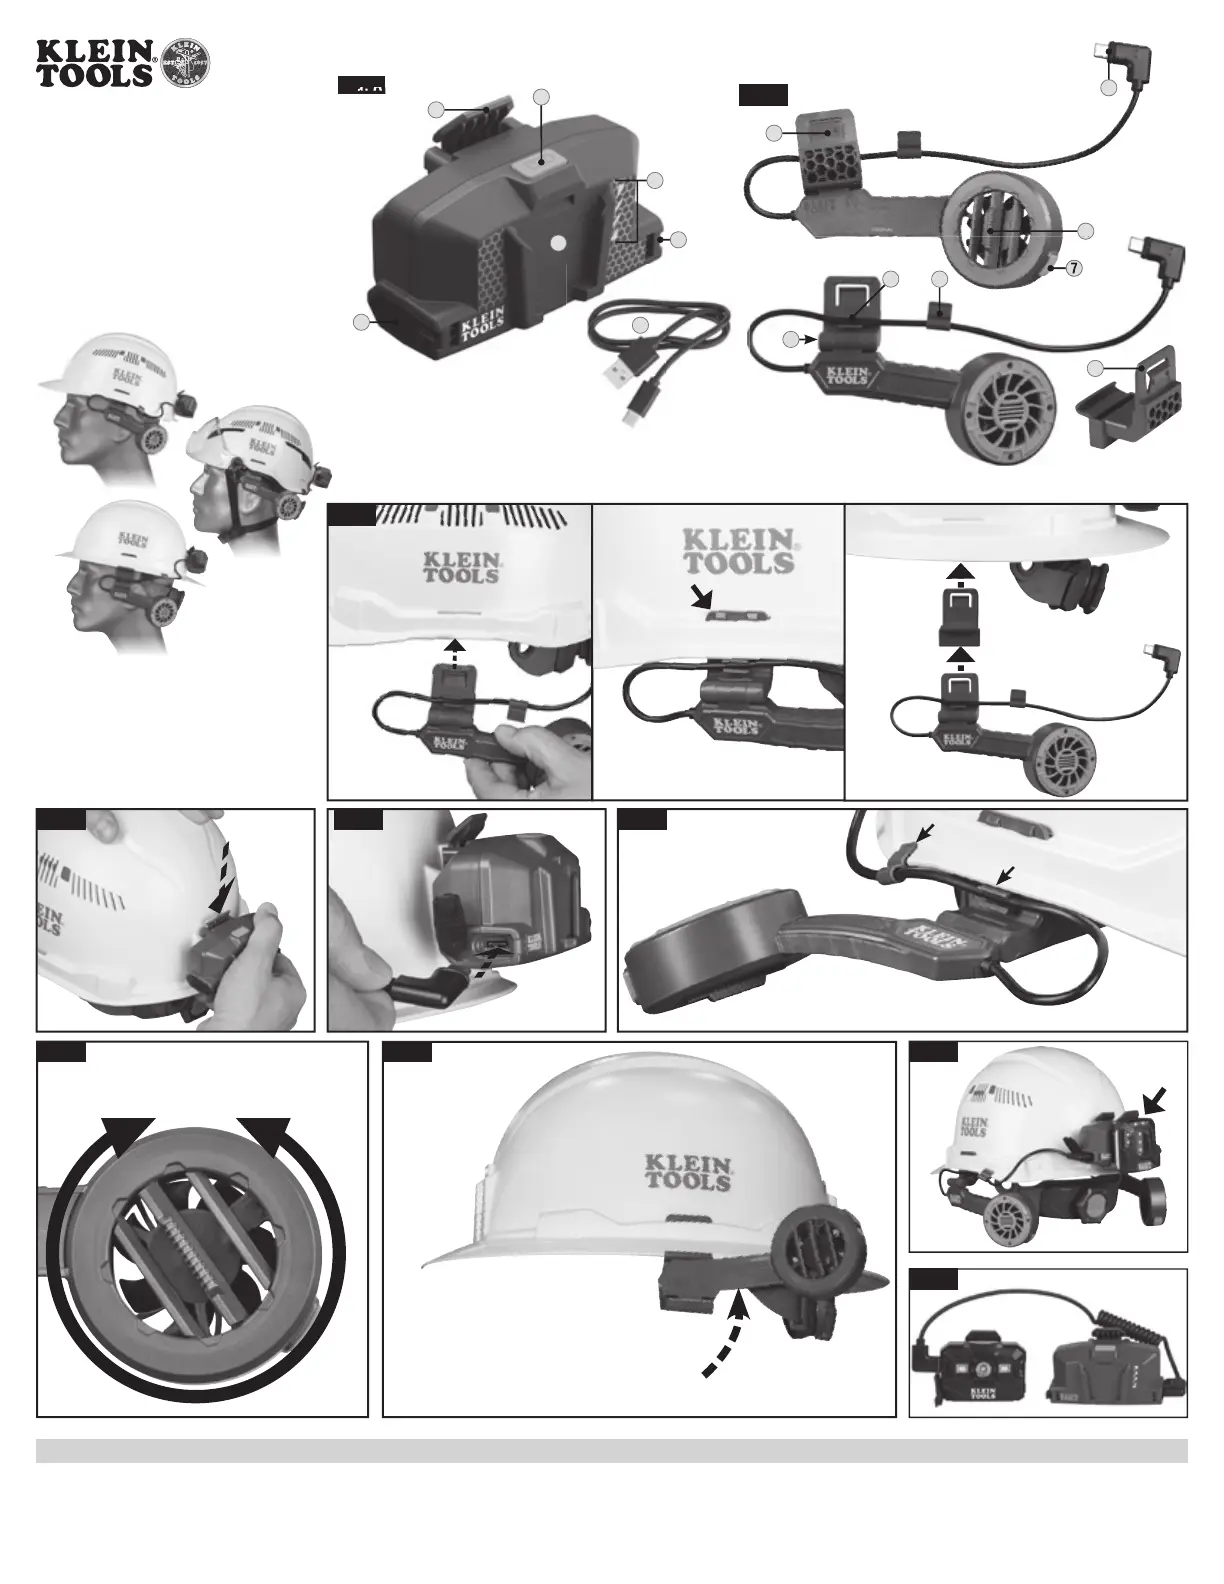
60523
Lightweight
Cooling Fans -
Instructions
BASED ON: 1390589 Rev 05/23 A
9
10
13
FIG. B
7
10
10
7
1211
8
14
Ventiladores de enfriamiento
livianos -
Instrucciones
Ventilateurs de
refroidissement légers–
instructions
Hard hats, safety helmet, and safety visor not included.
Cascos de seguridad tipo cachucha, casco de seguridad y
visera de seguridad no incluidos.
Casques de chantier, casques de sécurité et visières de sécurité
non inclus.
FIG. DFIG. EFIG. F
FIG. HFIG. G
360°
FIG. C
FIG. A
FIG. A
1
2
4
4
5
3
6
FIG. I
FIG. J
CUSTOMER SERVICE / SERVICIO AL CLIENTE / SERVICE À LA CLIENTÈLE
KLEIN TOOLS, INC.
450 Bond Street, Lincolnshire, IL 60069 1-800-553-4676
[email protected] www.kleintools.com
Produktspezifikationen
| Marke: | Klein Tools |
| Kategorie: | Nicht kategorisiert |
| Modell: | 60523 |
Brauchst du Hilfe?
Wenn Sie Hilfe mit Klein Tools 60523 benötigen, stellen Sie unten eine Frage und andere Benutzer werden Ihnen antworten
Bedienungsanleitung Nicht kategorisiert Klein Tools

7 März 2026
26 November 2025
22 November 2025
7 Oktober 2025
7 Oktober 2025
2 September 2025
1 September 2025
1 September 2025
1 September 2025
1 September 2025
Bedienungsanleitung Nicht kategorisiert
Neueste Bedienungsanleitung für -Kategorien-
3 April 2026
3 April 2026
3 April 2026
3 April 2026
3 April 2026
3 April 2026
3 April 2026
3 April 2026
3 April 2026
3 April 2026