Kramer KC-ON PREM Bedienungsanleitung
Kramer Nicht kategorisiert KC-ON PREM
Lies die bedienungsanleitung für Kramer KC-ON PREM (2 Seiten) kostenlos online; sie gehört zur Kategorie Nicht kategorisiert. Dieses Handbuch wurde von 23 Personen als hilfreich bewertet und erhielt im Schnitt 4.9 Sterne aus 3 Bewertungen. Hast du eine Frage zu Kramer KC-ON PREM oder möchtest du andere Nutzer dieses Produkts befragen? Stelle eine Frage
Seite 1/2
KC-ONPREM Quick Start
P/N:
2900-301595QS
Rev:
1
Scan for full manual
KC-ONPREM Quick Start Guide
This guide helps you install and use your KC-ONPREM for the rst time.
Go to www.kramerav.com/downloads/KC-ONPREM to download the latest user manual and check if
rmware upgrades are available.
Step 1: Check what’s in the box
KC-ONPREM Hardware platform for Control On Prem
1 Power adapter and cord
1 Quick start guide
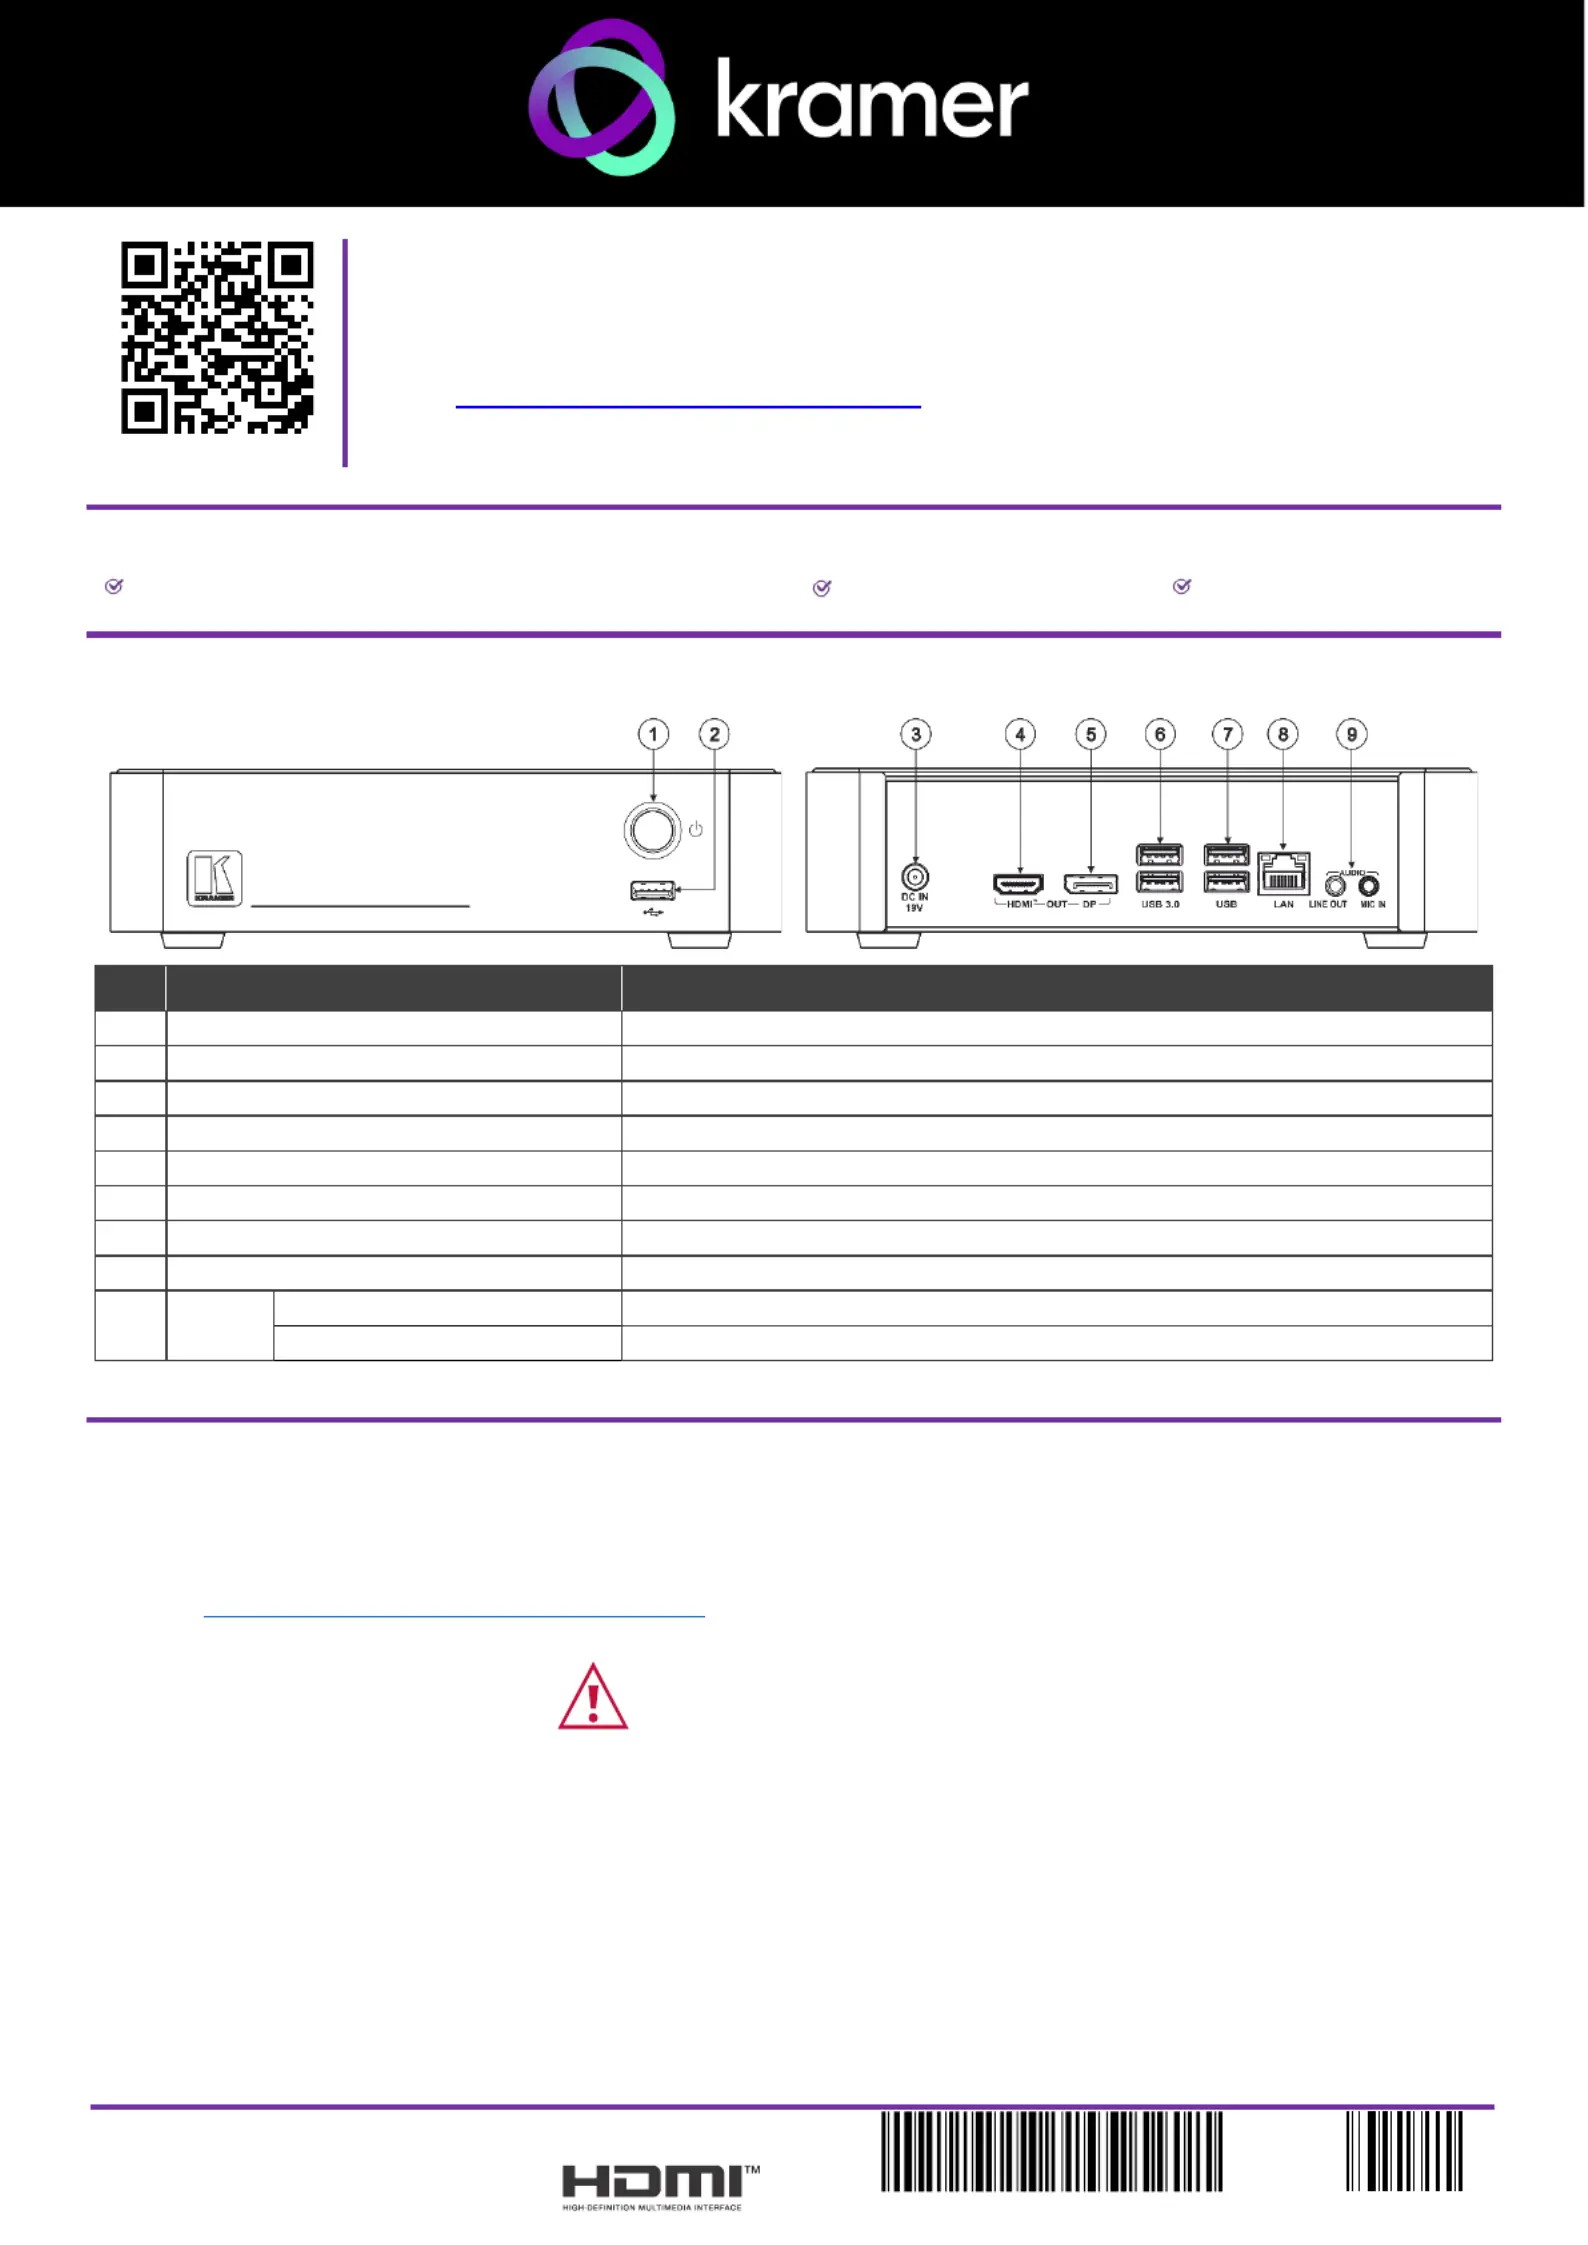
Step 2: Get to know your -ONPREM KC
#
Feature
Function
1
Power Button
Press to turn the on and o. unit
2
USB 2.0 Connector
Connect to a computer for upgrading rmware or connect a USB device. to
3
DC IN 19V Connector
Connects to the 19V DC power adapter.
4
HDMI OUT Connector ™
Connect to an HDMI display.
5
DP OUT Connector
Connect to a DisplayPort display.
6
USB 3.0 connectors
Connect to up to 2 USB devices.
7
USB 2.0 connectors
Connect to up to 2 USB devices.
8
LAN RJ-45 Connector
Connect to a Local Area Network (LAN) cable.
9
AUDIO
LINE OUT 3.5mm Mini Jack
Connect to an unbalanced stereo audio acceptor.
MIC IN 3.5mm Mini Jack
Connect to a microphone.
The terms HDMI, HDMI High-Denition Multimedia Interface, and the HDMI Logo are trademarks or registered trademarks of HDMI Licensing Administrator, Inc.
Step 3: Mount -ONPREM KC
Install using one of the following methods: KC-ONPREM
•Attach the rubber feet and place the unit on a at surface.
•Mount the unit in a rack using the recommended rack adapter
(see www.kramerav.com/product/KC-ONPREM).
•Ensure that the environment (e.g., maximum ambient temperature & air ow) is compatible for the device.
•Avoid uneven mechanical loading.
•Appropriate consideration of equipment nameplate ratings should be used for avoiding overloading of the circuits.
•Reliable earthing of rack-mounted equipment should be maintained.
•Maximum mounting height for the device is 2 meters.
Produktspezifikationen
| Marke: | Kramer |
| Kategorie: | Nicht kategorisiert |
| Modell: | KC-ON PREM |
Brauchst du Hilfe?
Wenn Sie Hilfe mit Kramer KC-ON PREM benötigen, stellen Sie unten eine Frage und andere Benutzer werden Ihnen antworten
Bedienungsanleitung Nicht kategorisiert Kramer

14 März 2026
24 Januar 2026
14 Januar 2026
27 September 2025
27 September 2025
27 September 2025
27 September 2025
9 September 2025
21 August 2025
21 August 2025
Bedienungsanleitung Nicht kategorisiert
Neueste Bedienungsanleitung für -Kategorien-
3 April 2026
3 April 2026
3 April 2026
3 April 2026
3 April 2026
3 April 2026
3 April 2026
3 April 2026
3 April 2026
3 April 2026