LC-Power Gaming 810W Bedienungsanleitung
LC-Power Computergehäuse Gaming 810W
Lies die bedienungsanleitung für LC-Power Gaming 810W (1 Seiten) kostenlos online; sie gehört zur Kategorie Computergehäuse. Dieses Handbuch wurde von 32 Personen als hilfreich bewertet und erhielt im Schnitt 4.0 Sterne aus 2 Bewertungen. Hast du eine Frage zu LC-Power Gaming 810W oder möchtest du andere Nutzer dieses Produkts befragen? Stelle eine Frage
Seite 1/1
10
Mainboard installaon�
1. Open the le side panel, install the I/O shield
2
to the mainboard model.
3. Insert the mainboard and seure with srews tpe 3
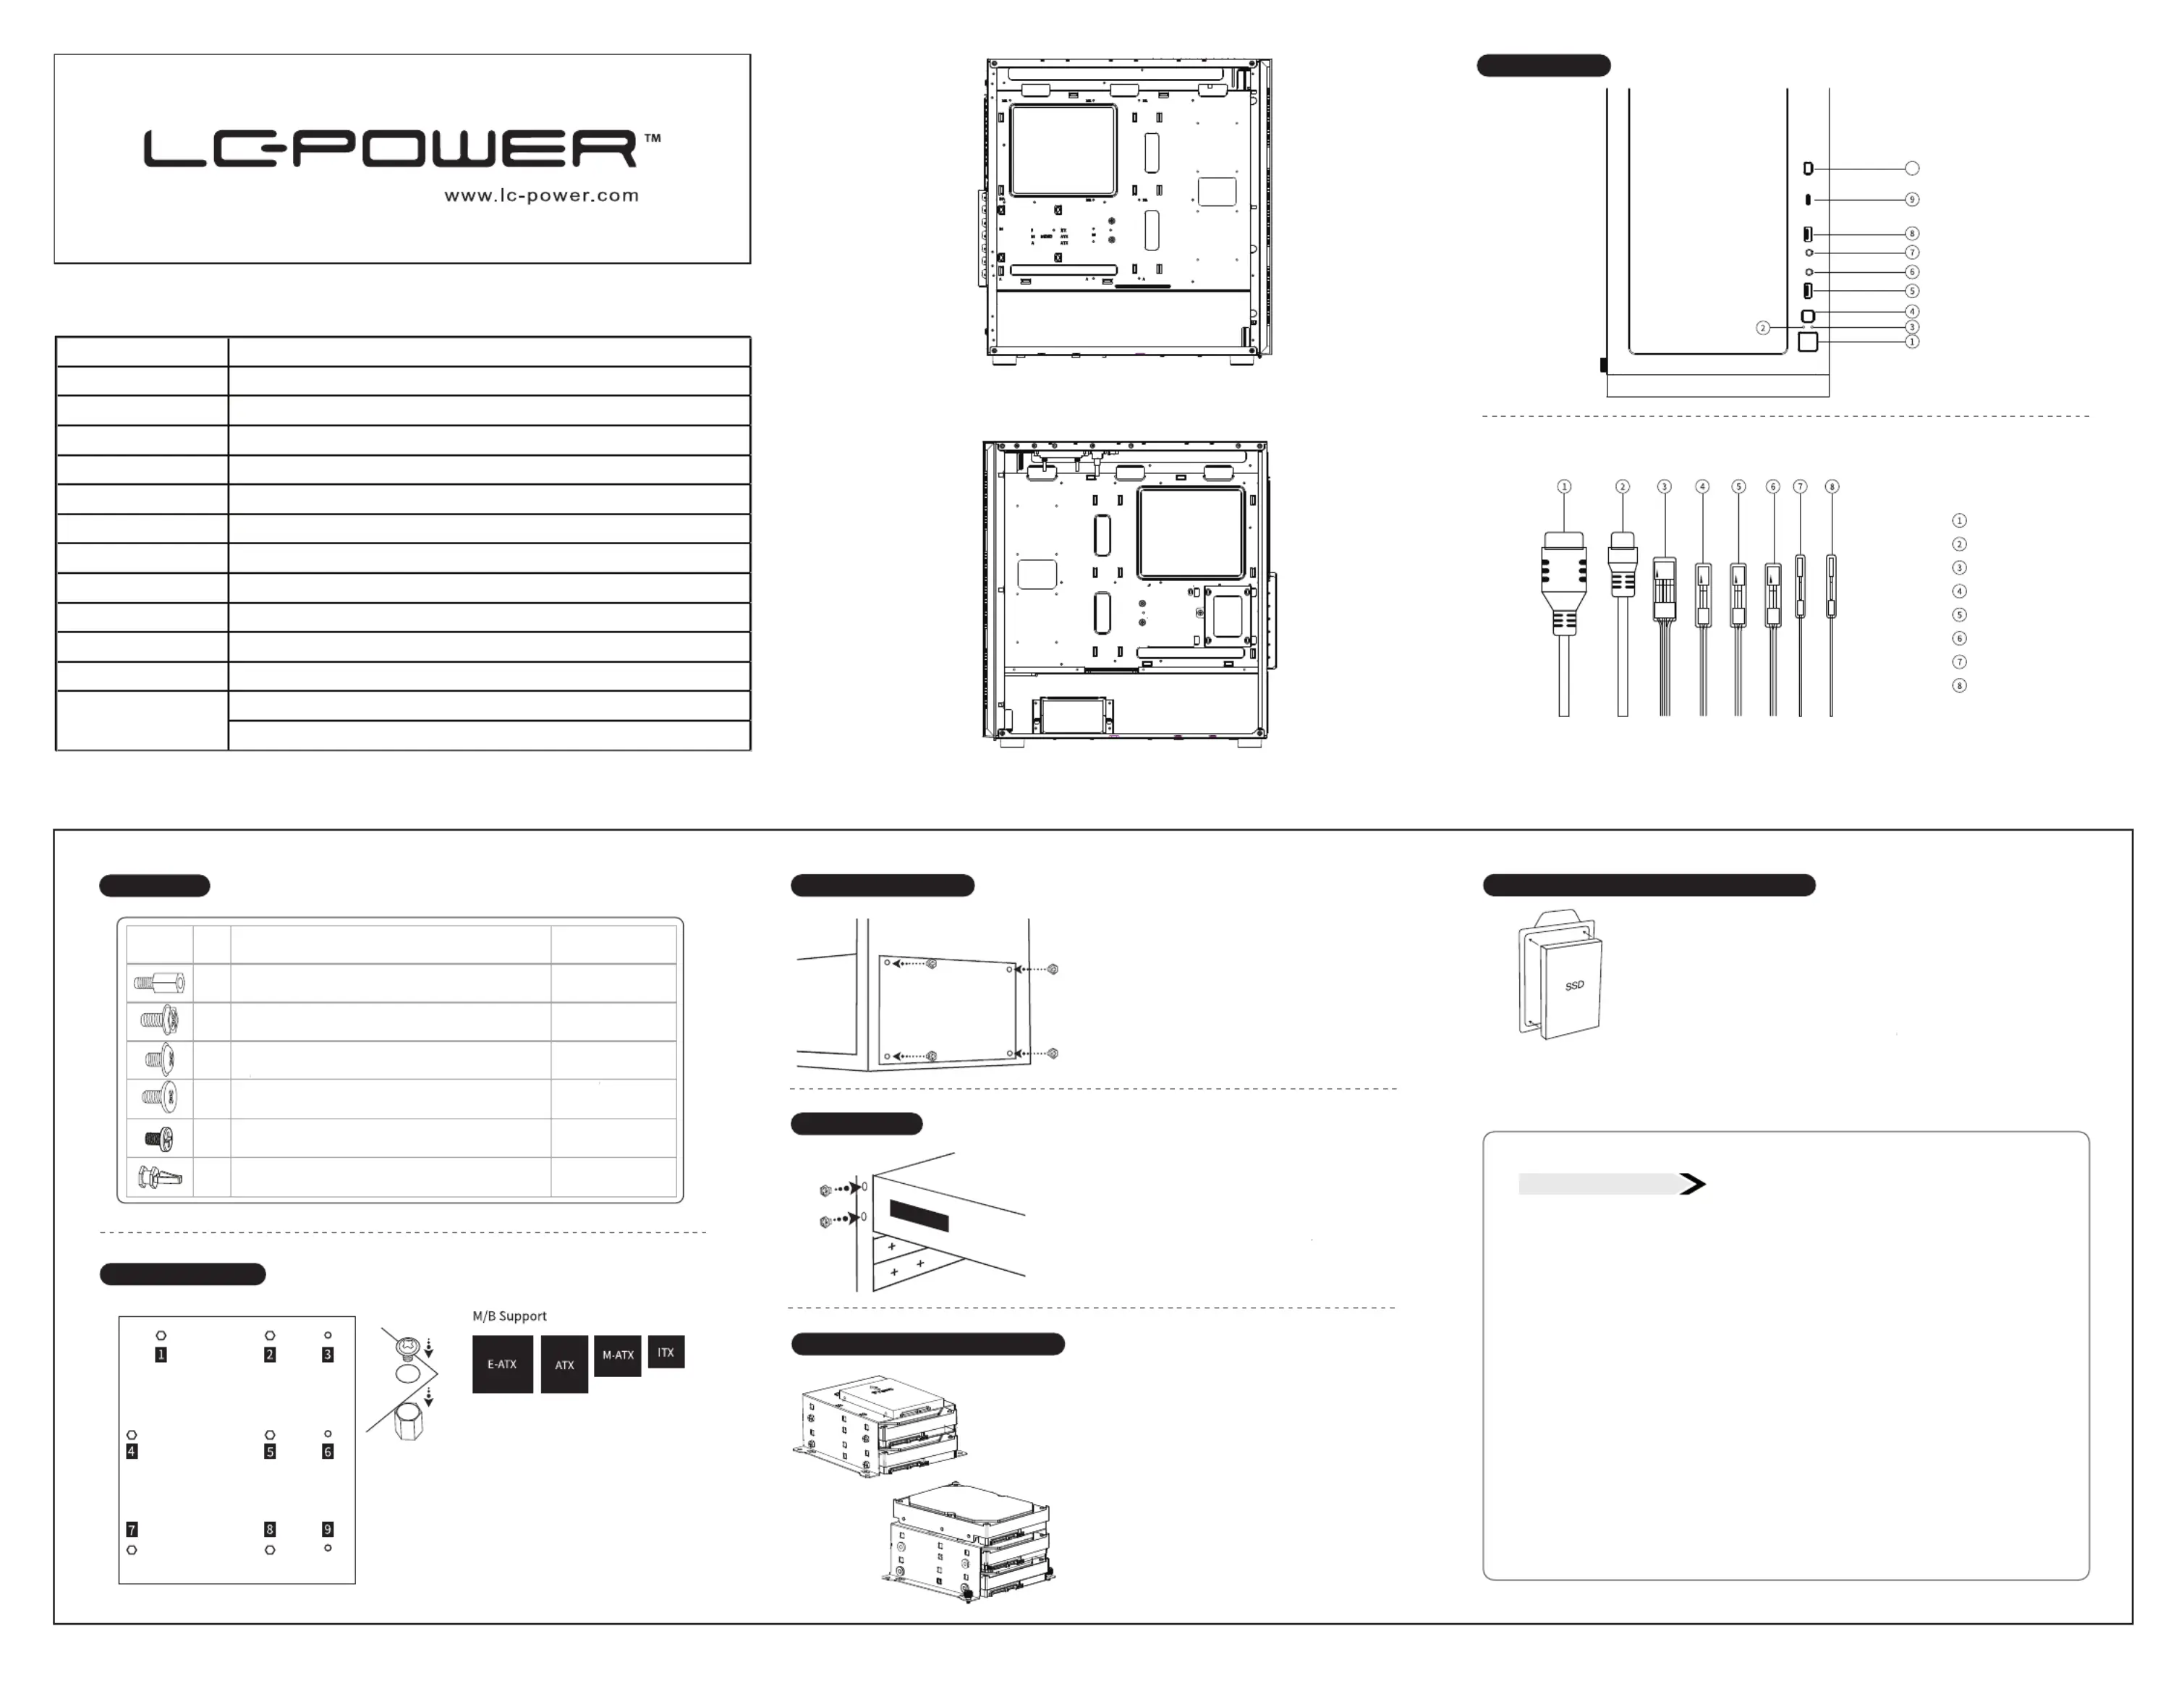
USB-A (3.2 Gen. 1x1)
USB-C (3.2 Gen. 2x2)
HD Audio
Power Switch
Reset Switch
HDD LED
Power LED +
Power LED -
Accessories
pe
DesriponQuant
1Mainboard standos3 ps
2Srews for power suppl PSU / GPU / PCI slot ps
3Srews for mainboard / 2,5" SSD18 ps
4
5
Srews for 3,5" HDD9 ps
2 ps
3 ps
USB-A (3.2 Gen. 1x1)
USB-A (3.2 Gen. 1x1)
Power Button
HDD LED
RESET Button
Power LED
Headphone
Microphone
USB-C (3.2 Gen. 2x2)
LED Button
User Interface
HDD/SSD installaon in HDD/SSD bracket�
1. Remove the riht side panel
2. Remove the HDD/SSD braket out of the ase boom
and slide the HDD tra out of the braket
3. Seure the HDD or SSD to the tras with srews pe 4 or pe 3
4. Install the HDD/SSD braket bak to
5. Seure the HDD braket with thumb srews
SSD installaon behind main board plate (oponal)��
1. Remove riht side panel and nd the SSD brakets
2. Remove the SSD brakets b unseure the srew
3. Seure the SSD at the bak side of mainboard with 4 srews pe 3
4. Seure the SSD braket with thumb srew
Service & notes
Avoid direct sunlight d a anhigh tatemperure environment, kp the case far eeaway from fire and heat sources.
Keep it in dry places, keep it away from corrosiveness causing materials.
The product has a two year warranty period from the date of purchase, service issues will be handled by your dealer.
If the case is damaged due to improper operation, the warranty period expires immediately.
Check www.lc-power.com or contact us by e-mail at: [email protected].
Silent Power Electronics GmbH
Formerweg 8, 47877 Willich, Germany
www.lc-power.com / service@ower.comlc-p / suorppt@lcer.com-pow
GPU installa�on
1. Remove metal plates on PCI slots
2.
3.
Power Supply installaon�
1. Open the riht side panel
2. he fan of the PSU, then slide
in the PSU into the power ompartment.
3. Seure the PSU with 4 srews tpe 2
* Please refer to the power suppl manual
for the power able onneon method.
ModelG
M/B TypeSupport EA, A, MiroA, MiniI
Internal Bays3,5’’ HDD & 2,5’’ SSD
Front I/O Panel US 2, HD Audio, Power SReset SLED S
Front Cooling Fan312 mm/14 mm fan or 124/28/3mm water oolin radiator
Rear Cooling Fan112 mm fan or 112 mm water oolin radiator
Top Cooling Fan 312 mm or 214 mm fan or 124/28/3 mm water oolin radiator
PCI Slot+ 2 vera
Graphic Card Lengthup t
o 4 mm
CPU Cooler Heightup to 155 mm
Supported Power SupplyA PSU
Cable managementbehind , up to 18 mm
42548 mm front pane
4254mm ludin front pane
Dimension
Produktspezifikationen
| Marke: | LC-Power |
| Kategorie: | Computergehäuse |
| Modell: | Gaming 810W |
Brauchst du Hilfe?
Wenn Sie Hilfe mit LC-Power Gaming 810W benötigen, stellen Sie unten eine Frage und andere Benutzer werden Ihnen antworten
Bedienungsanleitung Computergehäuse LC-Power

25 März 2026
21 März 2026
7 August 2025
6 August 2025
6 August 2025
Bedienungsanleitung Computergehäuse
Neueste Bedienungsanleitung für -Kategorien-
2 April 2026
30 März 2026
29 März 2026
29 März 2026
28 März 2026
27 März 2026
27 März 2026
27 März 2026
27 März 2026