Litegear LiteDimmer Plus DC100V Bedienungsanleitung
Lies die bedienungsanleitung für Litegear LiteDimmer Plus DC100V (2 Seiten) kostenlos online; sie gehört zur Kategorie Regeln. Dieses Handbuch wurde von 41 Personen als hilfreich bewertet und erhielt im Schnitt 4.8 Sterne aus 6 Bewertungen. Hast du eine Frage zu Litegear LiteDimmer Plus DC100V oder möchtest du andere Nutzer dieses Produkts befragen? Stelle eine Frage
Seite 1/2
ABOUT
LiteDimmer+ Plus DC100 and DC200 units are the ideal portable companions
to power +Series light fixtures. With a focus on DC input power, the 100W
and 200W units can be powered using typical Gold-mount or V-mount style
camera batteries. Optionally, an external AC powered, 12 volt DC supply is
available and can be attached to a battery mount with the included adapter
bracket. The LiteDimmer+ Plus rugged housing includes several mounting
options including four ¼-20 threads for attaching clamps or brackets. The
internal electronics include genuine LiteDimmer circuits known for smooth
low end dimming, flicker-free operation, and rock solid reliability. Control is
provided by our hideaway rotary knobs allowing you to lock settings such as
CCT. These controls have set the industry standard for tactile Hybrid control
along with the “Aaaaand Action!” trigger switch for easy cueing.
POWER
The DC100 and DC200 operate with DC voltage. When using Gold-mount or
V-mount batteries, the input voltage should not exceed 14.4VDC (nominal).
The alternate DC input voltage through the PL4 connector varies depending
on the model of LiteDimmer+ Plus. The DC100 PL4 input range is 9VDC to
40VDC. The DC200 PL4 input range is 10VDC to 18VDC.
•
DC100 & DC200 (Gold-mount or V-mount batteries):
14.4VDC (nominal) (10VDC to 16VDC)
•
DC100 (through alternate PL4): 9VDC to 40VDC
•
DC200 (through alternate PL4): 10VDC to 18VDC
OPERATING
1) Position the three-position rocker switch to the center (OFF) position.
2) Connect the load to the PL7 output connector.
Be sure you observe wattage requirements for both the LED load
and the LiteDimmer+ Plus unit being used.
3) Turn the “Level” knob to 0%.
4) Turn the “Kelvin” knob counterclockwise to TUN.
5) Provide DC power to either battery plate(s) or the alternate
PL4 DC voltage input.
See “POWER” section, observing voltage requirements.
You are now ready to operate the DC100 and/or DC200.
When installing the DC100 or the DC200, be sure to make use of the various
rigging points available, including slots for zip ties, Velcro® wraps, drywall
screws, rigging points to allow for hanging, and ¼-20 screws for attaching
clamps or other mounting hardware or even for attaching two or more units
together.
MODES
The DC100 and DC200 include several advanced software features. Moving
the three-position rocker switch to the ON position turns the dimmer on in
normal Hybrid mode. Moving the switch down to the ALT position accesses
one of several additional advanced software modes at any given time.
USER GUIDE
LITEDIMMERPLus
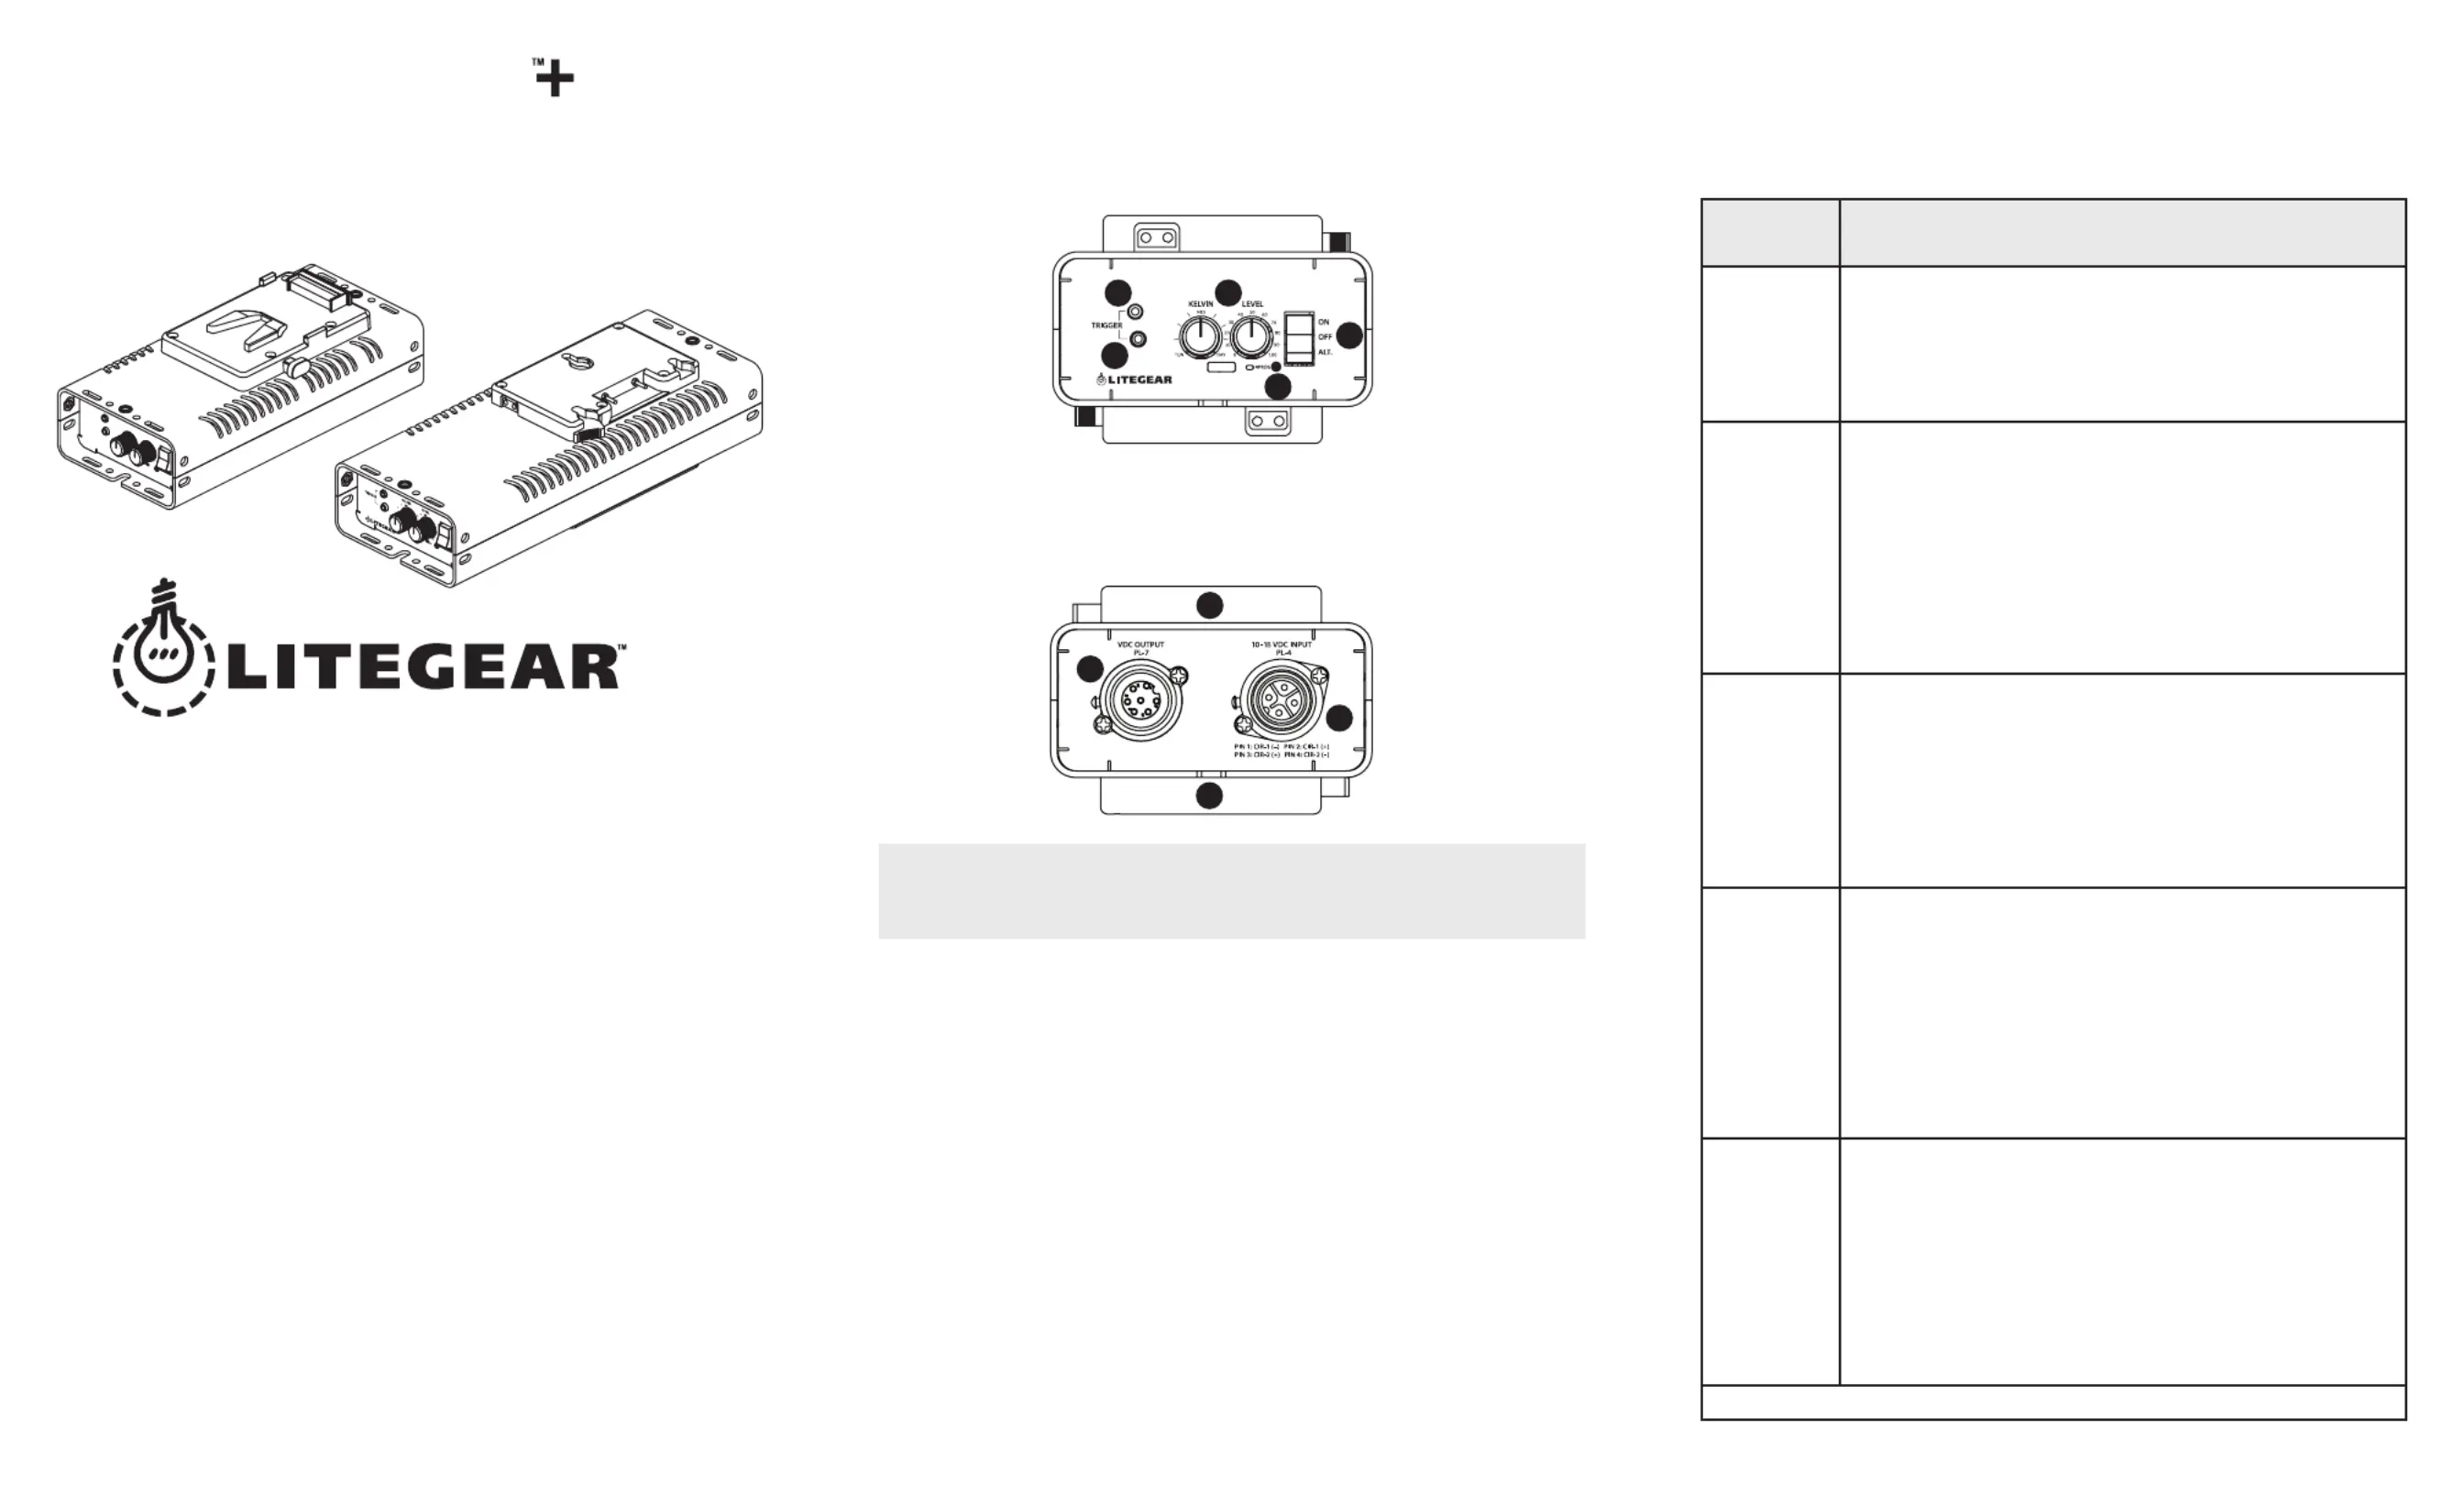
CONTROLS
A) Two Hideaway rotary knobs
B) Three-position rocker switch (ON, OFF, ALT.)
C) Local Trigger button for cueing and changing settings
D) Remote Trigger Jack, 2.5 mm TRS (For use with included trigger)
E) Program (PROG) button for Factory Reset
SAFETY AND MAINTENANCE
Before operation, inspect the cables and enclosure for any damage.
Also, inspect the installation for short circuits, damage, water, or similar.
ModeDescription
Hybrid
This mode ensures that the selected brightness of the LEDs does
not change even if the Kelvin temperature changes after setting the
brightness level. The indicator light will be green.
The indicator light will be green.
To access this mode:
1) Set the three-position rocker switch to the up (ON) position.
Low*
This mode is similar to normal Hybrid mode but decreases the
maximum output of the dimmer, enabling fine-adjustment of
brightness for low level requirements. The level to which the
maximum output is reduced can be adjusted. See “Variable Low
Mode.”
The indicator light will be blue.
To access this mode:
1) Ensure that Low mode is the selected ALT mode. To do this,
see “Changing ALT Modes” below.
2) Position the three-position rocker switch to the down
(ALT) position.
Bump
This mode allows for instantaneous full output when the LOCAL
TRIGGER or the REMOTE TRIGGER is pressed and held and no
output when any of the three buttons are released. The indicator
light will be purple.
To access this mode:
1) Ensure that Bump mode is the selected ALT mode.
To do this, see “Changing ALT Modes” below.
2) Position the three-position rocker switch to the down
(ALT) position.
Paparazzi
This mode allows for the LOCAL TRIGGER or the REMOTE TRIGGER,
when pressed, to trigger a paparazzi (flash) effect with adjustable
decay (see “Adjusting the Fade Time” below). For more information
on the Paparazzi effect, see “” below.Paparazzi Effect
The indicator light will be alternating purple and white.
To access this mode:
1) Ensure that Paparazzi mode is the selected ALT mode.
To do this, see “Changing ALT Modes” below.
2) Position the three-position rocker switch to the down
(ALT) position.
Fire
This mode randomizes the dimmer output to mimic a flame with
a variable low threshold and speed (see “Adjust Fire Effect
Parameters” section). For more information on the Fire effect, see
“” section. The indicator light will be orange.Fire Effect
To access this mode:
1) Ensure that Fire mode is the selected ALT mode.
To do this, see “Changing ALT Modes” below.
2) Position the three-position rocker switch to the down
(ALT) position.
*indicates the default ALT mode
4406 Vanowen Street, Burbank, California, 91505 USA
Tel: +1 (818) 358-8542 • Email: info@litegear.com • Web: www.litegear.com
CONNECTIONS
1) DC Power Input: Gold-Mount Plate* or V-Mount Plate* (one or two)
2) DC LED Output: PowerLock 7 (PL7) Connector
3) DC Power Input (alternate): PowerLock 4 (PL4) Connector
DC100DC200/
A
B
C
D
E
1
1
2
3
Produktspezifikationen
| Marke: | Litegear |
| Kategorie: | Regeln |
| Modell: | LiteDimmer Plus DC100V |
Brauchst du Hilfe?
Wenn Sie Hilfe mit Litegear LiteDimmer Plus DC100V benötigen, stellen Sie unten eine Frage und andere Benutzer werden Ihnen antworten
Bedienungsanleitung Regeln Litegear

1 August 2025
Bedienungsanleitung Regeln
Neueste Bedienungsanleitung für -Kategorien-
30 März 2026
28 März 2026
24 März 2026
22 März 2026
22 März 2026
22 März 2026
18 März 2026