Lorex LW2711AC1 Bedienungsanleitung
Lorex Sicherheitskamera LW2711AC1
Lies die bedienungsanleitung für Lorex LW2711AC1 (2 Seiten) kostenlos online; sie gehört zur Kategorie Sicherheitskamera. Dieses Handbuch wurde von 12 Personen als hilfreich bewertet und erhielt im Schnitt 4.4 Sterne aus 4 Bewertungen. Hast du eine Frage zu Lorex LW2711AC1 oder möchtest du andere Nutzer dieses Produkts befragen? Stelle eine Frage
Seite 1/2
www.lorextechnology.com
LW2711AC1 Series Quick Start Guide_R1 Page 1
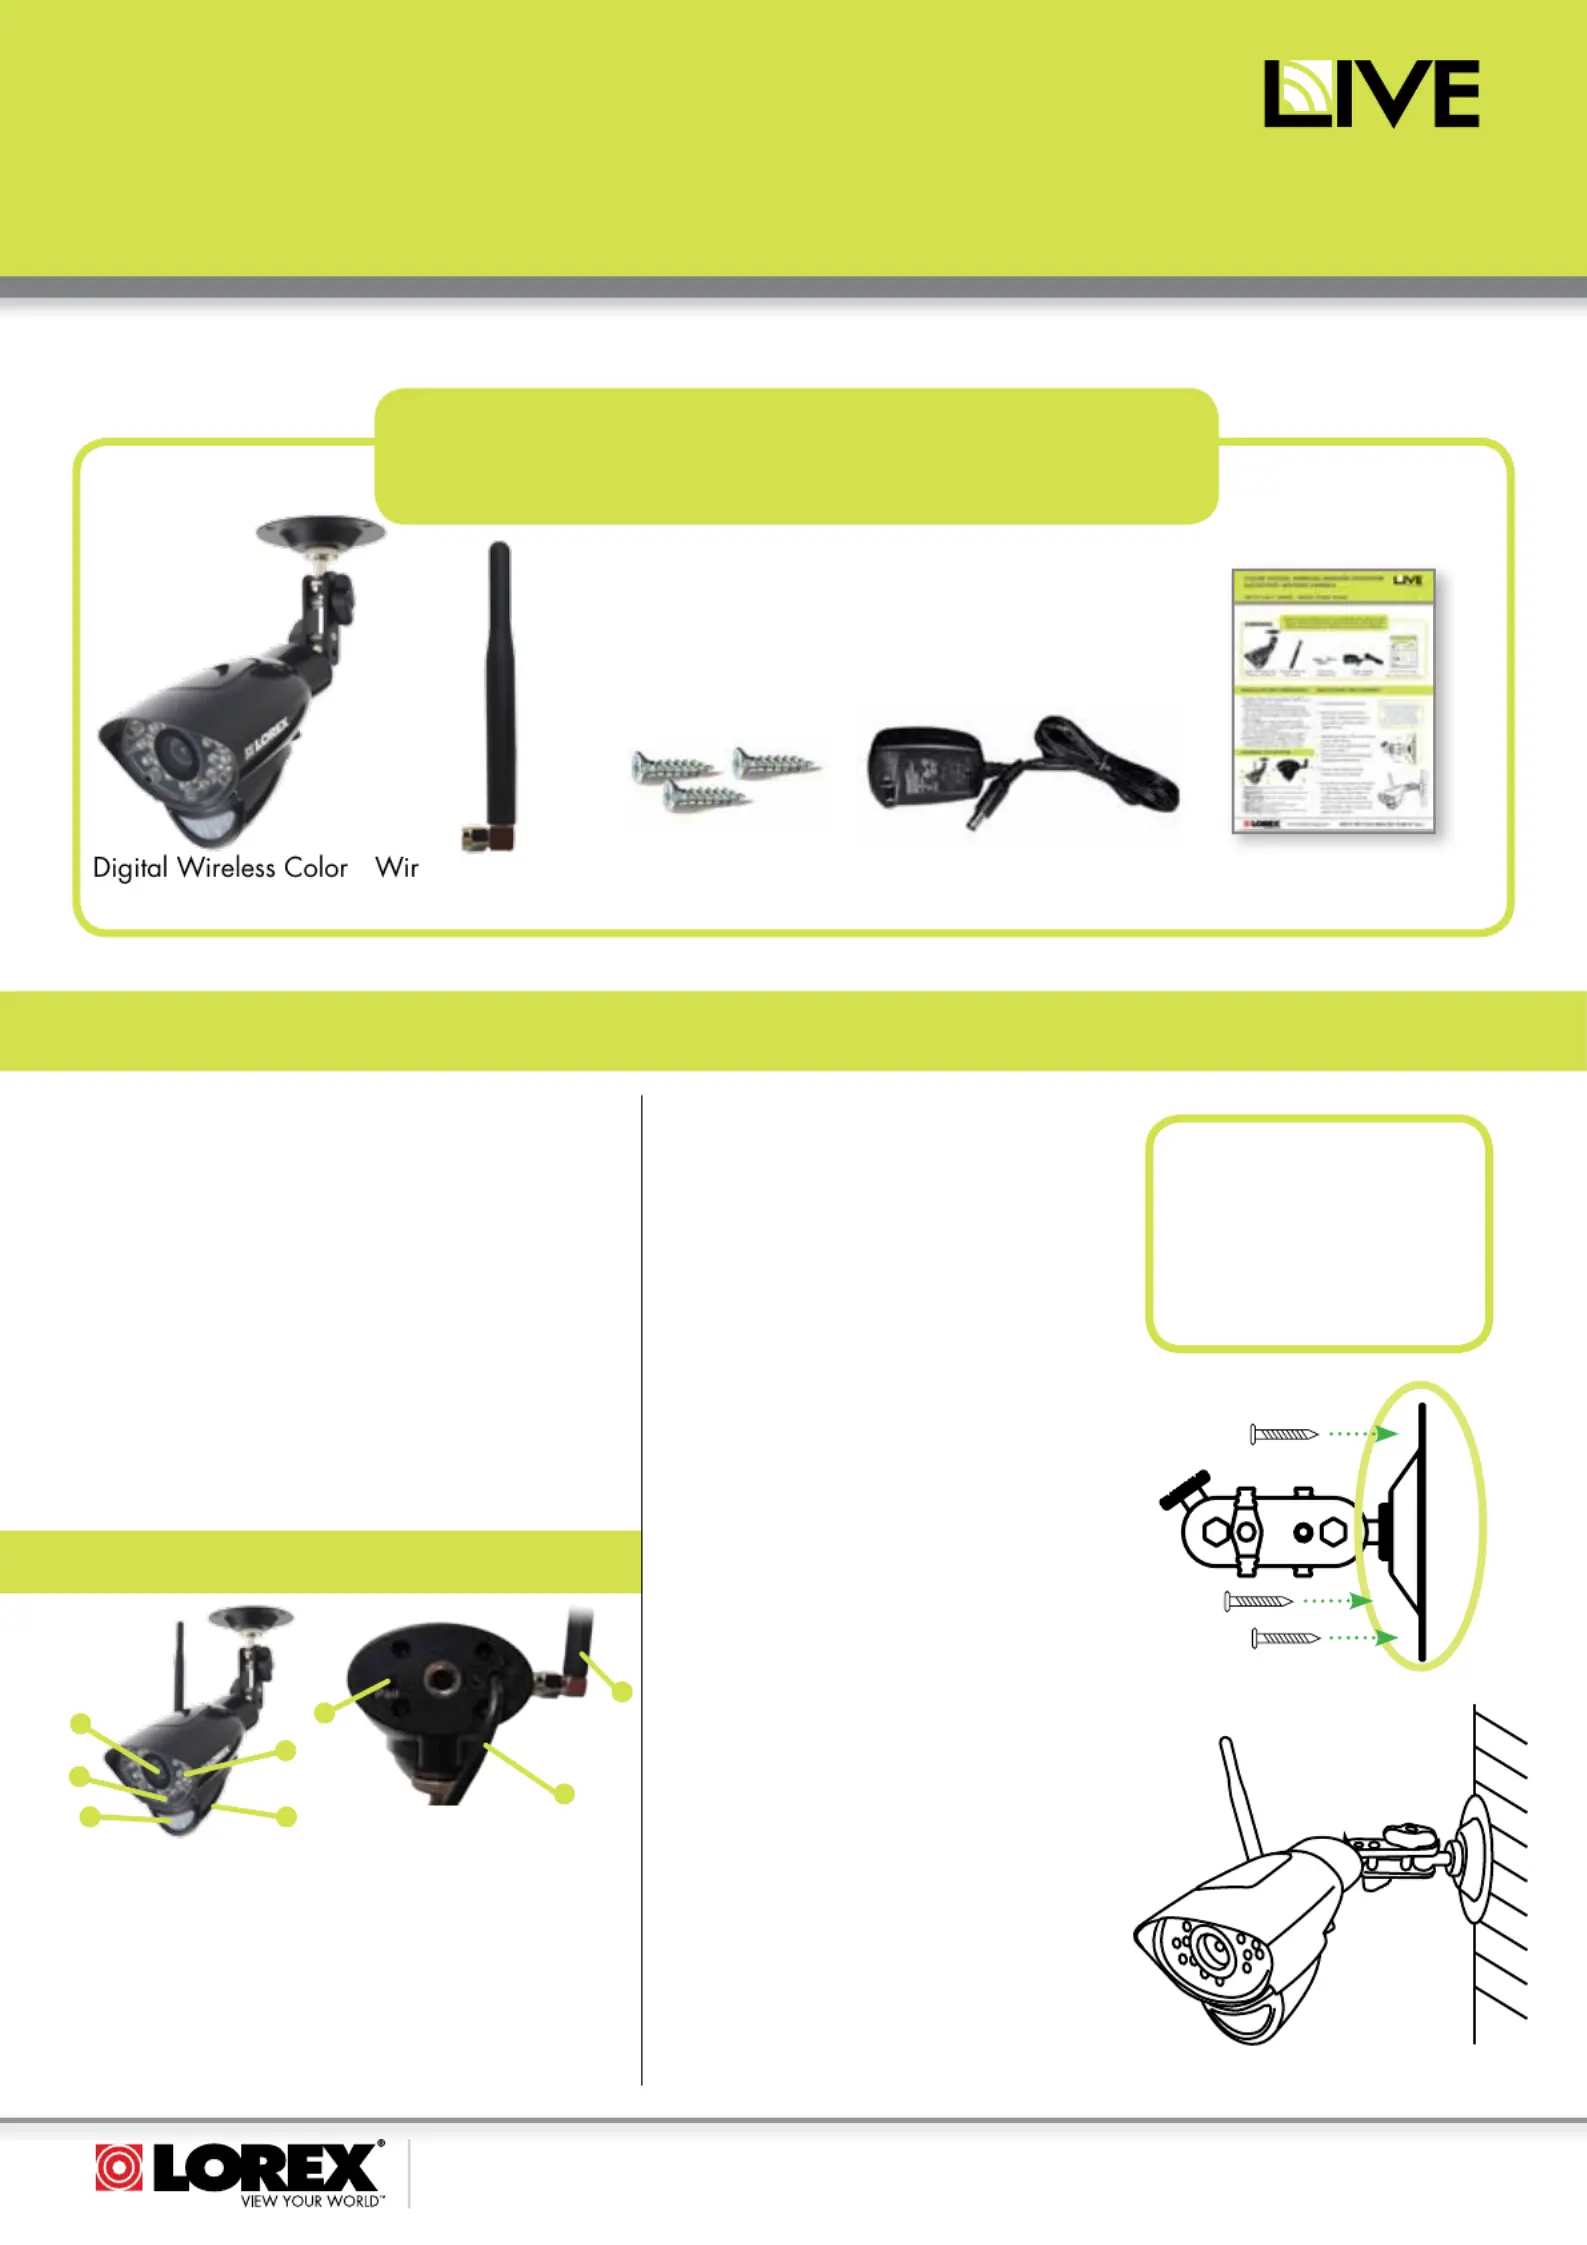
CONTENTS:
Quick Start Guide
Camera with Stand
eless Antenna
for camera
Power Adaptor
for camera*
• Mount the camera indoors or outdoors. For outdoor
installation, mount it in a sheltered place where it is not
directly exposed to rain or snow.
• Aim the Cameras to best optimize the viewing area:
Select a location for the camera that provides a clear
view of the area you want to monitor, which is free from
dust, and is not in line-of-sight to a strong light source or
direct sunlight.
• Avoid installing the cameras where there are thick
walls, obstructions, or interference (i.e. transformers,
microwave ovens or other electrical equipment) between
the Cameras and the Receiver.
• Select a location for the camera that has an ambient
temperature between 14°F~122°F (-10°C~50°C)
• Before starting permanent installation, have another
person hold the camera for you while you verify its
performance by observing the image on a monitor.
INSTALLING THE CAMERA
Before you install the camera, carefully plan where and
how it will be positioned, and where you will route the
cable that connects the camera to the power adaptor.
INSTALLATION WARNINGS
1. Carefully unpack the Camera.
2. Mount the stand to the wall or
ceiling (for ceiling mounting you
may need to move the antenna
sightly down):
• Mark the position of the screw holes
on the wall/ceiling.
• Drill holes and insert the drywall
plugs as needed.
• Firmly attach the stand to the wall
using the provided screws.
3. Screw on the Antenna to the
Camera prior to mounting.
4. Screw the camera to the stand by
attaching it either at the bottom or
back of the camera. For ceiling
mounting attach to the back thread.
Loosen the thumbscrews to adjust
position of the camera and tighten
to fix position.
*May not be exactly as shown
NOTE: AVOID INSTALLING IN A
LOCATION WHICH REQUIRES
THE WIRELESS SIGNAL TO
PASS THROUGH CEMENT,
CONCRETE AND METAL
STRUCTURES. THIS WILL REDUCE
THE TRANSMISSION RANGE.
Mounting
Hardware Kit
DIGITAL WIRELESS INDOOR/OUTDOOR
ACCESSORY MOTION CAMERA
LW2711AC1 SERIES - QUICK START GUIDE
CAMERA OVERVIEW
1. Passive IR motion sensor for more accurate PIR Sensor:
motion detection.
2. Built-in microphone for listening in.Microphone:
3. Camera Lens
4. For viewing in complete darkness.Night Vision IRs:
5. For two-way audio.Speaker:
6. See manual for more details.Pairing Button:
7. Detachable antenna.Antenna:
8. Power Cable
SIMPLY AWARE
™
7
8
5
6
4
1
2
3
Produktspezifikationen
| Marke: | Lorex |
| Kategorie: | Sicherheitskamera |
| Modell: | LW2711AC1 |
Brauchst du Hilfe?
Wenn Sie Hilfe mit Lorex LW2711AC1 benötigen, stellen Sie unten eine Frage und andere Benutzer werden Ihnen antworten
Bedienungsanleitung Sicherheitskamera Lorex

29 März 2026
27 März 2026
28 Februar 2026
28 Februar 2026
16 Januar 2026
3 November 2025
16 Oktober 2025
27 September 2025
15 September 2025
15 September 2025
Bedienungsanleitung Sicherheitskamera
Neueste Bedienungsanleitung für -Kategorien-
31 März 2026
31 März 2026
31 März 2026
31 März 2026
31 März 2026
29 März 2026
29 März 2026
29 März 2026
29 März 2026
28 März 2026