Lorex Vantage CVC7572PK4B Bedienungsanleitung
Lorex Sicherheitskamera Vantage CVC7572PK4B
Lies die bedienungsanleitung für Lorex Vantage CVC7572PK4B (2 Seiten) kostenlos online; sie gehört zur Kategorie Sicherheitskamera. Dieses Handbuch wurde von 11 Personen als hilfreich bewertet und erhielt im Schnitt 4.1 Sterne aus 9 Bewertungen. Hast du eine Frage zu Lorex Vantage CVC7572PK4B oder möchtest du andere Nutzer dieses Produkts befragen? Stelle eine Frage
Seite 1/2
FOR SUPPORT AND INFORMATION,
VISIT WWW.LOREXTECHNOLOGY.COM
Product Information
User Manuals
Quick Start Guides
Specification Sheets
Software Upgrades
Firmware Upgrades
Contents
•IR Night Vision Camera*
•Mounting Kit / Allen Key*
•60ft BNC / Power Extension Cable*
•Power Adapter**
•BNC-to-RCA Adapter***
Copyright © 2012 Lorex Technologies Inc.
As our products are subject to continuous improvement, Lorex reserves the right to modify product
design, specifications and prices, without notice and without incurring any obligation. E&OE
Camera Specifications
Image Sensor1/3” Color Image Sensor
Video FormatNTSC
Effective PixelsH: 728 V: 488
Resolution600 TV Lines
Scan System2:1 Interlace
Sync SystemInternal
S / N Ratio46.8dB (AGC Off)
IrisAES
AES Shutter Speed1/60 ~ 1/100,000 Sec.
Min. Illumination0.1 Lux without IR LED
0 Lux with IR LED
Video OutputComposite 1.0Vpp @ 75ohm
Lens / Lens Type3.6mm F2.1 / Fixed
FOV (Diagonal)78°
TerminationBNC Type
IR LED Qty. / Type24 pieces / 850nm
Night Vision Range*66ft (20m) / 90ft (28m)
Power Requirement12V DC ±10%
Power ConsumptionMax. 280mA (w / IR)
Operating Temp. Range14° ~ 122°F / –10° ~ 50°C
Operating Humidity Range< 60% RH
Indoor/Outdoor**Both (IP66)
Weight (including stand)0.6lbs / 0.3kg
* Stated IR illumination range is based on ideal conditions in total darkness and in typical outdoor
night time ambient lighting. Actual range and image clarity depends on installation location, viewing
area and light reflection / absorption level of object.
** Not intended for submersion in water. Installation in a sheltered location recommended.
WARNING - A REGULATED UL / CSA APPROVED power supply is
REQUIRED for use with this camera. Use of a non-regulated, non-conforming
power supply can damage this product and voids the warranty.
Features
•Super Resolution with enhanced optics image sensor
•BrightNight Viewing with enhanced lowlight image
sensor
•Night Vision up to 66/90ft (20/28m) away*
•Anti-glare feature ensures clear images under strong
lighting conditions
•Accurate colors with Lorex’s automatic light filtering
technology
•Vandal Resistant Design: Cable pass through bracket
•Weatherproof housing for indoor & outdoor installation
(IP66)**
•Wide-angle lens capturing 78° field of view (diagonal)
•Versatile mounting options: ceiling, counter or wall
mountable
Disclaimers:
* Stated IR illumination range is based on ideal conditions in total darkness and in typical outdoor
night time ambient lighting. Actual range and image clarity depends on installation location,
viewing area and light reflection / absorption level of object.
** Not intended for submersion in water. Installation in a sheltered location recommended.
Warning/Caution
•Read this guide carefully and keep it for future reference
•Follow all instructions for safe use of the product and handle with care
•Use the camera within given temperature, humidity and voltage levels
noted in Camera Specifications
•Do not disassemble the camera
•Do not point the camera directly towards the sun or a source of intense
light
•Use only the supplied regulated power supply. Use of a non-regulated,
non-conforming power supply can damage this product and voids the
warranty
•Periodic cleaning may be required. Use a damp cloth only. Do not use
harsh cleaners or aerosol cleaners.
•The supplied extension cable is rated for surface mounting only
•Cables for in-wall / floor-to-floor installations are sold separately
Installation Tips
•Point the camera where there is the least amount of obstructions (i.e. tree
branches)
•Install the camera in a location that is difficult for vandals to reach
•Secure cabling so that it is not exposed or easily cut
•Camera rated for outdoor use. Installation in a sheltered location
recommended
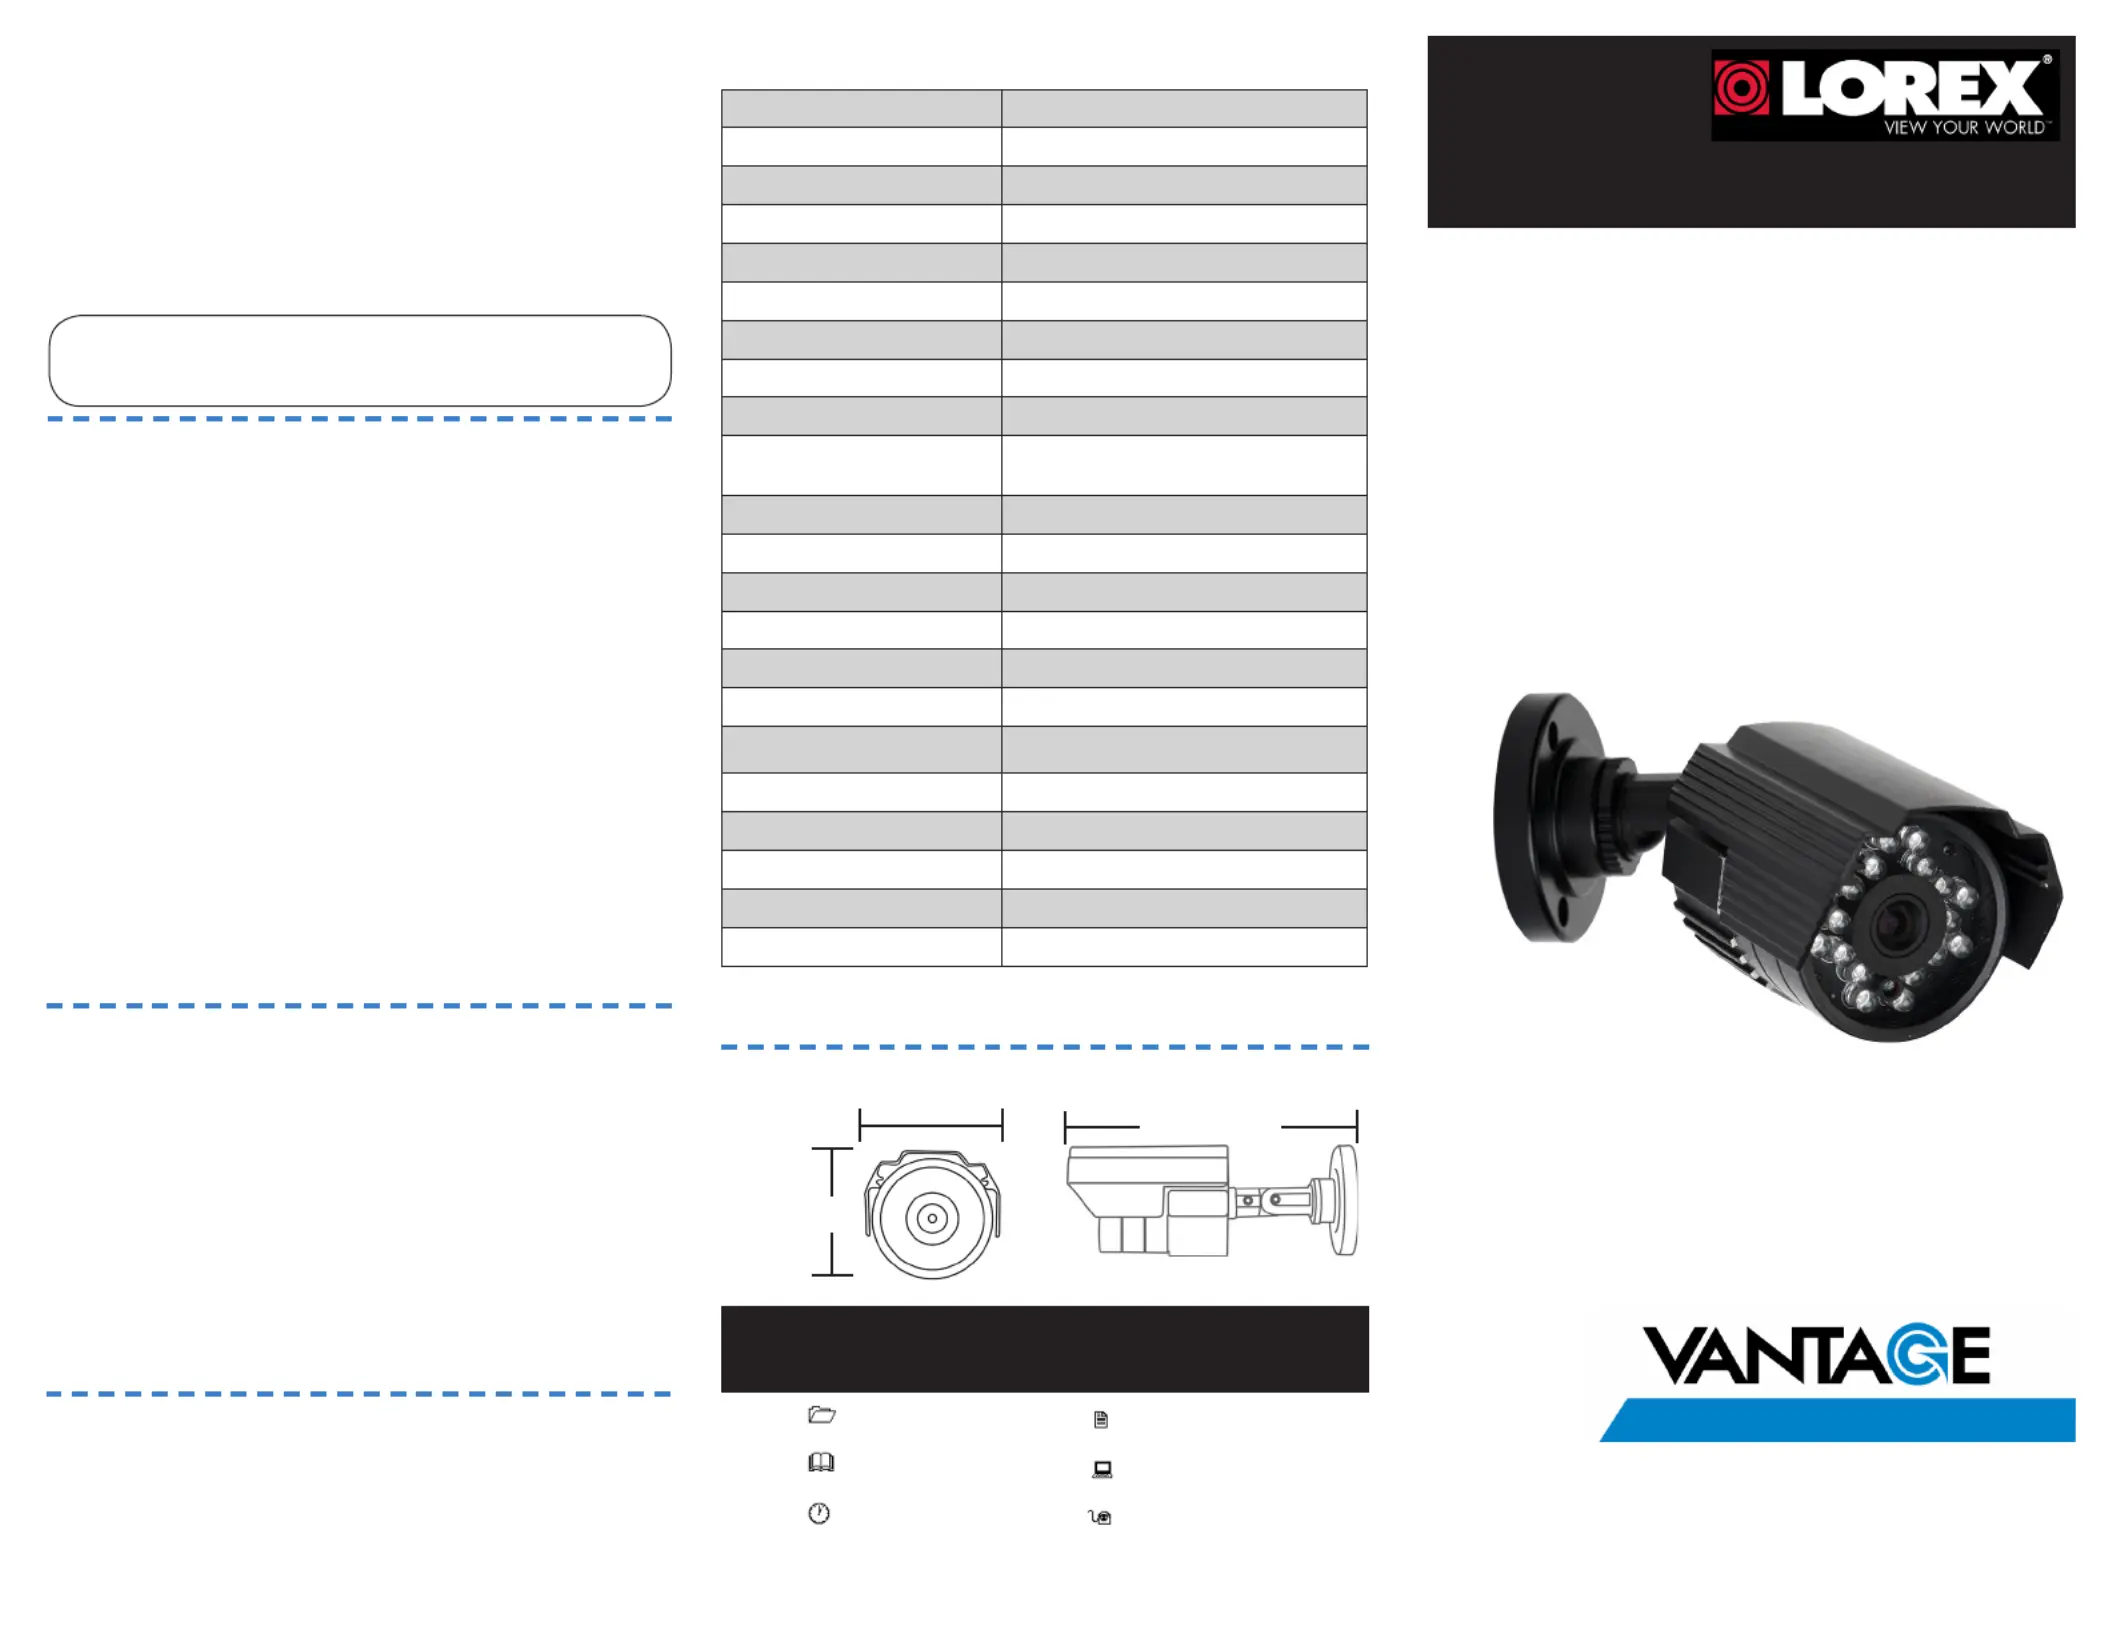
WEATHERPROOF
NIGHT VISION SECURITY CAMERA
Quick Start Guide
English Version 1.0
CVC7572 SERIES
153mm / 6.0”
53mm / 2.1”
Dimensions
*Model CVC7572PK4 is a 4-pack that includes four of the listed items.
** A “4-in-1” Power Adapter that provides power to four cameras or individual power adapters
may be provided, depending on product configuration.
*** Not included in multi-camera packs.
57mm / 2.2”
Produktspezifikationen
| Marke: | Lorex |
| Kategorie: | Sicherheitskamera |
| Modell: | Vantage CVC7572PK4B |
Brauchst du Hilfe?
Wenn Sie Hilfe mit Lorex Vantage CVC7572PK4B benötigen, stellen Sie unten eine Frage und andere Benutzer werden Ihnen antworten
Bedienungsanleitung Sicherheitskamera Lorex

29 März 2026
27 März 2026
28 Februar 2026
28 Februar 2026
16 Januar 2026
3 November 2025
16 Oktober 2025
27 September 2025
15 September 2025
15 September 2025
Bedienungsanleitung Sicherheitskamera
Neueste Bedienungsanleitung für -Kategorien-
31 März 2026
31 März 2026
31 März 2026
31 März 2026
31 März 2026
29 März 2026
29 März 2026
29 März 2026
29 März 2026
28 März 2026