Optimate 3 SP Bedienungsanleitung


Lies die bedienungsanleitung für Optimate 3 SP (4 Seiten) kostenlos online; sie gehört zur Kategorie Nicht kategorisiert. Dieses Handbuch wurde von 3 Personen als hilfreich bewertet und erhielt im Schnitt 5.0 Sterne aus 2 Bewertungen. Hast du eine Frage zu Optimate 3 SP oder möchtest du andere Nutzer dieses Produkts befragen? Stelle eine Frage

Seite 1/4
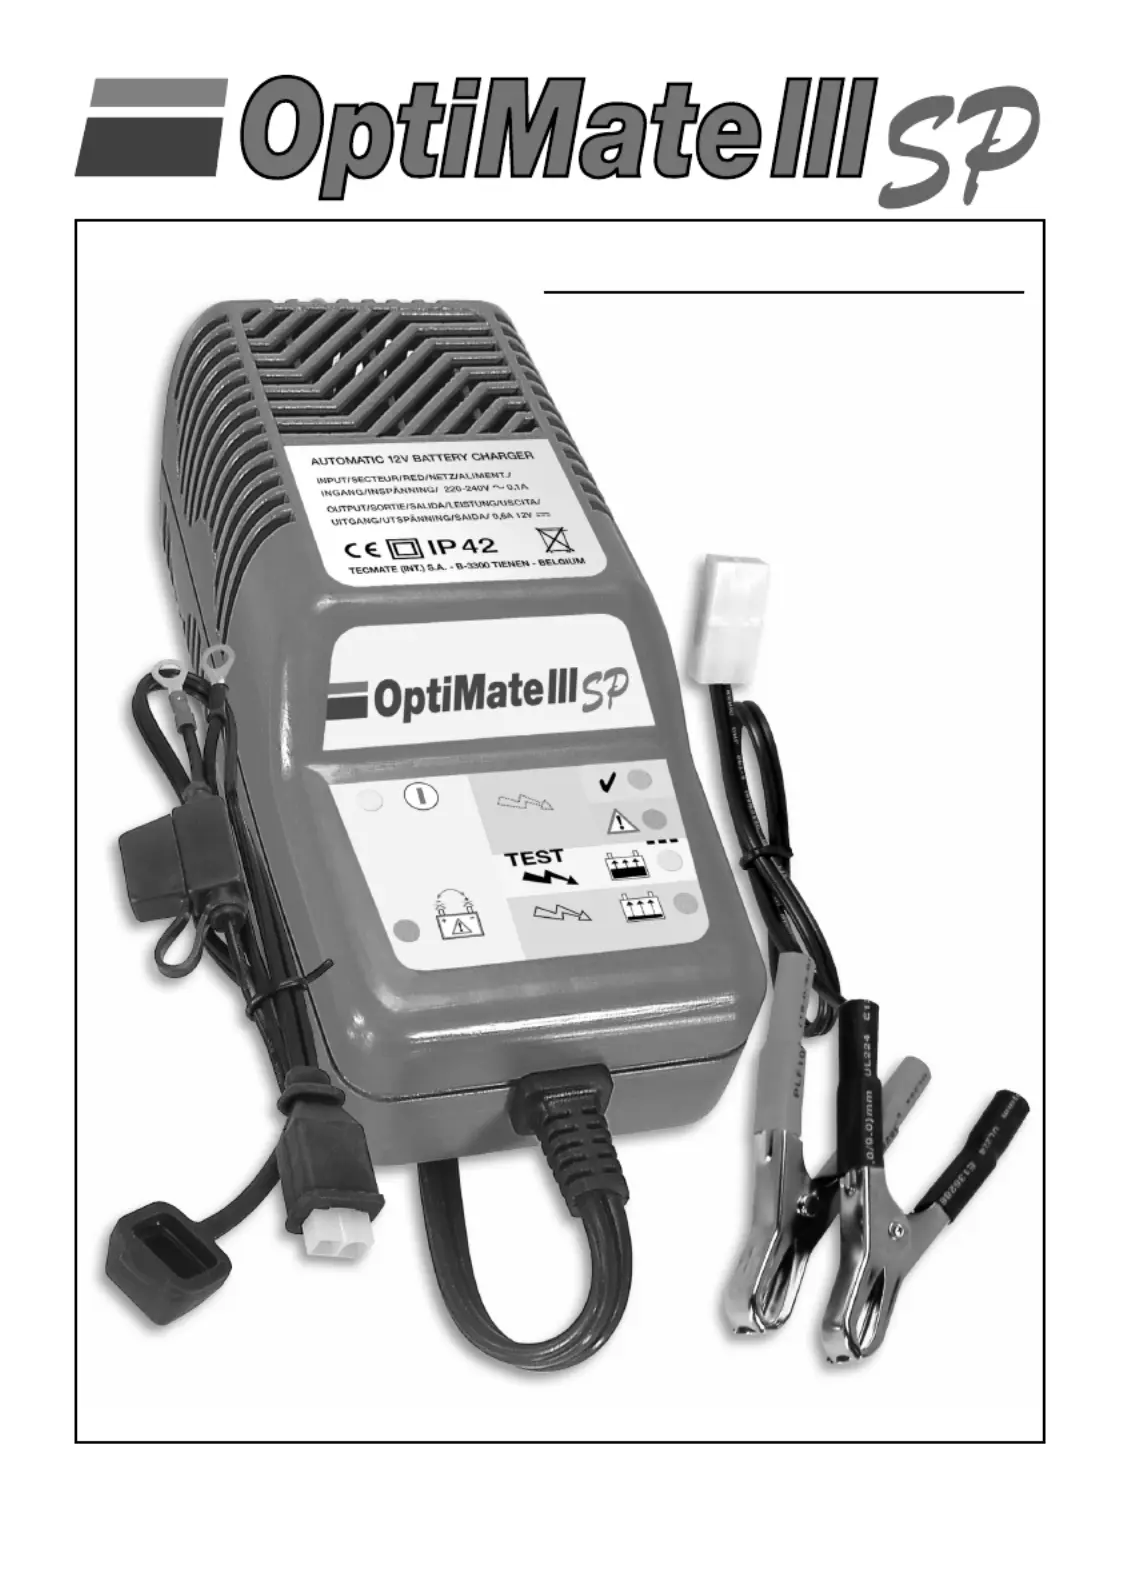
Automatic charger for 12V lead-acid batteries of from 2 to 32 Ah. Not for charging dry cell or NiCad batteries.
Input supply : 220-240V~. Output current : 0.6A, 12W (max.).
www.optimate3sp.com
2
Instructions for Use :
IMPORTANT : Read before charging.
SAFETY WARNING and NOTES Batteries emit
EXPLOSIVE GASES - prevent flame or sparks near batteries.
Disconnect AC power supply before making or breaking DC/battery connections. Battery acid is highly corrosive. Wear
a copper
wire brush; if greasy or dirty, clean with a rag damped in detergent. Only use the charger if the input & output
ger from
damp and humidity, acid and acid fumes both during use and in storage. Damage resulting from failure to do so
is not covered
by warranty. Distance the charger from the battery during charging to avoid acid contamination. Place the
charger on a hard, flat surface, but NOT on plastic, textile or leather. An optional wall mounting bracket is available.
EXPOSURE TO LIQUIDS :
When placed on a horizontal flat surface this charger is designed to withstand exposure
to liquids accidentally spilled or splashed onto the casing from above, or to light rainfall. However, prolonged exposure is
resulting from the eventual penetration of liquid into the electronic components is not covered by warranty.
supplied, the one with crocodile clamps for charging the battery off-vehicle, the other with metal eyelets for permanent
connection to the battery posts for easy connection to maintain the battery on-vehicle. When charging a car battery, or if
using the battery clamps, first disconnect & remove the battery from the vehicle and place it in a well ventilated area.
ger at the two-pole connector. Replace any burnt fuse only with a similar new fuse of identical type and rating, T 7.5A.
LED (light emitting diode) indicator information panel
Using the OptiMate
1) Connect the charger to the battery : RED clamp to POSITIVE (POS, P, +) terminal and BLACK clamp to NEGATIVE (NEG, N,
–) terminal.
Disconnect clamps and reconnect correctly.
3) The orange RECOVERING LED (bottom right on LED panel) will light when all correct connections are made and if the bat-
cate for up to 2 hours while a special high voltage (about 20V maximum) is applied to force a very small fixed current
replaced by the yellow CHARGING LED.
AC Power ON
GREEN. Battery charged and ready
for use (GOOD BATTERY).
RED. WARNING condition : read RED
LED clause below.
ORANGE. Battery badly discharged/
slightly sulphated; RECOVERING.
YELLOW. Battery discharged, but
charging normally (CHARGING).
INVERSE POLARITY
Wrong battery connections.
3
NOTE : A battery left deep discharged for an extended period which may result in permanent damage to one or more cells,
fortably hot to touch.
4) a) The CHARGING stage (yellow LED) delivers a constant current of 0,6 Amps into the battery, whose progressively rising
impedance will cause the charging voltage to increase until 14,3V, when the
OptiMate
will start the absorption and verifi-
cation stage.
b) The charging voltage is now limited at 13,6V during 30 minutes. Should the monitored voltage reduce by 300mV or
fication stage, the red warning LED will indicate.
c) Self-discharge test : Once the current has remained below 200mA for a full 30 minutes (this is indicative of a battery
that has accepted as much charge as its basic condition allows), a test period of 30 minutes automatically follows, to check
te test periods which follow provided the green LED continues to indicate. During test periods the circuit offers no current
consistent with ±50% of theoretical capacity for filler cap and ±40% for AGM / GEL batteries, the absolute minimum to crank
sive test of battery condition, which can be more exactly established by using a
miniTestMate
®
which tests on-vehicle bat-
BatteryMate
®
150-9
or
TestMate
®
digital battery tester.
offer support current to the battery until disconnected.
6) RED LED : the red WARNING LED means that after being charged the battery's voltage is not being sustained or that
battery voltage to dip below 12,3V. Always remove the battery from the vehicle, reconnect the
OptiMate
and allow it to pro-
BatteryMate
diagnostic load-tester/charger. It is important to note that even if the red LED does indicate, the battery will
7) Maintaining a battery for extended periods : After activating the charger you should observe the LED indications every
few hours until either the green GOOD or red WARNING battery LED indicate. If the red WARNING LED indicates, disconnect
gned for that type of battery. At least once every two weeks, check that the connections between the charger and battery
level of the electrolyte and if necessary, top up the cells with distilled water, then reconnect.
When handling batteries or in their vicinity, always take care to observe the SAFETY WARNINGS above.
8) Disconnect the
OptiMate
first from the AC mains supply and then from the battery. Always disconnect from the AC mains
before reconnecting to the same or another battery.
9) CHARGING TIME : The time required for the
OptiMate IIISP
to complete a charge on a normally discharged battery is
to progress to the self-discharge check (flashing yellow LED followed by the or
LED indication).
Deep-discharged batteries will take longer.


Produktspezifikationen

Marke: Optimate
Kategorie: Nicht kategorisiert
Modell: 3 SP

Brauchst du Hilfe?

Wenn Sie Hilfe mit Optimate 3 SP benötigen, stellen Sie unten eine Frage und andere Benutzer werden Ihnen antworten