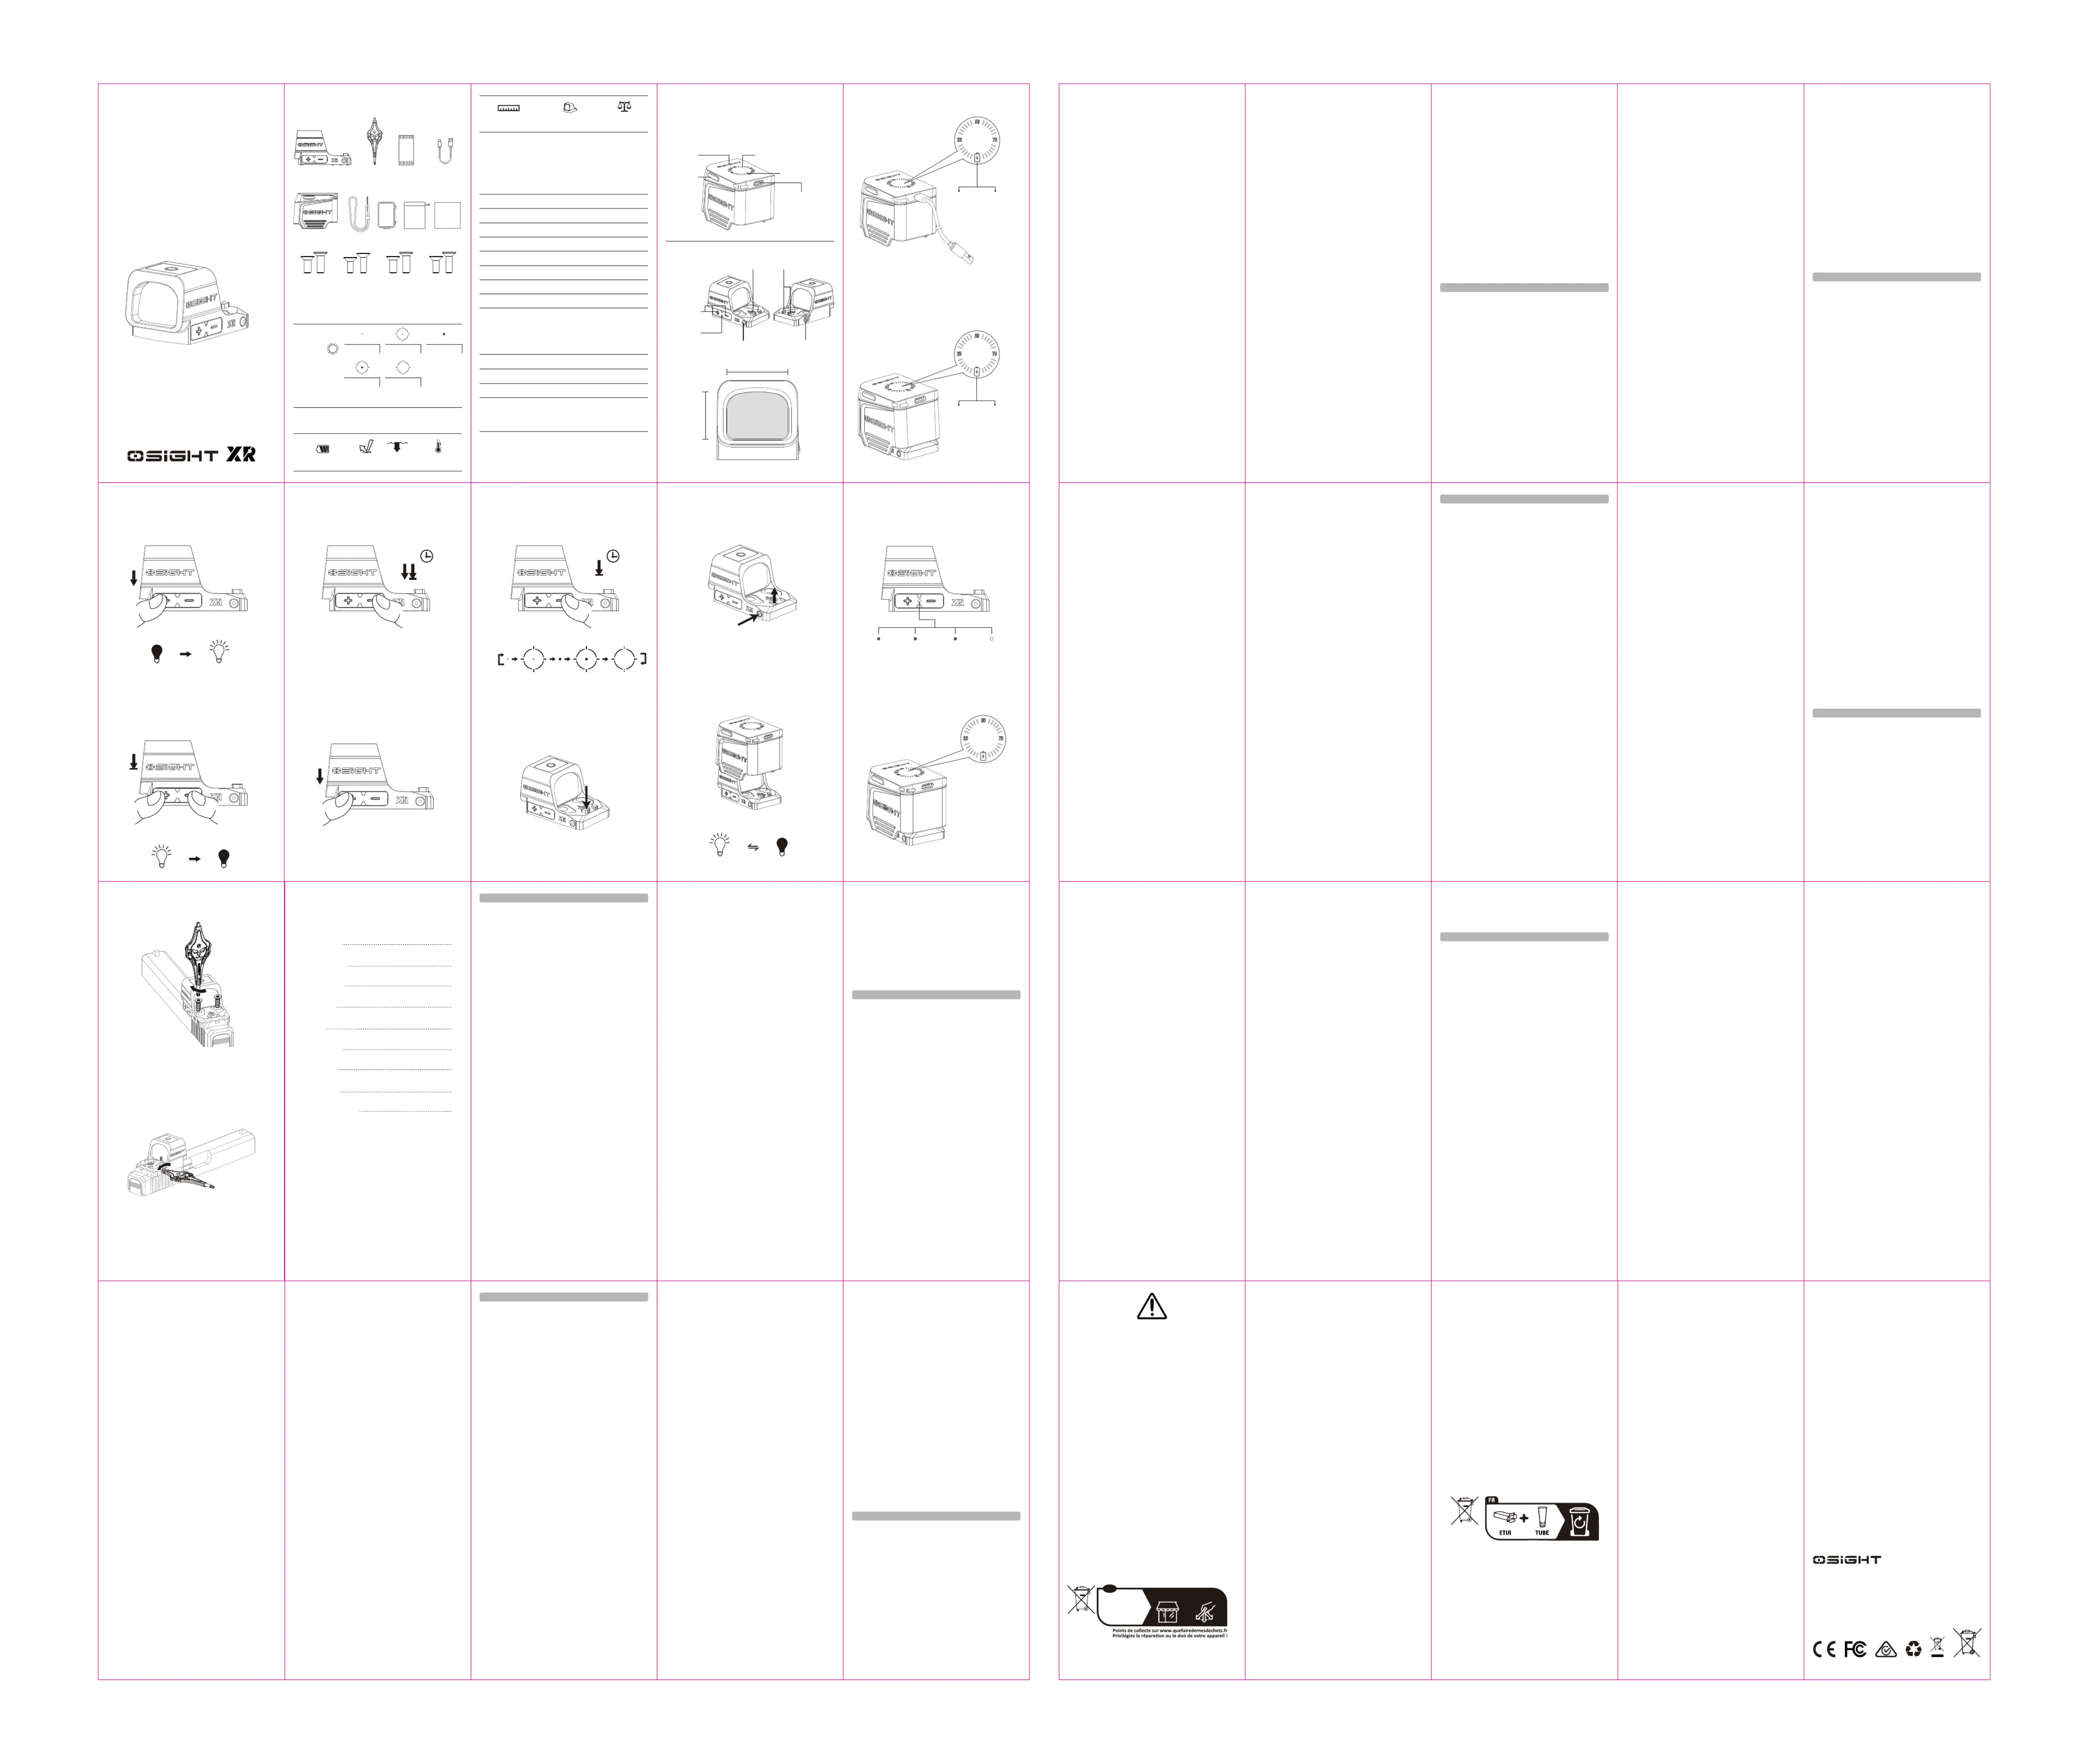
Osight XR Bedienungsanleitung
Lies die bedienungsanleitung für Osight XR (1 Seiten) kostenlos online; sie gehört zur Kategorie Nicht kategorisiert. Dieses Handbuch wurde von 2 Personen als hilfreich bewertet und erhielt im Schnitt 4.8 Sterne aus 3 Bewertungen. Hast du eine Frage zu Osight XR oder möchtest du andere Nutzer dieses Produkts befragen? Stelle eine Frage
Seite 1/1
USER
MANUAL
( EN) English
( DE ) Deutsch
( FR ) Français
( JP ) 日本語
( TH ) ไทย
( ES ) Español
( KR ) 한국어
( IT ) Italiano
( NL ) Nederlands
CONTENTS
01
03
06
08
11
13
16
18
21
01
161718
19202122230203
0405060708
0910111213
1415
IN THE BOX
USB-C Charging
Cable
Tool
Optic
Time to Fully Charge the
Charging Cover
2.5 H (Requiring a 5 V / 2 A (10 W)
power source. When the power source
capacity is insufficient, the charging
time will be longer).
USB-C Charging Cable
Cable Length
5 V / 2 A
Input
0.8 m
Charge Type
USB-C
Table 2:
Main Body
Dimensions
Weight
Battery Capacity
Input
Output
Plastic+AL6061
2.01*1.42*1.65 in / 51*36*42 mm
1.94 oz / 55 g
800 mAh 3.87 V (3.1 Wh)
Rated Capacity
510 mAh (4.45V/0.1A)
DC 5 V / 2 A (MAX)
DC 4.45 V / 0.1 A (MAX)
Time to Fully Charge the Optic
1.5 H
Osight XR Charging Cover
Desiccant
PouchScrew BoxCharging CoverCleaning Cloth
1.69 48 oz /g
(Including Battery)
(L) (W) (H) 1.91 * 1.18 * 1.16 in
(L) (W) (H) 48.7 * 30 * 29.5 mm
AL7075 Aluminum
(Housing Material)
89 mAh 3.87 V(0.344 Wh)
Working Temperature
32°F~113°F / 0°C~45°C
1.5
m
IPX7
Table 1: Optic
SPECIFICATIONS
Mode
100%
Mode 4
25000 H35000 H54000 H
Note: Please fully charge the product every three months to maintain stable
power consumption.
27000 H22000 H
This is at full 100% battery level, with motion detection off. For more runtime
details please visit osight.com.
Lanyard
#6-32#4-40#6-40M3
Figure 1
Product Overview
Figure 2
Charge the Charging Cover
Figure 3
Charge the Optic With the Cover
Brightness
Adjustment
USB-C Charging Port
Battery Indicator
Charging Cover
Battery Level
Display Button
Battery Indicator
CBRS/Collapsible
Backup Rear Sight
CBRS Button
Windage Adjustment
Optic
Battery Icon
Constant on for 5s
Citedhargng Comple
Flashes for 5s
Constant on for 5sFlashes for 5s
Cingharg
CitedCinghargng Compleharg
Elevation Adjustment
0.91 in / 23 mm
0.71 in / 18 mm
Note: Fully charge the product before first use.
Logo Display
1. Product Specifications, Table 1 & Table 2
2. Product Overview, Figure 1
3. Operating instructions:
4. Charging:
Before first use, fully charge the charging cover and the optic.
4.1 Charge The Charging Cover, Figure 2
Use the USB-C cable to charge the charging cover.
Charging: When the battery is not fully charged, the battery icon will flash,
and the battery indicator displays the current battery level for 5 seconds
before turning off, indicating in charging progress.
Fully Charged: The battery icon and the battery indicator remain on for 5
seconds and then turn off, indicating the charging cover is fully charged.
4.2 Charge The Optic, Figure 3
Place the charging cover over the optic to charge it.
Charging: The battery icon flashes for 5 seconds and then turns off,
indicating that the optic is being charged.
Fully Charged: The battery icon and the battery indicator remain on for 5
seconds and then turn off, indicating the optic is fully charged.
5. Optic Operating Instructions:
5.1 On, Figure 4
Manual on: Press any button to turn on the optic.
Auto on: When the motion sensor function is enabled, the optic will
automatically turn on upon detecting motion.
Memory Function: The previously used brightness level will be recalled.
5.2 Off, Figure 5
Manual off: Press the "+" and "-" buttons simultaneously for over 0.5
seconds to turn off the optic.
Auto off: When the motion sensor function is enabled, the optic will
automatically turn off after no motion is detected for 3 minutes.
5.3 Motion Sensor Function, Figure 6
The motion sensor function is enabled by default.
When the optic is on, double press and hold the "-" button for over 3
seconds to enable or disable this function.
When the function is selected, the reticle flashes once.
When the function is disabled, the reticle flashes twice.
5.4 Brightness Settings, Figure 7
The optic has 11 brightness levels. Levels 1, 2 and 3 are night vision
settings, and levels 4 to 11 are daylight settings, with level 11 being the
brightest.
( EN ) English
Press the “+” button to increase brightness and the “-” button to
decrease brightness.
When attempting to select a brightness level lower than 1 or higher than
11, the reticle will flash once to alert the user of reaching the minimum or
maximum brightness.
5.5 Reticle System Switch, Figure 8
When the optic is on, press and hold the "-" button for over 2 seconds to
cycle through five reticle options: 2 MOA dot, 2 MOA dot + 32 MOA circle,
6 MOA dot, 6 MOA dot + 32 MOA circle, 32 MOA circle, switching in that
order every 1 second.
The factory default is a 2 MOA dot.
6. CBRS/Collapsible Backup Rear Sight Adjustment:
6.1 CBRS Presses In, Figure 9-1
Use the tool or press the protrusion by hand until it is flush with the
surface. When you hear a "click," it will automatically lock in place.
6.2 CBRS Pops Up, Figure 9-2
Use the tool or press the CBRS button by hand until it ejects. The factory
default setting is the raised position.
7. Charging Cover Operating Instructions:
7.1 Power-Saving Function, Figure 10
The optic turns off to save power when the cover is placed over it; it will be
automatically activated when the cover is removed.
The optic can't be automatically activated when the optic is turned off
manually.
This function is disabled when the cover runs out of power.
8. Battery Indication, Figure 11
8.1 Optic Battery Indicator
Press any side button of the optic to display the optic’s battery level.
8.2 Charging Cover Battery Indicator
After the indicator turns on, the battery level is displayed for 5 seconds.
Displaying Optic Battery Level:
When the cover is placed over the optic to charge it, the indicator shows
the optic’s battery level.
When the optic is being charged, press the side button of the cover to show
the optic’s battery level again.
Displaying Charging Cover Battery Level:
When the cover is not on the optic, press the cover’s side button or use the
USB-C cable to charge the cover, the indicator shows the cover’s battery
level.
When the cover is placed over the optic and charged via the USB-C cable,
the indicator shows the cover’s battery level.
When the cover is removed from the optic, the indicator shows the cover’s
battery level.
9. How to Install, Figure 12
10. Zero Setting, Figure 13
For first-time use, users can adjust based on the different reticle heights on
the sleeve:
U (Elevation Angle): Adjusts the optic’s vertical movement (up and down).
R (Windage Angle): Adjusts the optic’s horizontal movement (left and right).
( DE ) Deutsch
1. Produktspezifikationen, Tabelle 1 & Tabelle 2
2. Produktübersicht, Abbildung 1
3. Bedienungsanleitung:
4. Laden:
Vor der ersten Verwendung muss sowohl der Ladekragen als auch das
optische Gerät vollständig aufgeladen werden.
4.1 Laden des Ladekragens, Abbildung 2
Verwenden Sie das USB-C-Kabel, um den Ladekragen zu laden.
Laden: Wenn der Akku nicht vollständig geladen ist, blinkt das Batteriesym-
bol, und die Akku-Anzeige zeigt für 5 Sekunden den aktuellen Ladestand,
bevor sie erlischt. Dies zeigt den Ladevorgang an.
Vollständig geladen: Das Batteriesymbol und die Akku-Anzeige bleiben für 5
Sekunden eingeschaltet und erlöschen dann, was anzeigt, dass der
Ladekragen vollständig geladen ist.
4.2 Laden des optischen Geräts, Abbildung 3
Setzen Sie den Ladekragen über das optische Gerät, um es zu laden.
Laden: Das Batteriesymbol blinkt für 5 Sekunden und erlischt dann, was
anzeigt, dass das optische Gerät geladen wird.
Vollständig geladen: Das Batteriesymbol und die Akku-Anzeige bleiben für 5
Sekunden eingeschaltet und erlöschen dann, was anzeigt, dass das optische
Gerät vollständig geladen ist.
5. Bedienungsanleitung für das optische Gerät:
5.1 Einschalten, Abbildung 4
Manuell einschalten: Drücken Sie eine beliebige Taste, um das optische
Gerät einzuschalten.
Automatisch einschalten: Wenn die Bewegungssensorfunktion aktiviert ist,
schaltet sich das optische Gerät automatisch ein, sobald eine Bewegung
erkannt wird.
Speicherfunktion: Die zuletzt verwendete Helligkeitsstufe wird gespeichert
und beim nächsten Einschalten wiederhergestellt.
5.2 Ausschalten, Abbildung 5
Manuell ausschalten: Drücken Sie die „+“- und „-“-Tasten gleichzeitig für
mehr als 0,5 Sekunden, um das optische Gerät auszuschalten.
Automatisch ausschalten: Wenn die Bewegungssensorfunktion aktiviert ist,
schaltet sich das optische Gerät automatisch aus, wenn für 3 Minuten keine
Bewegung erkannt wird.
5.3 Bewegungssensorfunktion, Abbildung 6
Die Bewegungssensorfunktion ist standardmäßig aktiviert.
Wenn das optische Gerät eingeschaltet ist, drücken und halten Sie die „-
“-Taste für mehr als 3 Sekunden, um diese Funktion zu aktivieren oder zu
deaktivieren.
Wenn die Funktion aktiviert ist, blinkt das Fadenkreuz einmal.
Wenn die Funktion deaktiviert ist, blinkt das Fadenkreuz zweimal.
5.4 Helligkeitseinstellungen, Abbildung 7
Das optische Gerät verfügt über 11 Helligkeitsstufen. Stufe 1, 2 und 3 sind
Nachtsicht-Einstellungen, Stufe 4 bis 11 sind Tageslicht-Einstellungen,
wobei Stufe 11 die hellste ist.
Drücken Sie die „+“-Taste, um die Helligkeit zu erhöhen, und die „-“-Taste,
um die Helligkeit zu verringern.
Wenn versucht wird, eine Helligkeitsstufe unter 1 oder über 11 auszuwählen,
blinkt das Fadenkreuz einmal, um den Benutzer darauf hinzuweisen, dass
die minimale oder maximale Helligkeit erreicht wurde.
5.5 Fadenkreuz-Systemumschaltung, Abbildung 8
Wenn das optische Gerät eingeschaltet ist, drücken und halten Sie die „-
“-Taste für mehr als 2 Sekunden, um durch fünf Fadenkreuzoptionen zu
wechseln:
2 MOA Punkt, 2 MOA Punkt + 32 MOA Kreis, 6 MOA Punkt, 6 MOA Punkt +
32 MOA Kreis, 32 MOA Kreis.
Der Wechsel erfolgt in dieser Reihenfolge alle 1 Sekunde.
Die werkseitige Standardeinstellung ist ein 2 MOA Punkt.
6. CBRS/Zusammenklappbare Visierverstellung:
6.1 CBRS eindrücken, Abbildung 9-1
Verwenden Sie das Werkzeug oder drücken Sie den Vorsprung mit der Hand,
bis er bündig mit der Oberfläche ist. Wenn Sie ein „Klicken“ hören, wird er
automatisch verriegelt.
6.2 CBRS ausfahren, Abbildung 9-2
Verwenden Sie das Werkzeug oder drücken Sie die CBRS-Taste mit der
Hand, bis sie herausspringt. Die werkseitige Standardeinstellung ist die
erhöhte Position.
7. Bedienungsanleitung für den Ladekragen:
7.1 Energiesparfunktion, Abbildung 10
Das optische Gerät schaltet sich aus, um Strom zu sparen, wenn der
Ladekragen darübergelegt wird; es wird automatisch aktiviert, sobald der
Kragen entfernt wird.
Das optische Gerät kann nicht automatisch aktiviert werden, wenn es
manuell ausgeschaltet wurde.
Diese Funktion ist deaktiviert, wenn der Ladekragen keine Energie mehr hat.
8. Batterieanzeige, Abbildung 11
8.1 Akku-Anzeige des optischen Geräts
Drücken Sie eine beliebige Seitentaste des optischen Geräts, um den
Akkustand des optischen Geräts anzuzeigen.
8.2 Akku-Anzeige des Ladekragens
Nachdem die Anzeige aktiviert wurde, wird der Akkustand für 5 Sekunden
angezeigt.
Anzeige des Akkustands des optischen Geräts:
Wenn der Ladekragen über das optische Gerät gelegt wird, um es zu laden,
zeigt die Anzeige den Akkustand des optischen Geräts an.
Während das optische Gerät geladen wird, können Sie erneut die Seitentaste
des Ladekragens drücken, um den Akkustand des optischen Geräts
anzuzeigen.
Anzeige des Akkustands des Ladekragens:
Wenn der Ladekragen nicht auf dem optischen Gerät liegt, drücken Sie die
Seitentaste des Kragens oder verwenden Sie das USB-C-Kabel, um den
Kragen zu laden. Die Anzeige zeigt dann den Akkustand des Ladekragens an.
Wenn der Ladekragen über das optische Gerät gelegt und über das
USB-C-Kabel geladen wird, zeigt die Anzeige den Akkustand des
Ladekragens an.
Wenn der Ladekragen vom optischen Gerät entfernt wird, zeigt die Anzeige
den Akkustand des Ladekragens an.
9. Installation, Abbildung 12
10. Nullpunkt-Einstellung, Abbildung 13
Bei der ersten Verwendung können Benutzer basierend auf den
unterschiedlichen Höhen des Fadenkreuzes am Gehäuse (Sleeve)
Anpassungen vornehmen:
U (Elevationswinkel): Stellt die vertikale Bewegung des optischen Geräts ein
(nach oben und unten).
R (Windage-Winkel): Stellt die horizontale Bewegung des optischen Geräts
ein (nach links und rechts).
( FR ) Français
1. Spécifications du produit — Tableau 1 & Tableau 2
2. Présentation du produit — Figure 1
3. Mode d’emploi :
4. Chargement / Recharge :
Avant la première utilisation, chargez complètement le couvercle de charge
et l’optique.
4.1 Recharge du couvercle de charge — Figure 2
Utilisez le câble USB-C pour recharger le couvercle de charge.
En charge : lorsque la batterie n’est pas pleine, l’icône batterie clignote et
l’indicateur affiche le niveau de charge pendant 5 secondes avant de
s’éteindre, indiquant que la charge est en cours.
Complètement chargé: l’icône batterie et l’indicateur restent allumés
pendant 5 secondes puis s’éteignent, indiquant que le couvercle de charge
est entièrement chargé.
4.2 Recharge de l’optique — Figure 3
Placez le couvercle de charge sur l’optique pour la recharger.
En charge : l’icône batterie clignote pendant 5 secondes puis s’éteint,
indiquant que l’optique est en cours de charge.
Complètement chargé : l’icône batterie et l’indicateur restent allumés
pendant 5 secondes puis s’éteignent, indiquant que l’optique est
entièrement chargée.
Instructions d’utilisation de l’optique :
5.1 Mise sous tension — Figure 4
Mise sous tension manuelle : appuyez sur n’importe quel bouton pour
allumer l’optique.
Mise sous tension automatique : lorsque la fonction de détection de
mouvement est activée, l’optique s’allume automatiquement dès détection
d’un mouvement.
Fonction mémoire : le niveau de luminosité utilisé précédemment est
mémorisé.
5.2 Extinction — Figure 5
Extinction manuelle : appuyez simultanément sur les boutons « + » et « - »
pendant plus de 0,5 seconde pour éteindre l’optique.
Extinction automatique : lorsque la fonction de détection de mouvement est
activée, l’optique s’éteint automatiquement si aucun mouvement n’est
détecté pendant 3 minutes.
5.3 Fonction de détection de mouvement — Figure 6
La fonction de détection de mouvement est activée par défaut.
Lorsque l’optique est allumée, appuyez deux fois sur le bouton « - » puis
maintenez-le enfoncé pendant plus de 3 secondes pour activer ou
désactiver cette fonction.
Lorsque la fonction est activée, le réticule clignote une fois.
Lorsque la fonction est désactivée, le réticule clignote deux fois.
5.4 Réglage de la luminosité — Figure 7
L’optique comporte 11 niveaux de luminosité. Les niveaux 1, 2 et 3 sont des
modes vision nocturne ; les niveaux 4 à 11 sont des modes jour, le niveau
11 étant le plus lumineux.
Appuyez sur le bouton « + » pour augmenter la luminosité et sur le bouton
« - » pour la diminuer.
Si vous tentez de sélectionner un niveau inférieur à 1 ou supérieur à 11, le
réticule clignote une fois pour indiquer que vous avez atteint la luminosité
minimale ou maximale.
5.5 Commutation du système de réticule — Figure 8
Lorsque l’optique est allumée, maintenez le bouton « - » enfoncé pendant
plus de 2 secondes pour faire défiler cinq options de réticule dans l’ordre
suivant : point 2 MOA, point 2 MOA + cercle 32 MOA, point 6 MOA, point 6
MOA + cercle 32 MOA, cercle 32 MOA — changement toutes les 1
seconde.
Le réglage d’usine par défaut est le point 2 MOA.
6. Réglage de la hausse de secours rabattable / CBRS :
6.1 CBRS Enfoncé — Figure 9-1
Utilisez l’outil ou appuyez sur la saillie à la main jusqu’à ce qu’elle soit
affleurante. Lorsque vous entendez un « clic », elle se verrouille
automatiquement.
6.2 CBRS Déployé — Figure 9-2
Appuyez sur le bouton CBRS latéral à l'arrière à l'aide d'un outil ou
manuellement jusqu'à son déploiement. Livré en position relevée par défaut.
7.1 Fonction d’économie d’énergie — Figure 10
L’optique s’éteint pour économiser l’énergie lorsque le couvercle de charge
est placé dessus ; elle se réactive automatiquement lorsque le couvercle est
retiré.
L’optique ne peut pas se réactiver automatiquement si elle a été éteinte
manuellement.
Cette fonction est désactivée lorsque le couvercle de charge est à court
d’énergie.
8. Indication de l’état de la batterie — Figure 11
8.1 Indicateur de batterie de l’optique
Appuyez sur n’importe quel bouton latéral de l’optique pour afficher le
niveau de batterie de l’optique.
8.2 Indicateur de batterie du couvercle de charge
Après activation de l’indicateur, le niveau de batterie s’affiche pendant 5
secondes.
Affichage du niveau de batterie de l’optique :
Lorsque le couvercle de charge est placé sur l’optique pour la recharger,
l’indicateur affiche le niveau de batterie de l’optique.
Lors de la charge de l’optique, appuyez sur le bouton latéral du couvercle
pour afficher à nouveau le niveau de batterie de l’optique.
Affichage du niveau de batterie du couvercle de charge :
Lorsque le couvercle n’est pas placé sur l’optique, appuyez sur le bouton
latéral du couvercle ou utilisez le câble USB-C pour le charger ; l’indicateur
affiche alors le niveau de batterie du couvercle.
Lorsque le couvercle est placé sur l’optique et que la charge s’effectue via
le câble USB-C, l’indicateur affiche le niveau de batterie du couvercle.
Lorsque le couvercle est retiré de l’optique, l’indicateur affiche le niveau de
batterie du couvercle.
9. Comment installer — Figure 12
10. Réglage de la mise à zéro — Figure 13
Pour une première utilisation, l’utilisateur peut ajuster en fonction des
différentes hauteurs de réticule sur la bague :
U (angle d’élévation) : ajuste le mouvement vertical de l’optique (haut /
bas).
R (angle de dérive) : ajuste le mouvement horizontal de l’optique (gauche /
droite).
( JP ) 日本語
1. 製品仕様、Table 1およびTable 2
2. 製品概要、Figure 1
3. 操作手順:
4. 充電:
初めて使用する前に、充電カバーと光学部品を完全に
充電してください。
4.1 充電カバーの充電、Figure 2
USB-Cケーブルを使用して充電カバーを充電します。
充電中:バッテリーが完全に充電されていない場合
は、バッテリーアイコンが点滅し、バッテリーインジ
ケーターに現在のバッテリーレベルが5秒間表示された
後、消灯します。これは充電中であることを示しま
す。
完全に充電された場合:バッテリーアイコンとバッテ
リーインジケーターが5秒間点灯した後、消灯します。
これは充電カバーが完全に充電されたことを示しま
す。
4.2 光学部品の充電、Figure 3
充電カバーを光学部品にかぶせて充電します。
充電中:バッテリーアイコンが5秒間点滅した後、消灯
します。これは光学部品が充電中であることを示しま
す。
完全に充電されました: バッテリー アイコンとバッテ
リー インジケーターが 5 秒間点灯した後、消灯し、光
学機器が完全に充電されたことを示します。
5. 光学機器の操作手順:
5.1 オン、Figure 4
手動オン:任意のボタンを押して光学機器をオンにし
ます。
自動オン:モーションセンサー機能が有効になってい
る場合、動きを検知すると光学機器が自動的にオンに
なります。
メモリ機能:前回使用した明るさレベルが呼び出され
ます。
5.2 オフ、Figure 5
手動オフ:+ボタンと-ボタンを同時に0.5秒以上押す
と、光学機器をオフにします。
自動オフ:モーションセンサー機能が有効になってい
る場合、3分間動きが検知されないと光学機器が自動的
にオフになります。
5.3 モーションセンサー機能、Figure 6
モーションセンサー機能はデフォルトで有効になって
います。
光学機器がオンの状態で、-ボタンを3秒以上2回押し続
けると、この機能の有効/無効を切り替えることができ
ます。
機能が選択されると、レチクルが1回点滅します。
機能が無効になると、レチクルが2回点滅します。
5.4 明るさ設定、Figure 7
光学装置には11段階の明るさレベルがあります。レベ
ル1、2、3は夜間視力設定、レベル4から11は昼光設定
で、レベル11が最も明るくなります。
「+」ボタンを押すと明るさが上がり、「-」ボタンを
押すと明るさが下がります。
1未満または11を超える明るさレベルを選択しようとす
ると、レチクルが1回点滅し、最小または最大の明るさ
に達したことをユーザーに知らせます。
5.5 レチクルシステムスイッチ、Figure 8
光学装置の電源が入っている状態で「-」ボタンを2秒以
上押し続けると、5種類のレチクルオプションが切り替
わります。2MOAドット、2MOAドット+32MOAサー
クル、6MOAドット、6MOAドット+32MOAサーク
ル、32MOAサークルの順で、1秒ごとにこの順番に切
り替わります。
工場出荷時のデフォルトは2MOAドットです。
6. CBRS/折りたたみ式バックアップリアサイト調整:
6.1 CBRSが押し込まれる場合(Figure 9-1)
工具を使用するか、リアサイトノッチボタンを手で押し
てノッチを飛び出させます。工場出荷時の設定はノッチ
が上がった状態です。
6.2 CBRSが飛び出す場合(Figure 9-2)
工具を使用するか、CBRSボタンを手で押して、押し出
すまで押します。工場出荷時は、CBRSボタンが上がっ
ている状態になっています。
7. 充電カバーの操作手順:
7.1 省電力機能、Figure 10
カバーを装着すると、光学素子は電力節約のため電源を
オフにします。カバーを外すと自動的にオンになりま
す。
光学素子を手動でオフにした場合、光学素子は自動的に
オンになりません。
カバーの電力がなくなると、この機能は無効になりま
す。
8. バッテリー表示、Figure 11
8.1 光学素子バッテリーインジケーター
光学素子のいずれかのサイドボタンを押すと、光学素子
のバッテリー残量が表示されます。
8.2 充電カバーバッテリーインジケーター
インジケーターが点灯した後、バッテリー残量は5秒間
表示されます。
光学素子バッテリー残量表示:
光学素子をカバーして充電すると、インジケーターに光
学素子のバッテリー残量が表示されます。
光学素子の充電中にカバーのサイドボタンを押すと、光
学素子のバッテリー残量が再び表示されます。
充電カバーバッテリー残量表示:
光学素子にカバーが装着されていない状態で、カバー
のサイドボタンを押すか、USB-Cケーブルを使用して
カバーを充電すると、インジケーターにカバーのバッ
テリー残量が表示されます。
光学素子にカバーを装着し、USB-Cケーブルで充電す
ると、インジケーターにカバーのバッテリー残量が表
示されます。
光学素子からカバーを取り外すと、インジケーターに
カバーのバッテリー残量が表示されます。
9. 取り付け方法、Figure 12
10. ゼロ設定、Figure 13
初めて使用する際は、スリーブ上の異なるレチクルの
高さに基づいて調整できます。
U(仰角):光学素子の垂直方向(上下)の動きを調整
します。
R(風偏角):光学素子の水平方向(左右)の動きを調
整します。
( TH ) ไทย
1. รายละเอียดผลิตภัณฑ์ ดู Table 1 และ Table 2
2. ภาพรวมผลิตภัณฑ์ ดู Figure 1
3. วิธีการใช้งาน
4. การชาร์จ
ชาร์จฝาครอบชาร์จ และกล้องเล็งให้เต็มก่อนใช้งานครั้งแรก
4.1 การชาร์จฝาครอบชาร์จ ดู Figure 2
ใช้สาย USB-C เพื่อชาร์จฝาครอบชาร์จ
ระหว่างชาร์จ: เมื่อแบตเตอรี่ยังไม่เต็ม ไอคอนแบตเตอรี่จะกะพริบ และไฟแสดง
ระดับแบตเตอรี่จะแสดงแบตเตอรี่ปัจจุบันเป็นเวลา 5 วินาทีแล้วดับลง แสดงว่า
กาลังอยู่ในขั้นตอนการชาร์จ
เมื่อชาร์จเต็ม: ไอคอนแบตเตอรี่และไฟแสดงระดับแบตเตอรี่จะติดค้างเป็นเวลา
5 วินาทีแล้วดับลง แสดงว่าฝาครอบชาร์จชาร์จเต็มแล้ว
4.2 การชาร์จกล้องเล็ง ดู Figure 3
วางฝาครอบชาร์จครอบลงบนกล้องเล็งเพื่อทาการชาร์จ
ระหว่างชาร์จ: ไอคอนแบตเตอรี่จะกะพริบเป็นเวลา 5 วินาทีแล้วดับลง แสดงว่า
กล้องเล็งกาลังอยู่ระหว่างการชาร์จ
เมื่อชาร์จเต็ม: ไอคอนแบตเตอรี่และไฟแสดงระดับแบตเตอรี่จะติดค้าง 5 วินาที
แล้วดับลง แสดงว่ากล้องเล็งชาร์จเต็มแล้ว
5. วิธีใช้งานกล้องเล็ง
5.1 การเปิด ดู Figure 4
เปิดด้วยตนเอง: กดปุ่มใดปุ่มหนึ่งเพื่อเปิดกล้องเล็ง
เปิดอัตโนมัติ: เมื่อเปิดฟังก์ชันตรวจจับการเคลื่อนไหว กล้องเล็งจะเปิดโดย
อัตโนมัติเมื่อมีการตรวจพบการเคลื่อนไหว
ฟังก์ชันจาค่าความสว่าง: ระบบจะจาระดับความสว่างล่าสุดที่ใช้งาน
5.2 การปิด ดู Figure 5
ปิดด้วยตนเอง: กดปุ่ม “+” และ “–” พร้อมกันค้างไว้เกิน 0.5 วินาทีเพื่อปิด
กล้องเล็ง
ปิดอัตโนมัติ: เมื่อเปิดฟังก์ชันตรวจจับการเคลื่อนไหว กล้องเล็งจะปิดอัตโนมัติ
หลังจากไม่ตรวจพบการเคลื่อนไหวเป็นเวลา 3 นาที
5.3 ฟังก์ชันตรวจจับการเคลื่อนไหว ดูFigure 6
ฟังก์ชันนี้เปิดอยู่โดยค่าเริ่มต้น
เมื่อกล้องเล็งเปิดอยู่ ให้กดปุ่ม “–” สองครั้งและกดค้างไว้เกิน 3 วินาที เพื่อเปิด
หรือปิดฟังก์ชันนี้
เมื่อเปิดใช้งาน เรทิเคิลจะกะพริบ 1 ครั้ง
เมื่อปิดใช้งาน เรทิเคิลจะกะพริบ 2 ครั้ง
5.4 การตั้งค่าความสว่าง ดู Figure 7
กล้องเล็งมีระดับความสว่าง 11 ระดับ ระดับที่ 1–3 สาหรับการใช้งานในที่มืด
ระดับที่ 4–11 สาหรับกลางวัน โดยระดับ 11 คือความสว่างสูงสุด
กดปุ่ม “+” เพื่อเพิ่มความสว่าง และ “–” เพื่อลดความสว่าง
หากพยายามตั้งค่าความสว่างต่ากว่าระดับ 1 หรือ สูงกว่าระดับ 11 เรทิเคิลจะ
กะพริบ 1 ครั้ง เพื่อเตือนว่าถึงขีดจากัด
5.5 การเปลี่ยนระบบเรทิเคิล ดู Figure 8
เมื่อกล้องเล็งเปิดอยู่ ให้กดปุ่ม “–” ค้างไว้เกิน 2 วินาที เพื่อสลับระหว่างเรทิเคิล
5 แบบ ได้แก่ 2 MOA dot, 2 MOA dot + 32 MOA circle, 6 MOA dot, 6
MOA dot + 32 MOA circle และ 32 MOA circle การเปลี่ยนจะวนตาม
ลาดับนี้ทุก ๆ 1 วินาที
โดยค่าเริ่มต้นจากโรงงานคือ 2 MOA dot
6. การปรับศูนย์หลังสารองแบบพับได้ (CBRS):
6.1 CBRS กดลง Figure 9-1
ใช้เครื่องมือหรือมือกดปุ่มนูน จนปุ่มเสมอกับผิวอุปกรณ์ เมื่อได้ยินเสียง “คลิก”
แสดงว่าล็อกเข้าที่เรียบร้อยแล้ว
6.2 CBRS เด้งขึ้น Figure 9-2
ใช้เครื่องมือหรือมือกดปุ่ม CBRS จนปุ่มเด้งขึ้นมา ตาแหน่งเริ่มต้นจากโรงงาน
คือแบบปุ่มเด้งขึ้น
7. วิธีใช้ฝาครอบชาร์จ
7.1 ฟังก์ชันประหยัดพลังงาน ดู Figure 10
กล้องเล็งจะปิดเพื่อประหยัดพลังงานเมื่อวางฝาครอบชาร์จครอบไว้ และจะเปิด
ทางานโดยอัตโนมัติเมื่อถอดฝาครอบชาร์จออก
กล้องเล็งจะไม่เปิดอัตโนมัติหากก่อนหน้านี้ถูกปิดด้วยตนเอง
ฟังก์ชันนี้จะไม่ทางานหากฝาครอบชาร์จแบตเตอรี่หมด
8. การแสดงระดับแบตเตอรี่ ดู Figure 11
8.1 ตัวแสดงแบตเตอรี่ของกล้องเล็ง
กดปุ่มด้านข้างใดก็ได้ของกล้องเล็งเพื่อดูระดับแบตเตอรี่
8.2 ตัวแสดงแบตเตอรี่ของฝาครอบชาร์จ
หลังจากไฟแสดงสถานะติดขึ้น ระดับแบตเตอรี่จะปรากฏเป็นเวลา 5 วินาที
การดูระดับแบตเตอรี่ของกล้องเล็ง:
เมื่อวางฝาครอบชาร์จครอบเพื่อชาร์จกล้องเล็ง ไฟจะแสดงระดับแบตเตอรี่ของ
กล้องเล็ง
ขณะกาลังชาร์จ หากกดปุ่มด้านข้างของฝาครอบชาร์จ จะสามารถดูระดับ
แบตเตอรี่ของกล้องเล็งได้อีกครั้ง
การดูระดับแบตเตอรี่ของฝาครอบชาร์จ:
เมื่อฝาครอบชาร์จไม่ได้วางบนกล้องเล็ง ให้กดปุ่มด้านข้างของฝาครอบชาร์จ
หรือเสียบสาย USB-C เพื่อดูระดับแบตเตอรี่ของฝาครอบชาร์จ
เมื่อฝาครอบชาร์จครอบบนกล้องเล็งและกาลังชาร์จผ่านสาย USB-C ไฟจะ
แสดงระดับแบตเตอรี่ของฝาครอบชาร์จ
เมื่อถอดฝาครอบชาร์จออกจากกล้องเล็ง ไฟจะแสดงระดับแบตเตอรี่ของฝา
ครอบชาร์จ
9. วิธีการติดตั้ง ดู Figure 12
10. การตั้งศูนย์ ดู Figure 13
เมื่อใช้งานครั้งแรก ผู้ใช้สามารถปรับตามระดับความสูงของเรทิเคิลที่ต่างกันได้
โดยมีตัวปรับดังนี้:
U (Elevation Angle): ปรับการเคลื่อนที่ในแนวดิ่ง (ขึ้น–ลง)
R (Windage Angle): ปรับการเคลื่อนที่ในแนวนอน (ซ้าย–ขวา)
( ES ) Español
1. Especificaciones del producto, Tabla 1 y Tabla 2
2. Descripción general del producto, Figura 1
3. Instrucciones de funcionamiento:
4. Carga: Antes del primer uso, cargue completamente la funda de
carga y la óptica.
4.1 Carga de la funda de carga, Figura 2
Utilice el cable USB-C para cargar la funda de carga.
Cargando: Cuando la batería no esté completamente cargada, el icono de
la batería parpadeará y el indicador mostrará el nivel de carga actual
durante 5 segundos antes de apagarse, indicando que la carga está en
curso.
Carga completa: El icono y el indicador de la batería permanecerán
encendidos durante 5 segundos y luego se apagarán, indicando que la
funda de carga está completamente cargada.
4.2 Carga de la óptica, Figura 3
Coloque la funda de carga sobre la óptica para cargarla.
Cargando: El icono de la batería parpadeará durante 5 segundos y luego se
apagará, indicando que la óptica se está cargando.
Carga completa: El icono y el indicador de la batería permanecerán
encendidos durante 5 segundos y luego se apagarán, indicando que la
óptica está completamente cargada.
5. Instrucciones de funcionamiento de la óptica:
5.1 Encendido, Figura 4
Encendido manual: Pulse cualquier botón para encender la óptica.
Encendido automático: Cuando la función de sensor de movimiento está
activada, la óptica se encenderá automáticamente al detectar movimiento.
Función de memoria: Se recuperará el nivel de brillo utilizado
anteriormente.
5.2 Apagado, Figura 5
Apagado manual: Pulse los botones "+" y "-" simultáneamente durante
más de 0,5 segundos para apagar la óptica.
Apagado automático: Cuando la función de sensor de movimiento está
activada, la óptica se apagará automáticamente después de 3 minutos sin
detectar movimiento.
5.3 Función de sensor de movimiento, Figura 6
La función de sensor de movimiento está activada por defecto.
Con la óptica encendida, mantenga pulsado el botón "-" durante más de 3
segundos para activar o desactivar esta función.
Cuando la función está activada, la retícula parpadea una vez.
Cuando la función está desactivada, la retícula parpadea dos veces.
5.4 Ajustes de brillo, Figura 7
La óptica cuenta con 11 niveles de brillo. Los niveles 1, 2 y 3 son para
visión nocturna, y los niveles 4 a 11 son para visión diurna, siendo el nivel
11 el más brillante.
Pulse el botón “+” para aumentar el brillo y el botón “-” para disminuirlo.
Al intentar seleccionar un nivel de brillo inferior a 1 o superior a 11, la
retícula parpadeará una vez para avisar al usuario de que p1-ha alcanzado el
brillo mínimo o máximo.
5.5 Cambio de sistema de retícula, Figura 8
Con la óptica encendida, mantenga pulsado el botón “-” durante más de 2
segundos para alternar entre las cinco opciones de retícula: punto de 2
MOA, punto de 2 MOA + círculo de 32 MOA, punto de 6 MOA, punto de 6
MOA + círculo de 32 MOA y círculo de 32 MOA, cambiando en ese orden
cada segundo.
El valor predeterminado de fábrica es un punto de 2 MOA.
6. Ajuste de la mira trasera de respaldo plegable/CBRS:
6.1 El CBRS se introduce, consulte la Figura 9-1
Utilice la herramienta o presione la protuberancia con la mano hasta que
quede alineada con la superficie. Al oír un "clic", se bloqueará
automáticamente.
6.2 El CBRS se levanta, consulte la Figura 9-2
Utilice la herramienta o presione el botón del CBRS con la mano hasta que
se expulse. La configuración predeterminada de fábrica es la posición
elevada.
7. Instrucciones de funcionamiento de la tapa de carga:
7.1 Función de ahorro de energía, Figura 10
La óptica se apaga para ahorrar energía al colocar la tapa; se activará
automáticamente al retirarla.
La óptica no se activará automáticamente si se apaga manualmente.
Esta función se desactiva cuando la tapa se queda sin batería.
8. Indicación de batería, Figura 11
8.1 Indicador de batería de la óptica
Pulse cualquier botón lateral de la óptica para visualizar el nivel de batería.
8.2 Indicador de batería de la tapa de carga
Tras encenderse, el indicador muestra el nivel de batería durante 5
segundos.
Visualización del nivel de batería de la óptica:
Cuando la tapa está colocada sobre la óptica para cargarla, el indicador
muestra el nivel de batería.
Mientras la óptica se está cargando, pulse el botón lateral de la tapa para
visualizar de nuevo el nivel de batería.
Visualización del nivel de batería de la tapa de carga:
Si la tapa no está colocada sobre la óptica, pulse el botón lateral de la tapa
o utilice el cable USB-C para cargarla; el indicador muestra el nivel de
batería de la tapa.
Cuando la tapa está colocada sobre la óptica y se carga mediante el cable
USB-C, el indicador muestra el nivel de batería de la tapa.
Cuando la tapa se retira de la óptica, el indicador muestra el nivel de
batería de la tapa.
9. Instrucciones de instalación, Figura 12
10. Ajuste a cero, Figura 13
Para el primer uso, se puede ajustar según:
las diferentes alturas de la retícula en la funda:
U (Ángulo de elevación): Ajusta el movimiento vertical de la óptica (arriba y
abajo).
R (Ángulo de deriva): Ajusta el movimiento horizontal de la óptica
(izquierda y derecha).
( KR ) 한국어
1.제품 사양,Table 1 & Table 2 참고
2.제품 개요,Figure 1 참고
3.작동 방법
4.충전 방법:
첫 사용 전, 충전 커버와 옵틱(Optic)을 완전히 충전해
주세요.
4.1 충전 커버 충전 Figure 2 참고
USB-C 케이블을 사용하여 충전 커버를 충전하세요.
충전 중: 배터리가 완전히 충전되지 않은 경우, 배터리
아이콘이 깜박이고 배터리 표시등이 현재 전원을 5초간
표시한 후 꺼집니다. 이는 충전 중임을 나타냅니다.
완전 충전: 배터리 아이콘과 표시등이 5초 동안 켜져 있다가
꺼집니다. 이는 충전 커버가 완전히 충전되었음을
의미합니다.
4.2 광학 장치 충전, Figure 3
광학 장치를 충전하려면 충전 커버를 광학 장치 위에
놓으세요.
충전 중: 배터리 아이콘이 5초 동안 깜빡인 후 꺼지면 충전
중임을 나타냅니다.
완전 충전: 배터리 아이콘과 배터리 표시기가 5초 동안
켜졌다가 꺼지면 광학 장치가 완전히 충전된 것입니다.
5. 옵틱(Optic) 작동 설명서
5.1 전원 켜기 Figure 4
수동 전원 켜기: 아무 버튼이나 눌러 옵틱을 켭니다.
자동 전원 켜기: 모션 센서 기능이 활성화되어 있을 경우,
움직임이 감지되면 옵틱이 자동으로 켜집니다.
메모리 기능: 이전에 사용했던 밝기 단계가 자동으로
기억되어 다시 적용됩니다.
5.2 전원 끄기 Figure 5
수동 전원 끄기: “+”와 “” 버튼을 동시에 0.5초 이상 –
누르면 옵틱이 꺼집니다.
자동 전원 끄기: 모션 센서 기능이 활성화되어 있을 경우, 3
분 동안 움직임이 감지되지 않으면 옵틱이 자동으로
꺼집니다.
5.3 모션 센서 기능 Figure 6
모션 센서 기능은 기본적으로 활성화되어 있습니다.
옵틱이 켜진 상태에서 “” 버튼을 두 번 누른 뒤 3초 이상 –
길게 누르면, 해당 기능을 활성화 또는 비활성화할 수
있습니다.
기능이 활성화되면 도트(reticle) 가 한 번 깜박이고,기능이
비활성화되면 두 번 깜박입니다.
5.4 밝기 설정 Figure 7
옵틱은 총 11단계의 밝기 레벨을 지원합니다.
1~3단계: 야간 투 모드,4~11단계: 주간 모드 (11단계가
가장 밝음).
“+” 버튼을 눌러 밝기를 높이고, “” 버튼을 눌러 밝기를 –
낮춥니다.
밝기 1단계 이하 또는 11단계 이상으로 조정하려 할 경우,
도트가 한 번 깜박이며 최소/최대 밝기에 도달했음을
알려줍니다.
5.5 조준망 시스템 전환 Figure 8
옵틱이 켜진 상태에서 “” 버튼을 2초 이상 길게 누르면 5–
가지 조준망 모드가 1초 간격으로 순환 전환됩니다. 2
MOA 도트,2 MOA 도트 + 32 MOA 원형,6 MOA 도트,6
MOA 도트 + 32 MOA 원형,32 MOA 원형
출고 시 기본 설정은 2 MOA 도트입니다.
6. CBRS/접이식 백업 리어 사이트 조정:
6.1 CBRS 눌림 상태, 그림 9-1
도구를 사용하거나 손으로 돌출부를 눌러 표면과 평평하게
맞춥니다."딸깍" 소리가 나면 자동으로 고정됩니다.
6.2 CBRS 솟아오름, 그림 9-2
도구를 사용하거나 CBRS 버튼을 손으로 눌러 튀어나올
때까지 조작하십시오. 공장 기본 설정은 돌출된 위치입니다.
7. 충전 커버 작동 설명서
7.1 절전 기능 Figure 10
커버를 옵틱 위에 덮으면 옵틱이 절전 모드로 자동
꺼집니다.
커버를 제거하면 옵틱이 자동으로 켜집니다.
옵틱을 수동으로 끈 경우에는 자동으로 켜지지 않습니다.
커버의 배터리가 방전되면 이 기능은 비활성화됩니다.
8. 배터리 표시 Figure 11
8.1 옵틱(Optic) 배터리 표시
옵틱 측면의 아무 버튼이나 눌러 옵틱 배터리 잔량을 확인할
수 있습니다.
8.2 충전 커버 배터리 표시
표시등이 켜지면, 배터리 잔량이 5초간 표시됩니다.
옵틱 배터리 잔량 표시
충전 커버를 옵틱 위에 올려 충전할 경우, 표시등에 옵틱
배터리 잔량이 표시됩니다.
옵틱 충전 중에는, 커버 측면 버튼을 눌러 옵틱 배터리
잔량을 다시 확인할 수 있습니다.
충전 커버 배터리 잔량 표시
커버가 옵틱 위에 없을 때, 커버 측면 버튼을 누르거나
USB-C 케이블로 충전하면 표시등에 커버 배터리 잔량이
표시됩니다.
커버가 옵틱 위에 올려져 USB-C 케이블로 충전 중일 때,
표시등에 커버 배터리 잔량이 표시됩니다.
커버를 옵틱에서 제거하면, 표시등에 커버 배터리 잔량이
표시됩니다.
9. 설치 방법 Figure 12
옵틱 설치 방법은 그림 12를 참조하세요.
10. 제로 설정 Figure 13
처음 사용할 때, 사용자는 슬리브의 서로 다른 조준망
높이에 따라 조정할 수 있습니다.
U ( 수직 조정): 옵틱의 수직 이동(위/아래)을 조절합니다.
R (수평 조정): 옵틱의 수평 이동(좌/우)을 조절합니다.
( IT ) Italiano
1. Specifiche del prodotto, Tabella 1 e Tabella 2
2. Panoramica del prodotto, Figura 1
3. Istruzioni per l'uso:
4. Ricarica:
Prima del primo utilizzo, caricare completamente la cover di ricarica e
l'ottica.
4.1 Ricarica della cover di ricarica, Figura 2
Utilizzare il cavo USB-C per caricare la cover di ricarica.
Ricarica: Quando la batteria non è completamente carica, l'icona della
batteria lampeggia e l'indicatore della batteria mostra il livello di carica
attuale per 5 secondi prima di spegnersi, indicando l'avanzamento della
ricarica.
Carica completa: L'icona della batteria e l'indicatore della batteria
rimangono accesi per 5 secondi e poi si spengono, indicando che la cover
di ricarica è completamente carica.
( NL ) Nederlands
1. Productspecificaties, tabel 1 en tabel 2
2. Productoverzicht, afbeelding 1
3. Bedieningsinstructies:
4. Opladen:
Laad de oplaadhoes en de optiek volledig op voordat u het product voor het
eerst gebruikt.
4.1 De oplaadhoes opladen, afbeelding 2
Gebruik de USB-C-kabel om de oplaadhoes op te laden.
Opladen: wanneer de batterij niet volledig is opgeladen, knippert het
batterijpictogram en geeft de batterij-indicator gedurende 5 seconden het
huidige batterijniveau weer voordat deze wordt uitgeschakeld, wat aangeeft
dat het opladen bezig is.
Volledig opgeladen: het batterijpictogram en de batterij-indicator blijven 5
seconden branden en worden vervolgens uitgeschakeld, wat aangeeft dat
de oplaadhoes volledig is opgeladen.
4.2 De optiek opladen, afbeelding 3
Plaats de oplaadhoes over de optiek om deze op te laden.
Opladen: het batterijpictogram knippert gedurende 5 seconden en gaat
vervolgens uit, wat aangeeft dat de optiek wordt opgeladen.
Volledig opgeladen: het batterijpictogram en de batterij-indicator blijven 5
seconden branden en gaan vervolgens uit, wat aangeeft dat de optiek
volledig is opgeladen.
5. Bedieningsinstructies voor de optiek:
5.1 Aan, afbeelding 4
Handmatig inschakelen: druk op een willekeurige knop om de optiek in te
schakelen.
Automatisch inschakelen: wanneer de bewegingssensorfunctie is
ingeschakeld, wordt de optiek automatisch ingeschakeld zodra er beweging
wordt gedetecteerd.
Geheugenfunctie: het eerder gebruikte helderheidsniveau wordt opnieuw
opgeroepen.
5.2 Uitschakelen, afbeelding 5
Handmatig uitschakelen: druk tegelijkertijd langer dan 0,5 seconde op de
knoppen “+” en “-” om de optiek uit te schakelen.
Automatisch uitschakelen: wanneer de bewegingssensorfunctie is
4.2 Ricarica dell'ottica, Figura 3
Posizionare la cover di ricarica sull'ottica per caricarla.
Ricarica: L'icona della batteria lampeggia per 5 secondi e poi si spegne,
indicando che l'ottica è in carica.
Carica completa: L'icona della batteria e l'indicatore della batteria
rimangono accesi per 5 secondi e poi si spengono, indicando che l'ottica è
completamente carica.
5. Istruzioni per l'uso dell'ottica:
5.1 Accensione, Figura 4
Accensione manuale: premere un pulsante qualsiasi per accendere l'ottica.
Accensione automatica: quando la funzione sensore di movimento è
abilitata, l'ottica si accenderà automaticamente al rilevamento di un
movimento.
Funzione memoria: verrà richiamato il livello di luminosità utilizzato in
precedenza.
5.2 Spegnimento, Figura 5
Spegnimento manuale: premere contemporaneamente i pulsanti "+" e "-"
per oltre 0,5 secondi per spegnere l'ottica.
Spegnimento automatico: quando la funzione sensore di movimento è
abilitata, l'ottica si spegnerà automaticamente dopo 3 minuti di inattività.
5.3 Funzione sensore di movimento, Figura 6
La funzione sensore di movimento è abilitata per impostazione predefinita.
Quando l'ottica è accesa, premere due volte e tenere premuto il pulsante
"-" per oltre 3 secondi per abilitare o disabilitare questa funzione.
Quando la funzione è selezionata, il reticolo lampeggia una volta.
Quando la funzione è disabilitata, il reticolo lampeggia due volte.
5.4 Impostazioni di luminosità, Figura 7
L'ottica p1-ha 11 livelli di luminosità. I livelli 1, 2 e 3 sono impostazioni per la
visione notturna, mentre i livelli da 4 a 11 sono impostazioni per la visione
diurna, con il livello 11 che è il più luminoso.
Premere il pulsante "+" per aumentare la luminosità e il pulsante "-" per
diminuirla.
Quando si tenta di selezionare un livello di luminosità inferiore a 1 o
superiore a 11, il reticolo lampeggerà una volta per avvisare l'utente del
raggiungimento della luminosità minima o massima.
5.5 Interruttore del sistema del reticolo, Figura 8
Quando l'ottica è accesa, tenere premuto il pulsante "-" per oltre 2 secondi
per scorrere cinque opzioni di reticolo: punto da 2 MOA, punto da 2 MOA +
cerchio da 32 MOA, punto da 6 MOA, punto da 6 MOA + cerchio da 32
MOA, cerchio da 32 MOA, cambiando in quest'ordine ogni 1 secondo.
L'impostazione predefinita di fabbrica è un punto da 2 MOA.
6. Regolazione della mira posteriore pieghevole di backup /CBRS:
6.1 CBRS si inserisce, Figura 9-1
Utilizzare l'utensile o premere manualmente la sporgenza finché non è a filo
con la superficie. Quando si sente un "clic", si bloccherà automaticamente
in posizione.
6.2 CBRS si solleva, Figura 9-2
Utilizzare l'utensile o premere manualmente il pulsante CBRS finché non
fuoriesce. L'impostazione predefinita di fabbrica è la posizione sollevata.
7. Istruzioni per l'uso del coperchio di ricarica:
7.1 Funzione di risparmio energetico, Figura 10
L'ottica si spegne per risparmiare energia quando il coperchio viene
posizionato sopra di essa; si attiva automaticamente quando il coperchio
viene rimosso.
L'ottica non può essere attivata automaticamente quando viene spenta
manualmente.
Questa funzione si disattiva quando il coperchio si scarica.
8. Indicazione della batteria, Figura 11
8.1 Indicatore della batteria dell'ottica
Premere un pulsante laterale dell'ottica per visualizzarne il livello di carica.
8.2 Indicatore della batteria del coperchio di ricarica
Dopo l'accensione dell'indicatore, il livello della batteria viene visualizzato
per 5 secondi.
Visualizzazione del livello della batteria dell'ottica:
Quando il coperchio viene posizionato sull'ottica per caricarla, l'indicatore
mostra il livello della batteria.
Quando l'ottica è in carica, premere il pulsante laterale del coperchio per
visualizzare nuovamente il livello della batteria.
Visualizzazione del livello della batteria del coperchio di ricarica:
Quando il coperchio non è posizionato sull'ottica, premere il pulsante
laterale del coperchio o utilizzare il cavo USB-C per caricarlo; l'indicatore
mostra il livello della batteria.
Quando il coperchio viene posizionato sull'ottica e caricato tramite il cavo
USB-C, l'indicatore mostra il livello della batteria.
Quando il coperchio viene rimosso dall'ottica, l'indicatore mostra il livello
della batteria.
9. Come installare, Figura 12
10. Azzeramento, Figura 13
Al primo utilizzo, gli utenti possono regolarla in base alle diverse altezze del
reticolo sulla custodia:
U (Angolo di elevazione): Regola il movimento verticale dell'ottica (su e
giù).
R (Angolo di derivazione): Regola il movimento orizzontale dell'ottica (sinistra
e destra).
ingeschakeld, wordt de optiek automatisch uitgeschakeld nadat er
gedurende 3 minuten geen beweging is gedetecteerd.
5.3 Bewegingssensorfunctie, afbeelding 6
De bewegingssensorfunctie is standaard ingeschakeld.
Wanneer de optiek is ingeschakeld, drukt u tweemaal op de knop “-” en
houdt u deze langer dan 3 seconden ingedrukt om deze functie in of uit te
schakelen.
Wanneer de functie is geselecteerd, knippert het dradenkruis één keer.
Wanneer de functie is uitgeschakeld, knippert het dradenkruis twee keer.
5.4 Helderheidsinstellingen, afbeelding 7
De optiek heeft 11 helderheidsniveaus. Niveaus 1, 2 en 3 zijn instellingen
voor nachtzicht en niveaus 4 tot en met 11 zijn instellingen voor daglicht,
waarbij niveau 11 het helderst is.
Druk op de knop “+” om de helderheid te verhogen en op de knop “-” om
de helderheid te verlagen.
Wanneer u een helderheidsniveau lager dan 1 of hoger dan 11 probeert te
selecteren, knippert het dradenkruis één keer om de gebruiker te
waarschuwen dat de minimale of maximale helderheid is bereikt.
5.5 Schakelaar voor dradenkruissysteem, figuur 8
Wanneer de optiek is ingeschakeld, houdt u de knop “-” langer dan 2
seconden ingedrukt om door de vijf dradenkruisopties te bladeren: 2
MOA-punt, 2 MOA-punt + 32 MOA-cirkel, 6 MOA-punt, 6 MOA-punt + 32
MOA-cirkel, 32 MOA-cirkel, waarbij elke seconde in die volgorde wordt
geschakeld.
De fabrieksinstelling is een 2 MOA-punt.
6. CBRS / Afstelling opklapbaar achtervizier:
6.1 CBRS drukt in, afbeelding 9-1
Gebruik het gereedschap of druk met de hand op het uitsteeksel totdat het
gelijk ligt met het oppervlak. Wanneer u een ‘klik’ hoort, wordt het
automatisch vergrendeld.
6.2 CBRS springt omhoog, afbeelding 9-2
Gebruik het gereedschap of druk met de hand op de CBRS-knop totdat deze
uit de houder springt. De fabrieksinstelling is de omhoogstaande positie.
7. Bedieningsinstructies voor de oplaadhoes:
7.1 Energiebesparingsfunctie, afbeelding 10
De optiek wordt uitgeschakeld om energie te besparen wanneer de hoes
eroverheen wordt geplaatst; deze wordt automatisch geactiveerd wanneer
de hoes wordt verwijderd.
De optiek kan niet automatisch worden geactiveerd wanneer deze
handmatig is uitgeschakeld.
Deze functie is uitgeschakeld wanneer de hoes leeg is.
8. Batterij-indicatie, afbeelding 11
8.1 Batterij-indicator van de optiek
Druk op een willekeurige zijknop van de optiek om het batterijniveau van de
optiek weer te geven.
8.2 Batterij-indicator van de oplaadhoes
Nadat de indicator is ingeschakeld, wordt het batterijniveau gedurende 5
seconden weergegeven.
Het batterijniveau van de optiek weergeven:
Wanneer de hoes over de optiek wordt geplaatst om deze op te laden, geeft
de indicator het batterijniveau van de optiek weer.
Wanneer de optiek wordt opgeladen, drukt u op de zijknop van de hoes om
het batterijniveau van de optiek opnieuw weer te geven.
Het batterijniveau van de oplaadhoes weergeven:
Wanneer de hoes niet op de optiek zit, drukt u op de zijknop van de hoes of
gebruikt u de USB-C-kabel om de hoes op te laden. De indicator geeft dan
het batterijniveau van de hoes weer.
Wanneer de hoes over de optiek wordt geplaatst en wordt opgeladen via de
USB-C-kabel, geeft de indicator het batterijniveau van de hoes weer.
Wanneer de hoes van de optiek wordt verwijderd, geeft de indicator het
batterijniveau van de hoes weer.
9. Installatie, afbeelding 12
10. Nulstelling, afbeelding 13
Bij het eerste gebruik kunnen gebruikers deze aanpassen op basis van
de verschillende dradenkruishoogtes op de huls:
U (hoogtehoek): past de verticale beweging van de optiek aan (omhoog en
omlaag).
R (windhoek): past de horizontale beweging van de optiek aan (links en
rechts).
• Do not ingest the battery, as there is a Chemical Burn Hazard.
• If the small battery is swallowed, it can cause severe internal burns in just
2 hours and may lead to death. Keep new and used batteries away from
children.
• If the battery compartment does not close securely, stop using the product
and keep it away from children.
• If you think batteries might have been swallowed or placed inside any part
of the body, seek immediate medical attention.
• Do not replace the battery with an incorrect type that can defeat a
safeguard, such as certain types of lithium batteries.
• Do not dispose of the battery in fire, a hot oven, or by crushing or cutting it,
as it may result in an explosion.
• Avoid leaving the battery in extremely high-temperature environments, as
it may cause an explosion or the leakage of flammable liquid or gas.
• A battery exposed to extremely low air pressure may result in an explosion
or the leakage of flammable liquid or gas.
WEEE Disposal and Recycling Information
All products bearing this symbol are waste electrical and electronic
equipment (WEEE as in directive 2012/19/EU) which should not be mixed
with unsorted household waste. Instead, to protect human health and the
environment, you should dispose of your waste equipment at a designated
collection point for the recycling of WEEE, appointed by the government or
local authorities. Proper disposal and recycling will help prevent potential
negative consequences to the environment and human health. Please
contact the installer or local authorities for more information about the
location as well as terms and conditions of such collection points.
Ce appareil et
baerie et
accessoire est
recyclable
À DÉPOSER
EN MAGASIN
À DÉPOSER
EN DÉCHÈTERIE
OU
FRFR
C. 12, 09, 2025
3.4000.1463
CAN ICES-003 (B) / NMB-003 (B)
USA Customer Support
For other countries and regions, please contact Global Customer
Support
WARRANTY
We are proud to offer a lifetime warranty. If your Osight product ever
experiences any issues, we promise to take care of it. If we are unable to
repair your product, we will promptly replace it with a product in perfect
working condition, which will be of equal or better physical condition. The
warranty covers defects in material and workmanship under normal use,
excluding loss, theft, deliberate damage, or cosmetic damage. For complete
warranty information, please visit osight.com.
EU Declaration of Conformity
Hereby Zhongshan Osight Co., Ltd declares that the products [Osight XR,
OCC-89mA] are in compliance with Directive 2014/30/EU and RoHS
Directive 2011/65/EU & (EU) 2015/863. The full text of the EU declaration
of conformity is available at the following internet address:
https://www.osight.com/certifications
FCC compliance statement
This device complies with part 15 of the FCC Rules. Operation is subject to
the following two conditions:
(1) This device may not cause harmful interference, and (2) this device
must accept any interference received, including interference that may
cause undesired operation.
Any changes or modifications not expressly approved by the party
responsible for compliance could void the user's authority to operate the
equipment.
Note: This equipment has been tested and found to comply with the limits
for a Class B digital device, pursuant to part 15 of the FCC Rules. These
limits are designed to provide reasonable protection against harmful
interference in a residential installation. This equipment generates, uses
and can radiate radio frequency energy and, if not installed and used in
accordance with the instructions, may cause harmful interference to radio
communications. However, there is no guarantee that interference will not
occur in a particular installation. If this equipment does cause harmful
interference to radio or television reception, which can be determined by
turning the equipment off and on, the user is encouraged to try to correct
the interference by one or more of the following measures:
-Reorient or relocate the receiving antenna.
-Increase the separation between the equipment and receiver.
-Connect the equipment into an outlet on a circuit different from that to
which the receiver is connected.
-Consult the dealer or an experienced radio/TV technician for help.
ISED Notice
This device complies with Industry Canada’s ICES standard(s). Operation is
subject to the following two conditions:
(1) this device may not cause interference, and (2) this device must accept
any interference, including interference that may cause undesired operation
of the device.
Designed by OSIGHT INC. in Arizona
4330 W Chandler Blvd, Suite 4 Chandler, AZ 85226
Manufacturer:
8th Floor, Building 1, Xinghuang Technology Park, No. 50, Zhongzhun Road,
Cuiheng New District, Zhongshan City, Guangdong, China.
Made in China
Cet appareil est conforme aux normes ICES d’industrie Canada.L'exploita-
tion est autorisée aux deux conditions suivantes:
(1) l'appareil nedoit pas produire de brouillage, et
(2) l'utilisateur de l'appareil doit accepter tout brouillage radioélectrique
subi,
même si le brouillage est susceptible d'en compromettre le fonctionnement.
This Class B digital apparatus complies with Canadian ICES-003.
Cet appareil numérique de la classe B est conforme à la norme NMB-003
du Canada.
Window Size
1
Figure 4
Optic OperatiIon nstructison
Rear Sight Adjustment
Manual On
Figure 5
Manual Off
Figure 6
Motion Sensor Function
On/Off
Press any button
2
Press the "+" and "-" buttons simultaneously for more than 0.5 seconds.
3s
Press and hold "" over 2s-Double press and hold "-" for over 3s
Flashes Once: On
Flashes Twice: Off
2s
OFF
ON
OFF
ON
Figure 9-1
CBRS/Collapsible Backup Rear Sight Presses In
Figure 9-2
CBRS/Collapsible Backup Rear Sight Pops Up
Figure 7
Brightness Adjustment
Press
"+": increase brightness; "-" : decrease brightness
The optic will automatically turn off after 3 minutes of inactivity.
Figure 8
Reticle System Switching
Shows the battery level of the
cover or optic depending on
different situations.
Figure 11
Battery Indicators
Green
(≥50%)
Red Blink
(<10%)
Red
(20%-10%)
Yellow
(50%-20%)
1
2
Cycle
OFF
ON
Figure 10
Power-Saving Function
The reticle turns off when the cover is placed over the optic. It will be automatically activated
when the cover is removed (The reticle can't be activated when the optic is turned off manually).
Use the tool or press the protrusion by hand until it is
flush with the surface. When you hear a "click," it
will automatically lock in place.
Rotate to adjust elevation or windage
Figure 13
Zero Setting
1 MOA per click
Figure 12
How to Install
Screw on
For torque specification, please read the installation card.
Press
Press
Use the tool to press the CBRS button until it ejects.
Produktspezifikationen
| Marke: | Osight |
| Kategorie: | Nicht kategorisiert |
| Modell: | XR |
Brauchst du Hilfe?
Wenn Sie Hilfe mit Osight XR benötigen, stellen Sie unten eine Frage und andere Benutzer werden Ihnen antworten
Bedienungsanleitung Nicht kategorisiert Osight

26 März 2026
Bedienungsanleitung Nicht kategorisiert
Neueste Bedienungsanleitung für -Kategorien-
26 März 2026
26 März 2026
26 März 2026
26 März 2026
26 März 2026
26 März 2026
26 März 2026
26 März 2026
26 März 2026
26 März 2026