Panasonic SD-ZX2522 Bedienungsanleitung
Panasonic
Brotbackautomaten
SD-ZX2522
Lies die bedienungsanleitung für Panasonic SD-ZX2522 (62 Seiten) kostenlos online; sie gehört zur Kategorie Brotbackautomaten. Dieses Handbuch wurde von 34 Personen als hilfreich bewertet und erhielt im Schnitt 4.7 Sterne aus 17.5 Bewertungen. Hast du eine Frage zu Panasonic SD-ZX2522 oder möchtest du andere Nutzer dieses Produkts befragen? Stelle eine Frage
Seite 1/62

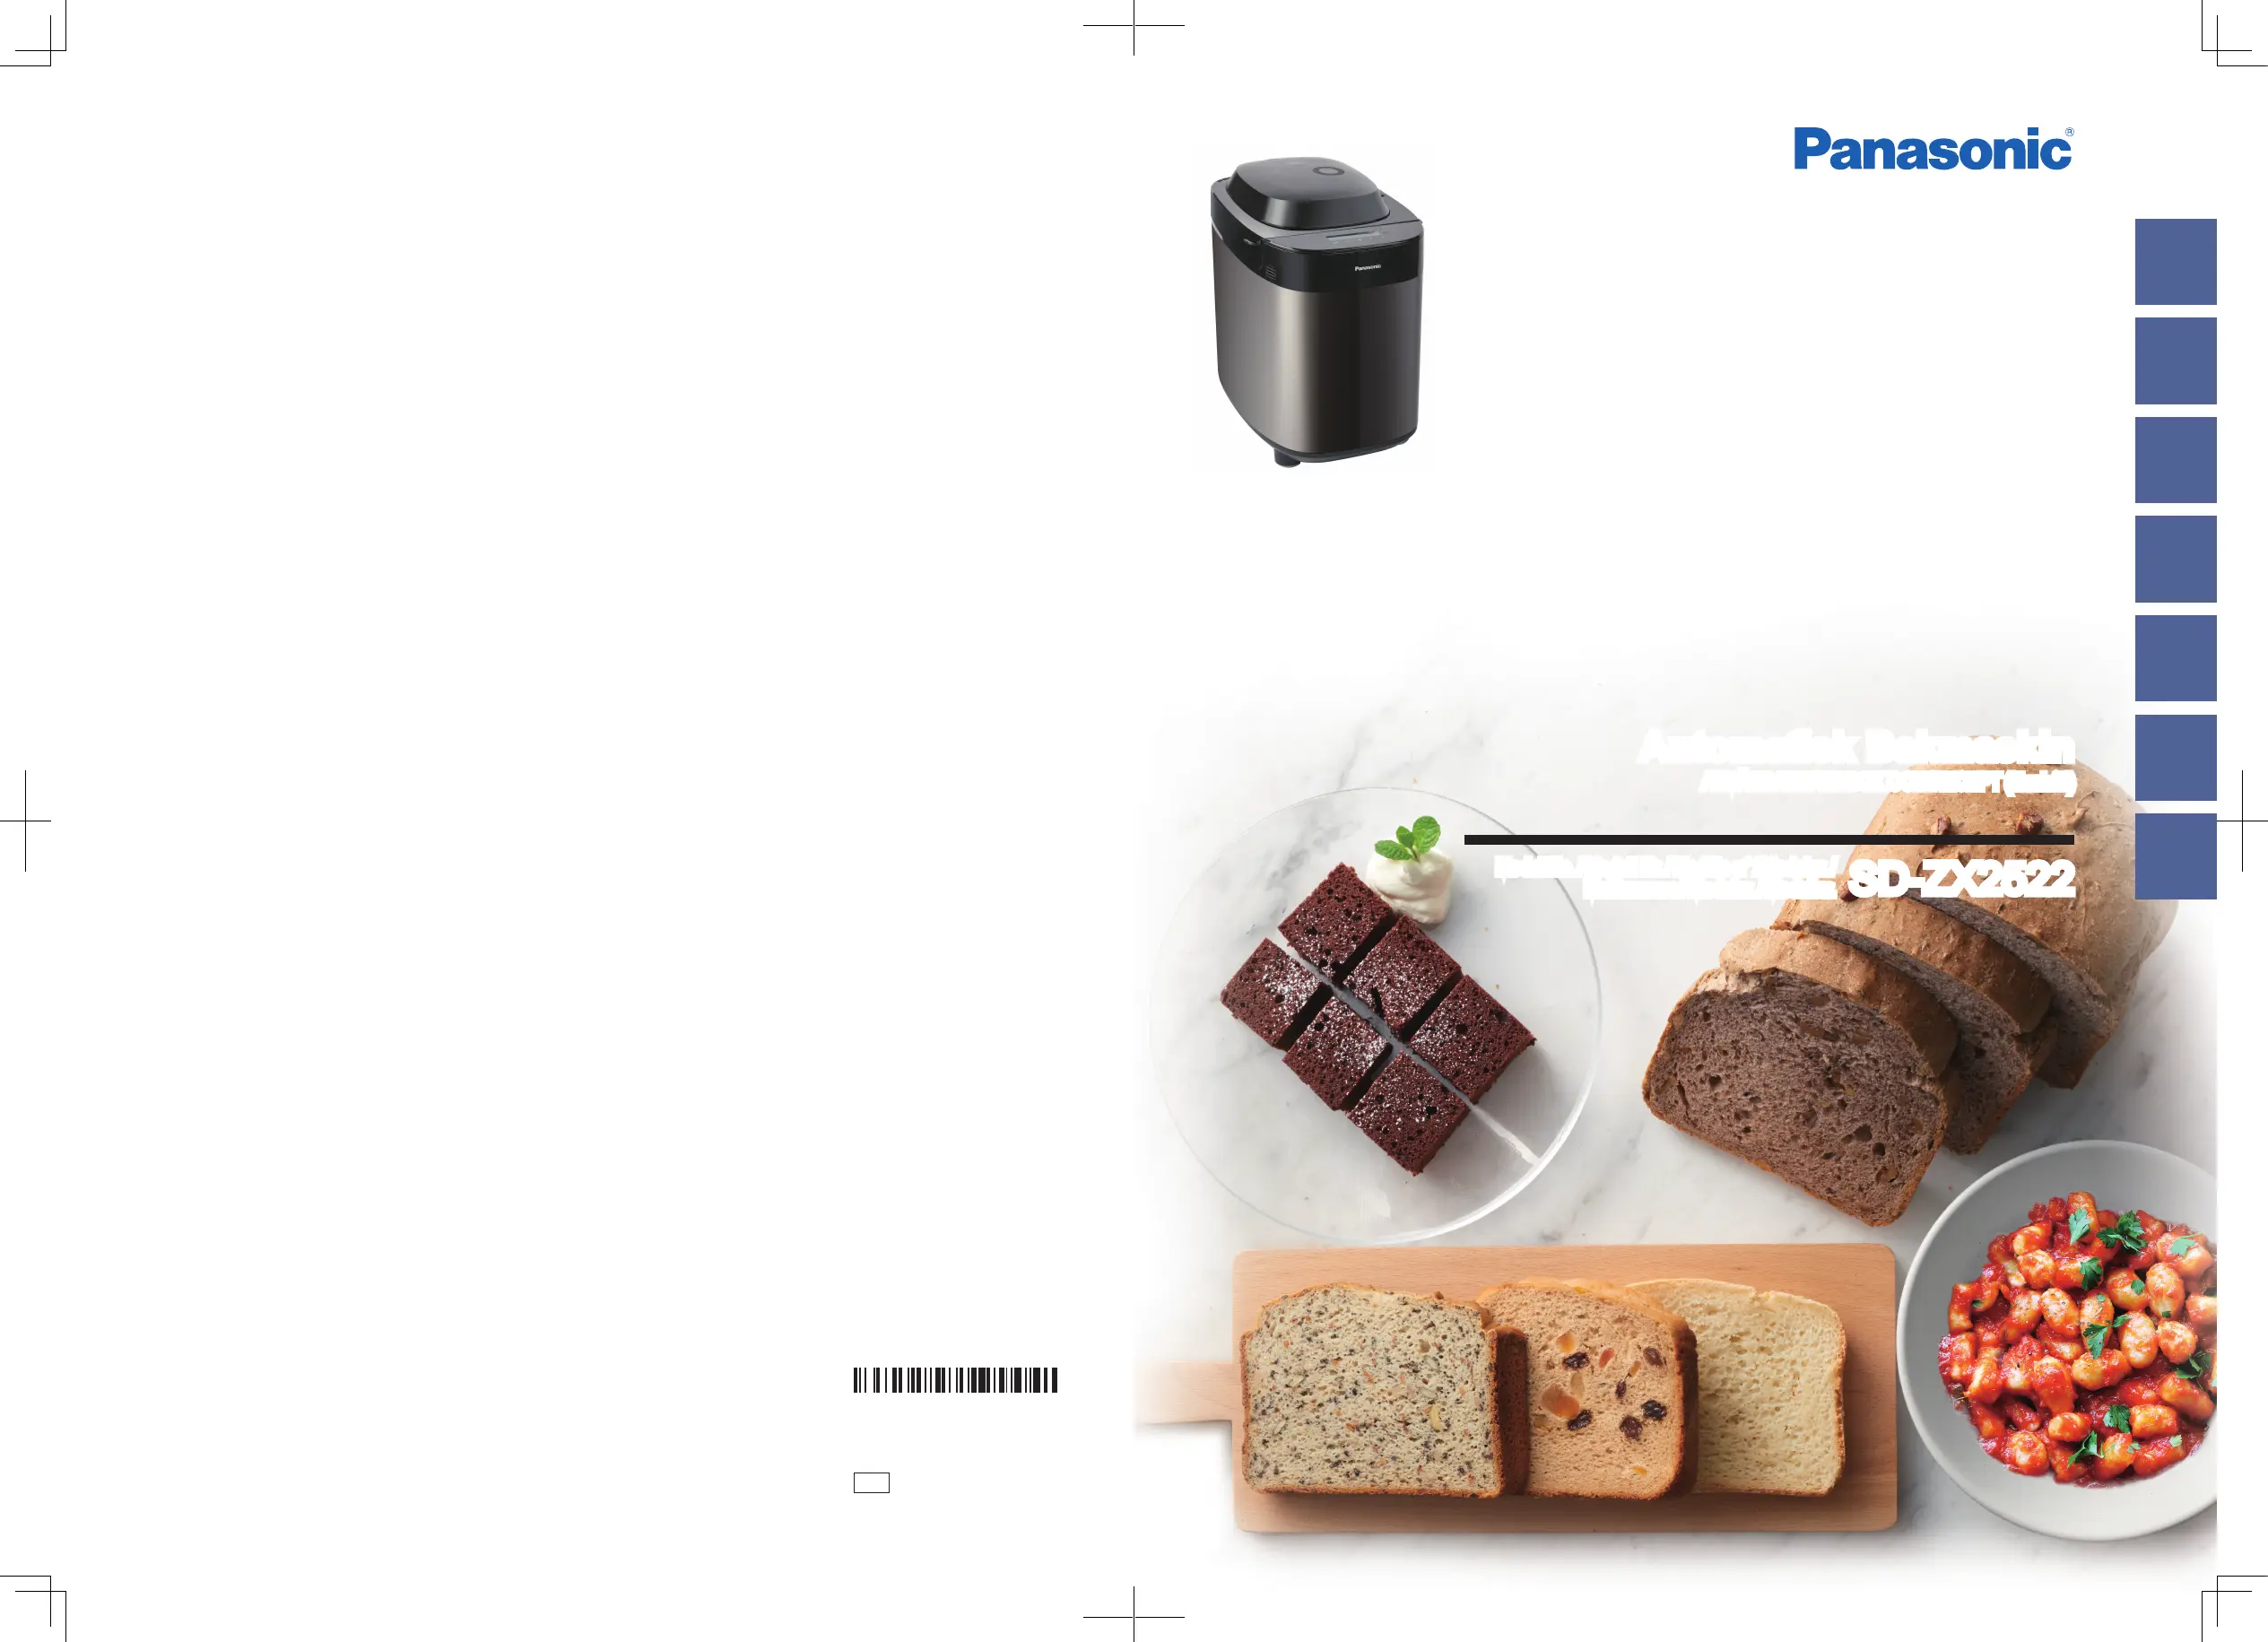
Automatic Bread Maker
OPERATING MANUAL AND RECIPES (Household Use)
Brotbackautomat
BEDIENUNGSANLEITUNG UND REZEPTE (Hausgebrauch)
Machine à pain automatique
MODE D’EMPLOI ET RECETTES (Usage Domestique)
Automatische Broodbakoven
BEDIENINGSHANDLEIDING EN RECEPTEN (Voor huishoudelijk gebruik)
Automaattinen leipäkone
KÄYTTÖOPAS JA RESEPTIT (Kotitalouskäyttöön)
Automatisk bagemaskine
BRUGSANVISNING OG OPSKRIFTER (Husholdningsbrug)
Automatisk Bakmaskin
ANVÄNDARHANDBOK OCH RECEPT (Hushåll)
Model No. / Modell Nr. / Modèle n° / Modelnr. /
Mallinumero / Modelnr. / Modellnr.
SD-ZX2522
Panasonic Taiwan Co., Ltd.
http://www.panasonic.com
© Panasonic Taiwan Co., Ltd. 2017
Representative in EU :
Panasonic Marketing Europe GmbH
Panasonic Testing Centre
Winsbergring 15, 22525 Hamburg, Germany
English Deutsch Français
Nederlands
Suomalainen
Dansk Svenska
DZ50B2081
MX0417E0
Printed in China
KXG

GB2 GB3
Contents
Parts Names ........................................................................GB2
Bread - making Ingredients.................................................GB3
Menu Charts and Baking Options .....................................GB4
Handling Instructions .........................................................GB6
●
Baking Bread ......................................................................GB6
●
Making Dough .....................................................................GB7
●
When Adding Additional Ingredients ......................................GB7
●
Multigrain Rapid & Rustic Artisan ..........................................GB8
●
Rustic Sourdough ................................................................GB8
●
Baking Brioche / Making Brioche Dough .................................GB9
●
Baking Rustic Scone / Gluten Free Cake ................................GB9
●
Baking Cake........................................................................GB9
●
Gluten Free Pasta..............................................................GB10
●
Making Jam / Compote .......................................................GB10
Recipes .............................................................................. GB11
●
Baking Recipes .................................................................GB11
●
Dough Recipes ..................................................................GB12
●
Jam Recipes .....................................................................GB13
●
Compote Recipes ..............................................................GB13
●
Gluten Free Information and Recipes ..................................GB14
●
AVEVE Recipes .................................................................GB15
●
AVEVE Charts ...................................................................GB16
Troubleshooting ...............................................................GB16
Thank you for purchasing the Panasonic product.
●
For this product, there are 2 instructions. This is “OPERATING MANUAL AND RECIPES”, the other one is “OPERATING INSTRUCTIONS” which includes
content of Safety Precautions, Cleaning & Care and so on.
Please read 2 instructions carefully to use the product correctly and safely.
●
Before using this product please give your special attention to “Safety Precautions” and “Important Information” of “OPERATING
INSTRUCTIONS”. (P. GB3 - GB5).
●
This product is intended for household use only.
●
Please keep 2 instructions for future use.
●
Panasonic will not accept any liability if the appliance is subject to improper use, or failure to comply with these instructions.
Accessories
Measuring spoon
To measure out sugar, salt, dry yeast, etc.
(15 mL) (5 mL)
Tablespoon
•
½ marking
Teaspoon
•
¼, ½, ¾ markings
Sourdough starter spoon
To measure out sourdough starter yeast.
approx. 0.1 g
Sourdough cup × 2
To measure out liquids, make sourdough starter.
•
10 mL increments
Lid
(max. 550 mL)
Touch Panel and Display
Below picture shows all words and symbols, but only those relevant will be displayed during operation.
Displayed for the current stage of the program except “ ” and “ ”.
: Provide an indication of a power failure.
:
●
Provide an indication of adding ingredients manually. (Menu 4, 5, 14, 24, 33)
●
Provide an indication of doing scrape off or shape the surface during operation. (Menu 17, 20, 21)
n
Operation status
Menu
1) Tap “Menu” icon once to be a setting mode.
2) Tap the icon to change “Menu” number.
(To advance more quickly, hold the icon after step of 1.)
SeeP.GB4 - GB5formenunumber.
n
Time showing
●
Time remaining until ready.
●
When adding ingredients manually, display will show the time until adding extra ingredients in the program.
●
Menu required some manual steps, display will show the time until starting its process after touch “Start” icon.
Start
To start the program.
Stop
To cancel the setting / stop the program. (Hold for approximate 1 second.)
Crust
To choose the crust colour.
Size
To choose the size.
Timer
●
Set delay timer (time until bread is ready). For available menu, it
can be set up to 13 hours (except menu 11 only set up to 9 hours).
●
Set the baking / cooking time for menu 18, 36 and 37.
●
Setting the additional cooking time is available on menu 17, 18, 36 and 37.
* See P. GB7 in “OPERATING INSTRUCTIONS” for more details.
Bread - making Ingredients
It is extremely important to use the correct measure of ingredients for best results.
Liquid ingredients
•
Should be measured with the sourdough cup or measuring spoon provided.
Dry ingredients
•
Should be weighed on scales or measured with measuring spoon provided for the small amounts.
Flour
Main ingredient of bread. The protein in flour forms gluten during kneading.
Gluten provides structure and texture and helps the bread to rise.
Use strong flour. Strong flour is milled from the wheat and has a high
content of protein which is necessary for the development of gluten.
Carbon dioxide produced during fermentation is trapped within the elastic
network of gluten, thus making the dough rise.
White flour
Made by grinding wheat kernel, excluding bran and germ. The best kind
of flour for baking bread is a flour marked “for bread baking”.
Donotuseplainorself - raisingflourasasubstituteforbreadflour.
Whole wheat flour
Made by grinding entire wheat kernel, including bran and germ.
Makes very health-giving bread. This bread is lower in height and
heavier than bread baked with white flour.
Rye flour
Made by grinding rye kernel. Contains more iron, magnesium and
potassium, which are necessary for human’s health, than white flour.
But there isn’t enough gluten.
Makes dense, heavy bread. Do not use more than stated quantity
(could overload motor).
Spelt flour
In the wheat family but is a completely different species genetically.
Makes loaves with a flat / slightly sunken crust.
Spelt wholegrain flour bread becomes low height and dense compared
with spelt white flour bread.
We will recommend spelt white flour to be used more than the half of
the entire flour.
•
There is Spelt (Triticum spelta) suitable for baking bread and Einkorm
wheat (Triticum monococcum: also it is called small spelt.) which is
not suitable for baking bread are sold as spelt. Please use spelt on
menu 15, 16, 34, or 35.
Dry yeast
Enables the bread to rise.
Besuretousedryyeastthatdoesnotrequirepre - fermentation(donot
use fresh yeast or dry yeast requiring fermentation before using). Dry
yeast which has “instant yeast” written on the packet is recommended.
When using dry yeast from sachets, seal the sachet again immediately
after use, and keep in the refrigerator. (Use within the manufacturer’s
recommended time)
Dairy products
Add flavour and nutritional value.
•
If you use milk instead of water, the nutritional value of the bread will be
higher, but do not use in timer setting as it may not keep fresh overnight.
ÉReduce the amount of water proportionally to the amount of milk.
Sugar (granulated sugar, brown sugar, honey, treacle, etc.)
Food for the yeast, sweetens and adds flavour to the bread, changes the
colour of the crust.
•
Use less sugar if using raisins or other fruits, which contain fructose.
Water
Use normal tap water.
When room temperature is low, use tepid water for menu 2, 4, 7 , 9, 19,
21, 27 or 31.
When room temperature is high, use chilled water for menu 9, 10, 14, 15,
16, 27, 28, 33, 34 or 35.
Always measure out liquids using the sourdough cup provided.
Salt
Improves the flavour and strengthens gluten to help the bread rise.
The bread may lose size / flavour if measuring is inaccurate.
Fat
Adds flavour and softness to the bread.
Use butter (unsalted), margarine or oil.
You can make your bread taste better by adding other
ingredients.
■
Eggs
Improve the nutritional value and colouring of the bread. (Water amount
must be reduced proportionally.) Beat eggs when adding eggs. Do not
use the timer for the recipe with egg. (Eggs go rotten quickly if your room
temperature is high.)
■
Bran
Increases the bread’s fibre content.
•
Use max. 75 mL (5 tbsp).
■
Wheat germ
Gives the bread a nuttier flavour.
•
Use max. 60 mL (4 tbsp).
■
Spices, herbs
Enhance the flavour of the bread.
• Only use a small amount (max. 1 tbsp).
If using a bread mix...
■
Bread mixes including dry yeast
➀
Place the mix in the bread pan, then add water.
(Follow instructions on the packet for the quantity of water)
➁
Select the menu 2, choose a size according to the volume of the mix, and
start the baking.
•
600 g – XL
•
500 g – L
•
With some mixes, it is not clear how much dry yeast is included, so some
trial and error may be required to obtain optimum results.
■
Bread mix with separate dry yeast sachet
➀
First place the bread mix in the bread pan, then the water. Then place the
measured dry yeast in the yeast dispenser.
➁
Set the machine according to the type of flour included in the mix, and start
the baking.
•
White flour, brown flour - menu 1
•
Multi-grain flour - menu 4
•
Whole wheat - menu 6
•
Rye flour - menu 9
■
Baking brioche with brioche mix
Select the menu 14 or 2, “Medium” size - “Light” crust colour.
Parts Names
Main Unit
Lid
Handle
Touch panel
The shape of mains plug may be different from illustration.
Raisin nut dispenser flap
Bread pan
Mains plug
Mains lead
Steam vent
Yeast dispenser
Raisin nut dispenser
Kneading blade (rye menu)
Kneading blade
Dispenser Lid
English
Produktspezifikationen
Marke: | Panasonic |
Kategorie: | Brotbackautomaten |
Modell: | SD-ZX2522 |
Brauchst du Hilfe?
Wenn Sie Hilfe mit Panasonic SD-ZX2522 benötigen, stellen Sie unten eine Frage und andere Benutzer werden Ihnen antworten
Bedienungsanleitung Brotbackautomaten Panasonic
7 September 2025
6 September 2025
6 September 2025
13 Juli 2024
11 Juli 2024
5 Juli 2024
25 Juni 2024
15 Juni 2024
14 Oktober 2022
8 Oktober 2022
Bedienungsanleitung Brotbackautomaten
- Arendo
- Cuisichef
- Moulinex
- Zojirushi
- MPM
- Tefal
- DeLonghi
- Heinner
- Alaska
- Rommelsbacher
- Breville
- Cloer
- Funai
- Superior
- Zelmer
Neueste Bedienungsanleitung für -Kategorien-
1 September 2025
1 September 2025
29 August 2025
28 August 2025
27 August 2025
27 August 2025
27 August 2025
19 August 2025
19 August 2025