Panduit PZICE Bedienungsanleitung
Panduit Nicht kategorisiert PZICE
Lies die bedienungsanleitung für Panduit PZICE (4 Seiten) kostenlos online; sie gehört zur Kategorie Nicht kategorisiert. Dieses Handbuch wurde von 31 Personen als hilfreich bewertet und erhielt im Schnitt 5.0 Sterne aus 8 Bewertungen. Hast du eine Frage zu Panduit PZICE oder möchtest du andere Nutzer dieses Produkts befragen? Stelle eine Frage
Seite 1/4
INSTALLATION INSTRUCTIONS CM363
© Panduit Corp. 2008
FOR TECHNICAL SUPPORT www.panduit.com/resources/install_maintain.asp
Page 1 of 4
PZ ANONEIn-Ceiling Enclosure
PZICE
Part Numbers:PZICE
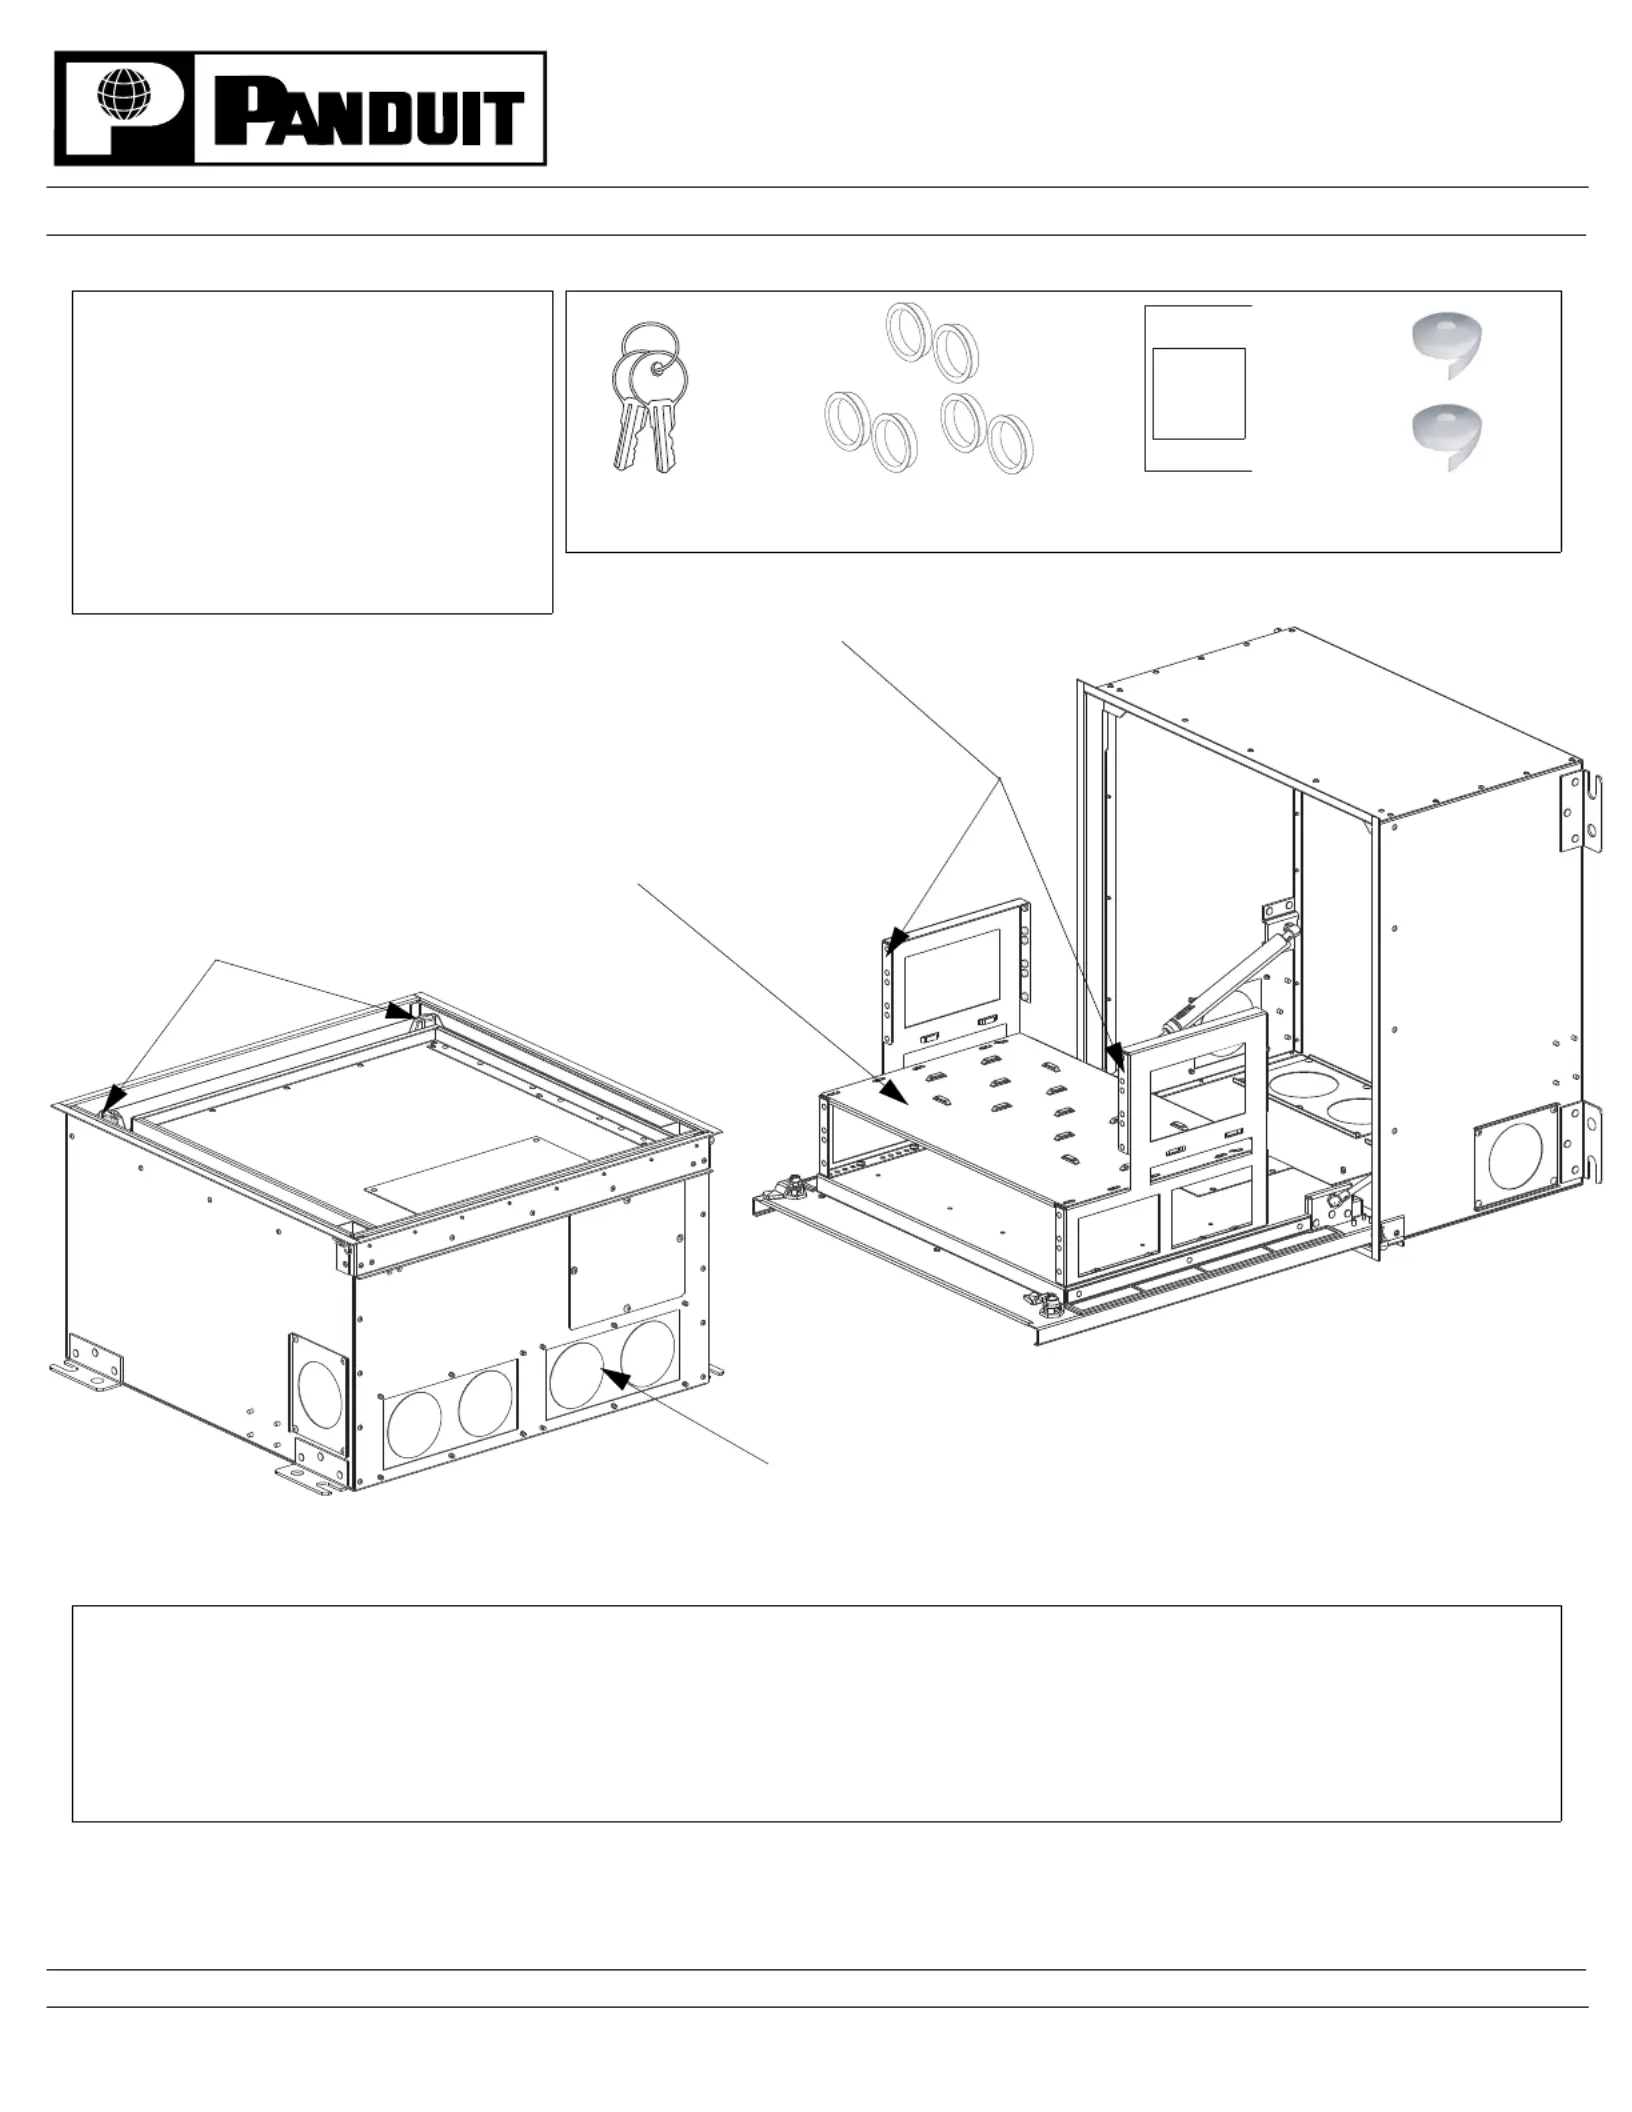
List of Components:
Install in Ceiling..........................................................................................................................................
Equipment Installation...............................................................................................................................
Cable Routing and Slack...........................................................................................................................
2
3
4
Table of Contents
Entry/Exit Knockout Plates (4x)
Mounting Brackets
Keyed Locks
Integrated
Horizontal
Slack Manager
Set of two keys
Grommets
Ceiling tile template
Tak Ties
(1) Set of two Keys
(1) Left Mounting Bracket
(1) Right Mounting Bracket
(6) Grommets
(2) Tak-Ty Rolls (Hook and Loop)
(1) Ceiling Tile Template
(1) Integrated Horizontal Slack Manager
(4) Entry/Exit Knockout Plates
Produktspezifikationen
| Marke: | Panduit |
| Kategorie: | Nicht kategorisiert |
| Modell: | PZICE |
| Breite: | 597 mm |
| Tiefe: | 341 mm |
| Produktfarbe: | Weiß |
| Höhe: | 597 mm |
| Gehäusematerial: | Aluminium |
| Nachhaltigkeitszertifikate: | RoHS |
Brauchst du Hilfe?
Wenn Sie Hilfe mit Panduit PZICE benötigen, stellen Sie unten eine Frage und andere Benutzer werden Ihnen antworten
Bedienungsanleitung Nicht kategorisiert Panduit

22 März 2026
21 März 2026
20 März 2026
20 März 2026
19 März 2026
18 März 2026
18 März 2026
10 März 2026
9 März 2026
9 März 2026
Bedienungsanleitung Nicht kategorisiert
Neueste Bedienungsanleitung für -Kategorien-
3 April 2026
3 April 2026
3 April 2026
3 April 2026
3 April 2026
3 April 2026
3 April 2026
3 April 2026
3 April 2026
3 April 2026