Penton SENTRY6RT/EN Bedienungsanleitung
Penton
Lautsprecher
SENTRY6RT/EN
Lies die bedienungsanleitung für Penton SENTRY6RT/EN (1 Seiten) kostenlos online; sie gehört zur Kategorie Lautsprecher. Dieses Handbuch wurde von 31 Personen als hilfreich bewertet und erhielt im Schnitt 4.4 Sterne aus 16 Bewertungen. Hast du eine Frage zu Penton SENTRY6RT/EN oder möchtest du andere Nutzer dieses Produkts befragen? Stelle eine Frage
Seite 1/1

RoHS
Penton UK Ltd
Unit 2 Teville Industrials Dominion Way Worthing West Sussex | | | | BN14 8NW
T: +44 (0)1903 215315 F: +44(0)1903 215415 E: sales@ pentonuk.co.uk | |
www.pentonuk.co.uk
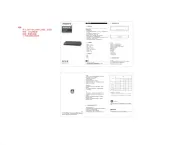
1. LOUDSPEAKER ENCLOSURE
2. REFERENCE AXIS
3. REFERENCE PLANE
4. HORIZONTAL PLANE
VANDALPROOF METAL
CABINET LOUDSPEAKERS
f SENTRY6RT/EN
f SENTRY6RT/ENC
EN54-24
INSTALLATION INSTRUCTIONS
EN54-24:2008
Certificate No: 0359-CPD-0163 TYPE A
f SENTRY6RT/EN
f SENTRY6RT/ENC
* with capacitor
ZCL0504-080
OCTOBER 2012
COMMON
0.25W
0.75W
1.5W
3W
6W
2. The back box has the
option of glanding cable directly
into any of the 3 x 20mm
knockouts or through the rear of
the cabinet.
3. Secure the back box to a
flat surface using the fixing holes
provided. (Fixings are not
included). Do not forget to fit the
rubber "O" ring between the wall
and back box before fixing to the
wall. This will ensure that the
screw fixings and any rear cable
entry will be sealed from water
ingress.
1. Decide on the back box
orientation. Normally the back
box is installed with the 2 x
20mm knockouts facing
upwards. However the back
box can be installed in any
orientation as well as
horizontally on a ceiling if
required.
4. Once the back box has
been fixed securely to the
surface the installation
cable can be fitted as
required. The cable can then
be terminated into the
terminal block fitted to the
back box. The terminals are
suitable to take "loop in"
"loop out" connections up to
2.5mm per core.
5. Take the speaker plate
and connect the 3
pre-installed wires from the
terminal block on the back
box to the spade terminals
provided on the speaker
transformer.
6. Slot the speaker plate on
to the retaining lug ‘A’ and then
push the speaker into the back
box. Tighten the grub screw ‘B’
until it firmly holds the speaker
plate. Be careful not to over
tighten the grub screw.
4
3
2
1
GLAND Hole X1
GLAND Hole X2
O Ring
Produktspezifikationen
| Marke: | Penton |
| Kategorie: | Lautsprecher |
| Modell: | SENTRY6RT/EN |
| Breite: | - mm |
| Tiefe: | - mm |
| Gewicht: | 1500 g |
| Empfohlene Nutzung: | Universal |
| Produktfarbe: | Weiß |
| Übertragungstechnik: | Kabelgebunden |
| Impedanz: | 8 Ohm |
| Höhe: | 75 mm |
| RMS-Leistung: | 6 W |
| AC Eingangsspannung: | 100 V |
| Betriebstemperatur: | -10 - 55 °C |
| Relative Luftfeuchtigkeit in Betrieb: | 0 - 95 % |
| Audio Kanäle: | - Kanäle |
| Anzahl des Antriebs: | 1 |
| Frequenzbereich: | 250 - 18000 Hz |
| Durchmesser: | 194 mm |
| Lautsprecherplatzierung: | Ceiling-mountable, Wall-mountable |
| Verstärker: | Nein |
| Transformatorabgriffe: | 1.5, 3,6 W |
| Eingebauter Anpassungstransformator: | Ja |
Brauchst du Hilfe?
Wenn Sie Hilfe mit Penton SENTRY6RT/EN benötigen, stellen Sie unten eine Frage und andere Benutzer werden Ihnen antworten
Bedienungsanleitung Lautsprecher Penton

24 August 2024

8 Juli 2024

23 September 2023

23 September 2023

23 September 2023

23 September 2023

23 September 2023

18 Juni 2023

18 Juni 2023

18 Juni 2023
Bedienungsanleitung Lautsprecher
- Naim
- Micro Innovations
- FoneStar
- Denon DJ
- Magnat
- SpeakerCraft
- Verbatim
- MyDJ
- Sunfire
- Monitor Audio
- Audictus
- B&W
- Cerwin-Vega
- KEF
Neueste Bedienungsanleitung für -Kategorien-
9 August 2025
9 August 2025
9 August 2025

9 August 2025
9 August 2025
9 August 2025
9 August 2025

9 August 2025
9 August 2025

9 August 2025