Pioneer 381323-03-1 Bedienungsanleitung
Lies die bedienungsanleitung für Pioneer 381323-03-1 (2 Seiten) kostenlos online; sie gehört zur Kategorie Auto Kit. Dieses Handbuch wurde von 19 Personen als hilfreich bewertet und erhielt im Schnitt 4.0 Sterne aus 4 Bewertungen. Hast du eine Frage zu Pioneer 381323-03-1 oder möchtest du andere Nutzer dieses Produkts befragen? Stelle eine Frage
Seite 1/2
10 mm
10 mm
© 12/2008 ALL RIGHTS RESERVED. Technical changes possible. No liability for misprints.
Compatible with these Pioneer double DIN devices
Pioneer Navigation
Installation Manual
Double DIN Kit
381323-03-1 (anthracite)
381323-03-2 (black)
• Porsche 911 (Type 997) 20084
• Porsche Boxster (Type 987)
42008
• Porsche Cayman (Type 987)
42008
Installation Manual 381323-03-1 / 381323-03-2
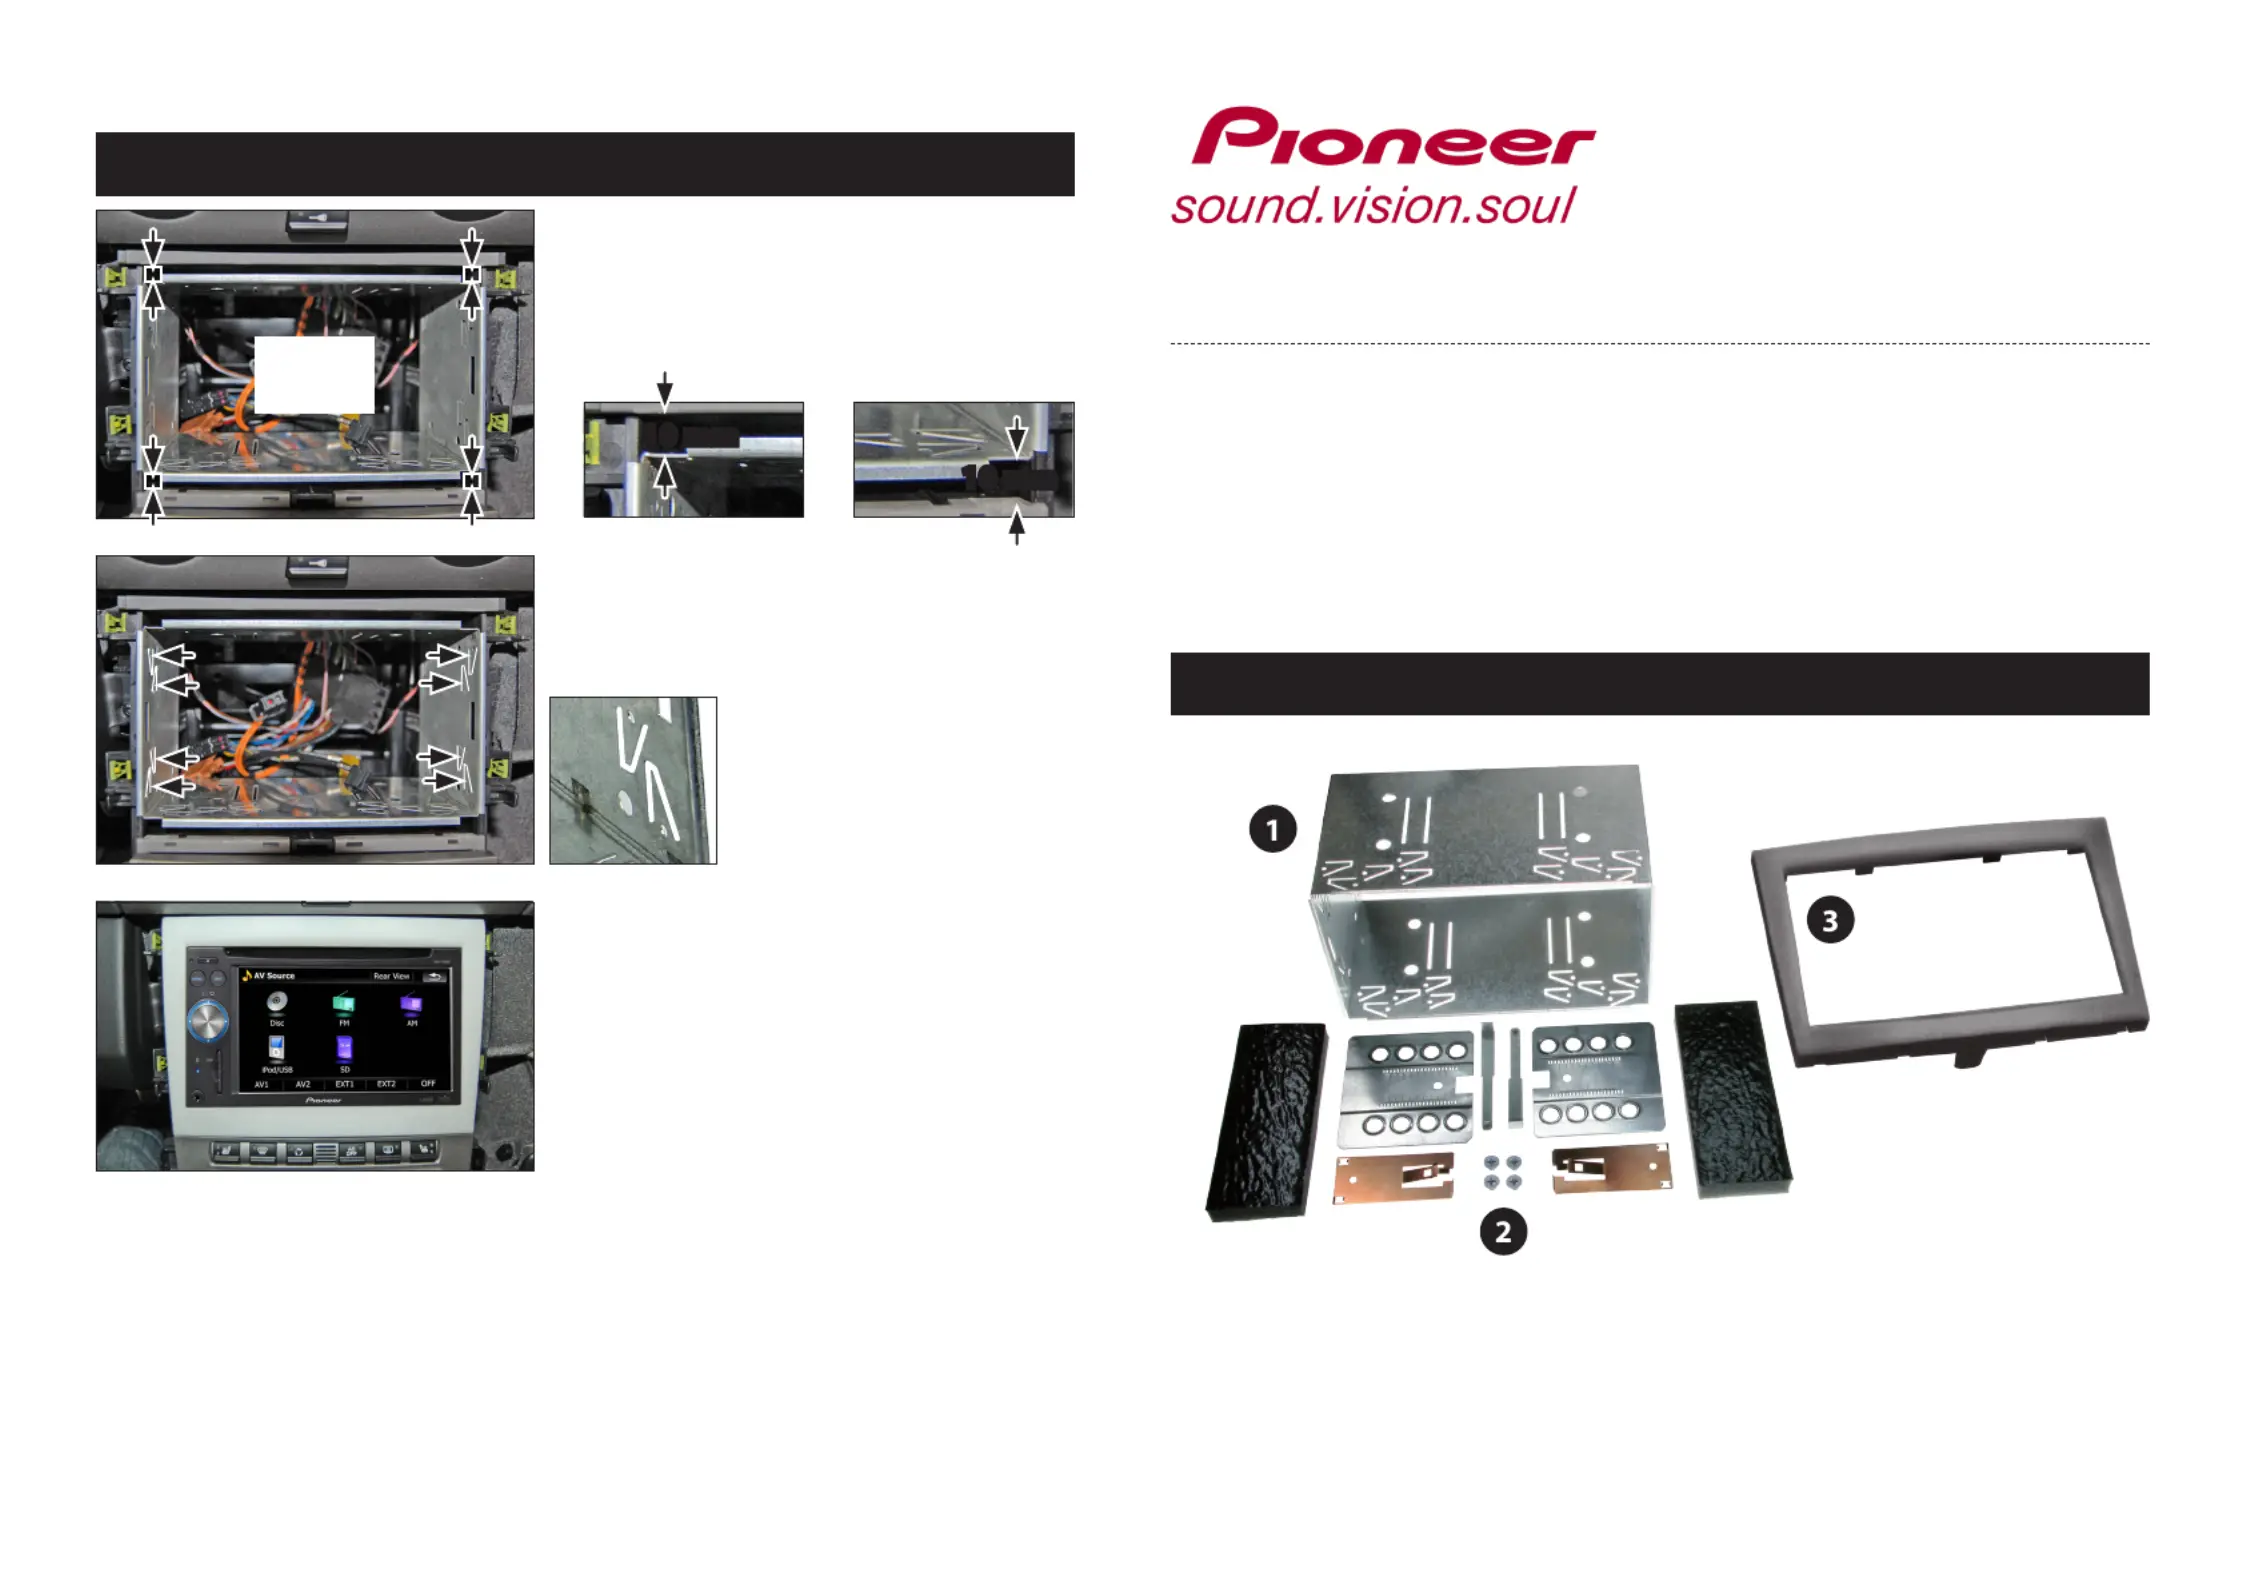
7. Place the metal frame into the
dashboard.
Adjust it vertically with 10 mm
of space to the top and bottom.
Double DIN Kit contents
• (1) Metal Frame
• (2) Installation Kit
• (3) Facia Plate
9. Push the Pioneer Navigation
into the fixed metal frame until
it snaps in.
Place the facia plate.
Reinstall everything in reverse
order to finish installation.
8. Use a soldering iron to heat up
the plastic surface under the
metal hooks left and right (4 on
each side) and press them
into the heated plastic.
(see arrows)
All installation work must be performed by a qualified professional installer only.
The manufacturer / dealer is not liable for any kind of incidential or indirect damages.
10 mm
space
Produktspezifikationen
| Marke: | Pioneer |
| Kategorie: | Auto Kit |
| Modell: | 381323-03-1 |
Brauchst du Hilfe?
Wenn Sie Hilfe mit Pioneer 381323-03-1 benötigen, stellen Sie unten eine Frage und andere Benutzer werden Ihnen antworten
Bedienungsanleitung Auto Kit Pioneer

2 August 2025
2 August 2025
2 August 2025
1 August 2025
1 August 2025
1 August 2025
1 August 2025
1 August 2025
1 August 2025
1 August 2025
Bedienungsanleitung Auto Kit
Neueste Bedienungsanleitung für -Kategorien-
10 November 2025
7 Oktober 2025
5 Oktober 2025
3 Oktober 2025
3 Oktober 2025
3 Oktober 2025
3 Oktober 2025
3 Oktober 2025
26 September 2025
21 September 2025