Rane MM 8x Bedienungsanleitung
Lies die bedienungsanleitung für Rane MM 8x (9 Seiten) kostenlos online; sie gehört zur Kategorie Mischer. Dieses Handbuch wurde von 11 Personen als hilfreich bewertet und erhielt im Schnitt 4.6 Sterne aus 3 Bewertungen. Hast du eine Frage zu Rane MM 8x oder möchtest du andere Nutzer dieses Produkts befragen? Stelle eine Frage
Seite 1/9
Manual-1
OPERATORS MANUAL
MM 8x MIXER
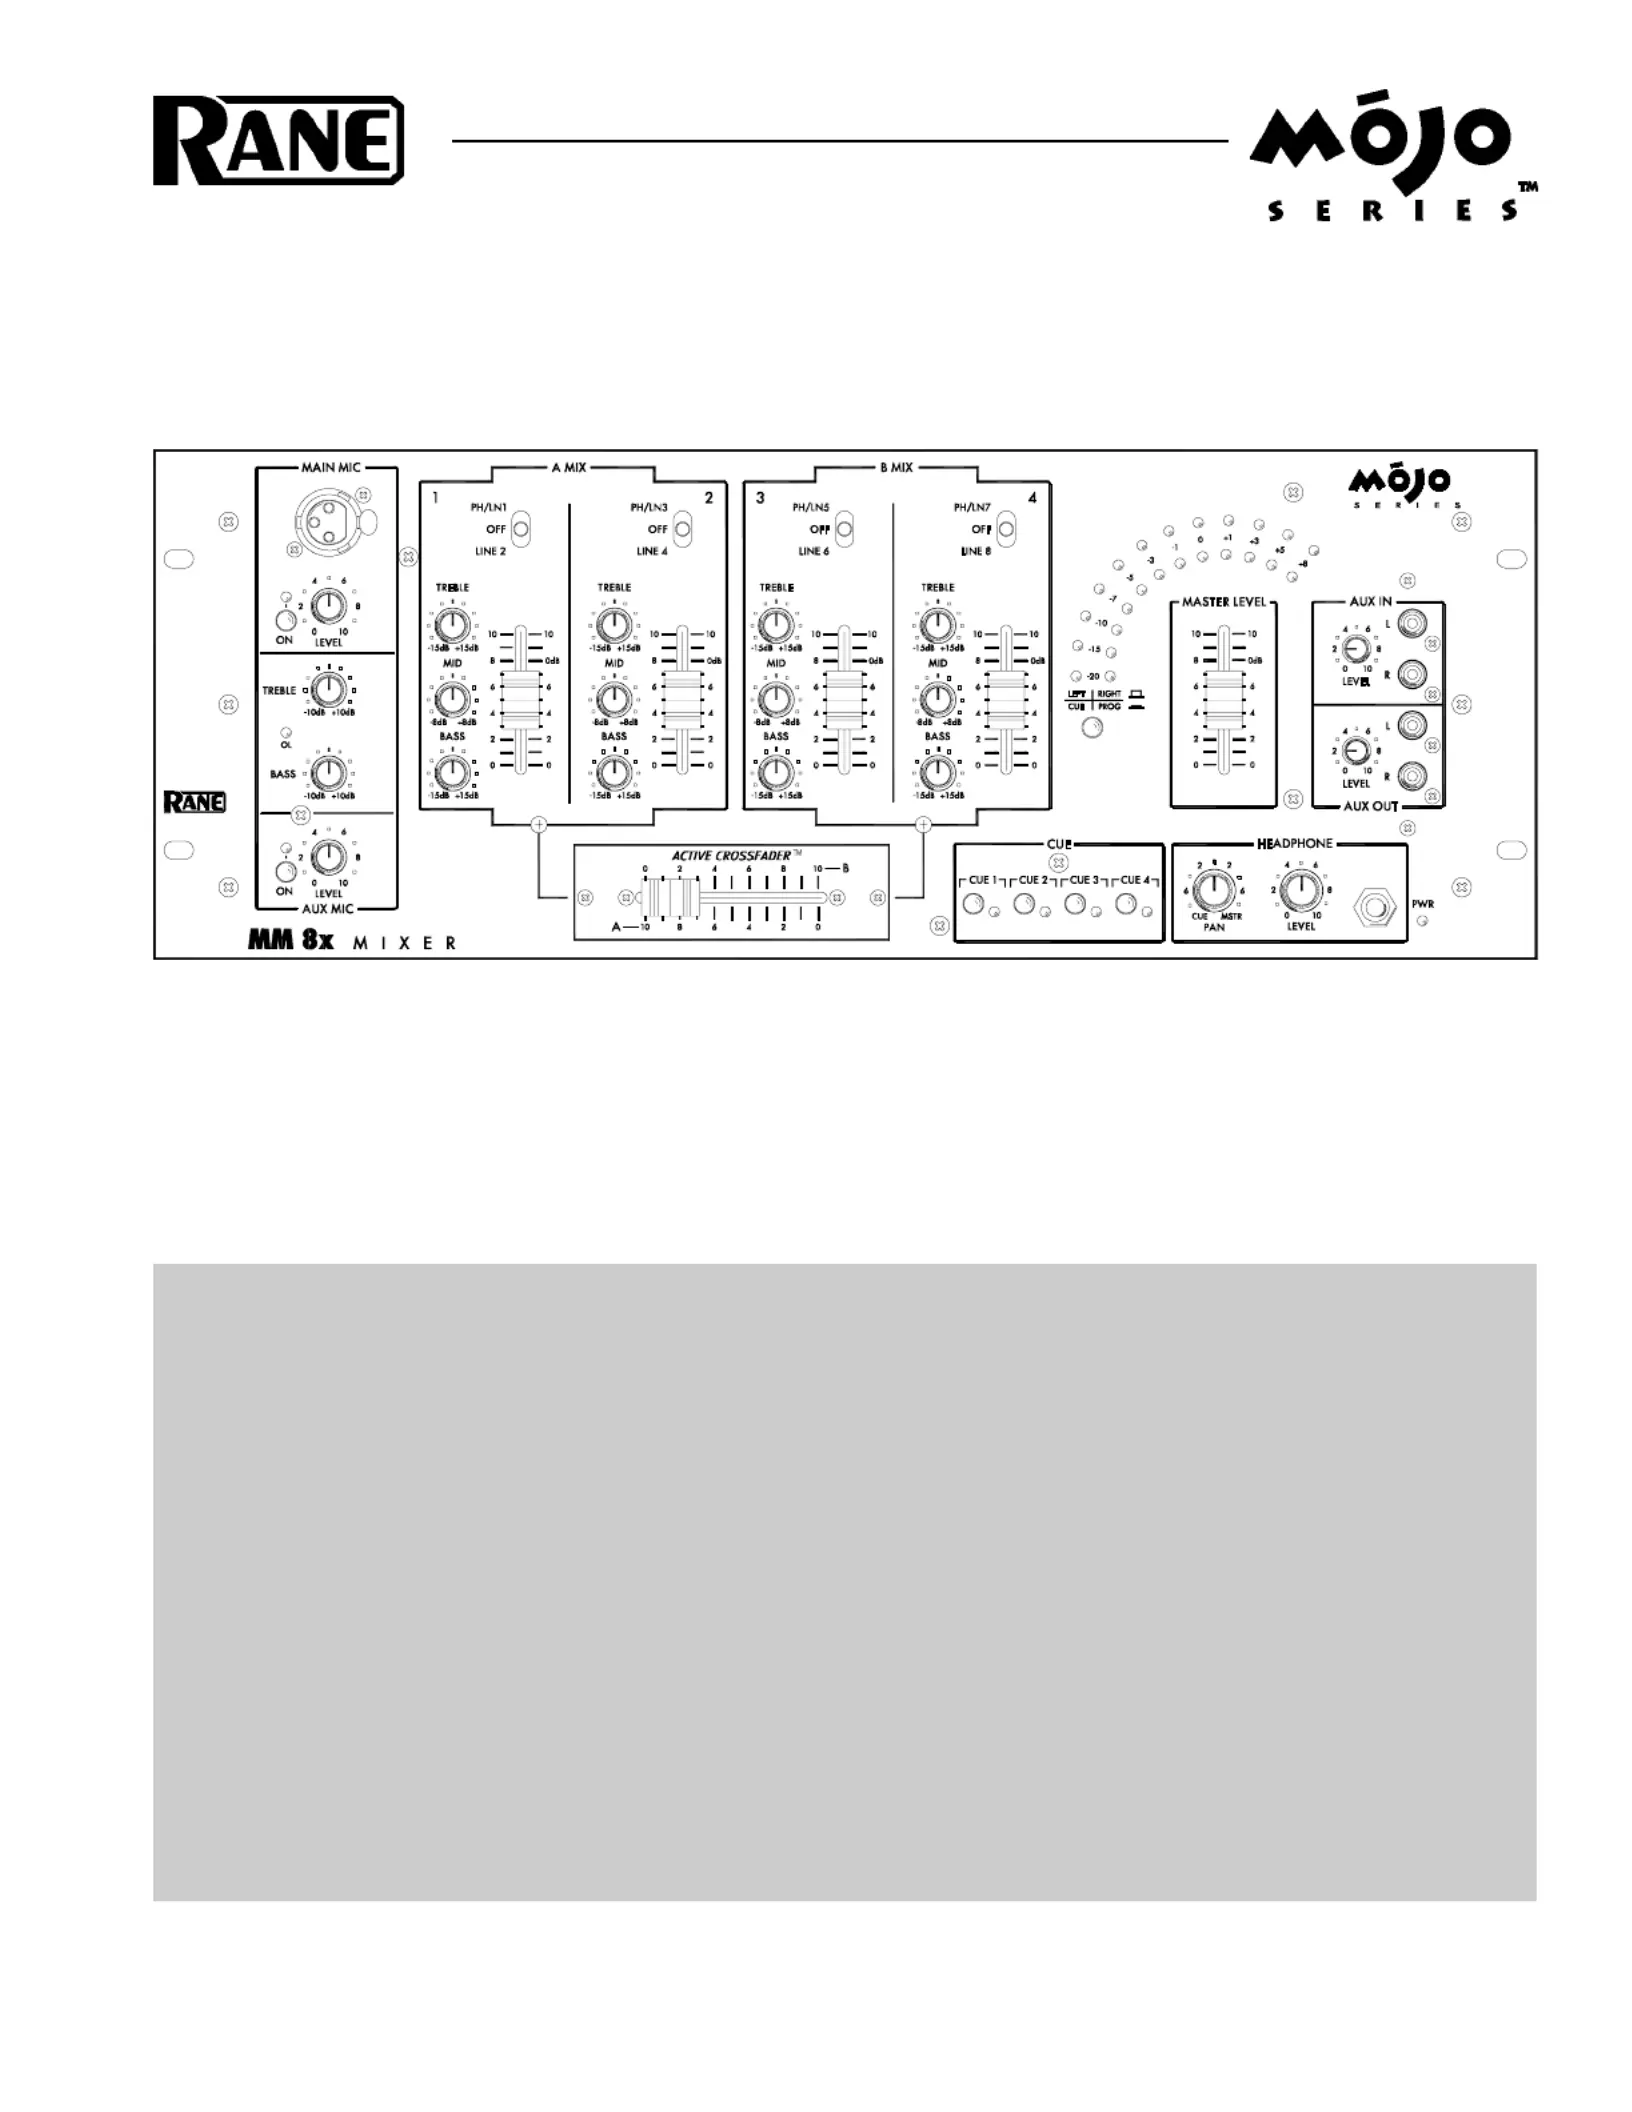
QUICK START
Here are a few basic “plug and play” steps to get you performing. If you are a first time DJ mixer user, please do
yourself a favor and at least read this section.
Begin by making sure your amplifier is off before making connections. The MM 8x has all unbalanced connectors,
except for the 1/4” balanced main outputs and XLR microphone inputs. Plug a source component, such as a CD player,
into one of the four LINE inputs on the rear. Connect the MAIN OUTPUTS to your amplifier. Set all front panel controls
to the middle of their travel and all pushbuttons to their out position. Slide the MASTER LEVEL down to 0. Set an
INPUT SELECT switch to your active source input. Plug in the MM 8x’s power supply and see the PWR indicator
illuminate. Turn on your source and amplifier. Slowly turn up the and see the meters lighting and hearMASTER LEVEL
music from your speakers.
In use, you can get tripped up at two places. If you have a phono signal into one of the four PH/LN inputs, be sure the
PH/LN switch is in the PHONO position (in); likewise, when using a tape deck or CD into these inputs, be sure the switch
is in the LINE (out) position. If you plug into the PROGRAM LOOP, the internal signal path is broken. Be sure that a
complete loop is made, to and from an outside device.
Couldn’t be easier, right?
Never connect anything except a Rane power supply to the thing that looks like a telephone jack on the rear or the
unit.This is an AC input and requires special attention if you do not have a power supply exactlylike the one originally
packed with your unit. See the full explanation of the power supply requirements elsewhere in this manual.
Produktspezifikationen
| Marke: | Rane |
| Kategorie: | Mischer |
| Modell: | MM 8x |
Brauchst du Hilfe?
Wenn Sie Hilfe mit Rane MM 8x benötigen, stellen Sie unten eine Frage und andere Benutzer werden Ihnen antworten
Bedienungsanleitung Mischer Rane

8 Juli 2025
6 Juli 2025
6 Juli 2025
6 Juli 2025
6 Juli 2025
6 Juli 2025
6 Juli 2025
6 Juli 2025
6 Juli 2025
6 Juli 2025
Bedienungsanleitung Mischer
Neueste Bedienungsanleitung für -Kategorien-
3 April 2026
2 April 2026
1 April 2026
1 April 2026
26 März 2026
26 März 2026
25 März 2026
20 März 2026
14 März 2026
13 März 2026