Satco S11641 Bedienungsanleitung
Satco Nicht kategorisiert S11641
Lies die bedienungsanleitung für Satco S11641 (2 Seiten) kostenlos online; sie gehört zur Kategorie Nicht kategorisiert. Dieses Handbuch wurde von 5 Personen als hilfreich bewertet und erhielt im Schnitt 4.2 Sterne aus 3 Bewertungen. Hast du eine Frage zu Satco S11641 oder möchtest du andere Nutzer dieses Produkts befragen? Stelle eine Frage
Seite 1/2
4"/6"LED
DOWNLIGHT RETROFIT
Model: S11640, S11641
Satco Products, Inc.
Brentwood, NY 11717
INSTALLATION AND SAFETY INSTRUCTIONS
WARRANTY: This product is guaranteed for a 5 year
warranty. Any quality issue in normal use within the warranty
period, will be repaired or replaced according to the situation
Visit www.Satco.com for full warranty details and dimmer
compatibility information.
© Copyright 2020 Satco Products, Inc. 7/20
NOTE 1: This equipment has been tested and found to comply with the limits for a Class B digital device, pursuant to part 15 of the FCC Rules.
These limits are designed to provide reasonable protection against harmful interference in a residential installation. This equipment generates, uses and
can radiate radio frequency energy and, if not installed andused in accordance withthe instructions, may cause harmful interference to radio communications.
However, there is no guarantee that interference will not occur in a particular installation. If this equipment does cause harmful interference to radio or
television reception, which can be determined by turning the equipment off and on, the user is encouraged to try to correct the interference by one or
more of the following measures:
– Reorient or relocate the receiving antenna.
– Increase the separation between the equipment and receiver.
– Connect the equipment into an outlet on a circuit different from that to which the receiver is connected.
– Consult the dealer or an experienced radio/TV technician for help.
NOTE 2:
’s authority to
operate the equipment.
Dimensions:
S11640S11641
5.50
1.74
3.93
1.55
7.48
7.5
5.2
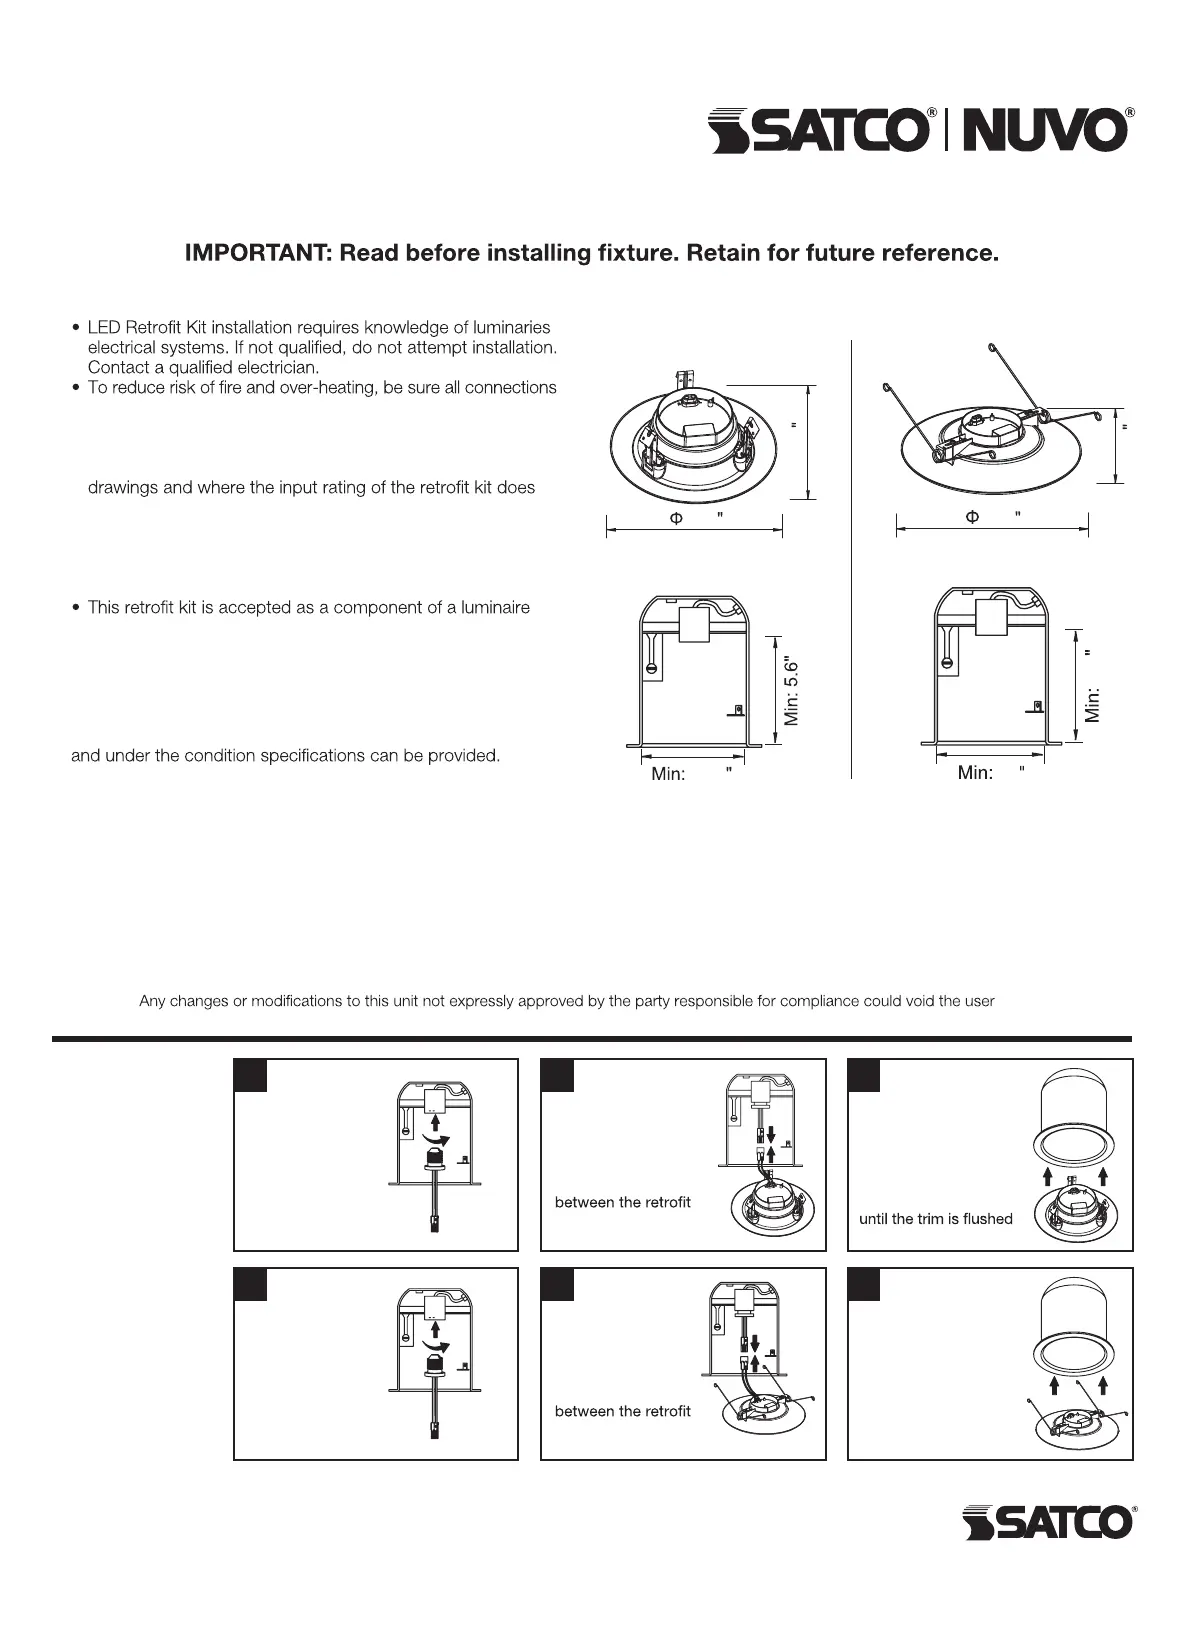
INSTALLATION:
S11640
S11641
Slide the LED
Downlight up into
the recessed housing
with the ceiling.
Gently squeeze
together the torsion
springs of the LED
trim and insert into
the recessed housing.
2
3
Connect the
quick disconnect
kit and the medium
base umbilicalsocket.
1
Twist the lamp
base into the
lamp holder.
2
3
Connect the
quick disconnect
kit and the medium
base umbilicalsocket.
1
Twist the lamp
base into the
lamp holder.
WARNING: Risk of Fire or Electric Shock
are tight.
• TURN OFF the electrical power before proceeding.
• Install this kit only in luminaires that have the construction
features and dimensions shown in the photographs and/or
not exceed the input rating of the luminaire.
• To prevent wiring damage or abrasion, do not expose wiring
to edges of sheet metal or other sharp objects.
• Do not make or alter any open holes in an enclosure of wiring
or electrical components during kit installation.
where the suitability of the combination shall be determined
by authorities having jurisdiction. (Sold to Canada only.)
• This device is not intended for use with emergency exits.
210x290mm
Produktspezifikationen
| Marke: | Satco |
| Kategorie: | Nicht kategorisiert |
| Modell: | S11641 |
Brauchst du Hilfe?
Wenn Sie Hilfe mit Satco S11641 benötigen, stellen Sie unten eine Frage und andere Benutzer werden Ihnen antworten
Bedienungsanleitung Nicht kategorisiert Satco

3 April 2026
3 April 2026
3 April 2026
2 April 2026
2 April 2026
2 April 2026
2 April 2026
2 April 2026
2 April 2026
1 April 2026
Bedienungsanleitung Nicht kategorisiert
Neueste Bedienungsanleitung für -Kategorien-
3 April 2026
3 April 2026
3 April 2026
3 April 2026
3 April 2026
3 April 2026
3 April 2026
3 April 2026
3 April 2026
3 April 2026