Sennheiser ClipMic Digital Bedienungsanleitung
Sennheiser Mikrofon ClipMic Digital
Lies die bedienungsanleitung für Sennheiser ClipMic Digital (2 Seiten) kostenlos online; sie gehört zur Kategorie Mikrofon. Dieses Handbuch wurde von 56 Personen als hilfreich bewertet und erhielt im Schnitt 4.8 Sterne aus 3 Bewertungen. Hast du eine Frage zu Sennheiser ClipMic Digital oder möchtest du andere Nutzer dieses Produkts befragen? Stelle eine Frage
Seite 1/2
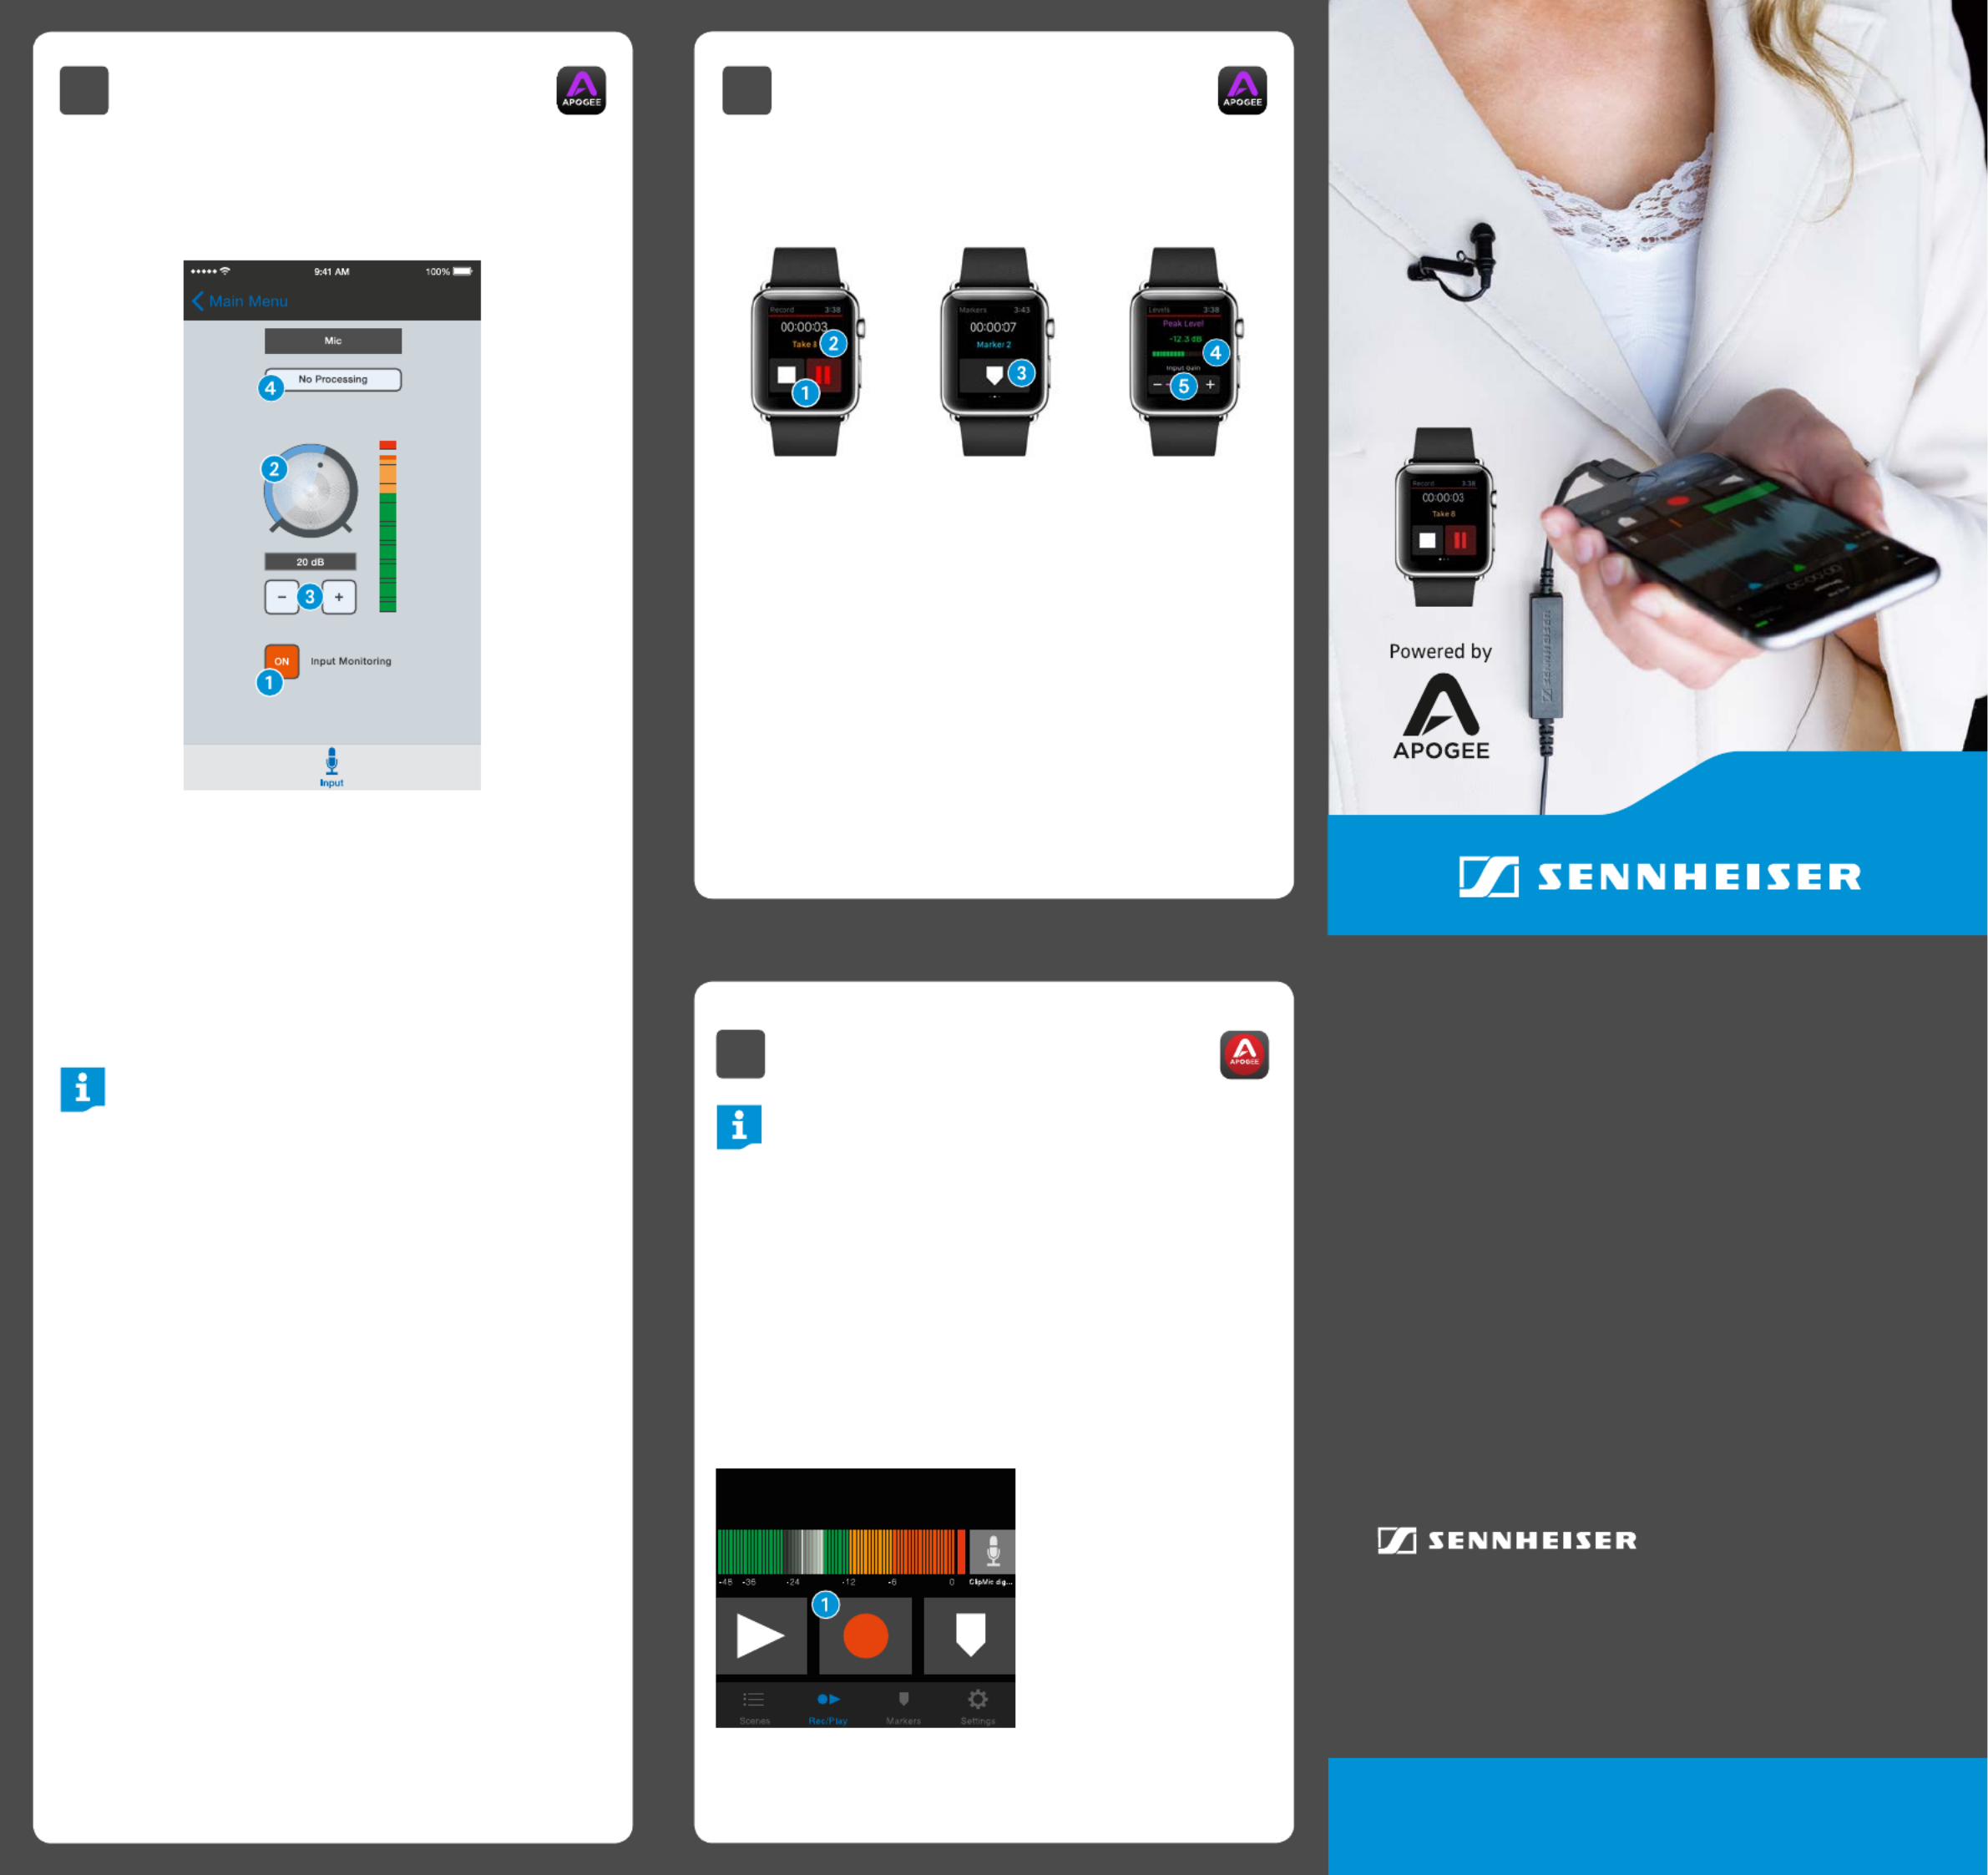
3B Adjusting Input Level with
Apogee Maestro App
XOpen Apogee Maestro app and choose Sennheiser
ClipMic digital from the main menu.
1 Tap the button to hear your micro-Input Monitoring
phone input.
2 Turn the knob to increase or decrea-Gain Adjustment
se the microphone input to the desired level. Small
adjustments can also be made by pressing either the
“–“or “+“ buttons 3.
Tips for Setting Input Level
The best way to do this is to monitor the loudest
sound you will be recording and adjust the input
gain so the input metering remains green, yellow or
orange and not red. If the microphone input meter
becomes red when recording, the input is too high
and the recording will be distorted.
4 Select an preset. The presets use Input Processing
onboard DSP processing to shape the sound with EQ,
compression and limiting to achieve the most natural
or unique result. Select or leave as is to No Processing
bypass this feature.
1 Tap to operate transport controls.
2 Force tap to toggle favorite status.
3 Tap to add a marker.
4 Tap to reset max. peak display.
5 Tap “+” or “–“ to adjust input gain.
ClipMic digital
Quick Start Guide
4Recording
Note:
It is recommended that you set your iOS device to
airplane mode to prevent any incoming calls from
disrupting your recordings.
XOpen Apogee MetaRecorder or any other Core Audio
compatible recording App.
ClipMic digital should be automatically detected and
selected as the input device.
XIf you haven’t already done so, connect headphones to
the built-in output on your iOS device and enable input
monitoring in the recording App.
XTap the button Record 1 in the App to begin.
3C Apple Watch Remote
Control
XMetaRecorder offers an Apple Watch App to remotely
operate these controls.
Sennheiser electronic GmbH & Co. KG
Am Labor 1, 30900 Wedemark, Germany
www.sennheiser.com
Publ. 06/18 A06
Produktspezifikationen
| Marke: | Sennheiser |
| Kategorie: | Mikrofon |
| Modell: | ClipMic Digital |
| Übertragungstechnik: | Kabelgebunden |
| Mikrofon Stummschaltung: | Ja |
| Kabellänge: | 1.6 m |
| Geräteschnittstelle: | Lightning |
| Mikrofon-Frequenz: | 30 - 20000 Hz |
| Ausrichtung des integrierten Mikrofons: | Omnidirektional |
| Mikrofongewicht: | 24 g |
| Bit-Rate: | 24 Bit |
Brauchst du Hilfe?
Wenn Sie Hilfe mit Sennheiser ClipMic Digital benötigen, stellen Sie unten eine Frage und andere Benutzer werden Ihnen antworten
Bedienungsanleitung Mikrofon Sennheiser

15 Oktober 2025
9 Oktober 2025
7 Oktober 2025
1 Oktober 2025
30 September 2025
30 September 2025
30 September 2025
18 September 2025
18 September 2025
18 September 2025
Bedienungsanleitung Mikrofon
Neueste Bedienungsanleitung für -Kategorien-
3 April 2026
1 April 2026
30 März 2026
29 März 2026
29 März 2026
29 März 2026
28 März 2026
26 März 2026
24 März 2026
24 März 2026