White Lightning BMC24 Bedienungsanleitung
Lies die bedienungsanleitung für White Lightning BMC24 (2 Seiten) kostenlos online; sie gehört zur Kategorie Nicht kategorisiert. Dieses Handbuch wurde von 30 Personen als hilfreich bewertet und erhielt im Schnitt 4.4 Sterne aus 5 Bewertungen. Hast du eine Frage zu White Lightning BMC24 oder möchtest du andere Nutzer dieses Produkts befragen? Stelle eine Frage
Seite 1/2
SmartGPU™ Battery Maintenance Charger
Our SmartGPUs feature an easy-to-install option for Battery
Maintenance Charging. Follow these steps to install the model
BMC24 upgrade for the SmartGPU. A helpful video is also available
on our website, or scan the QR code.
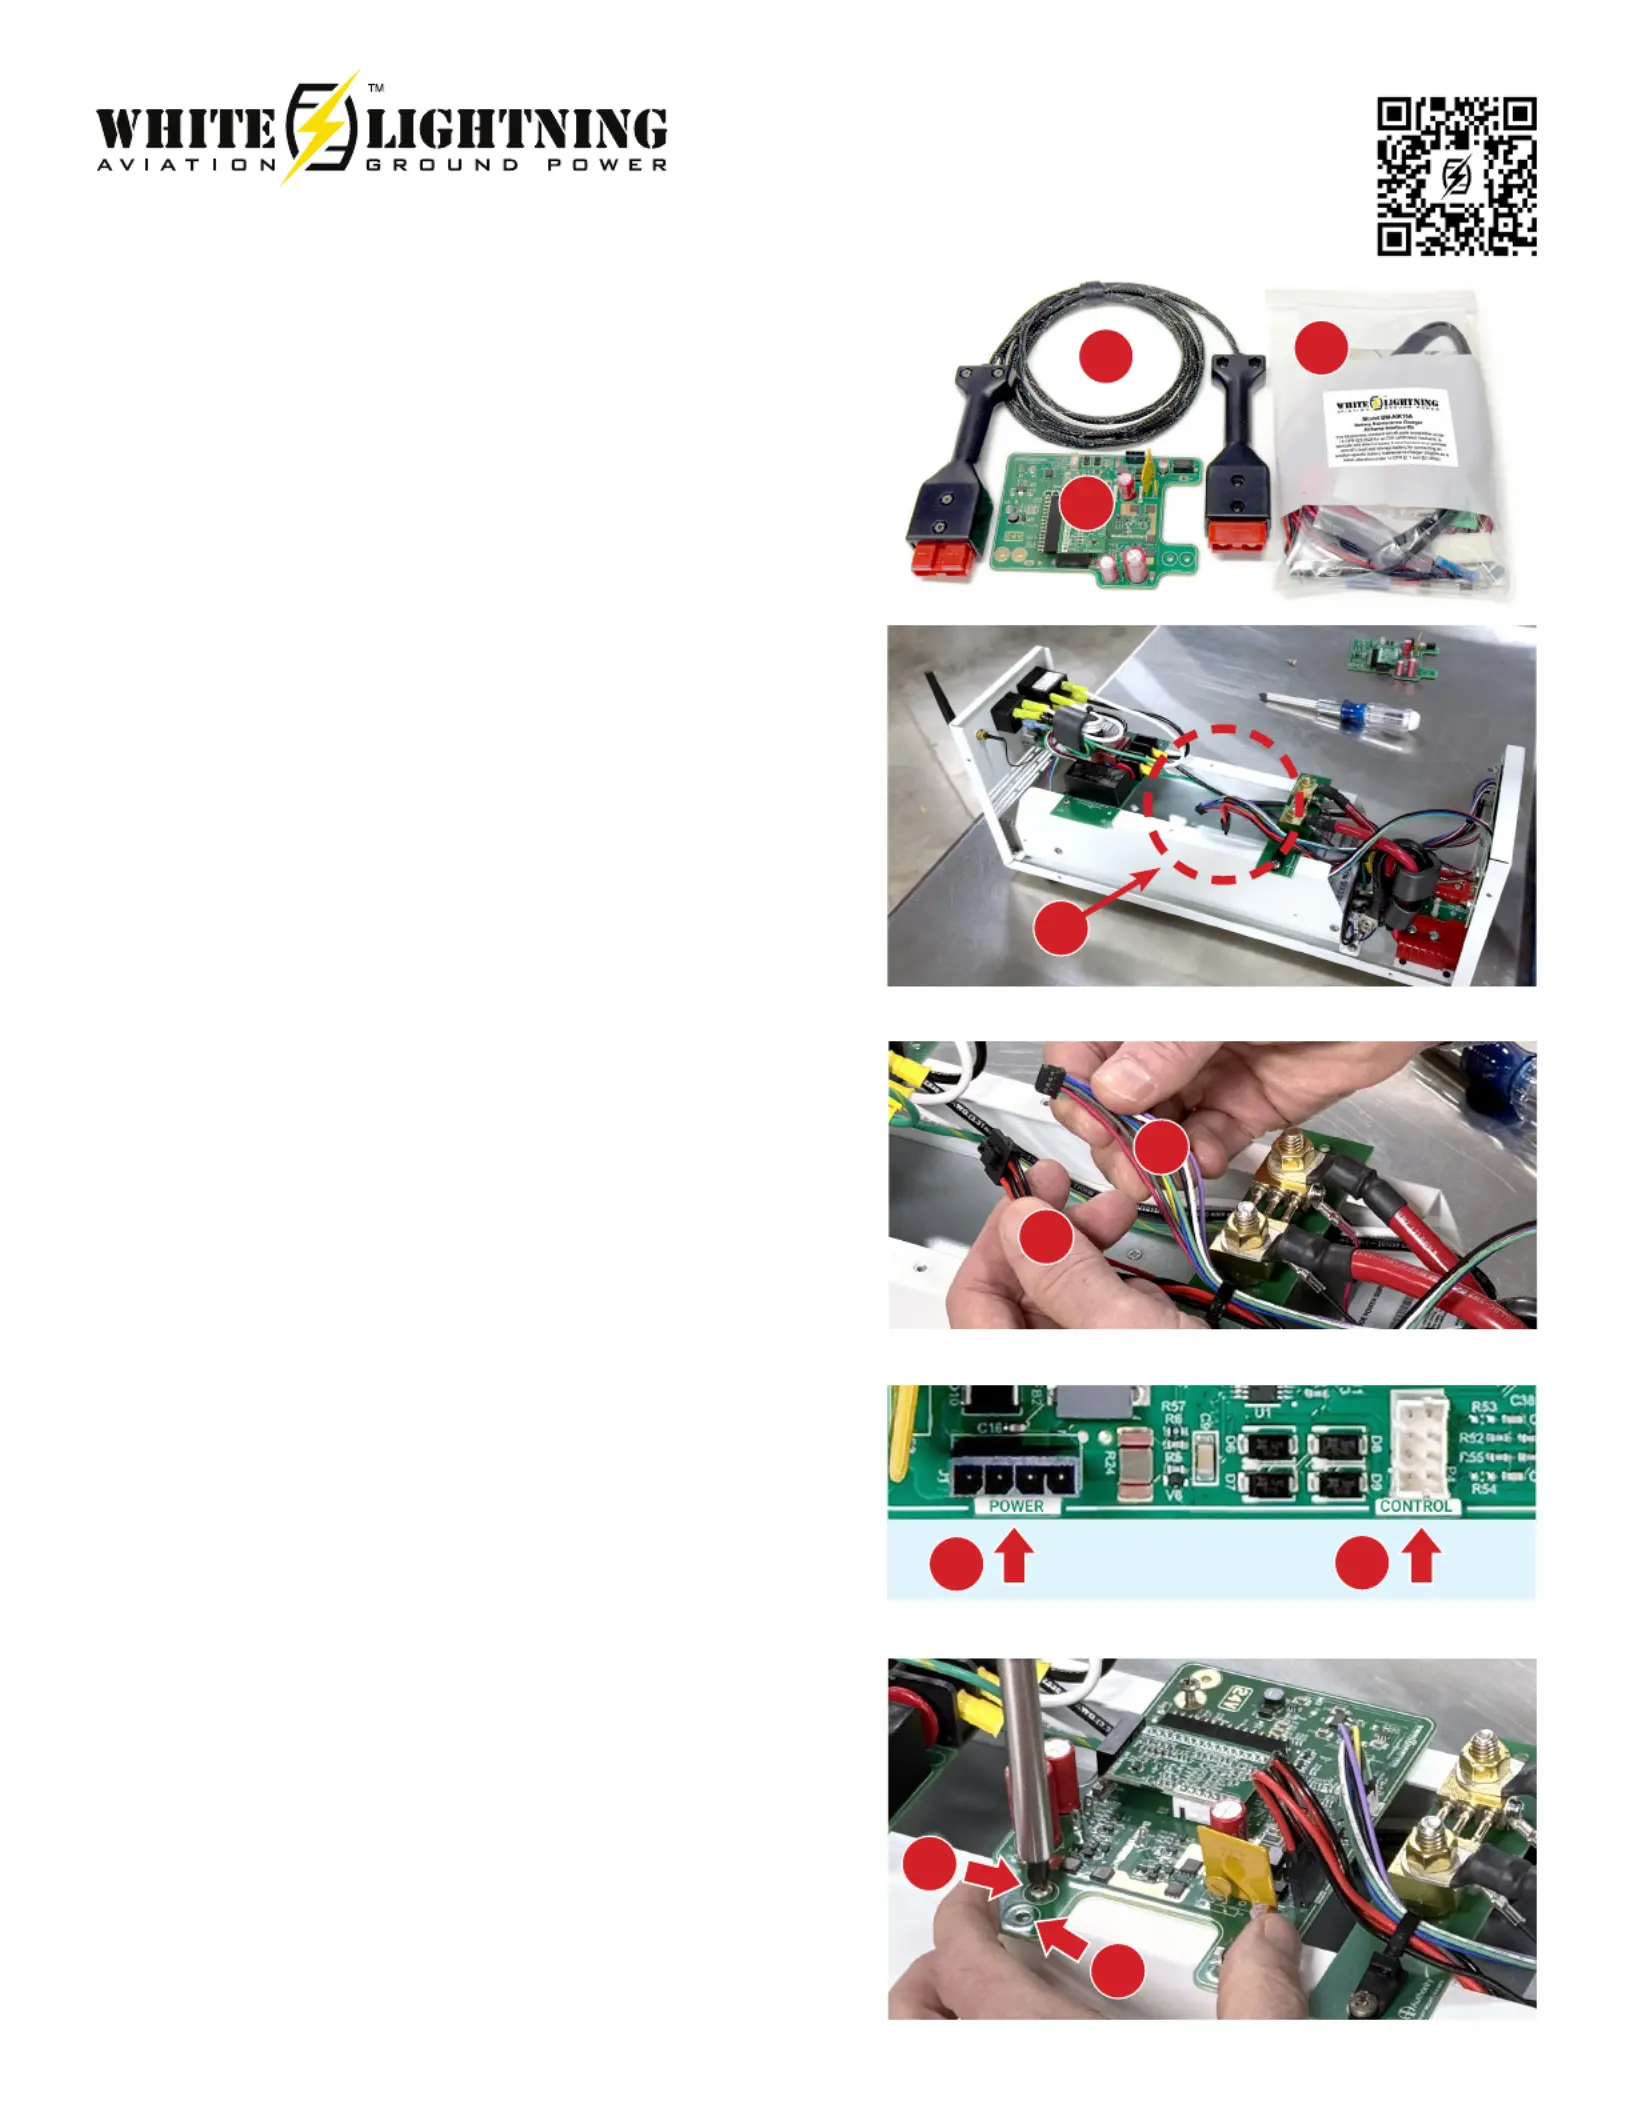
Kit Contents
(A) charging cable
(B) printed circuit board assembly (PCA)
(C) battery wiring kit for your aircraft
Give the harness kit to your mechanic to install on your aircraft. The
kit is eligible to be installed as a minor alteration and approved with
a simple airframe maintenance log entry.
Installation
Tools required: #2 Philips head screwdriver.
Disconnect all input and output cables from the GPU and place it on
a clean surface. Remove the 8 screws, that secure the top cover to
the GPU chassis and set aside.
Be careful not to disturb or touch any components or wires outside
of the installation area (D).
There are 2 wiring harnesses that connect to the PCA – a
4-conductor POWER harness (E) with larger red and black
wires, and an 8-conductor CONTROL harness (F) with smaller,
multicolored wires. Each harness is designed so that it can only be
plugged into one location and in one orientation.
On the PCA, there are 2 corresponding receptacles for these
harness plugs, one marked POWER and the other marked
CONTROL.
Hold the PCA in one hand and plug in the red & black power
harness onto the mating POWER receptacle on the PCA. The
connector will snap and lock into place when fully inserted. A gentle
tug will assure that it cannot come loose.
Plug the multicolor 8-pin harness onto the mating CONTROL
receptacle. It is also keyed so that it can only be inserted one way.
These connections do not require a great deal of force, so if either
does not seem to t easily, stop, look closely, and verify proper
orientation before proceeding.
With the harnesses connected, the PCA is ready to fasten to the
mounting rails with the hardware provided.
Place the PCA on the mounting rails so that the holes align as
shown. Mounting holes for Model S28114 are pictured (G). Note: the
S28054 holes match the outer set of PCA screw holes (H). Use the 2
Philips head screws with integral lock-washers to secure it in place.
Hand tighten snuggly but don’t over torque.
Check the connections before nishing the installation:
• Power harness connected
• Control harness connected
• PCA secured to the mounting rails
Model BMC24
Installation Video
D
E
E
G
F
F
H
A
B
C
Produktspezifikationen
| Marke: | White Lightning |
| Kategorie: | Nicht kategorisiert |
| Modell: | BMC24 |
Brauchst du Hilfe?
Wenn Sie Hilfe mit White Lightning BMC24 benötigen, stellen Sie unten eine Frage und andere Benutzer werden Ihnen antworten
Bedienungsanleitung Nicht kategorisiert White Lightning

21 August 2025
31 August 2024
31 August 2024
31 August 2024
31 August 2024
31 August 2024
Bedienungsanleitung Nicht kategorisiert
Neueste Bedienungsanleitung für -Kategorien-
3 April 2026
3 April 2026
3 April 2026
3 April 2026
3 April 2026
3 April 2026
3 April 2026
3 April 2026
3 April 2026
3 April 2026