Digital Watchdog DWC-PV20CMW Bedienungsanleitung
Digital Watchdog
Nicht kategorisiert
DWC-PV20CMW
Lies die bedienungsanleitung für Digital Watchdog DWC-PV20CMW (2 Seiten) kostenlos online; sie gehört zur Kategorie Nicht kategorisiert. Dieses Handbuch wurde von 32 Personen als hilfreich bewertet und erhielt im Schnitt 5.0 Sterne aus 16.5 Bewertungen. Hast du eine Frage zu Digital Watchdog DWC-PV20CMW oder möchtest du andere Nutzer dieses Produkts befragen? Stelle eine Frage
Seite 1/2

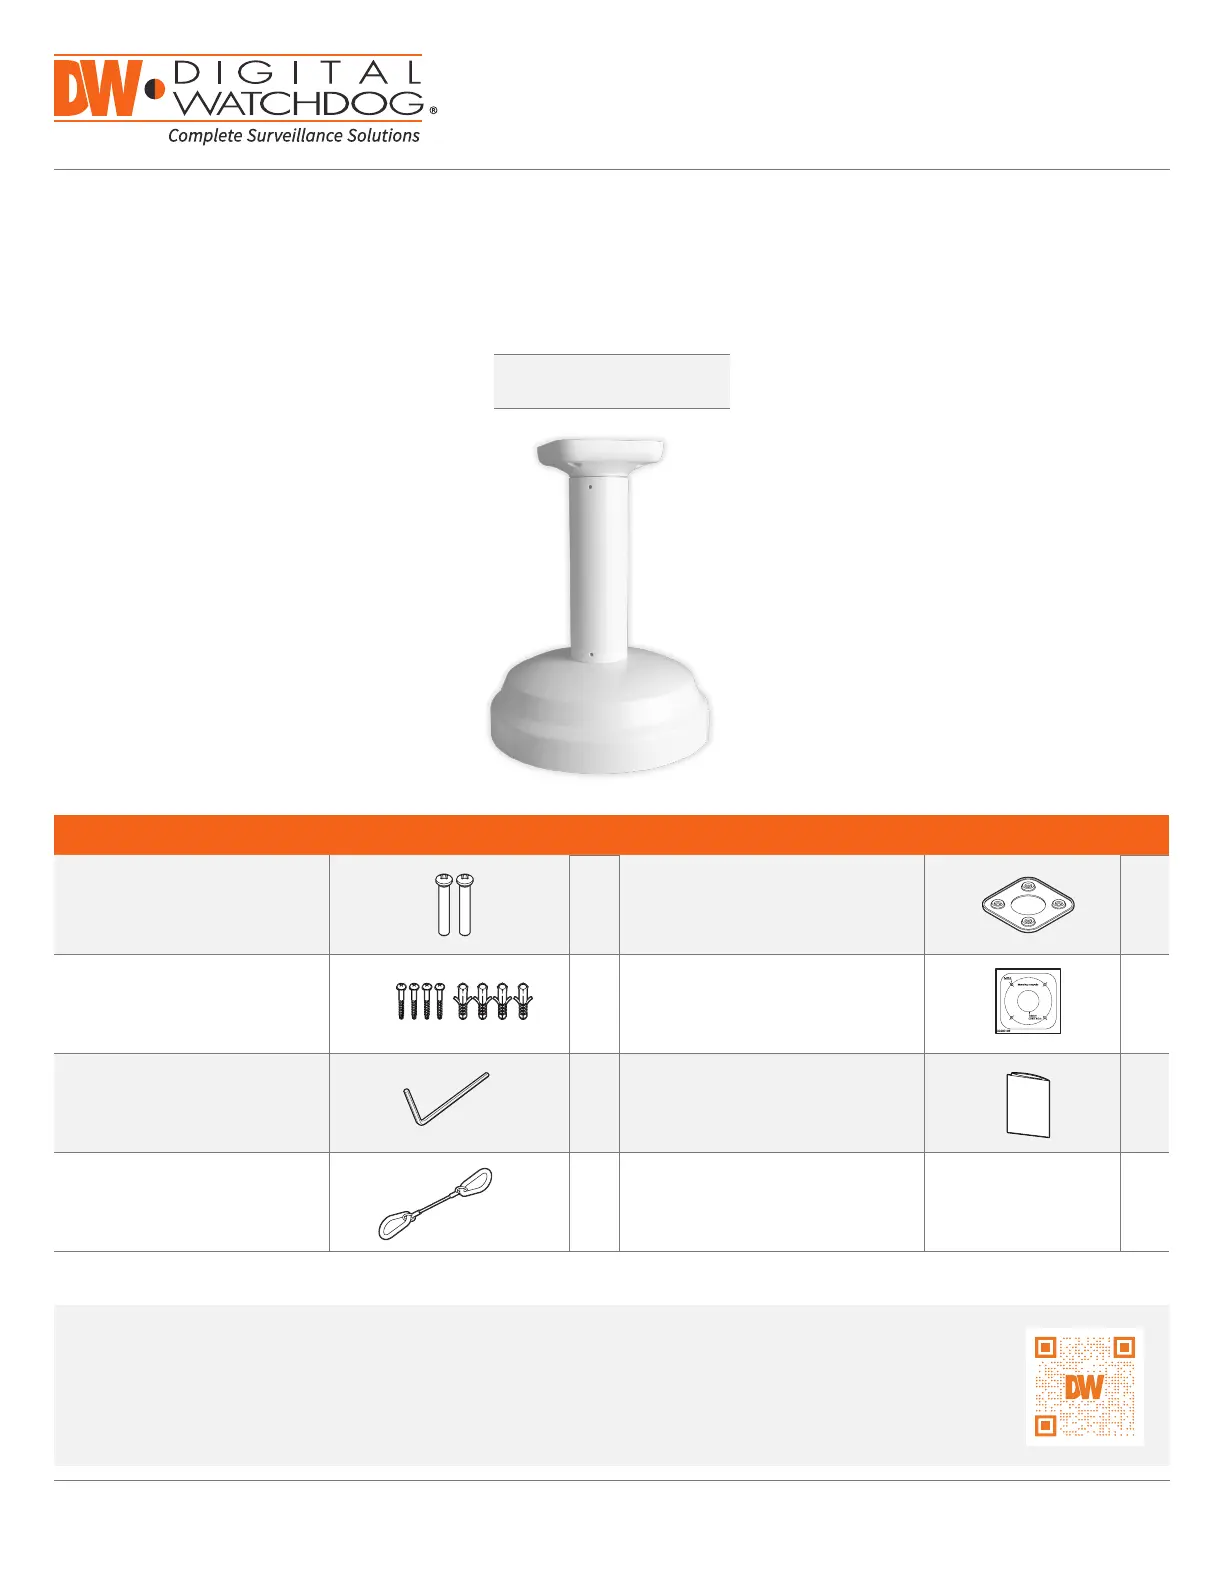
Ceiling mount bracket for multi-sensor
vari-focal cameras
Quick Start Guide
Tel: +1 (866) 446-3595 / (813) 888-9555
Technical Support Hours: 9:00AM – 8:00PM EST, Monday through Friday
digital-watchdog.com
NOTE: Download all your support materials and tools in one place.
1. Go to: http://www.digital-watchdog.com/resources
2. Search your product by entering the part number in the search bar. Results ‘Search by Product’
for applicable part numbers will populate automatically based on the part number you enter.
3. Click ‘Search’. All supported materials, including manuals
and quick start guide (QSGs) will appear in the results.
DWC-PV20CMW
WHAT’S IN THE BOX
Camera Mounting Screws 2 Mounting Pad 1
Screws and Plastic Anchors 4 Mounting Template 1
Hexagonal Wrench 1 1Quick Setup Guide
Safety Wire 1

1 Using the mounting template or the mounting bracket itself, mark and drill the necessary holes on the mounting surface.
2 Secure the mounting bracket base to the mounting surface using the screws and anchors that were included with the mount.
Use the mounting pad between the bracket’s arm and mounting surface as needed.
3 Connect the ceiling mount’s neck into the plate, and secure using the screws at the top of the neck. Use the hexagonal wrench
to secure the screws in place.
4
Connect the ceiling mount’s base into the neck, and secure using the screws at the bottom of the neck. Use the hexagonal
wrench to secure the screws in place.
5 Ax the safety wire at the bottom of the mounting bracket’s base. Connect the other side of the safety wire to the base of the
camera.
6
To mount the camera to the mounting accessory, remove the
dome from the camera base using the wrench included
with the camera.
NOTE: Do not touch the lenses when handling the camera modules.
7
Pass wires through and make all necessary connections.
8
Secure the camera to the mounting bracket using the included
screws. Align the indented lines on the side of the camera with
the lines on the mounting bracket as seen in the image below.
Rotate the camera clockwise to lock it into position.
UNLOCK LOCK
9
Adjust the camera module positions and angles, then
complete the installation by placing the dome cover on the
camera. Secure the dome cover to the camera base using the
screws included with the camera. See the camera’s QSG for
more information.
Quick Start Guide
Rev: 08/21
Copyright © Digital Watchdog. All rights reserved.
Specifications and pricing are subject to change without notice.
INSTALLATION
Ceiling mount
neck
Camera module
Camera dome cover
Ceiling mount
plate
Ceiling mount base
Produktspezifikationen
Marke: | Digital Watchdog |
Kategorie: | Nicht kategorisiert |
Modell: | DWC-PV20CMW |
Brauchst du Hilfe?
Wenn Sie Hilfe mit Digital Watchdog DWC-PV20CMW benötigen, stellen Sie unten eine Frage und andere Benutzer werden Ihnen antworten
Bedienungsanleitung Nicht kategorisiert Digital Watchdog
30 August 2024
30 August 2024
30 August 2024
29 August 2024
29 August 2024
29 August 2024
29 August 2024
29 August 2024
29 August 2024
15 März 2024
Bedienungsanleitung Nicht kategorisiert
- The T.bone
- Sound Devices
- Computherm
- Saramonic
- FireAngel
- Tommee Tippee
- Bissell
- Valco Baby
- Russound
- Toolland
- Uniden
- CreativeWorKs
- Toorx
- Doomoo
- Deutz
Neueste Bedienungsanleitung für -Kategorien-
15 Juni 2025
15 Juni 2025
15 Juni 2025
15 Juni 2025
15 Juni 2025
15 Juni 2025
15 Juni 2025
15 Juni 2025
15 Juni 2025
15 Juni 2025