EXSYS EX-1346IS Bedienungsanleitung
EXSYS Nicht kategorisiert EX-1346IS
Lies die bedienungsanleitung für EXSYS EX-1346IS (2 Seiten) kostenlos online; sie gehört zur Kategorie Nicht kategorisiert. Dieses Handbuch wurde von 11 Personen als hilfreich bewertet und erhielt im Schnitt 4.7 Sterne aus 8 Bewertungen. Hast du eine Frage zu EXSYS EX-1346IS oder möchtest du andere Nutzer dieses Produkts befragen? Stelle eine Frage
Seite 1/2
USB APlug:-
USB 2.0 APlug-
PinSignalPinSignal
1VCC3DATA+
2DATA4GND-
6
5
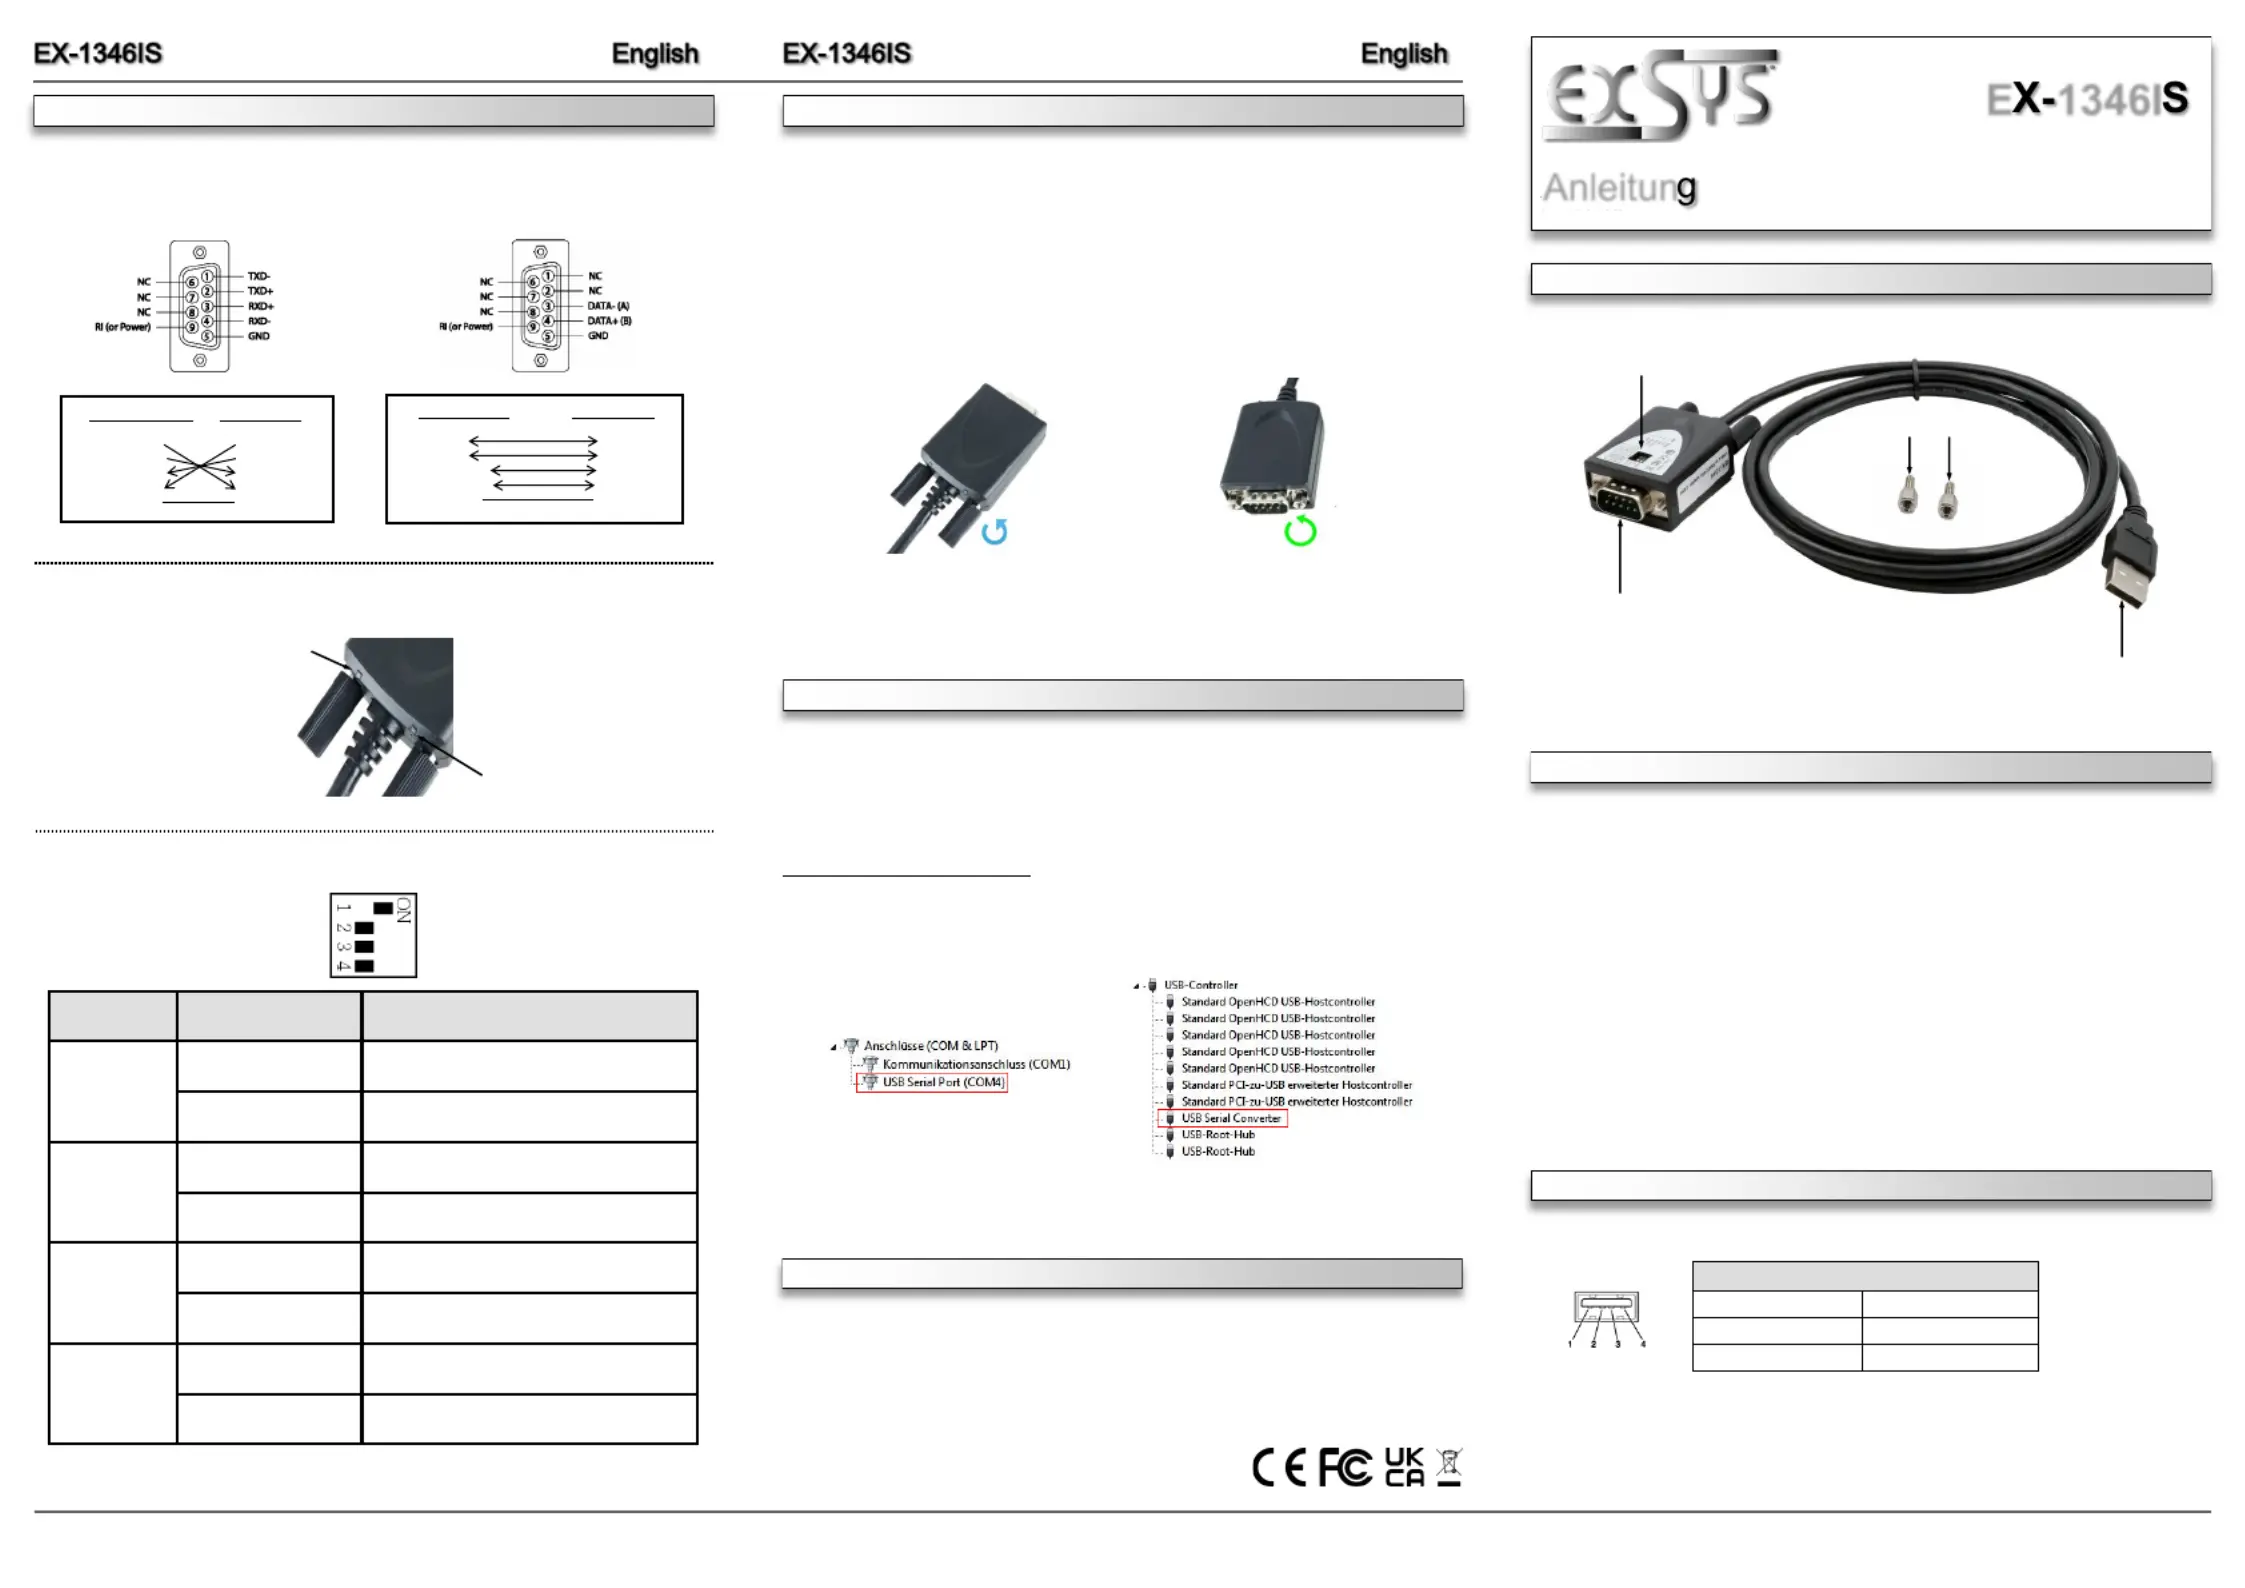
Das EX1346IS USB zu Seriell Kabel stellt einen seriellen RS422/485 High Performance UART --
16C550 Port mit 15KV ESD Überspannungsschutz und 4.0KV Isolation zur Verfügung. Es
wurde entwickelt um serielle Geräte am USB 1.1 bis 3.2 Gen 2 Bus eines PCs, Servers oder
einer Workstation anzuschließen. Durch die einfache Installation am USBPort muss der -
Rechner nicht geöffnet werden und der Konverter kann bei laufendem Betrieb installiert werden.
Zusätzlich wird ein DB9 Adapter zu 5 Pin Terminal Block mitgeliefert. Das Kabel bietet die
perfekte Lösung für den Anschluss von Barcodescanner, Kartenlesegeräte, Waagen usw.
Kompatibilität:USB 1.1, 2.0 & 3.2
Betriebssysteme:Windows 9.x / ME / 2000 / XP / Vista / 7 / 8.x / 10 / 11 / Server 20xx /
Linux / MAC
Anschlüsse:1x USB 2.0 AStecker, 1x 9 Pin Stecker Seriell RS422/485--
Lieferumfang:1346IS, Adapter 9 Pin Buchse zu 5 Pin Terminal Block,EX-
2x Sechskantmuttern, Anleitung
1
BESCHREIBUNG & TECHNISCHE DATEN
AUFBAU
CONNECTORS, STATUS LED & DIPSWITCH-
CLEANING
DRIVER INSTALLATION
After the hardware installation, the operating system will recognize the device automatically and
install the drivers. If the driver should not be installed automatically, please download the driver
from our homepage (www.exsys.de / www.exsys.ch) first. Now select the folder with your
operating system and install the driver. Follow the hardware assistant and finish the installation.
Important! Restart your PC in any case after installing the drivers.
CHECK INSTALLED DRIVER
Open the . Now you should see at >Device manager<„Ports (COM & LPT)USB“ and „-
Controller“the following new entry:
If you see this or a similar information the device is installed correctly.
To clean the unit, use only a dry, lintfree cloth and apply light pressure to remove dirt. Be -
careful not to leave any fibres of the cloth in the connector area.
Never use a damp or wet cloth for cleaning!
Switzerland:
EXSYS Vertriebs GmbH
Dübendorfstrasse 17
8602 Wangen
www.exsys.ch
Germany:
EXSYS Vertriebs GmbH
Industriestrasse 8
61449 Steinbach
www.exsys.de
Italy:
EXSYS Italia Srl
Via Belvedere, 45/B
I22100 Como -
www.exsys.it
Anleitun
Vers. 1.3 / 06.09.24
E1346I
ANSCHLÜSSE, STATUS LED & DIPSCHALTER-
HARDWAREINSTALLATION
Because there are large differences between PCs, we can give you only a general installation
guide. Please refer your computers reference manual whenever in doubt.
1.-- Connect the EX1346IS USB to the USB APort at the your PC.
2.-If you would like to screw the serial cable to the 9 Pin connector of the EX1346IS, then
unscrew the screws (see Picture 1) and screw the supplied hexagon nuts into the holes on
the EX1346IS (see Picture 2). Now you can attach the serial cable to the EX1346IS.--
Picture 1Picture 2
Remove the ScrewsInsert the Hexagon Nuts
3.When you are ready you can start your PC and continue with Driver Installation.„“
Status LEDs:
RXD
TXD
USB 2.0 AStecker -
zum Anschluss an PC
S1: 9 Pin Stecker Seriell RS422/485-
2x Sechskantmuttern
DIPSchalter-
DIPSwitchPositionDescription-
1
ON (Factory Settings)2wire RS485 Mode--
OFF4wire RS485 or RS422 Mode---
2
ONReserved for features in future
OFF (Factory Settings)Reserved for features in future
3
ON120 Ohm TXD Termination Resistor is Enabled
OFF (Factory Settings)120 Ohm TXD Termination Resistor is Disabled
ON120 Ohm RXD Termination Resistor is Enabled
4
OFF (Factory Settings)120 Ohm RXD Termination Resistor is Disabled
DIPSwitch:-
DB 9M RS422/485 Pin Assignments:-
DB9 (EX-1346IS) DB9 (Device)
1 TXD 1 TCD--
2 TXD+ 2 TXD+
3 RXD+ 3 RXD+
4 RXD- 4 RXD-
5 GND 5 GND
RS--422 and RS485 4wire Pin Assignment485 2wire Pin Assignment- RS--
DB9 (EX-1346) DB9 (Device)
1 NC 1 NC
2 NC 2 NC
3 DATA-3 DATA-
4 DATA+ 4 DATA+
5 GND 5 GND
Produktspezifikationen
| Marke: | EXSYS |
| Kategorie: | Nicht kategorisiert |
| Modell: | EX-1346IS |
Brauchst du Hilfe?
Wenn Sie Hilfe mit EXSYS EX-1346IS benötigen, stellen Sie unten eine Frage und andere Benutzer werden Ihnen antworten
Bedienungsanleitung Nicht kategorisiert EXSYS

14 März 2026
26 September 2025
26 September 2025
6 September 2025
6 September 2025
5 September 2025
31 Juli 2025
25 Juli 2025
24 Juli 2025
24 Juli 2025
Bedienungsanleitung Nicht kategorisiert
Neueste Bedienungsanleitung für -Kategorien-
3 April 2026
3 April 2026
3 April 2026
3 April 2026
3 April 2026
3 April 2026
3 April 2026
3 April 2026
3 April 2026
3 April 2026