EXSYS EX-16500E-2 Bedienungsanleitung
EXSYS Nicht kategorisiert EX-16500E-2
Lies die bedienungsanleitung für EXSYS EX-16500E-2 (2 Seiten) kostenlos online; sie gehört zur Kategorie Nicht kategorisiert. Dieses Handbuch wurde von 9 Personen als hilfreich bewertet und erhielt im Schnitt 4.3 Sterne aus 2 Bewertungen. Hast du eine Frage zu EXSYS EX-16500E-2 oder möchtest du andere Nutzer dieses Produkts befragen? Stelle eine Frage
Seite 1/2
651
BESCHREIBUNG & TECHNISCHE DATEN
AUFBAU
Anleitun
Vers. 1.0 / 31.01.23
E16500
Kompatibilität:PCIExpress p1-x1 bis x16-
Betriebssysteme:Windows ME Vista / 7 / 8.x / 10 / 11 / Server 20xx / MAC / / 2000 / XP /
Linux
Anschlüsse:3x 6Pin 1394a (extern), 1x 6Pin 1394a (intern) , --
-- 1x 10Pin Pfostenstecker, 1x 4Pin Floppy Anschluss
Lieferumfang:2, Low Profile Bügel, AnleitungEX-16500E-
Zertifikate:
3x 6Pin 1394a Buchse-
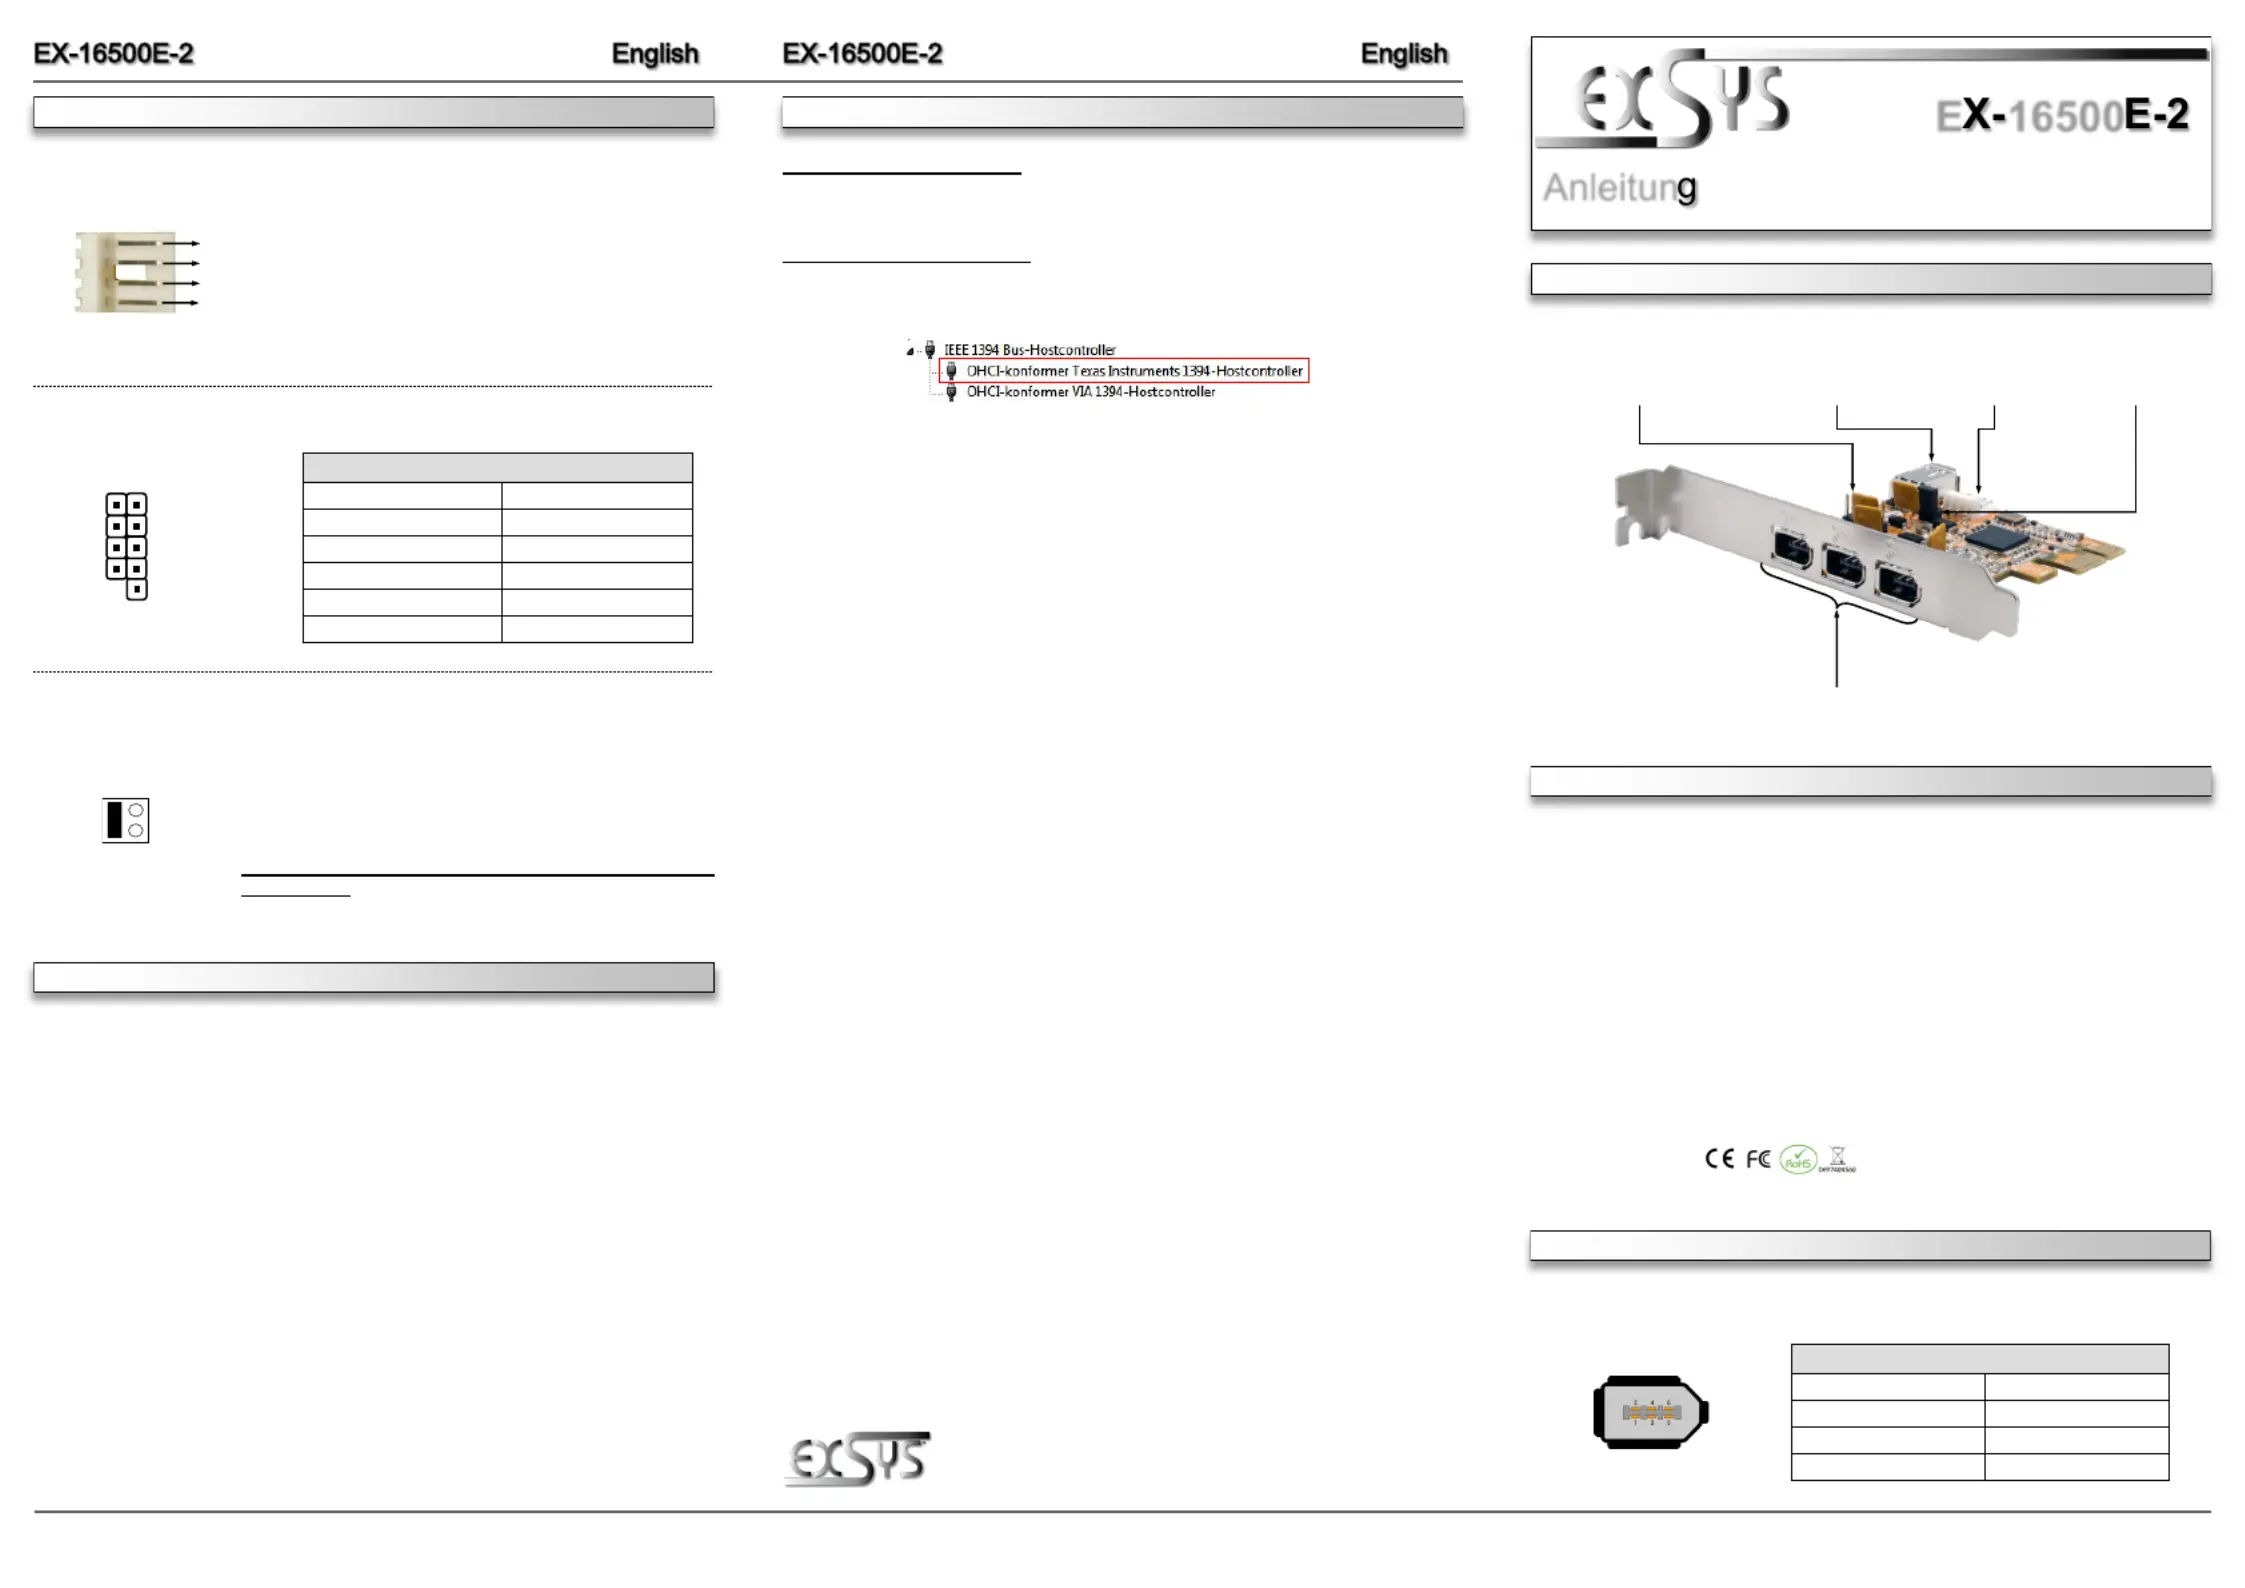
Die EX2 ist eine FireWire 1394a PCIExpress Karte. Sie ist extern mit drei 6Pin und -16500E---
intern mit einer 6Pin 1394a Buchse ausgestattet. Die EX--16500E--2 unterstützt alle PCI
Express Slots von p1-x1 bis x16. Der serielle PCIExpress Bus unterstützt optimal die Leistung des -
schnellen Texas Instrument Chipsatz. Die EX2 gewährleistet so eine sichere Daten--16500E-
übertragung und exzellente Performance von bis zu 400 Mbit/s! Die Karte benötigt nicht zwin-
gend zusätzlichen Strom vom PC Netzteil, jedoch wird es empfohlen den 4Pin Floppy An--
schluss mit dem PC Netzteil zu verbinden.
Switzerland:
EXSYS Vertriebs GmbH
Dübendorfstrasse 17
8602 Wangen
www.exsys.ch
Germany:
EXSYS Vertriebs GmbH
Industriestrasse 8
61449 Steinbach
www.exsys.de
DRIVER INSTALLATION
Alle Operating Systems
After the hardware installation, the operating system will recognize the device automatically and
install the drivers.
CHECK INSTALLED DRIVER
Open the >Device manager<. Now you should see at the following „IEEE 1394Hostcontroller-“
new entry:
If you see this or a similar information the device is installed correctly.
1x 6Pin 1394a Buchse-
(Wird mit dem externen
Anschluss J13 geteilt)
4Pin Floppy -
Anschluss für
PC- Netzteil
1x interner Pfostenstecker
für Front Bay Hubs
Stromquelle wählen
PCIE oder AUX-
ANSCHLÜSSE & JUMPER EINSTELLUNG
6Pin FireWire 1394a Buchse:-
6Pin FireWire 1394a Buchse-
PinSignalPinSignal
1Power4TPB+
2Ground5TPA -
3TPB6TPA+-
CONNECTOR & JUMPER SETTINGS
4Pin Floppy Connector:-
2 GND
3 GND
It is not mandatory to connect the EX16500E2 to the PC --
power supply, but it is recommended for stable operation! If
jumper JP1 is set to AUX, the connector must be connected
to the PC power supply, otherwise the card will not be
supplied with power!
Please pay attention to the correct polarity!
Attention! Never plug in or unplug while the PC is swit-
ched on!
HARDWAREINSTALLATION
Please note the following installation instructions. Because there are large differences between the
PC’s, we can give you only a general installation instructions for the EX-16500E-2. Please refer
your computer’s reference manual whenever in doubt.
1.Turn off the power to your computer and any other connected peripherals.
2.Remove the mounting screws located at the rear and/or sides panels of your Computer and
gently slide the cover off.
3.Locate an available PCI-Express expansion slot and insert the card. Make sure that the card
is plugged in correctly.
4.Now install the power supply via the 4Pin Floppy Connector.-
5.Then attach the card with a screw to the rear panel of the computer.
6.Gently replace your computer’s cover and the mounting screws.
4 +12V
1 +5V
10- Pin FireWire 1394a Connector
PinSignalPinSignal
1NTPAD+6NTPBD -
2NTPAD7+12V-
3GND8+12V
4GND9 NC
5NTPBD+GND 10
10- Pin Connector:
TPA-
GND
TPB-
+12V
GND
TPA+
GND
TPB+
+12V
KEY
JP1:
PCIE = (Factory Setting)Power from PCIExpress BUS -
AUX = Power from PC power supply
(Direct power from PC power supply, provide an sufficient power
for devices with high power consumption)
4Pin Floppy Connector must then be connected to the PC -
power supply!
PCIEAUX
Produktspezifikationen
| Marke: | EXSYS |
| Kategorie: | Nicht kategorisiert |
| Modell: | EX-16500E-2 |
Brauchst du Hilfe?
Wenn Sie Hilfe mit EXSYS EX-16500E-2 benötigen, stellen Sie unten eine Frage und andere Benutzer werden Ihnen antworten
Bedienungsanleitung Nicht kategorisiert EXSYS

14 März 2026
26 September 2025
26 September 2025
6 September 2025
6 September 2025
5 September 2025
31 Juli 2025
25 Juli 2025
24 Juli 2025
24 Juli 2025
Bedienungsanleitung Nicht kategorisiert
Neueste Bedienungsanleitung für -Kategorien-
3 April 2026
3 April 2026
3 April 2026
3 April 2026
3 April 2026
3 April 2026
3 April 2026
3 April 2026
3 April 2026
3 April 2026