EXSYS EX-48200 Bedienungsanleitung
EXSYS Nicht kategorisiert EX-48200
Lies die bedienungsanleitung für EXSYS EX-48200 (2 Seiten) kostenlos online; sie gehört zur Kategorie Nicht kategorisiert. Dieses Handbuch wurde von 12 Personen als hilfreich bewertet und erhielt im Schnitt 4.1 Sterne aus 5 Bewertungen. Hast du eine Frage zu EXSYS EX-48200 oder möchtest du andere Nutzer dieses Produkts befragen? Stelle eine Frage
Seite 1/2
65
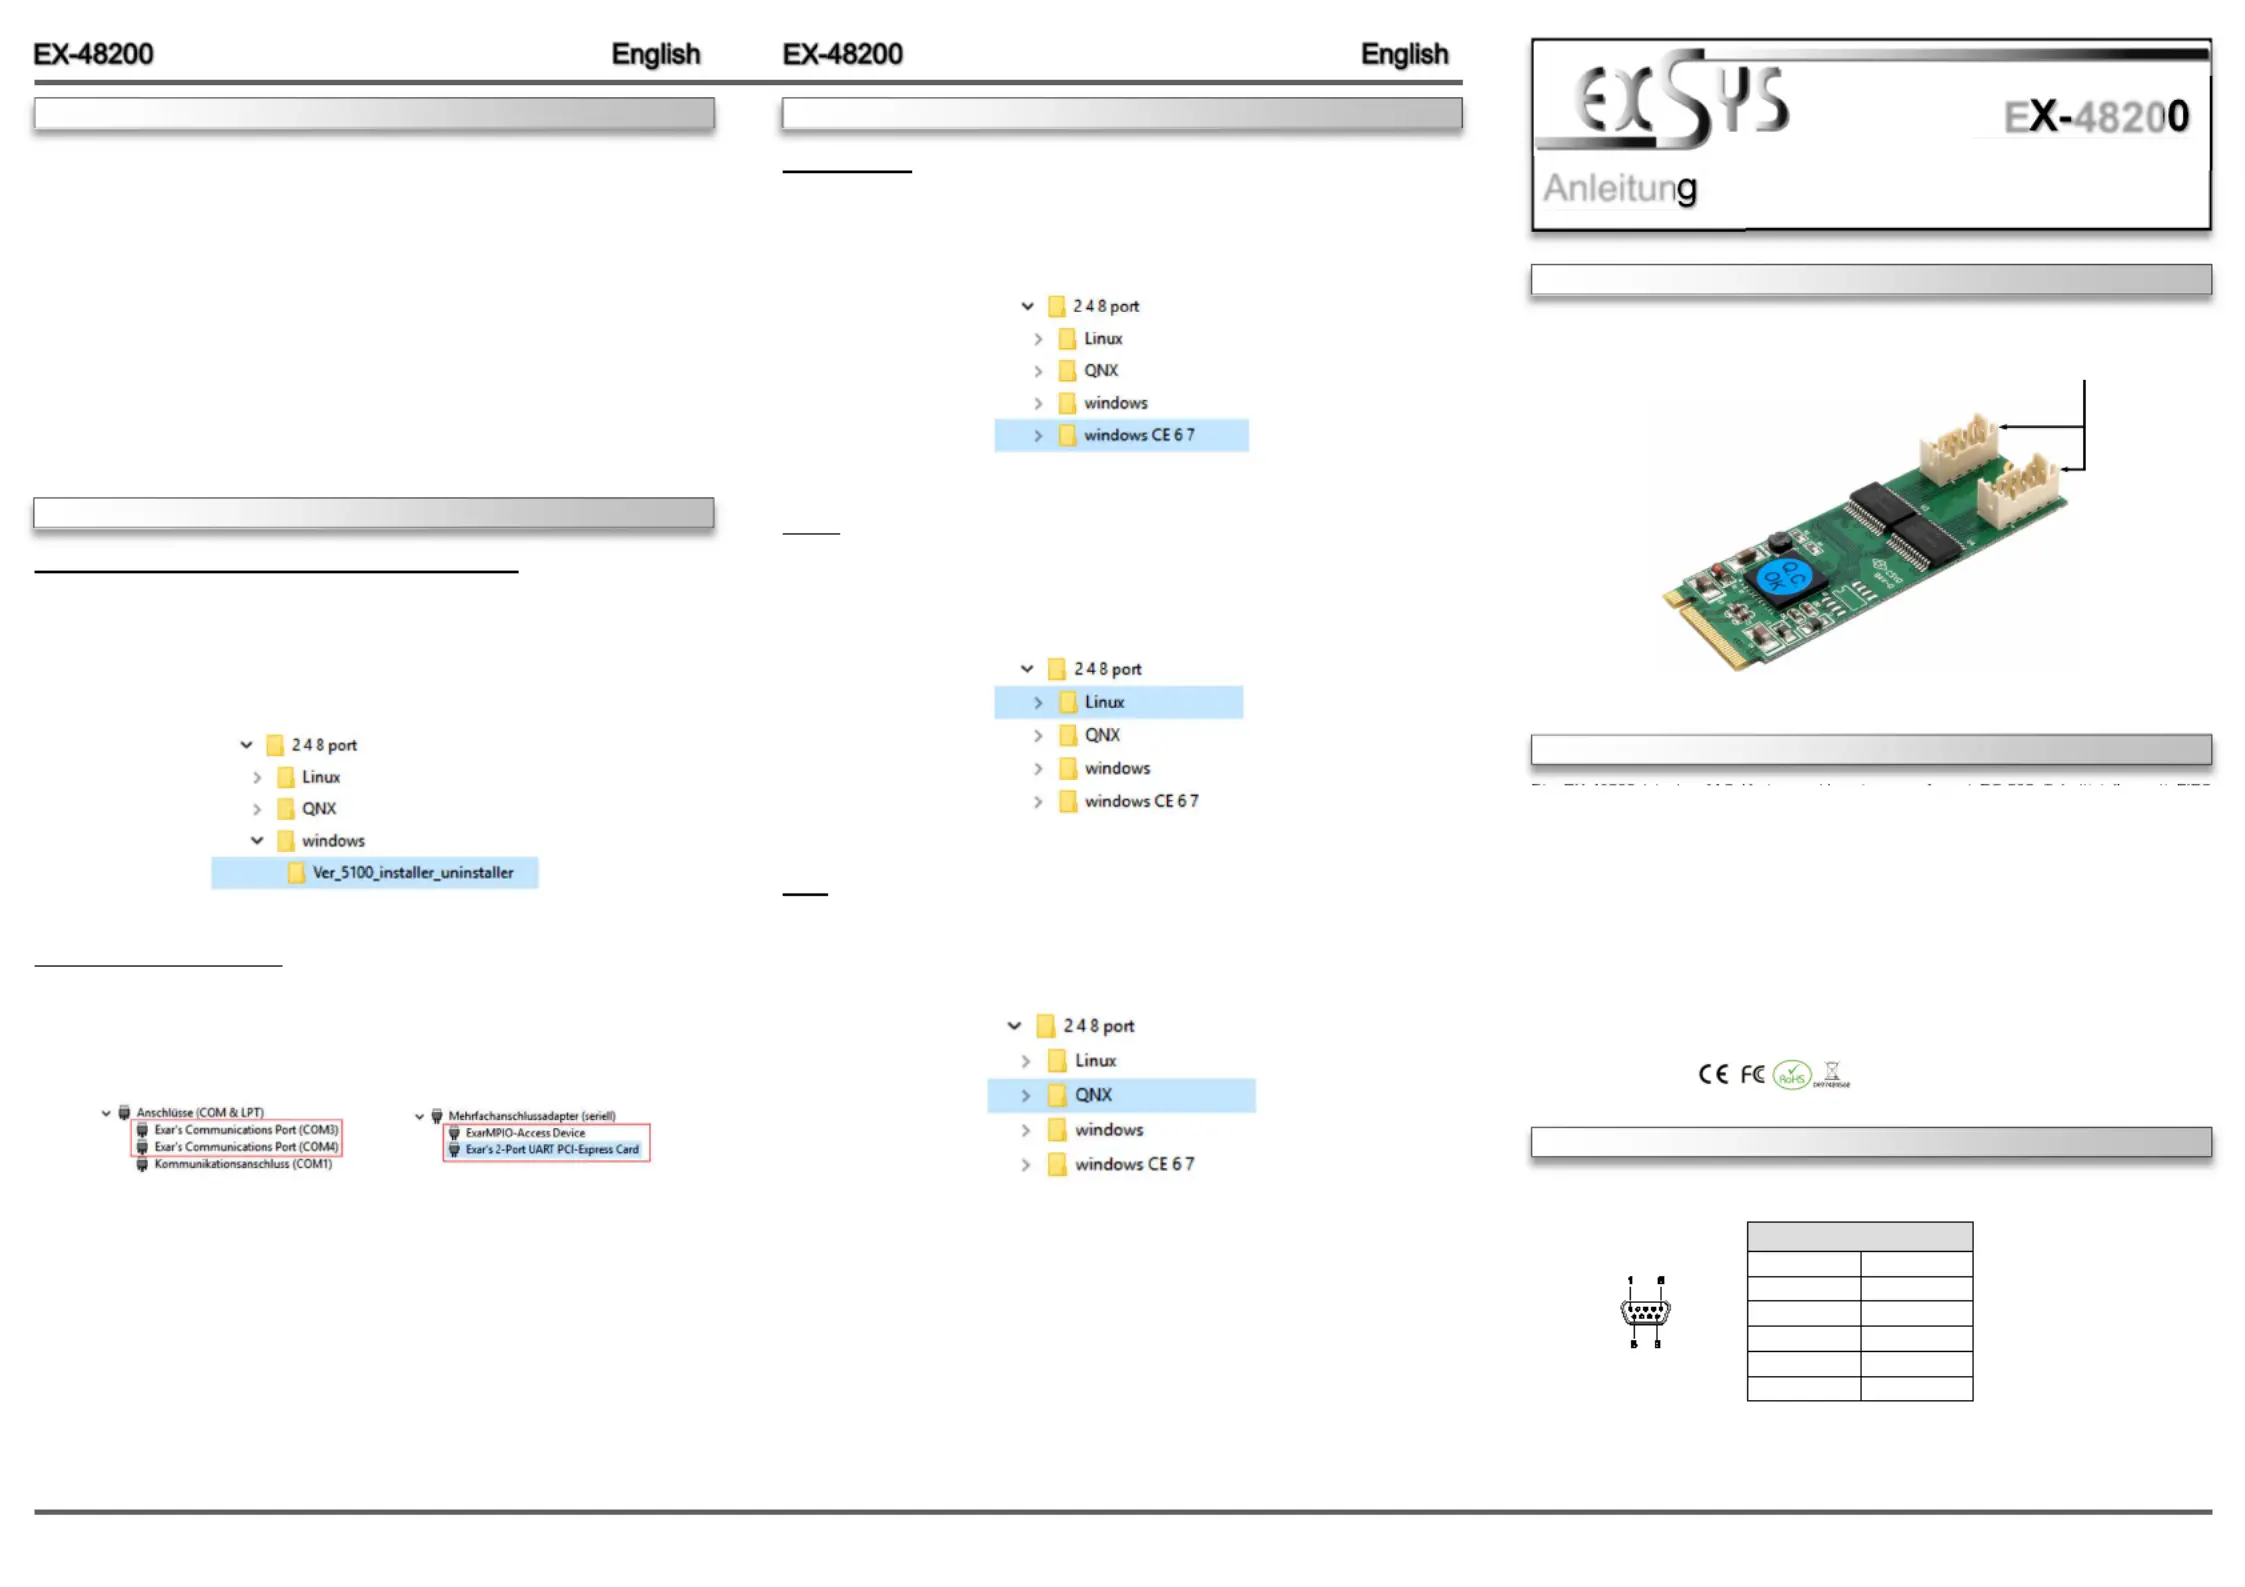
Die EX48200 ist eine M.2 Karte zur Umsetzung auf zwei RS232 Schnittstellen mit FIFO --
16C550 Port für den Anschluss von High Speed Seriellen RS232 Peripherie Geräten (z.B. -
Modem, Plotter usw.). Die EX-48200 nutzt den Exar Chipsatz, der die neueste HighSpeed--
InterfaceTechnologie beinhaltet. Die Karte gewährleistet so eine sichere Datenübertragung und -
exzellente Performance von bis zu 921.6 KBaud/s für jedes angeschlossene serielle Gerät! Sie
unterstützt den M.2 NGFF Bus mit AKey. Es ist nicht möglich die I/O Adressen und Interrupts -
manuell einzustellen, da die Einstellungen der Karte vom System (BIOS) und beim installieren
des Betriebssystems automatisch vorgenommen werden.
Kompatibilität:M.2 NGFF mit AKey-
Betriebssysteme:Windows 200x/ XP/ Vista/ 7/ 8.x/ 10/ Server 20xx/ Linux/ QNX 6.0
Anschlüsse:2x 9 Pin Stecker Seriell RS232-
Lieferumfang:EX48200, 2x Flachbandkabel, Treiber CD, Anleitung-
Zertifikate:
1
BESCHREIBUNG & TECHNISCHE DATEN
AUFBAU
Anleitun
Vers. 1.0 / 20.02.19
E4820
ANSCHLÜSSE
9 Pin Stecker Seriell RS232-
PinSignalPinSignal
1DCD6DSR
2RXD7RTS
3TXD8CTS
4DTR9RI
5GND
DB 9M
HARDWAREINSTALLATION
DRIVER INSTALLATION
Please note the following installation instructions. Because there are large differences between the
PC’s, we can give you only a general installation instructions for the EX48200. Please refer your -
computer’s reference manual whenever in doubt.
1.Turn off the power to your computer and any other connected peripherals.
2.Remove the mounting screws located at the rear and/or sides panels of your Computer and
gently slide the cover off.
3.Now connect the two Ribbon Cable with the 10 Pin Floppy Connectors at the EX48200.-
4.Locate an available M.2 NGFF expansion slot and insert the card. Make sure that the card is
plugged in correctly.
5.Gently replace your computer’s cover and the mounting screws.
Windows 200x/ XP/ Vista/ 7/ 8.x/ 10/ Server 20xx
After starting Windows is recognizes a new .Insert the driver CD into „Serial PCIConnector“-
you CDROM drive (eg drive D:) and then start the installer -„xr17v35x_win_single_installer“
which located in folder „Ver_5100_installer_uninstaller“ (see picture). Follow the installation
instructions and finish the installation:
CHECK INSTALLED DRIVER
Open the>DeviceManagerPorts (COM & LPT) Multiple -<. Now you should see at „“ and at„
Connection Adapter (serial)“the following new entry‘s:
If you see this or a similar information the device is installed correctly.
DRIVER INSTALLATION
Windows CE
After starting Windows is recognizes a new .Insert the driver CD into „Serial PCIConnector“-
you CDROM drive (eg drive D:) and then use the driver which located in the folder „windows -
CE 6 7“ (see picture):
Linux
After starting Linux is recognizes a new .Insert the driver CD into you „Serial PCIConnector“-
CDROM drive (eg drive D:) and then use the driver which located in the folder „Linux“ (see -
picture):
QNX
After starting the system is recognizes a new .Insert the driver CD into „Serial PCIConnector“-
you CDROM drive (eg drive D:) and then use the driver which located in the folder „QNX“ (see -
picture):
COM1&COM2: 2x 10 Pin Floppy Anschluss für
- RS422/485 9 Pin Flachbandkabel
Produktspezifikationen
| Marke: | EXSYS |
| Kategorie: | Nicht kategorisiert |
| Modell: | EX-48200 |
Brauchst du Hilfe?
Wenn Sie Hilfe mit EXSYS EX-48200 benötigen, stellen Sie unten eine Frage und andere Benutzer werden Ihnen antworten
Bedienungsanleitung Nicht kategorisiert EXSYS

14 März 2026
26 September 2025
26 September 2025
6 September 2025
6 September 2025
5 September 2025
31 Juli 2025
25 Juli 2025
24 Juli 2025
24 Juli 2025
Bedienungsanleitung Nicht kategorisiert
Neueste Bedienungsanleitung für -Kategorien-
3 April 2026
3 April 2026
3 April 2026
3 April 2026
3 April 2026
3 April 2026
3 April 2026
3 April 2026
3 April 2026
3 April 2026